Create a Journal Entry
1
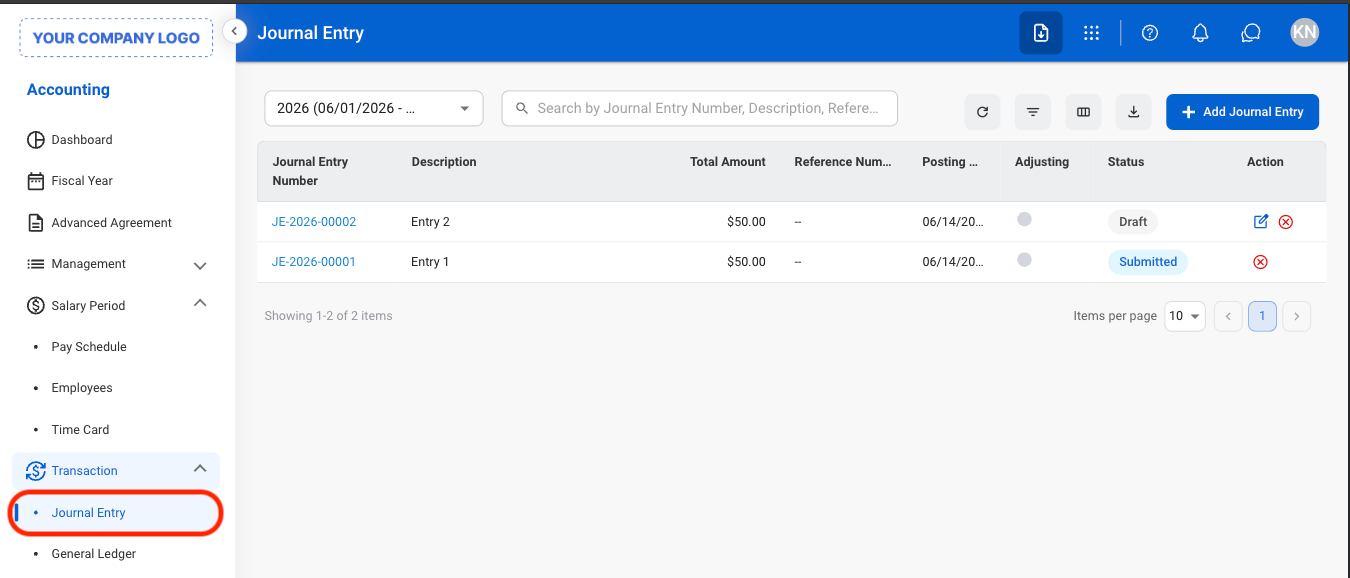
Navigate to Journal Entry
2
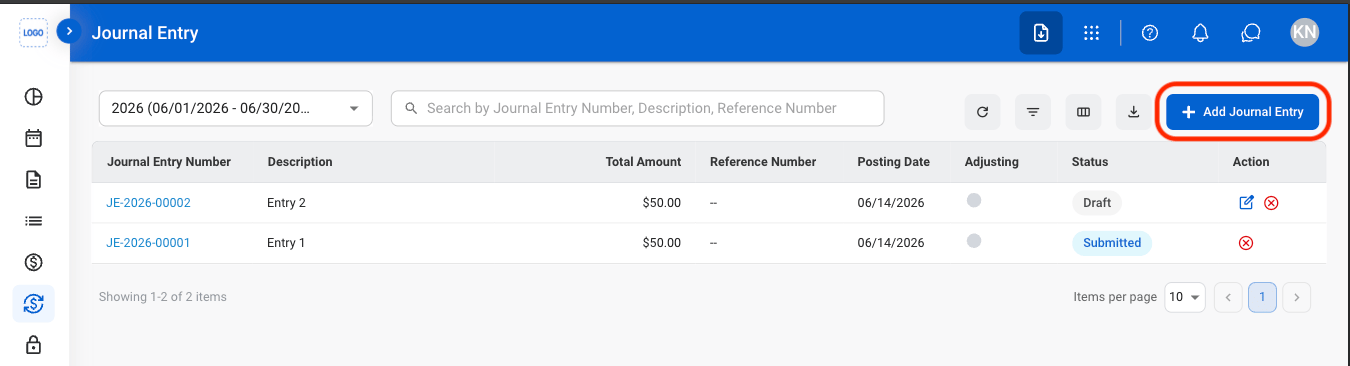
Select Add Journal Entry
3
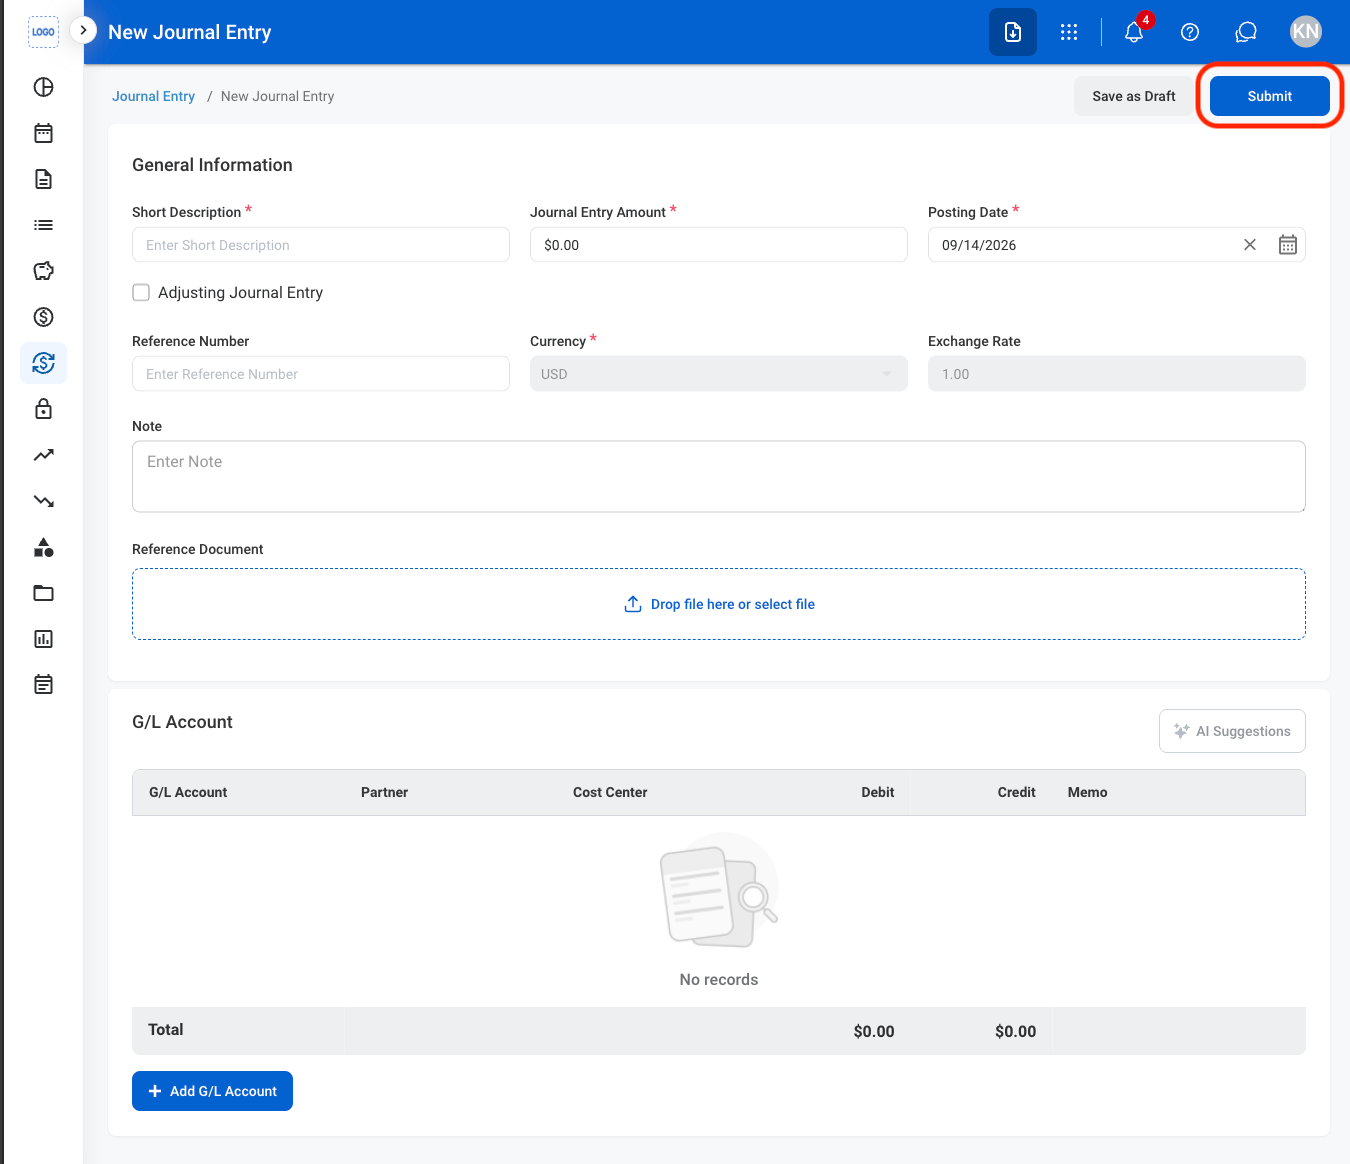
Fill in the required information
Use **AI Suggestions **to have AI recommend the appropriate debit and credit accounts for the transaction. Each suggested account includes an explanation to help you evaluate the recommendation. The suggestions improve over time using posted transaction history to identify relevant debit and credit account pairings for future transactions.
The system may flag a transaction for a potential anomaly based on configured detection rules. If an anomaly is detected, a warning appears on the transaction detail screen with an option to review the reason for the flag. An anomaly indicates that the transaction may be unusual and does not necessarily indicate an error or fraudulent activity.
Use AI Suggestions for G/L Accounts
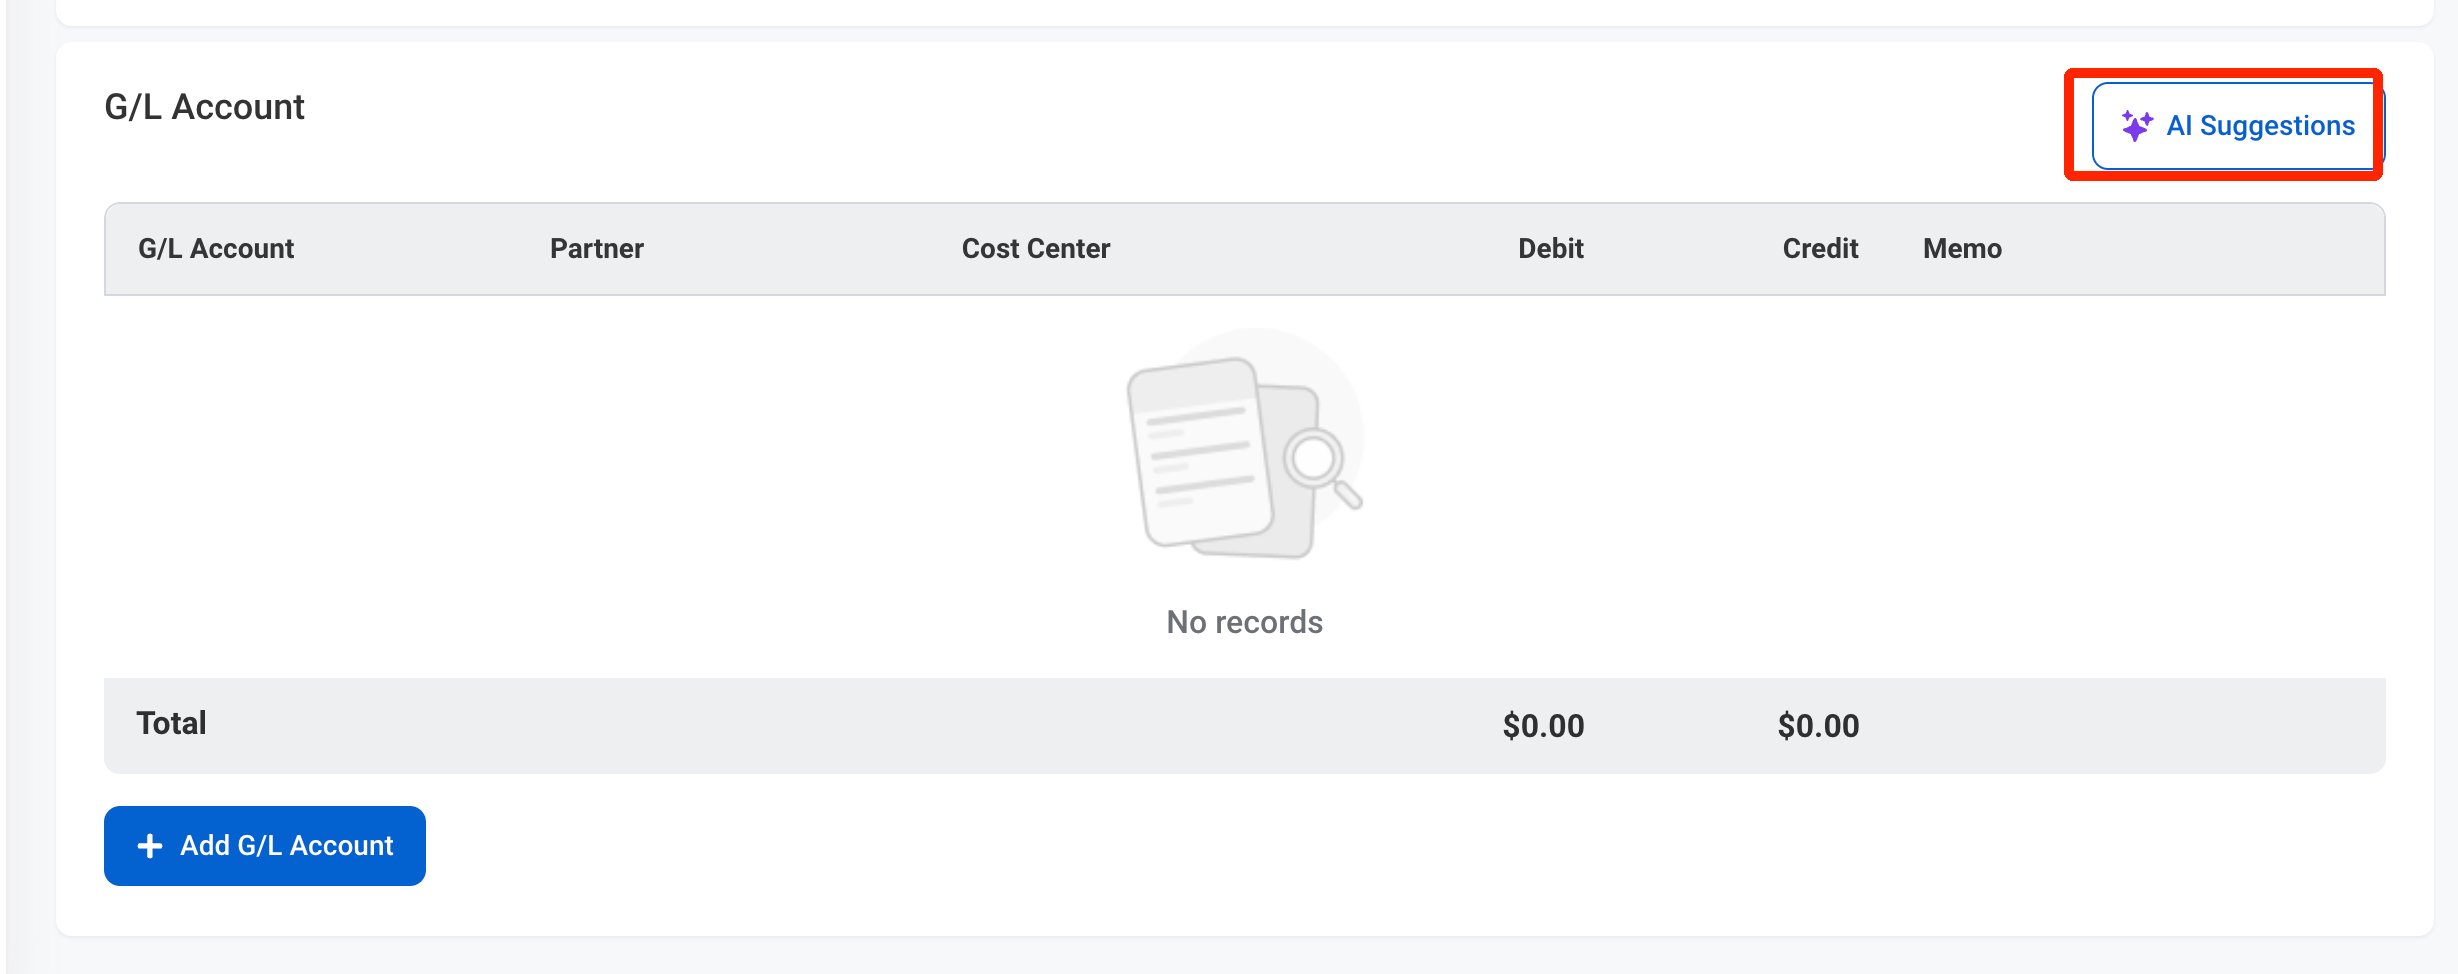
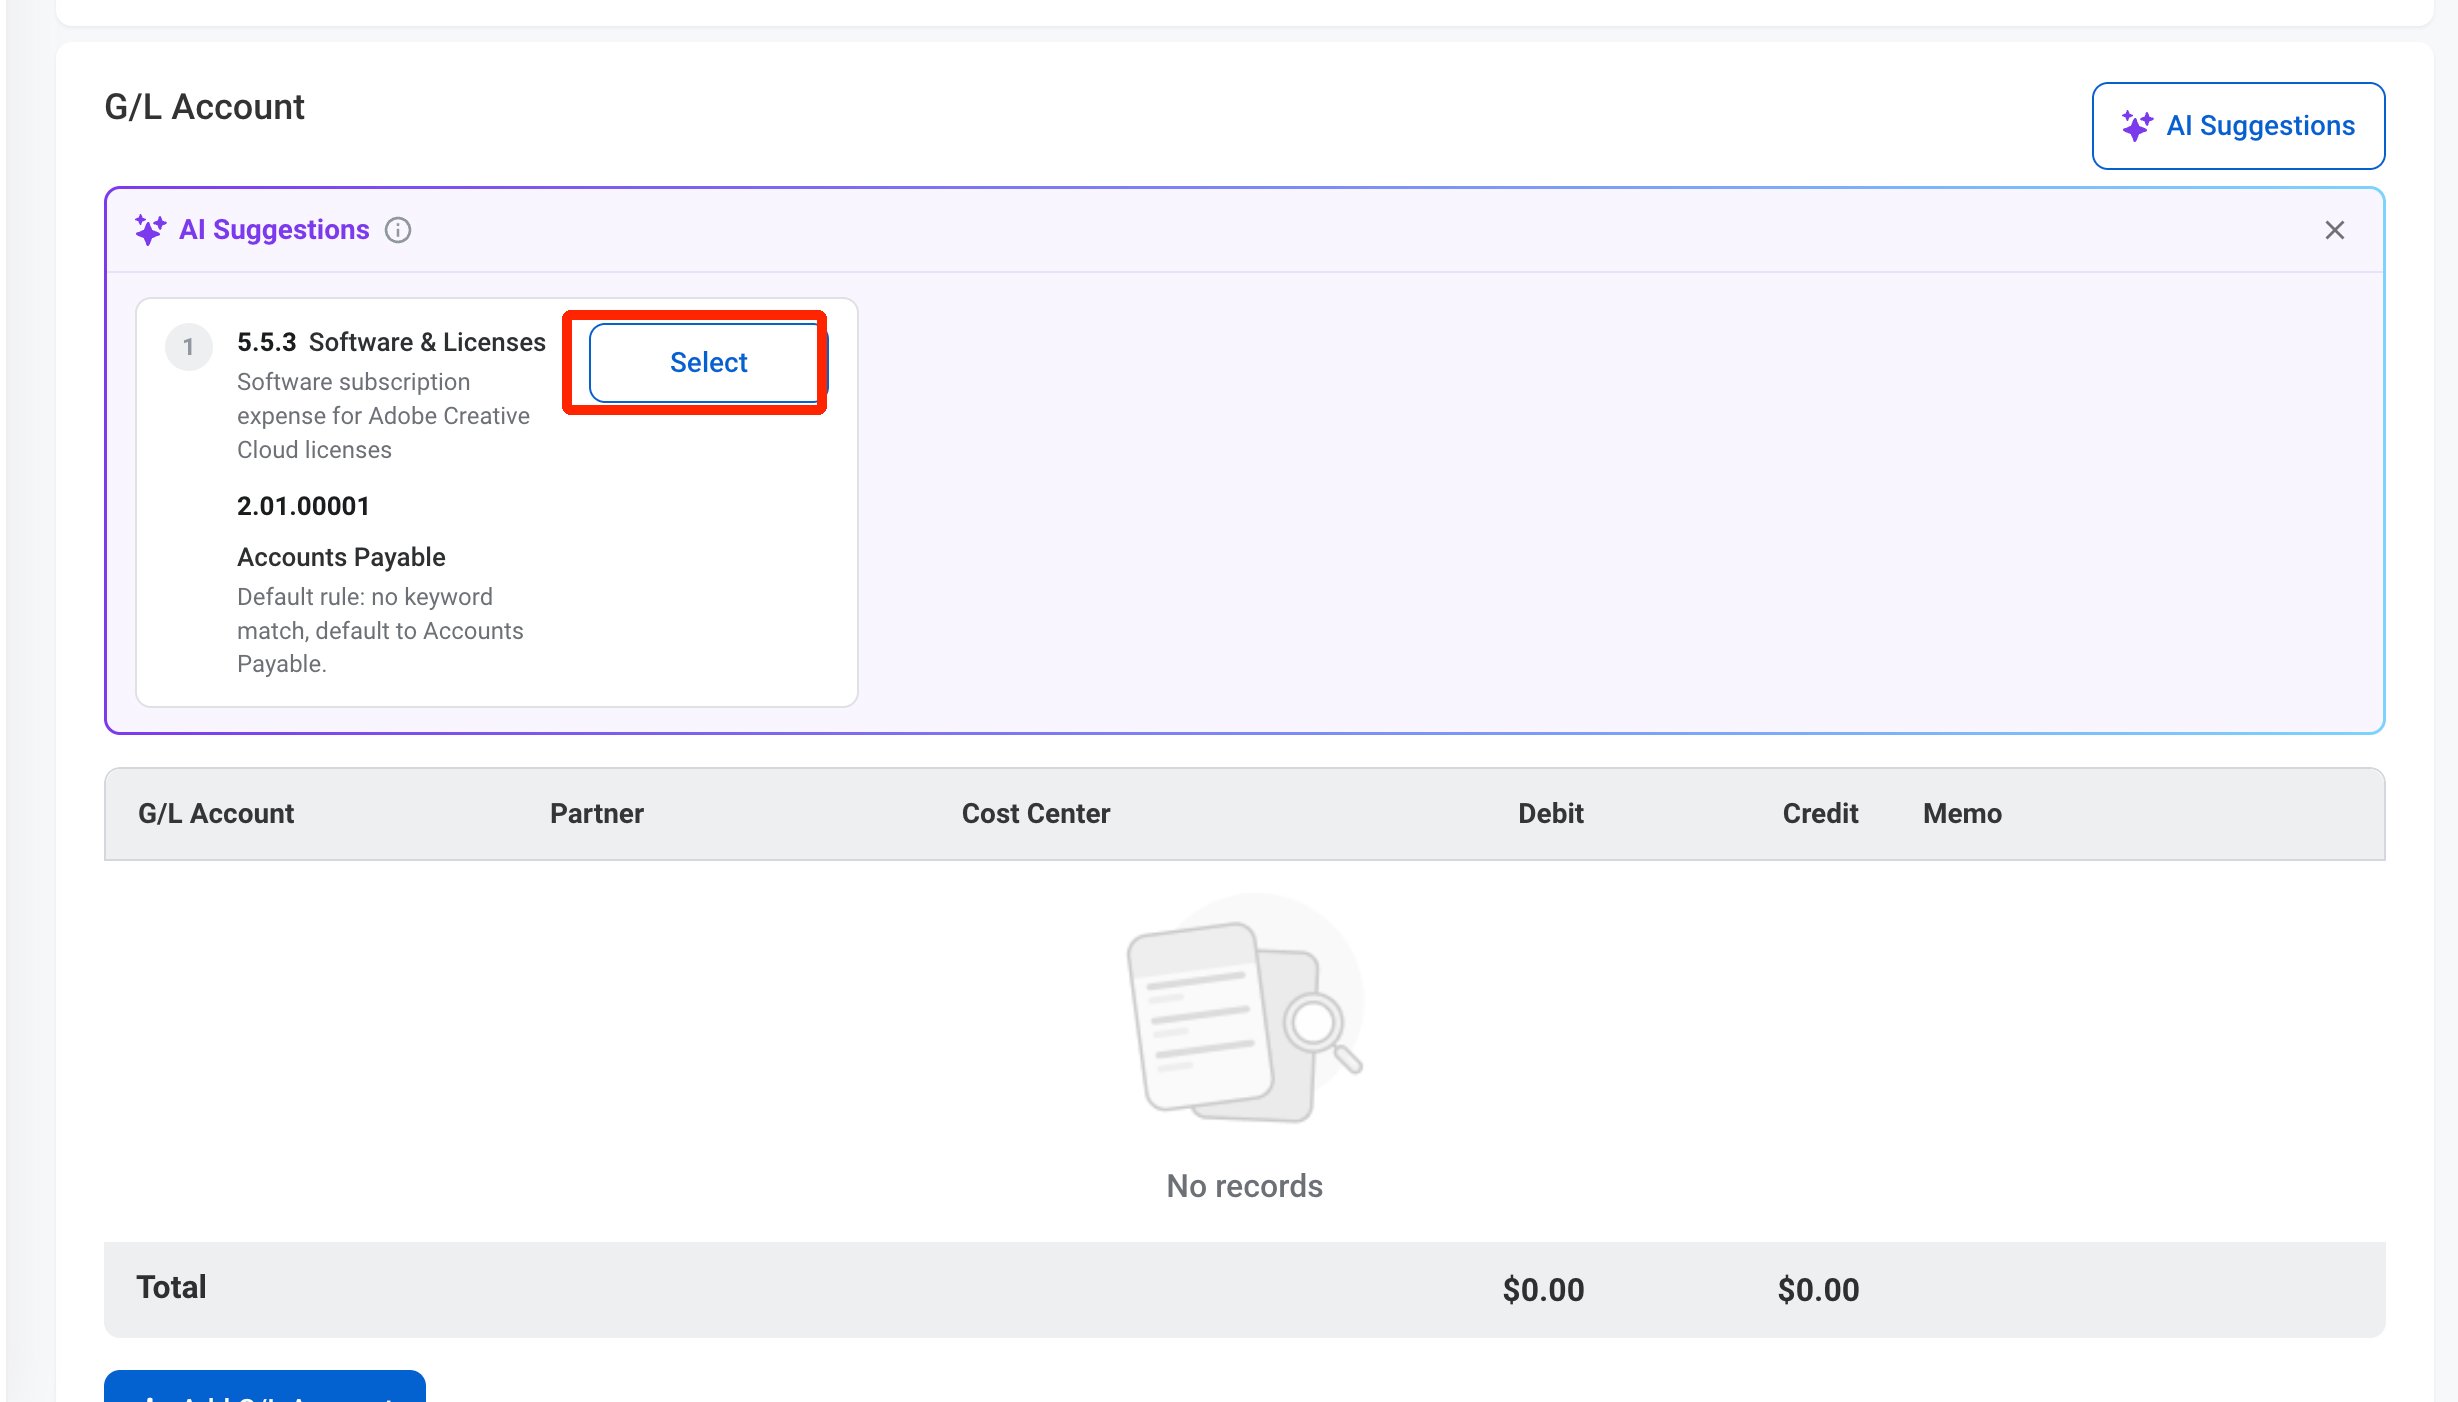
AI Suggestions categorizes the expense and recommends the debit and credit G/L accounts for the journal entry. Suggestions are based on the entry’s short description and note, your posted transaction history, vendor patterns, and past accounting behavior, so they improve over time. Each suggested account includes an explanation to help you evaluate it.Enter a Short Description or Note to enable AI Suggestions. Review suggested accounts before submitting. You can still select G/L accounts manually.
1
In the G/L Account section, select AI Suggestions
2
Review the suggestions and select one
3
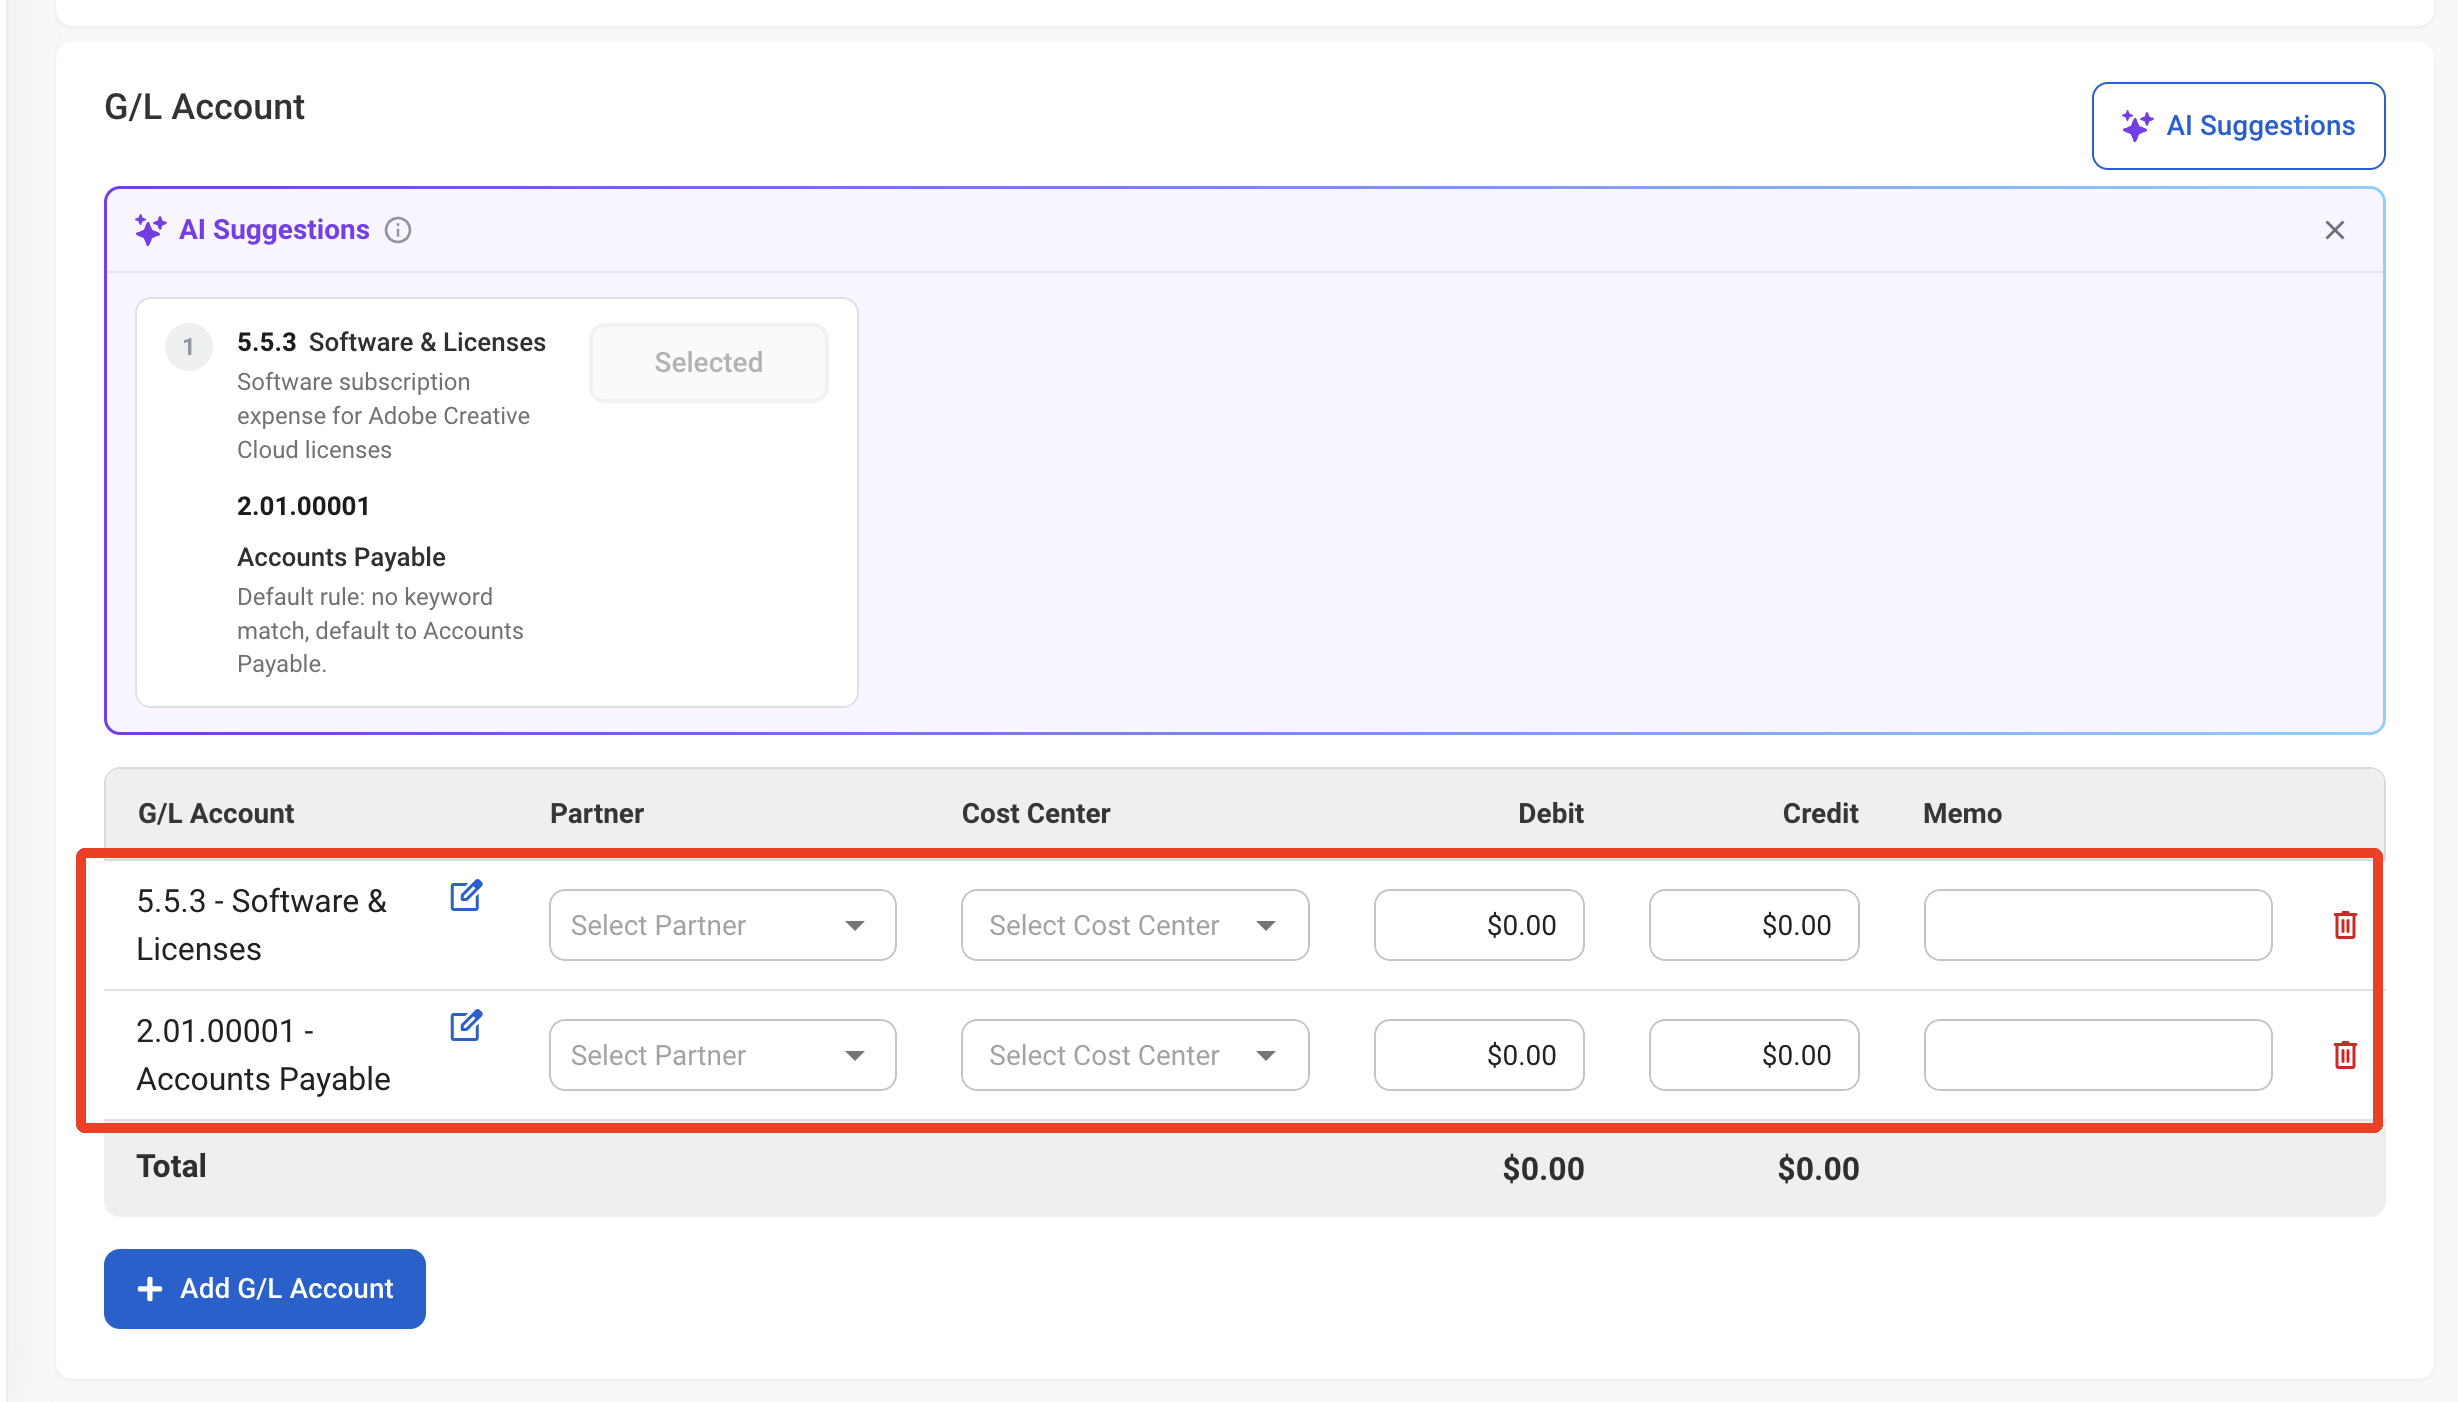
Review the added G/L accounts
Edit a Journal Entry
1
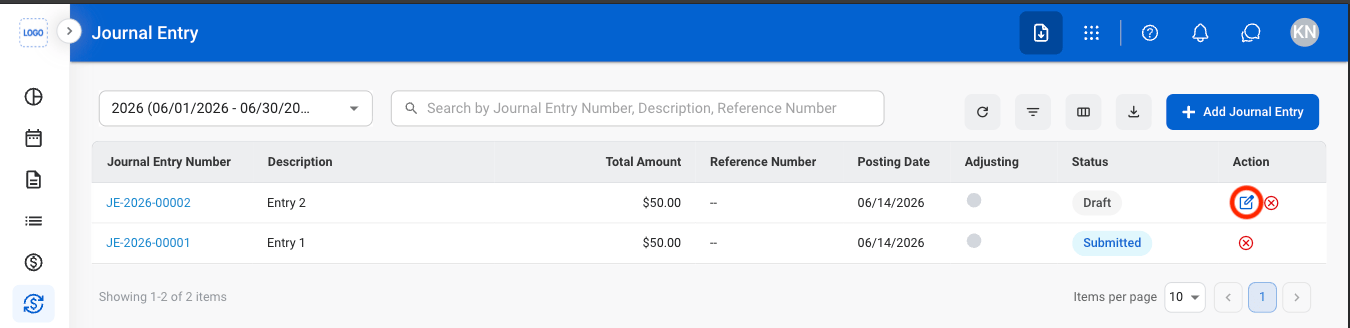
Select the edit icon
2
Fill in the required information
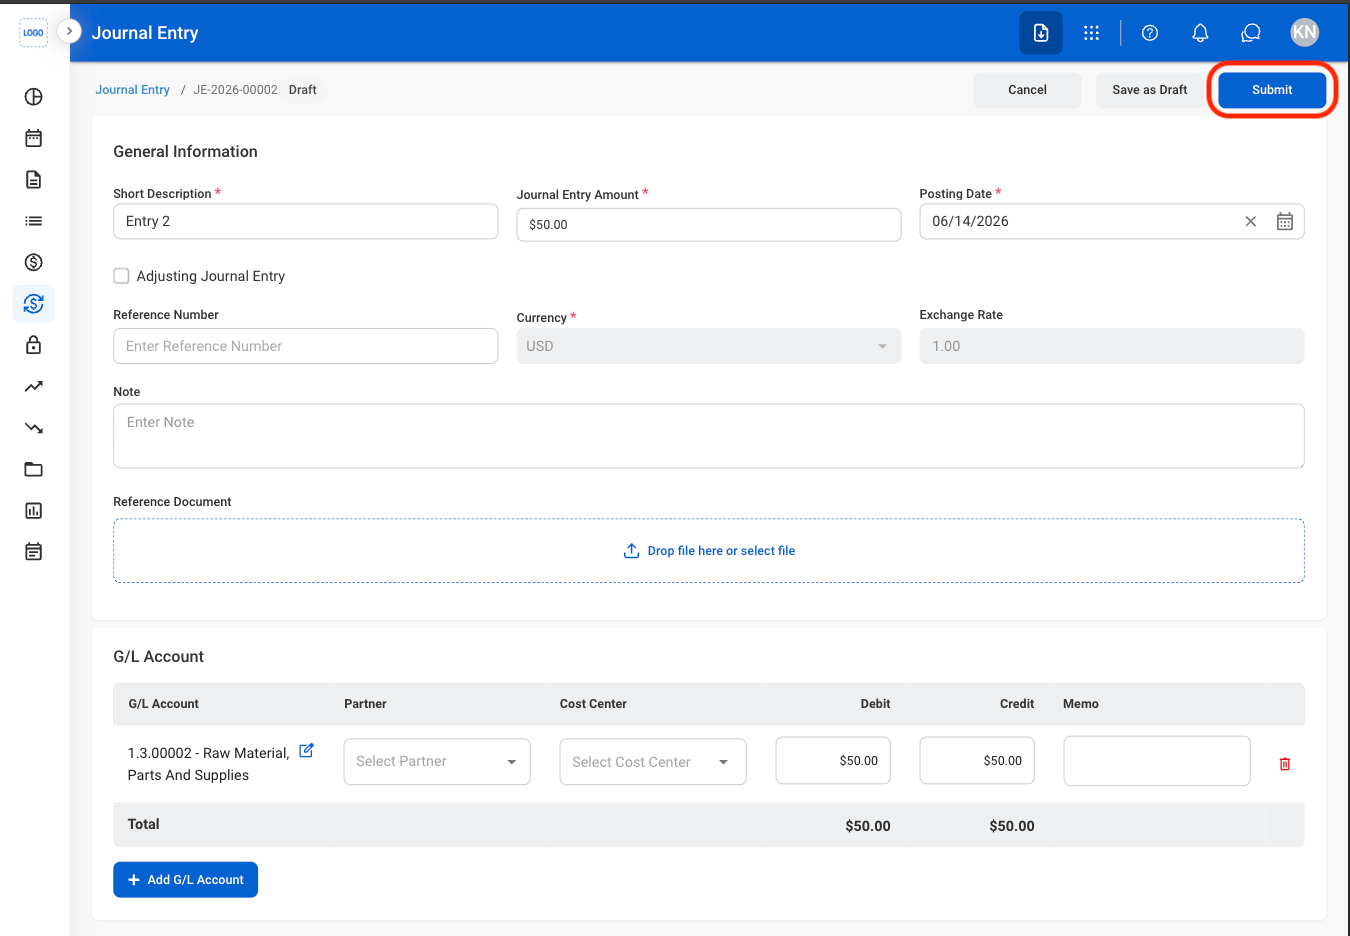
Delete a Journal Entry
1
Select the Delete icon
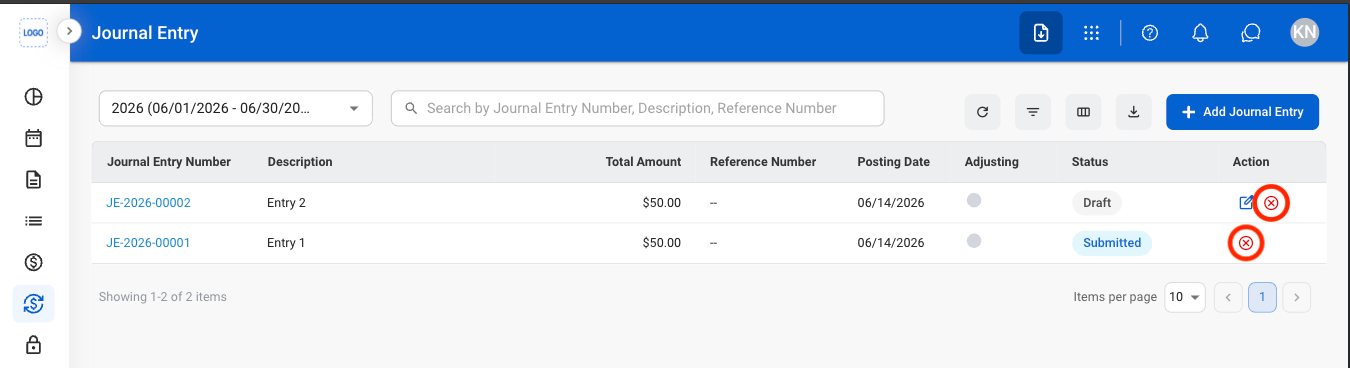
2
Confirm action

Review a Journal Entry
Journal Entries must be in Submitted status before they can be reviewed.
1
Select a submitted journal entry
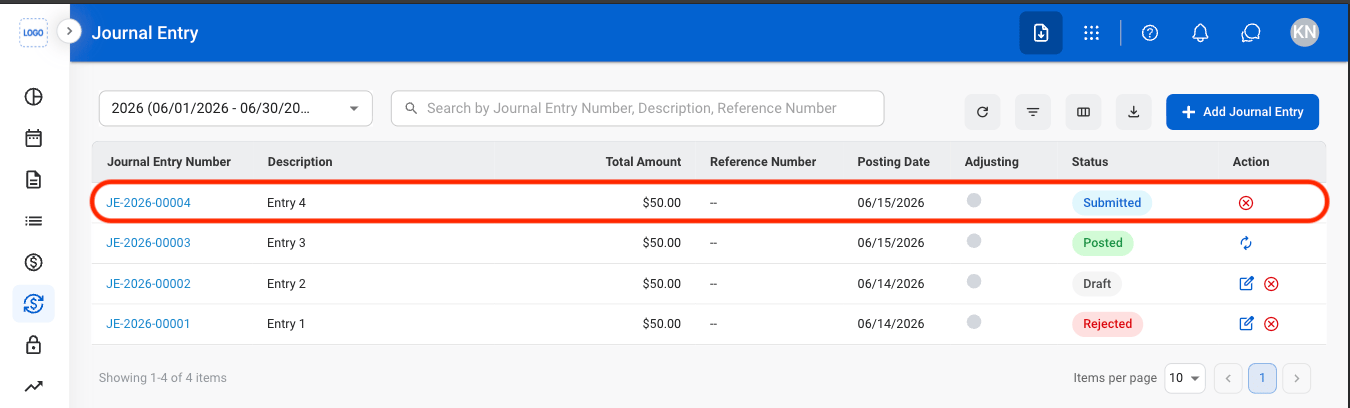
2
Review and process the record
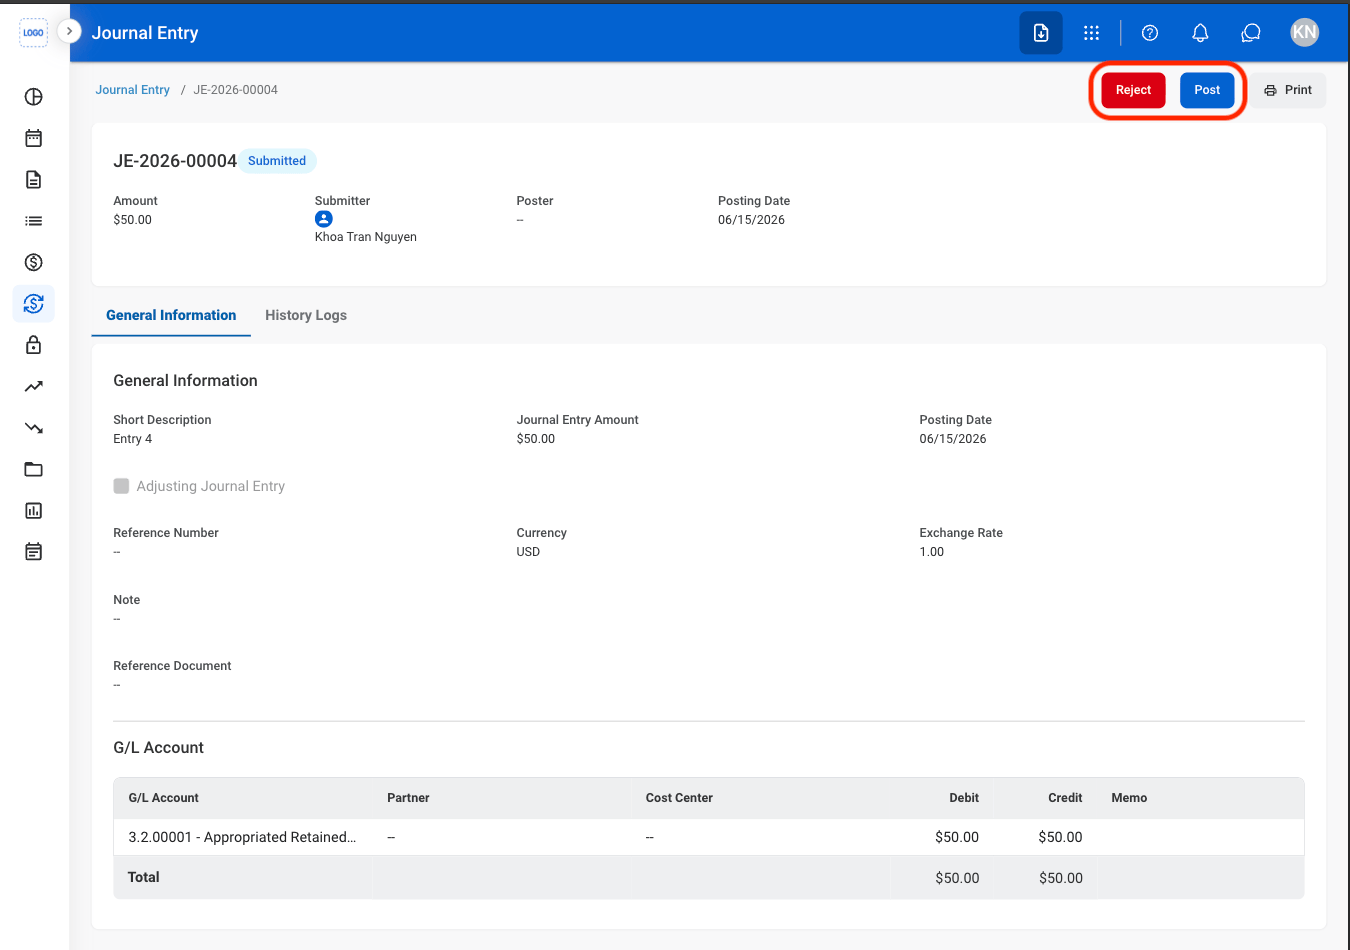
- Reject: The status changes to Rejected and the journal entry is not posted to the General Ledger.
- Post: The status changes to Posted and the journal entry is recorded in the General Ledger.
3
Confirm the action
- Reject: Enter a rejection reason. Select Reject to complete or Cancel to exit without saving changes.
- Post: Select Confirm to complete or Cancel to exit without saving changes.
Reverse a Journal Entry
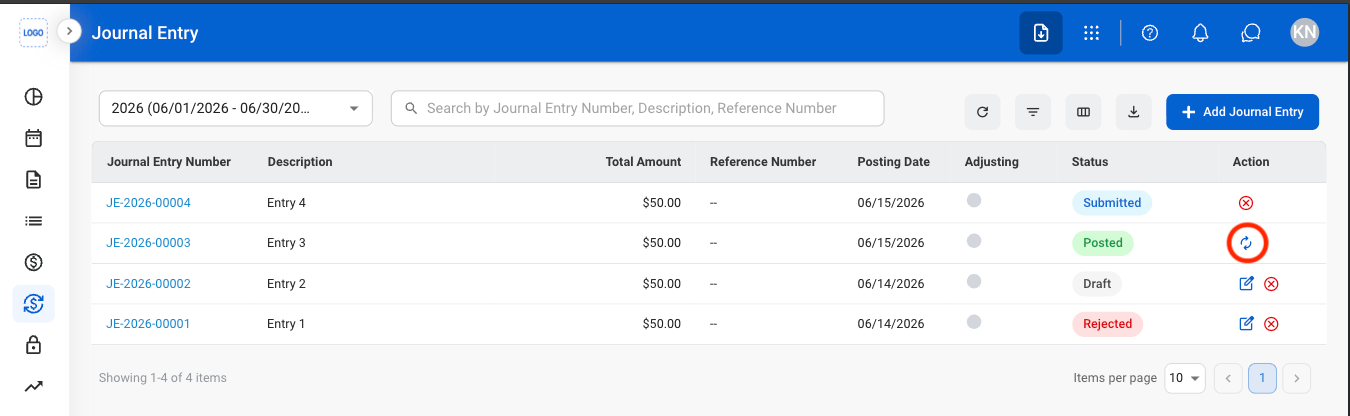
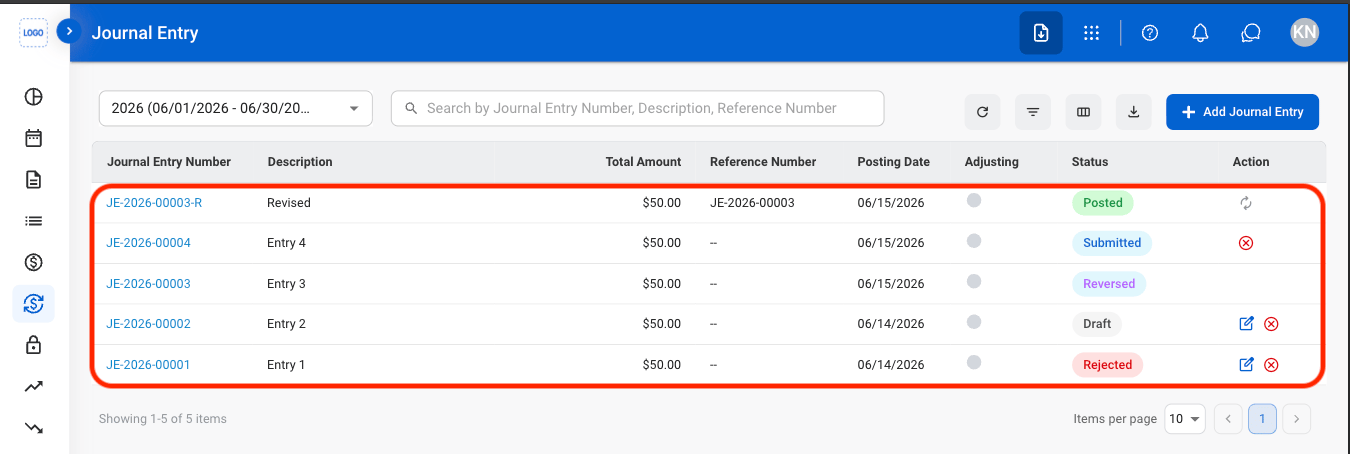
Reverse the journal entry by creating an offsetting entry. The original journal entry remains in the system and a reversing entry is recorded in the General Ledger.Journal entries must be in Posted status before they can be reversed.
1
Select the Reverse icon
2
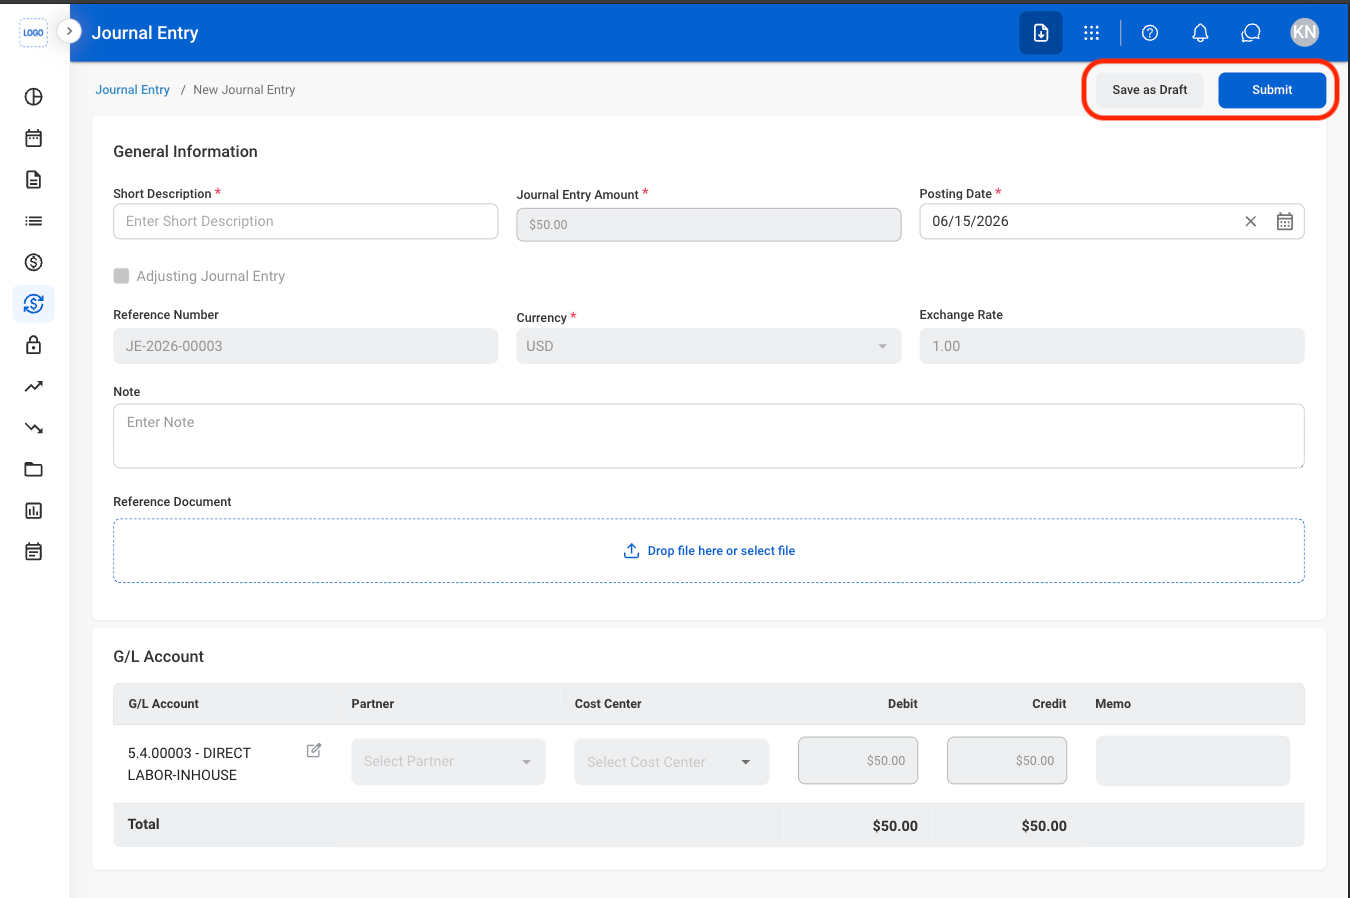
Fill in the required information
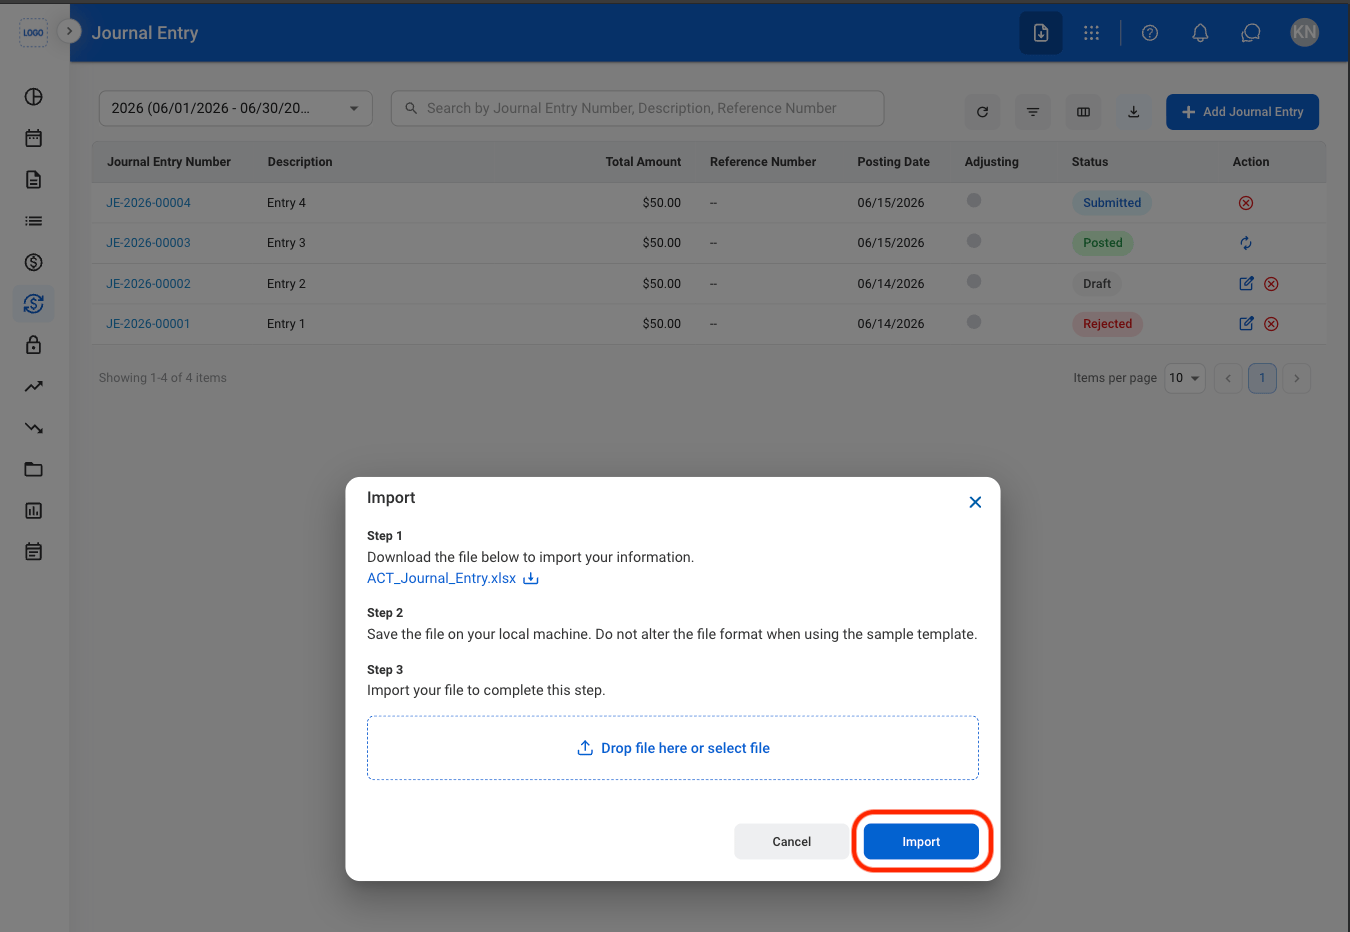
Import a Journal Entry
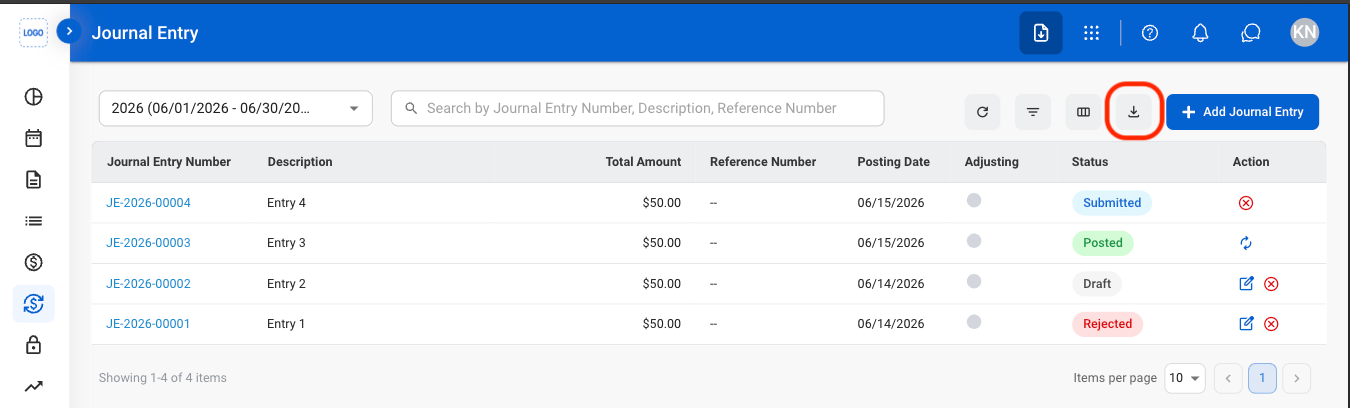
1
Select the Import icon
2
Download the template
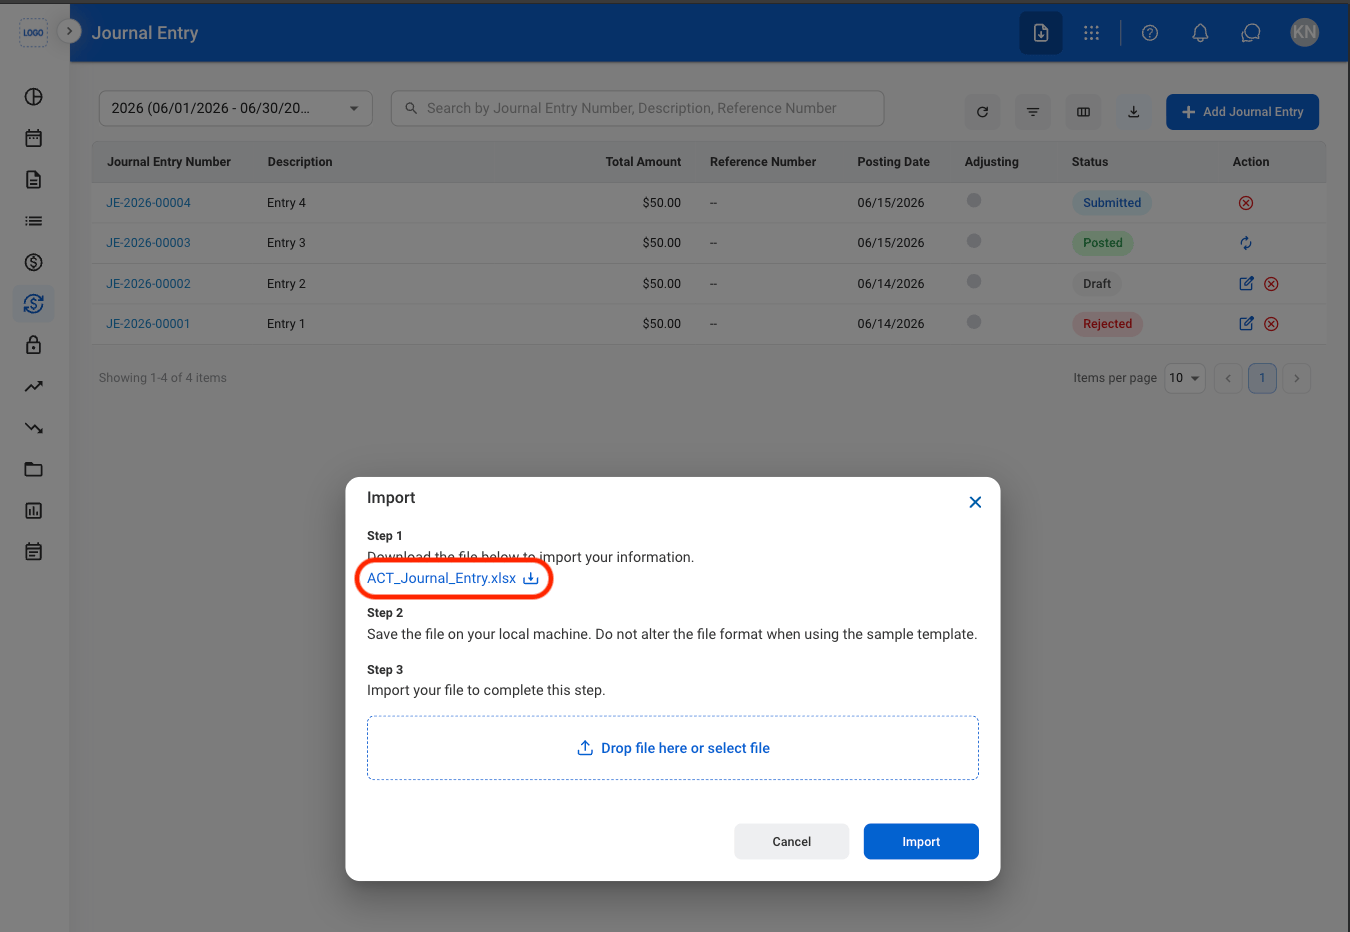
The system supports up to 1,000 G/L lines per import file.
3
Upload the completed file
View Journal Entry History
1
Select a journal entry
2
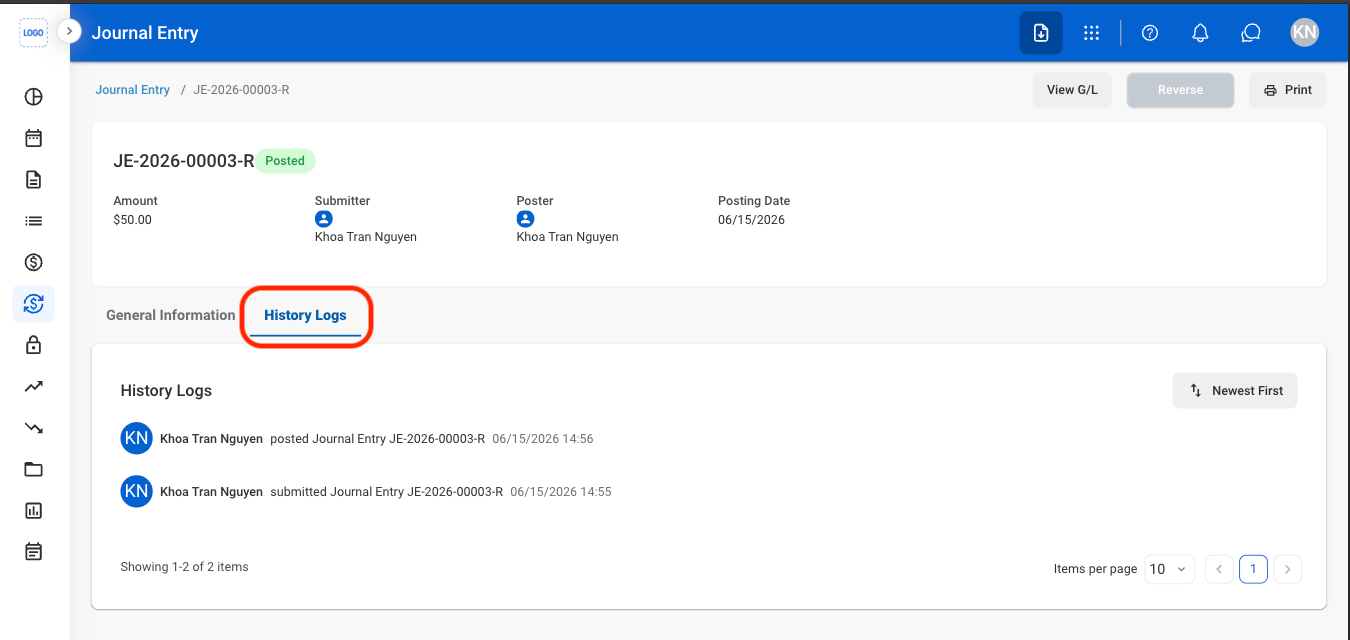
Select History Logs