
Add a New Employee
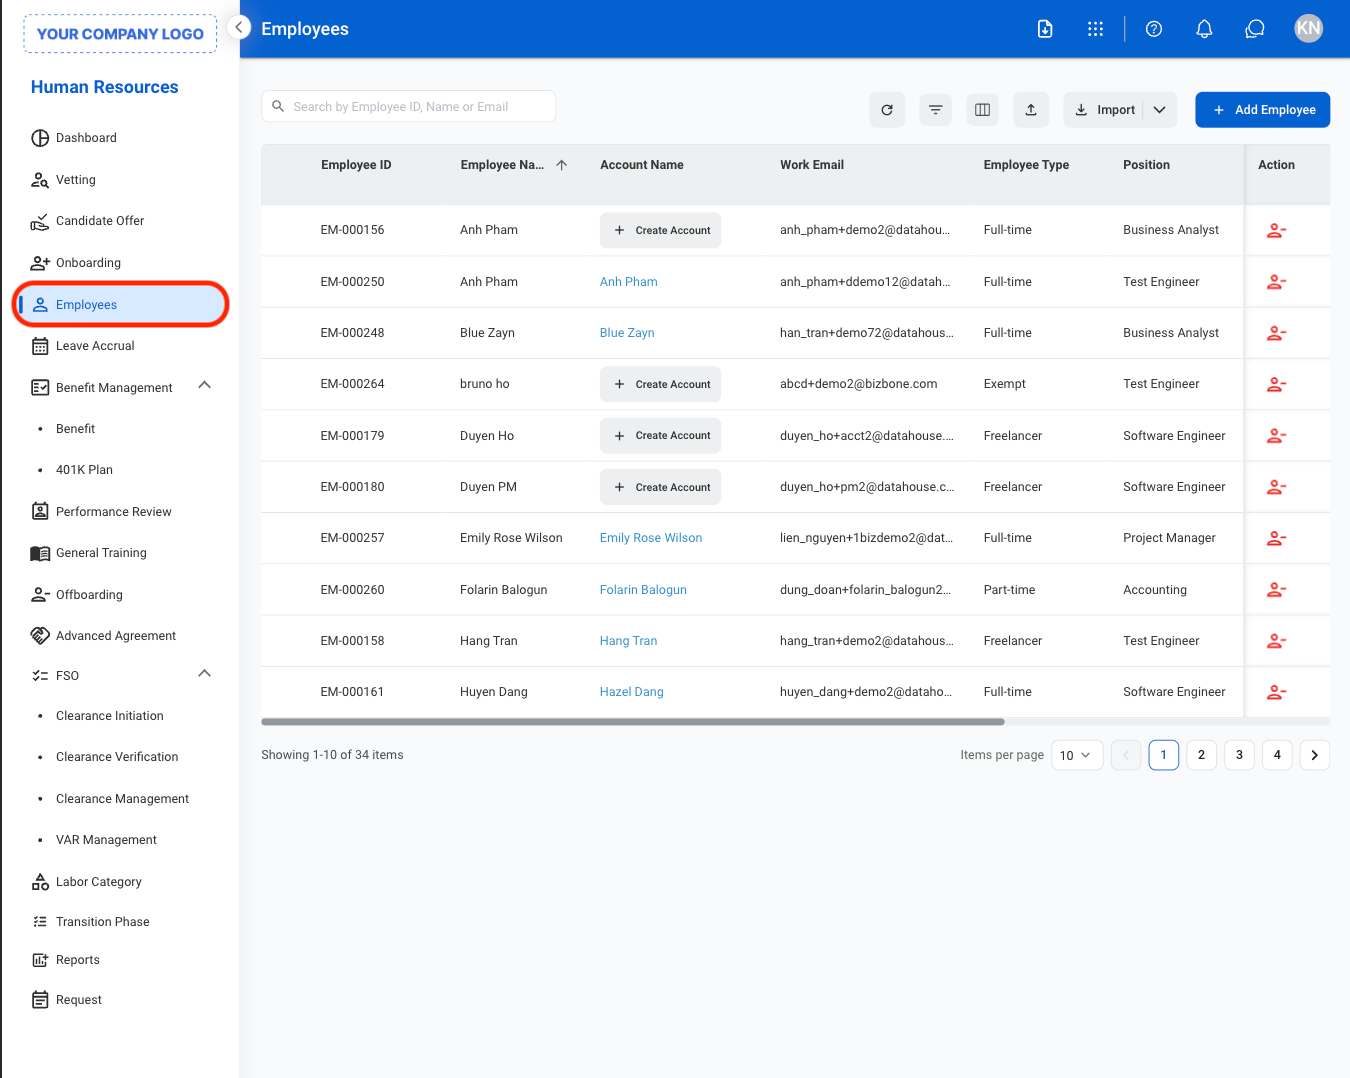
Create a new employee profile by entering required personal, employment, and organizational information to initiate the employee record in the system.Navigate to Employees
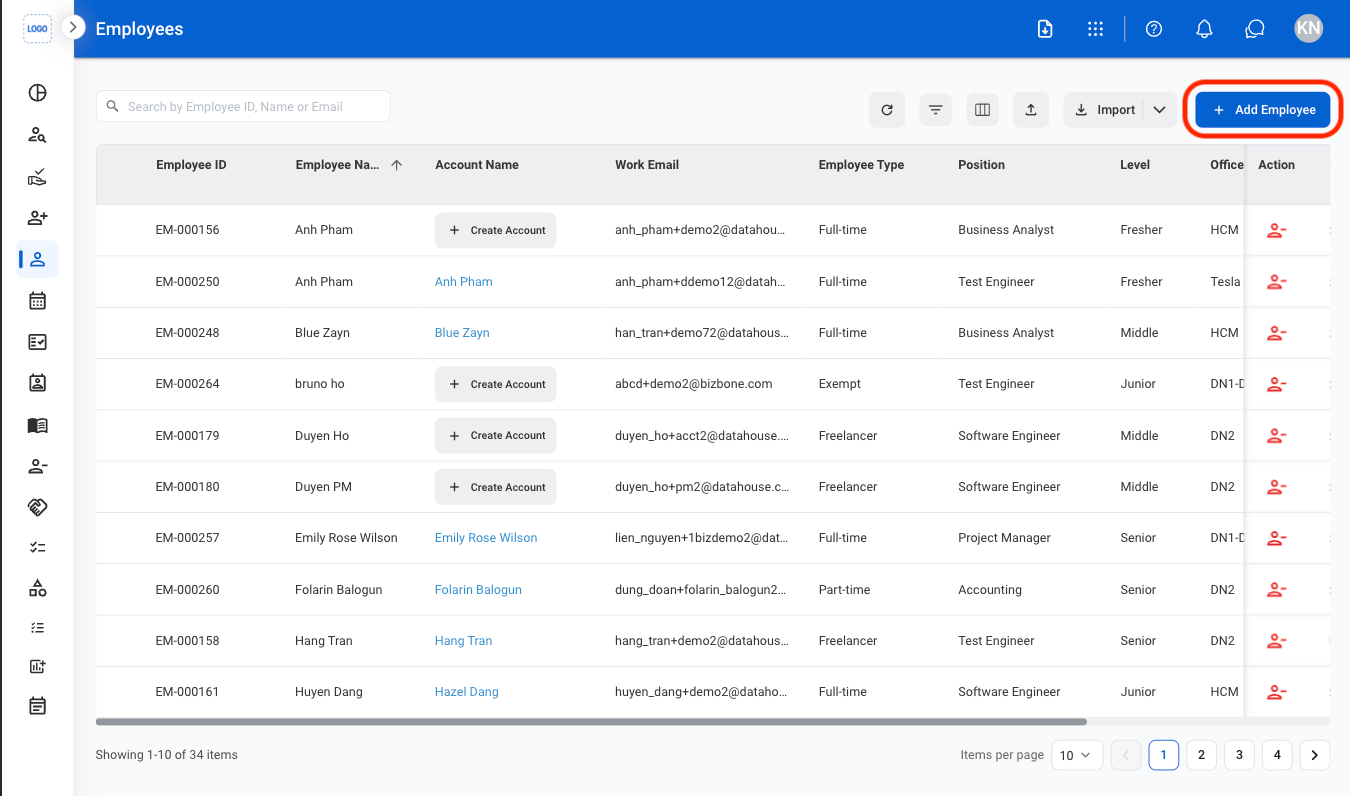
Select Add Employee
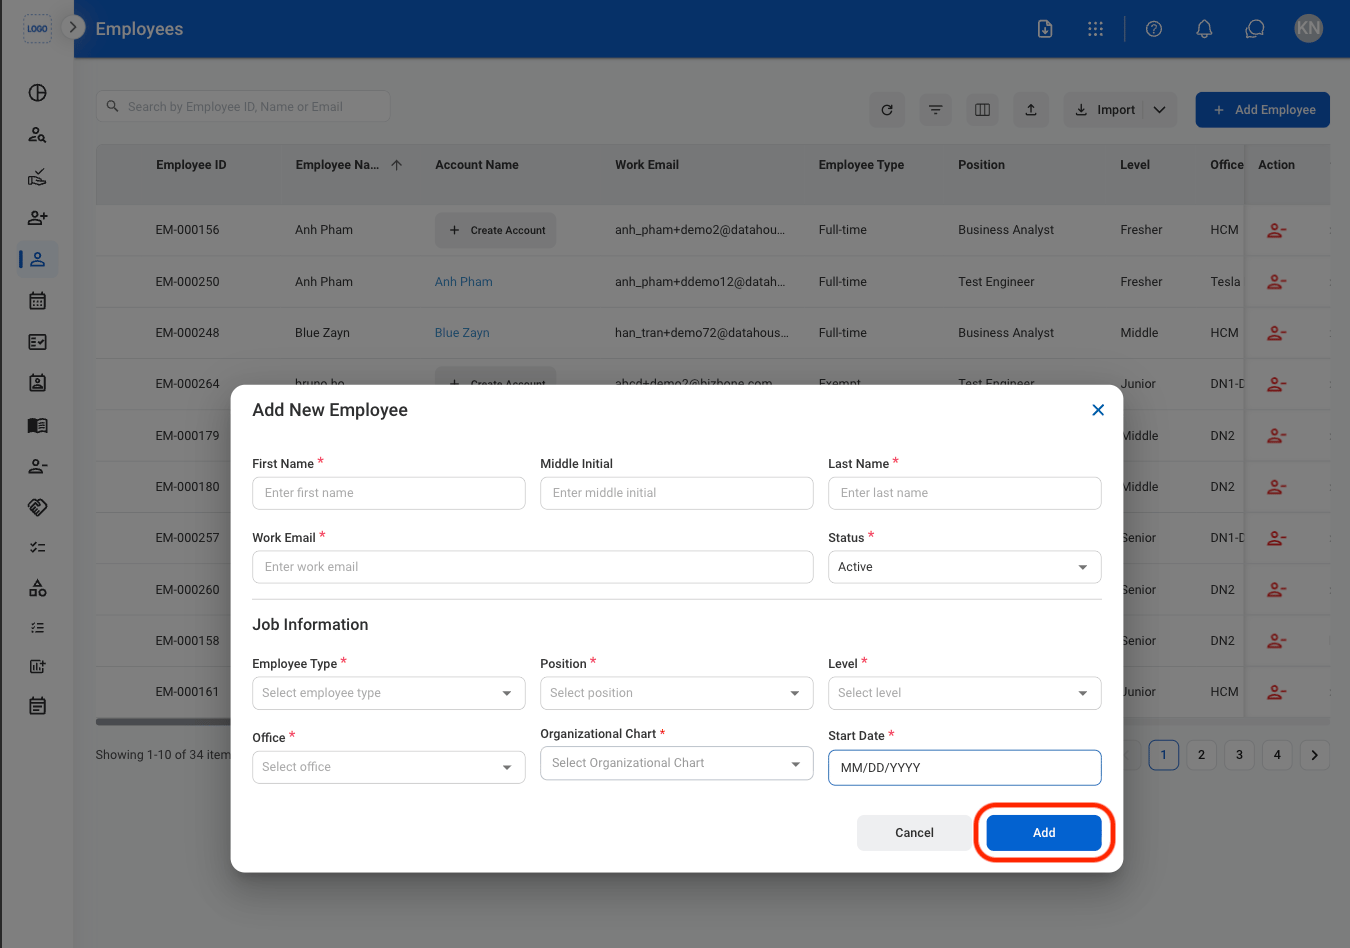
Fill in the required information
Request to Create an Account
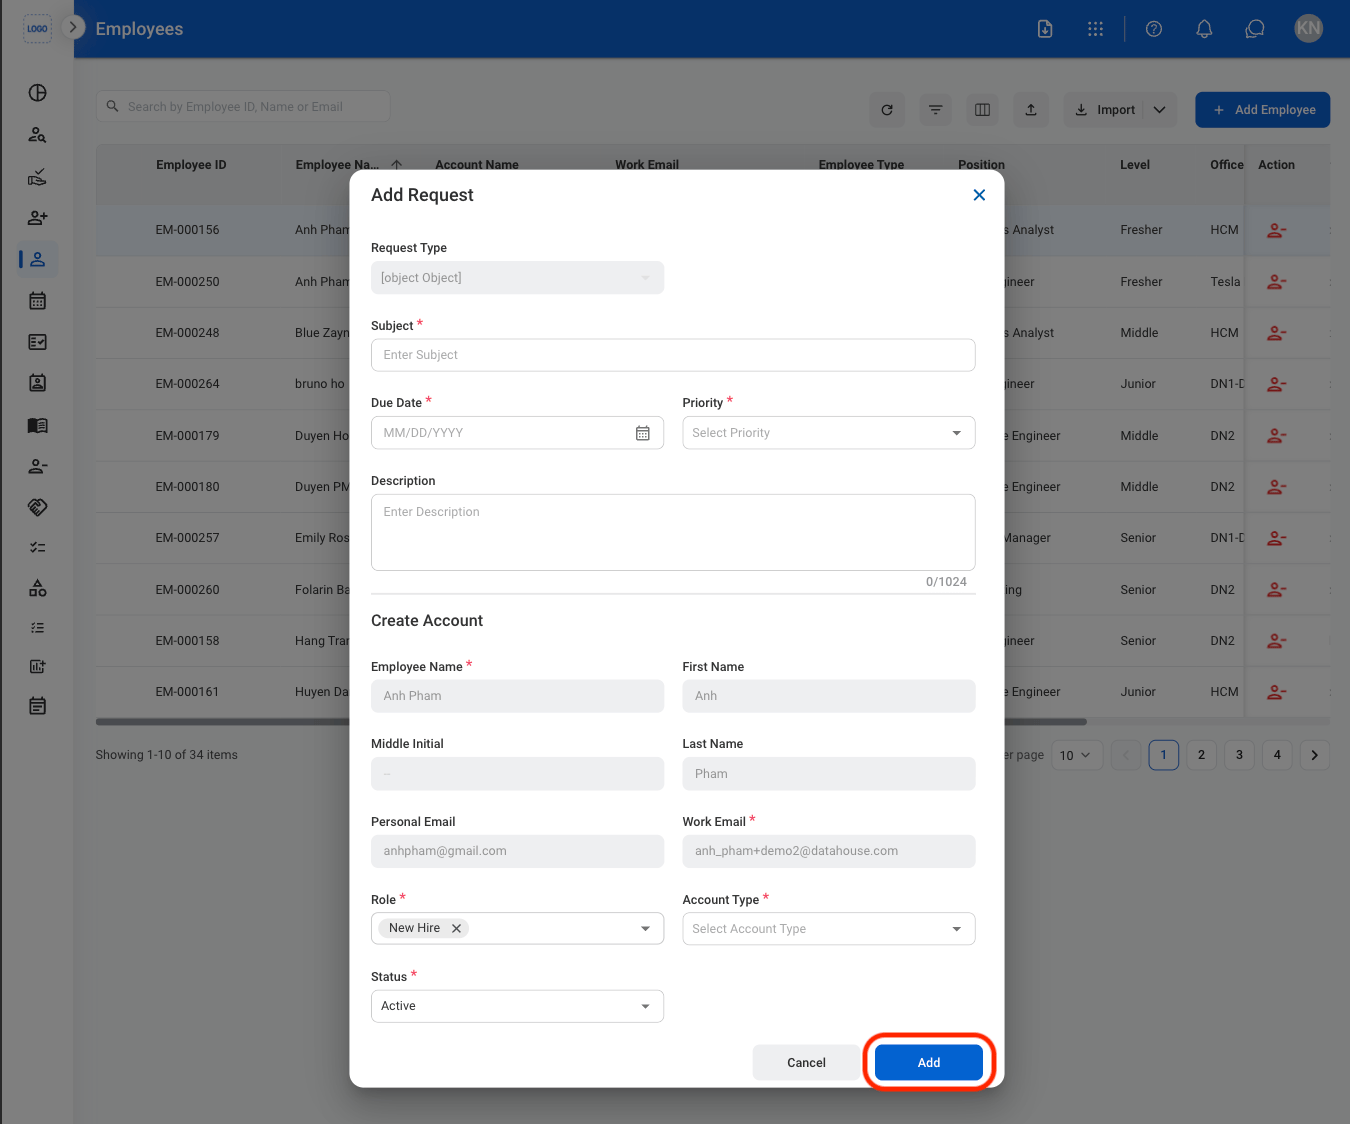
Create and submit a request for employee system account setup. Submitted requests are routed to the Requests module for review and approval.Select Create Account

Fill in the required information
Approval and fulfillment
Deactivate
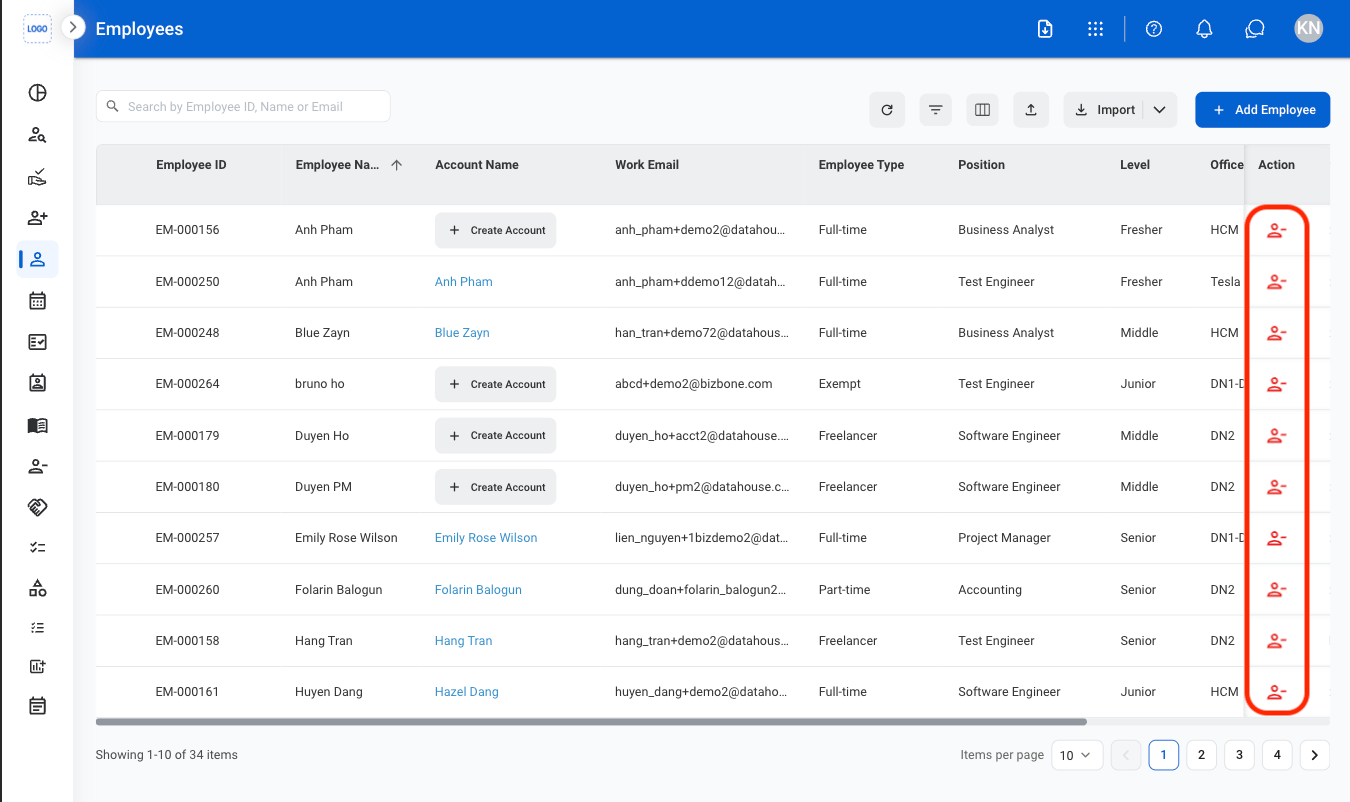
Deactivate an employee account to initiate the offboarding process. The employee will be moved to the Offboarding section and will no longer appear in the active employee list.Select the deactivate button to the right of the employee's profile
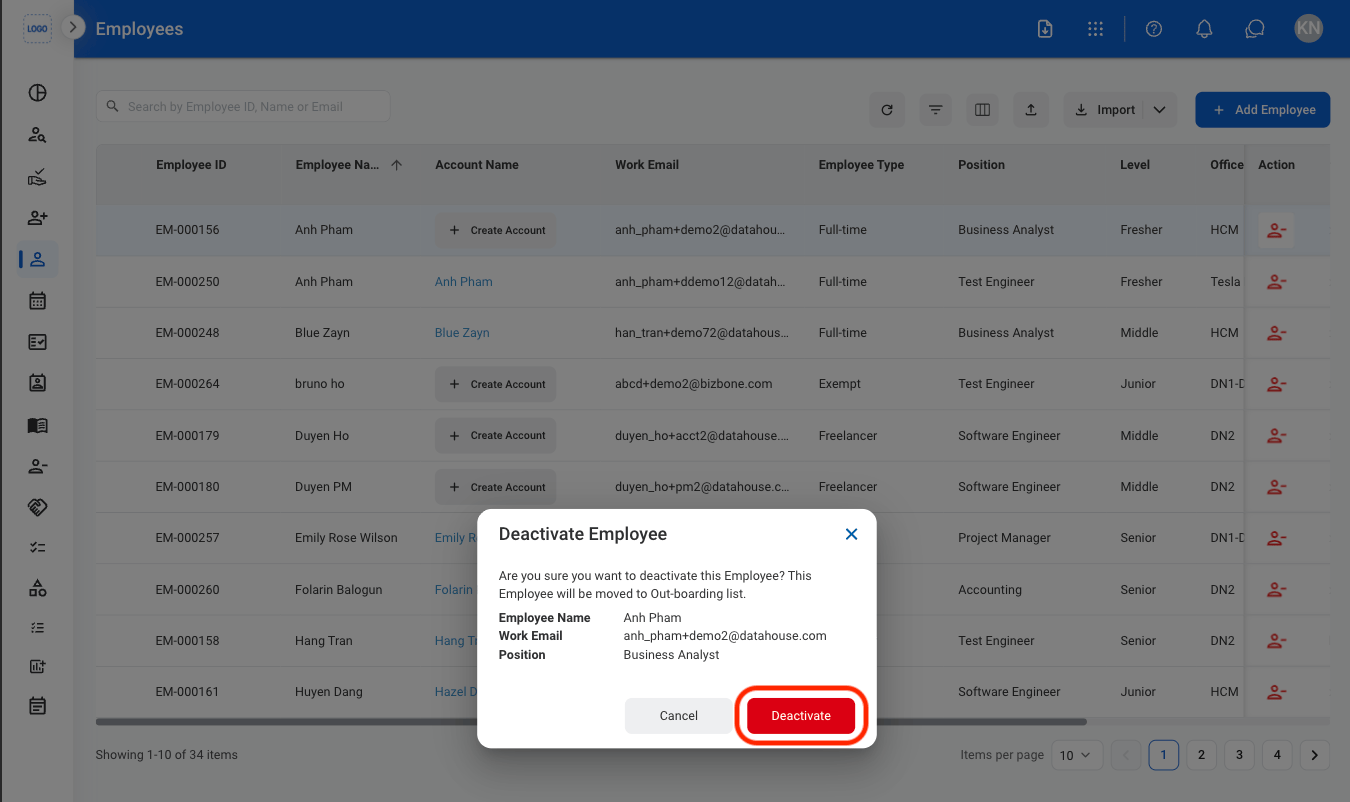
Select Deactivate to confirm
Complete offboarding in the Offboarding module
View and Update Employee Information
General Information
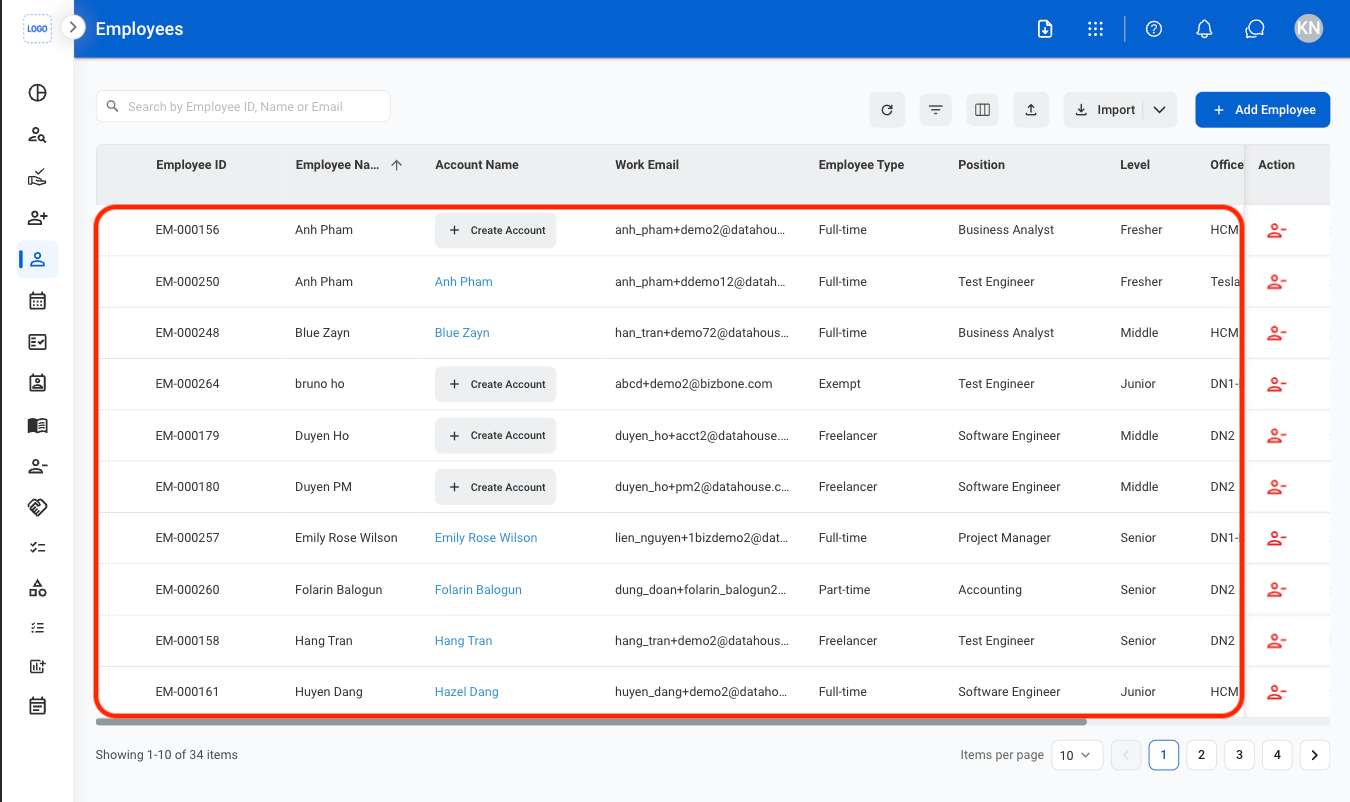
Update employee’s basic profile details.Select an employee
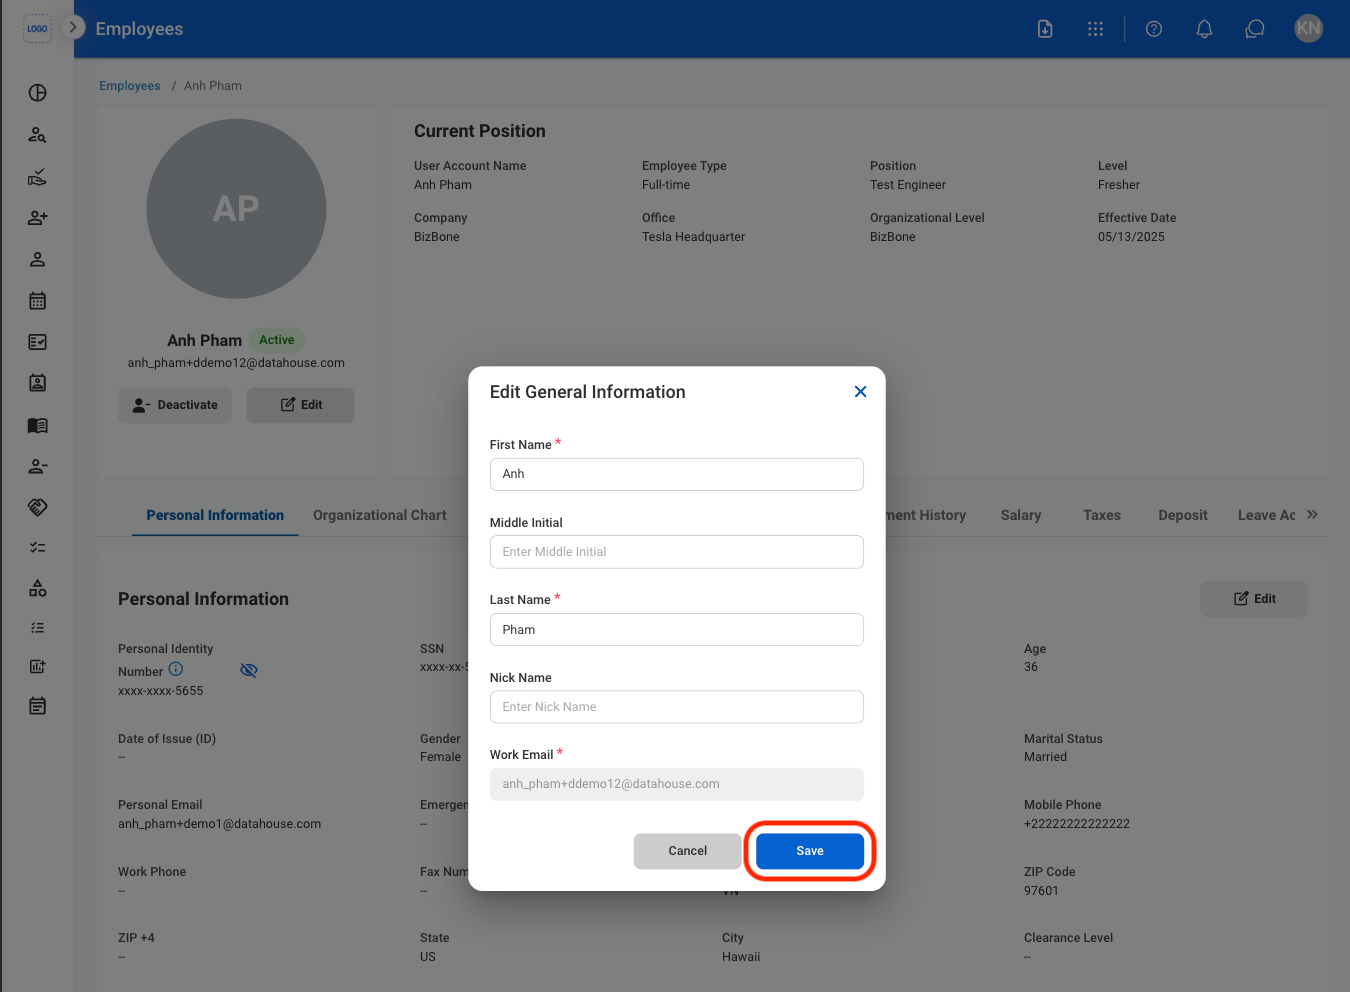
Select Edit

Fill in the required information
Personal Information
Manage employee’s confidential personal details for records and compliance.Edit Personal Information
Navigate to Personal Information

Select Edit
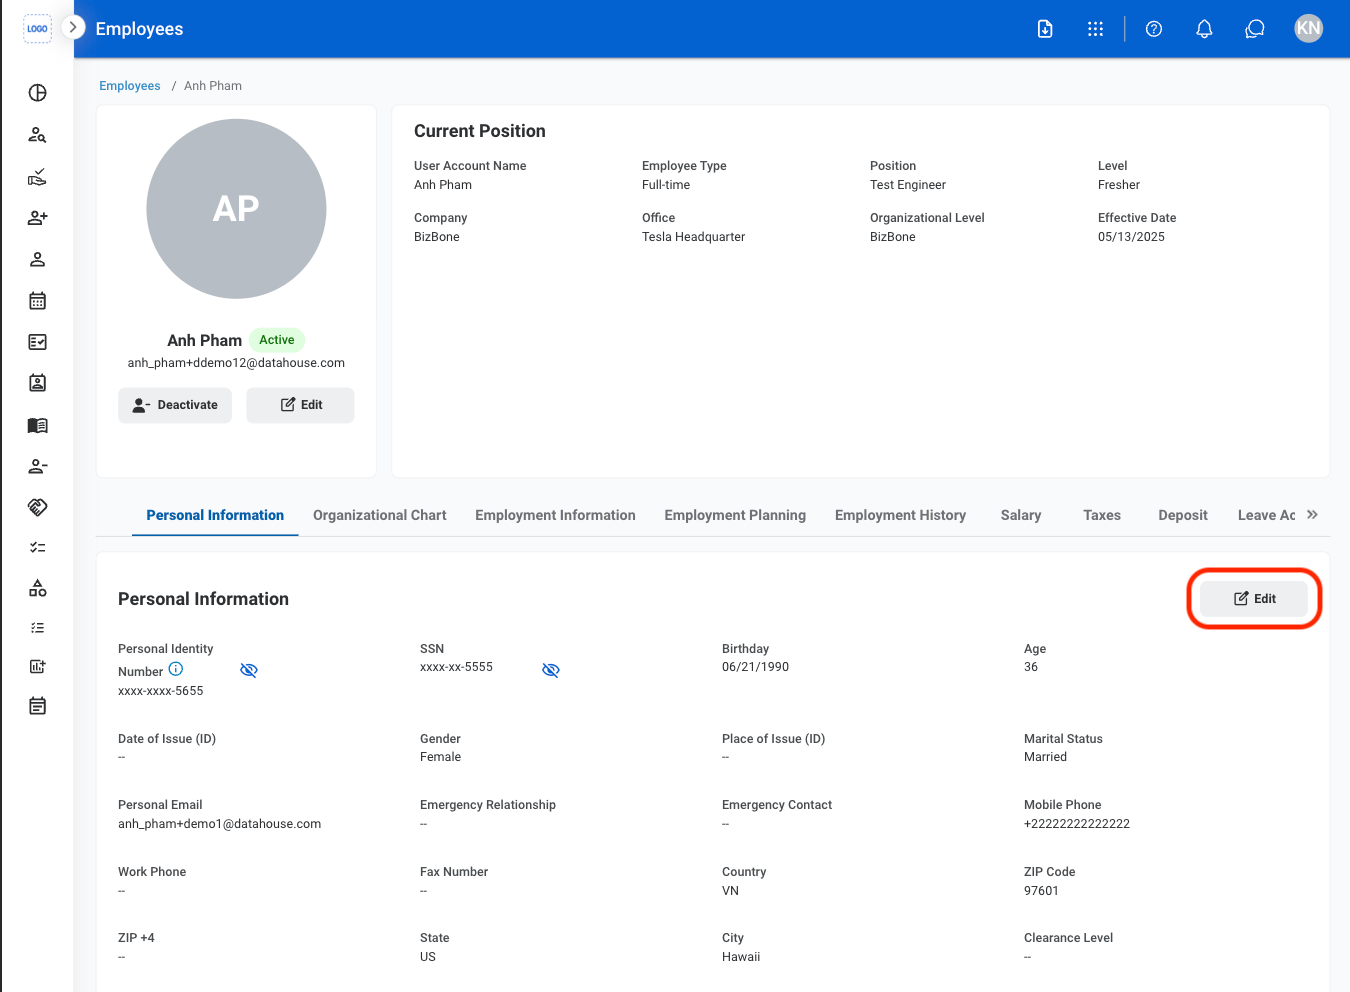
Fill in the required information

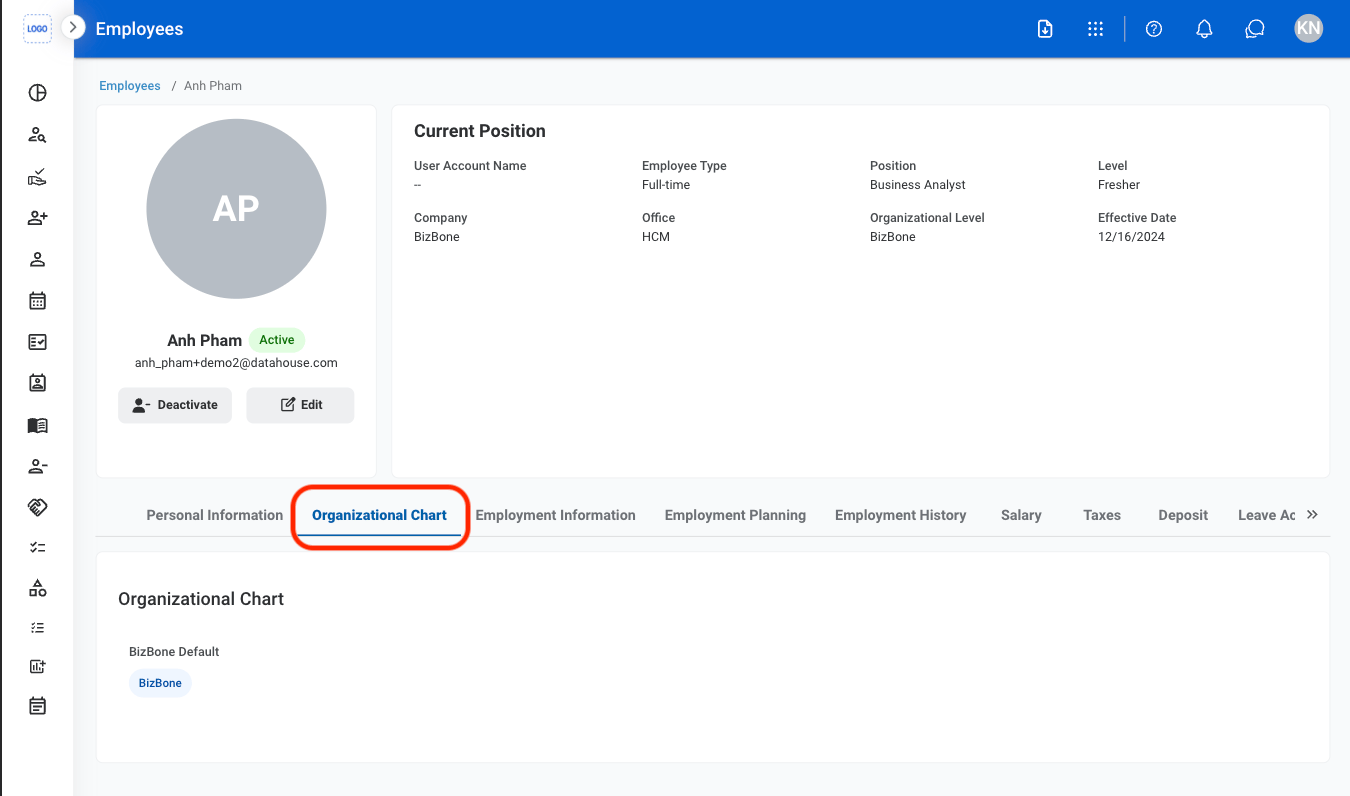
Organizational Chart
View an employee’s organizational chart.Navigate to Organizational Chart
Employment Information
Manage employment-related details such as hire date, reporting manager, and other information used for internal records.Edit Employment Information
Navigate to Employment Information

Select Edit
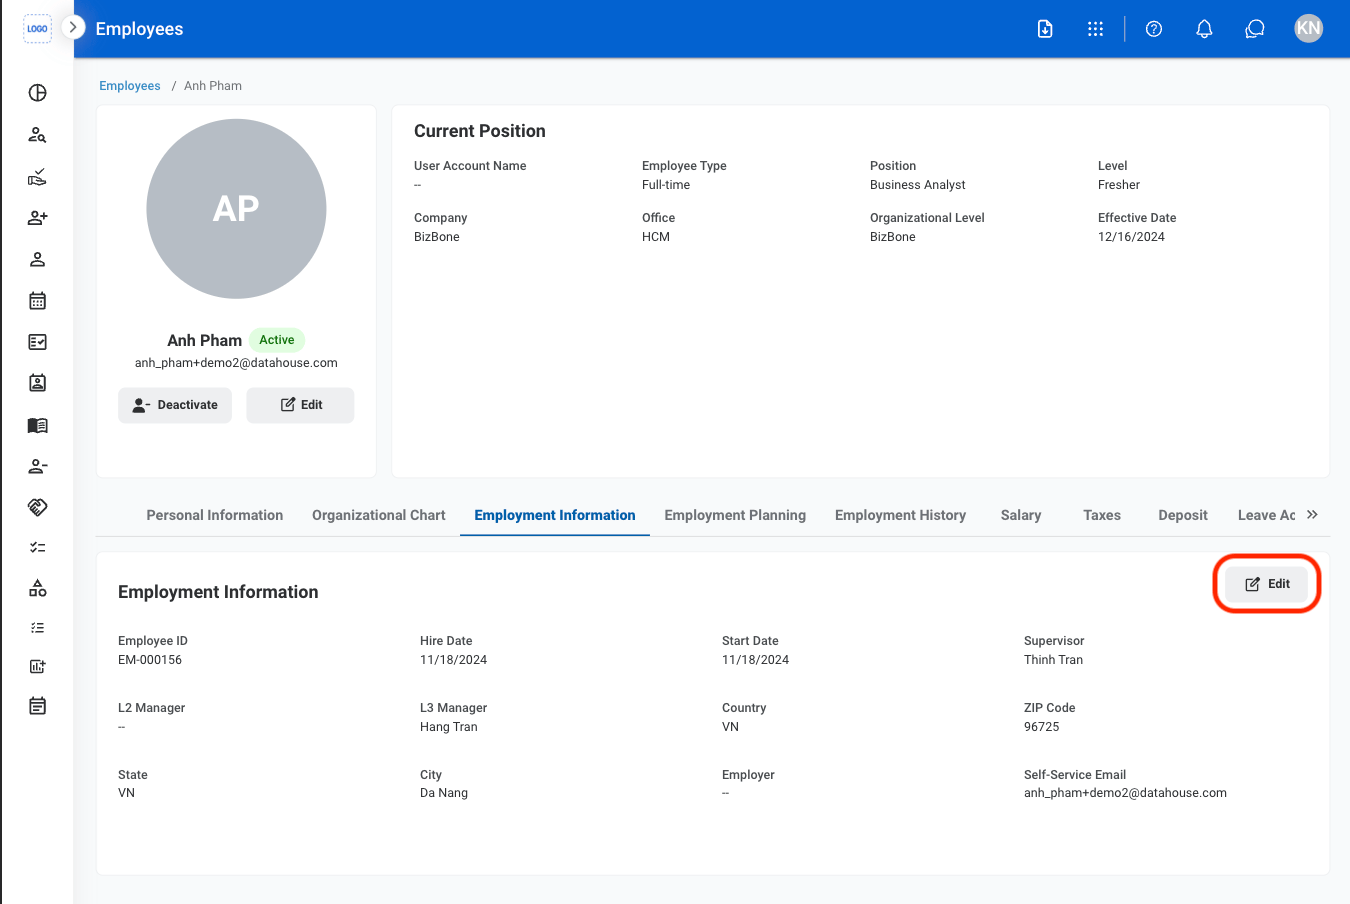
Fill in the required information

Employment Planning
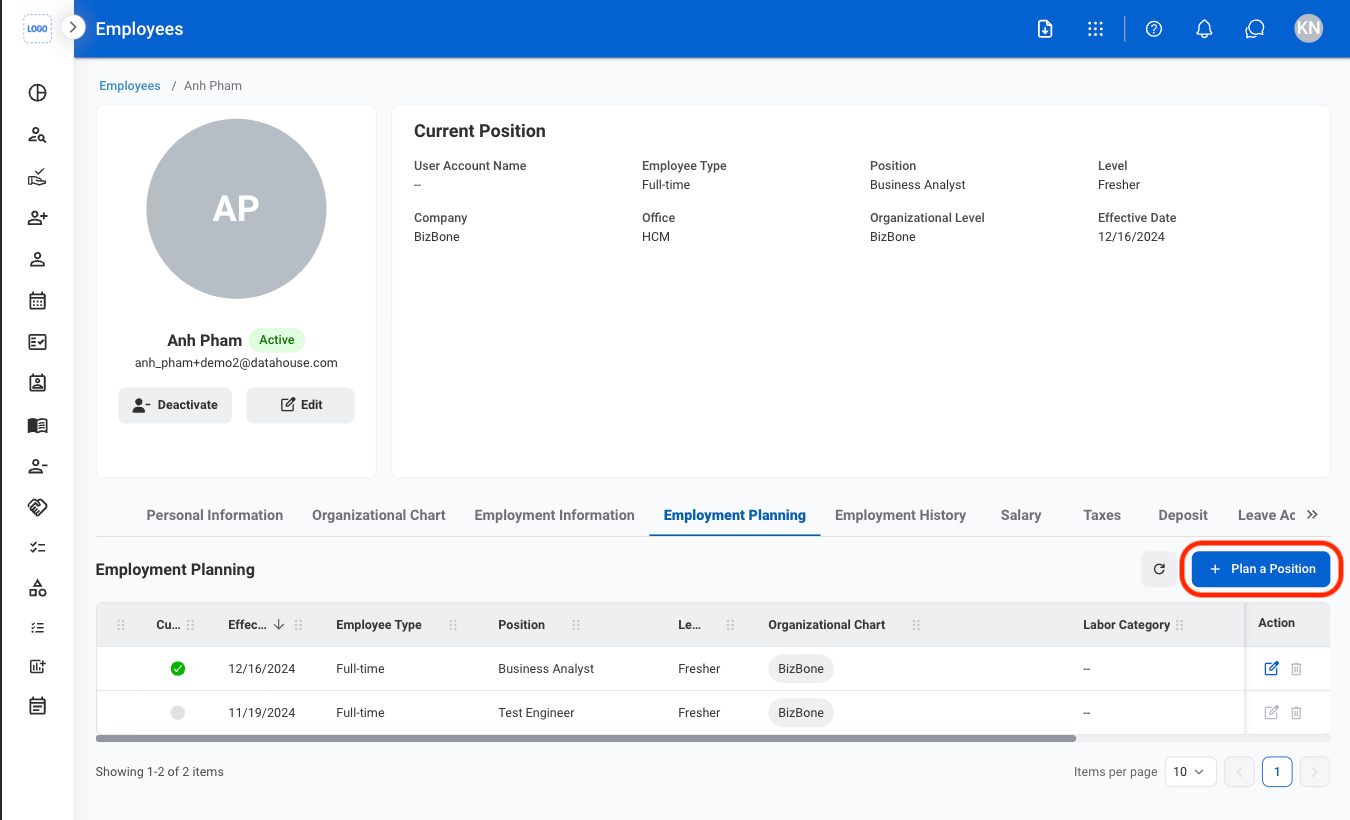
Manage internal job changes such as role updates, transfers, and promotions. Changes made in this section are reflected in the organizational chart.Plan a New Employee Position
Navigate to Employment Planning
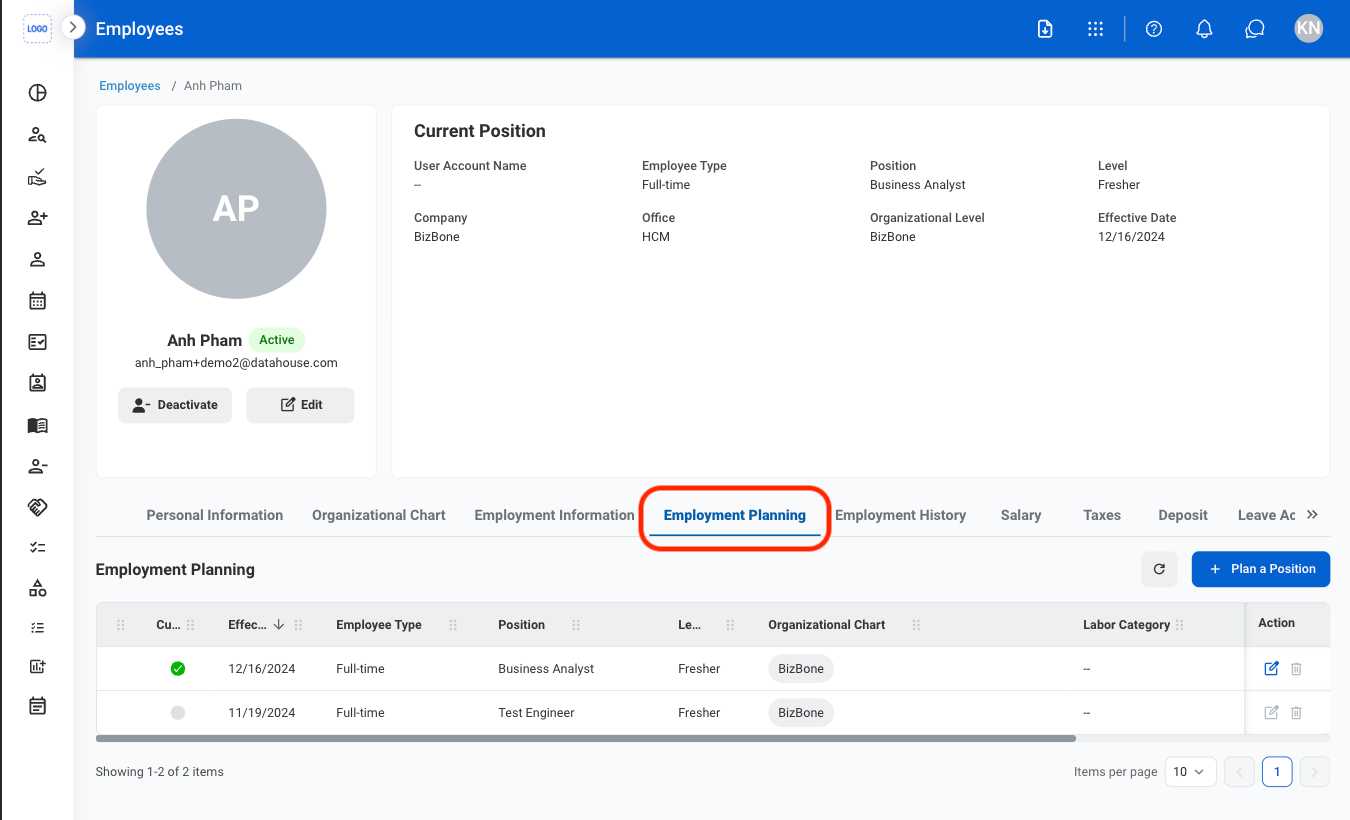
Select Plan a Position
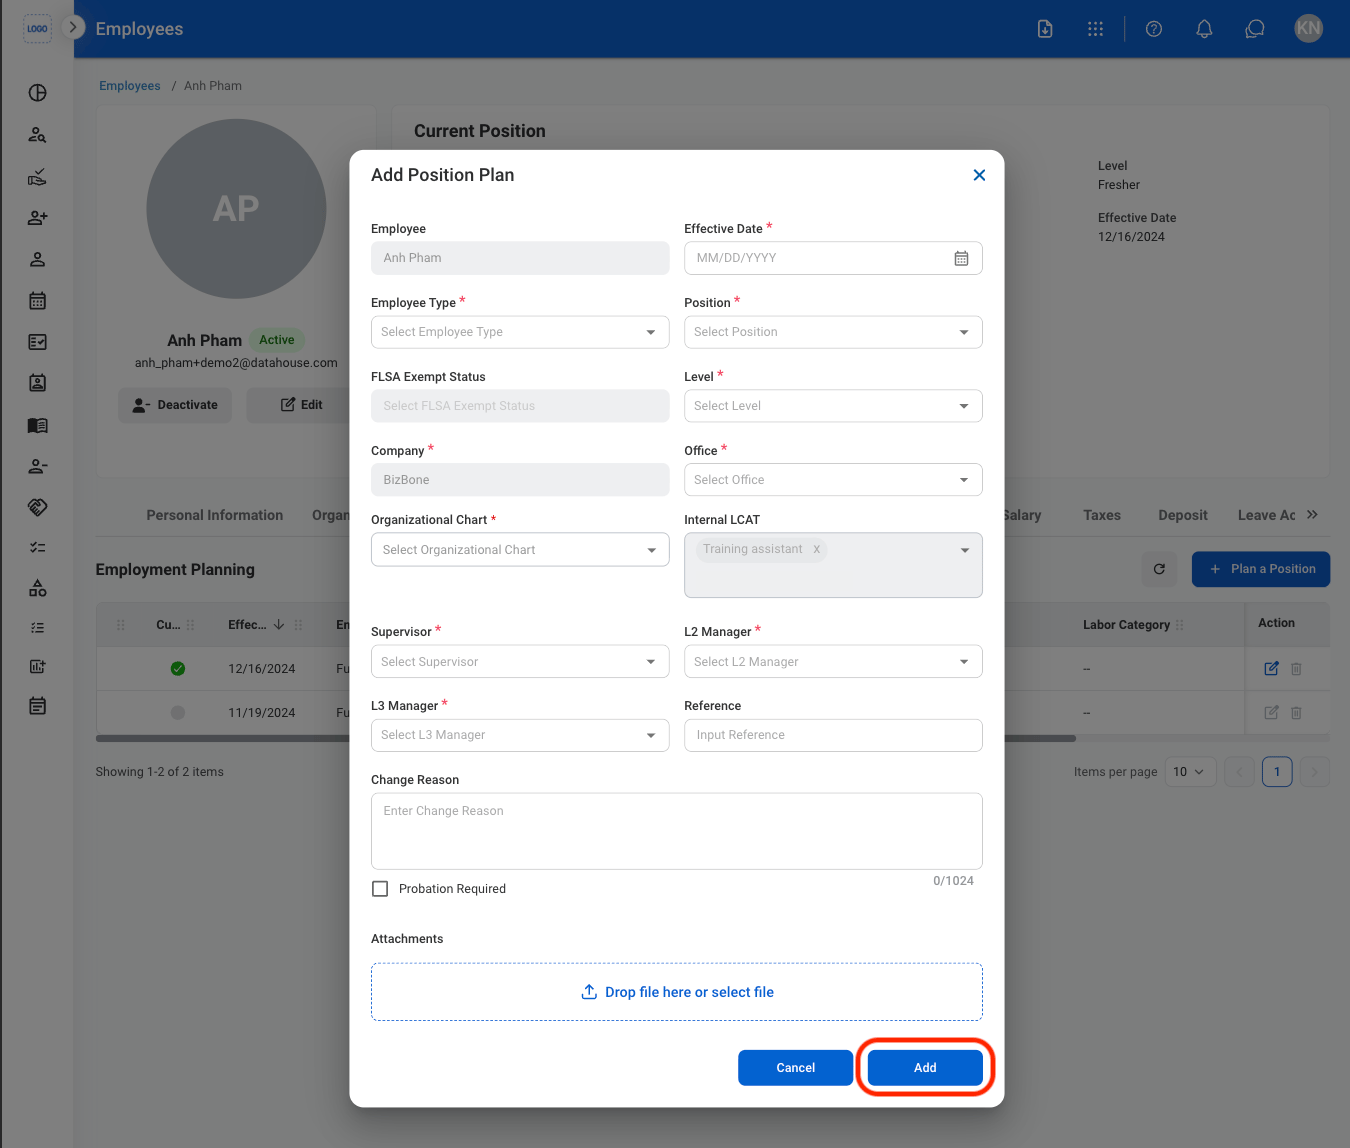
Fill in the required information
Modify an Employee Position
Select an action
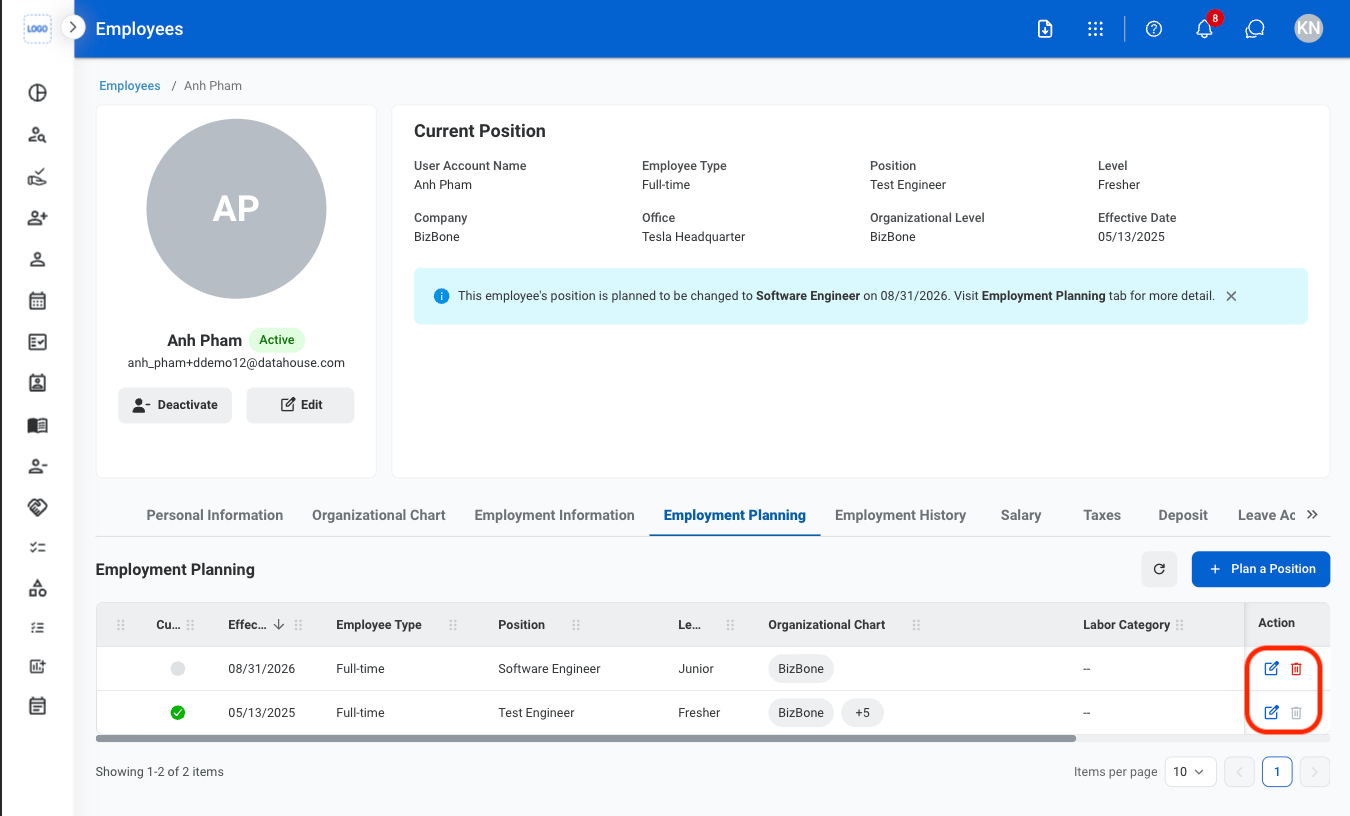
- Edit: Select the edit icon to update an existing entry
- Delete: Select the trash icon to delete an existing entry.
Confirm the action
- Edit: Fill in the required information. Select Update to complete or Cancel to exit without saving changes.
- Delete: Select Delete to complete or Cancel to exit without saving changes.
Employment History
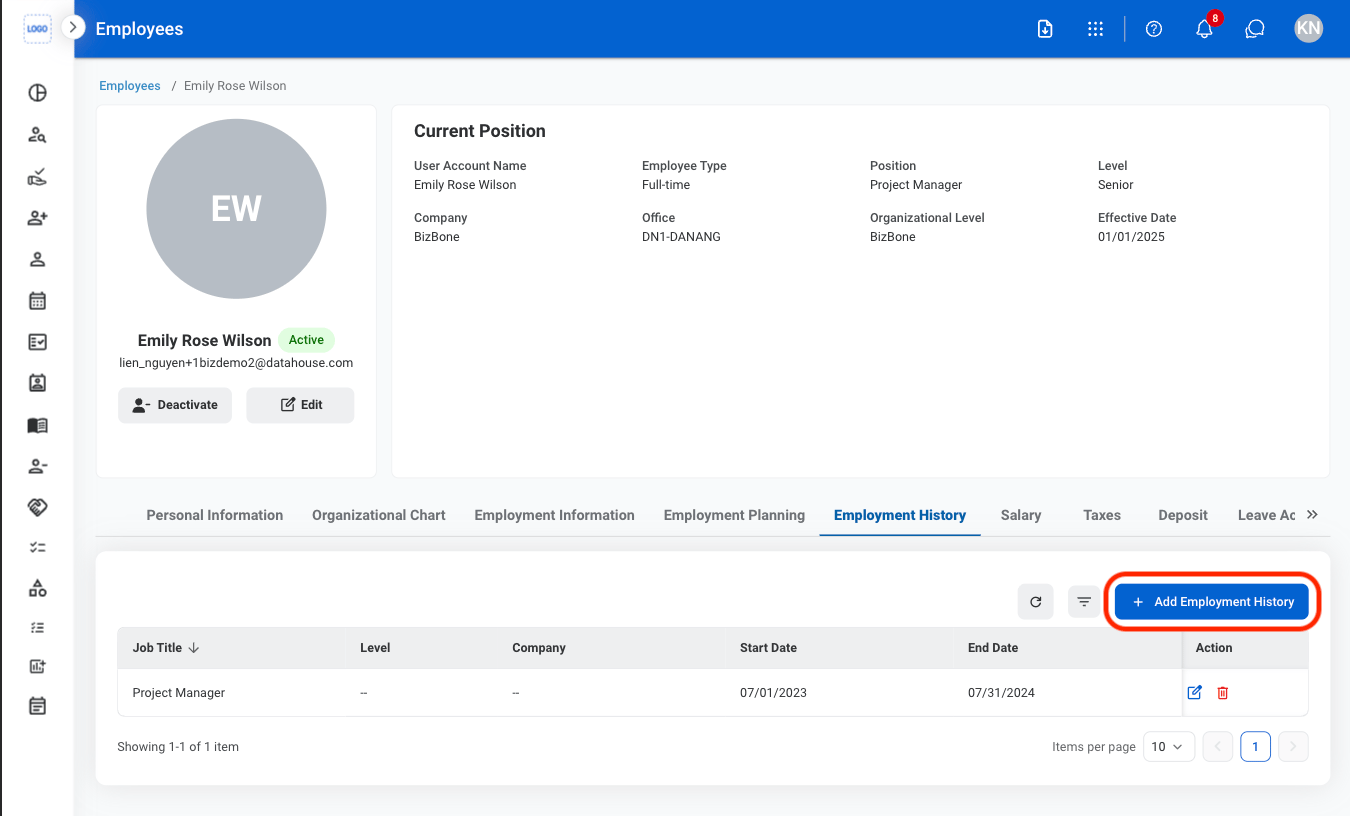
Record previous roles and employment details to track employee history.Add Employment History
Navigate to Employment History
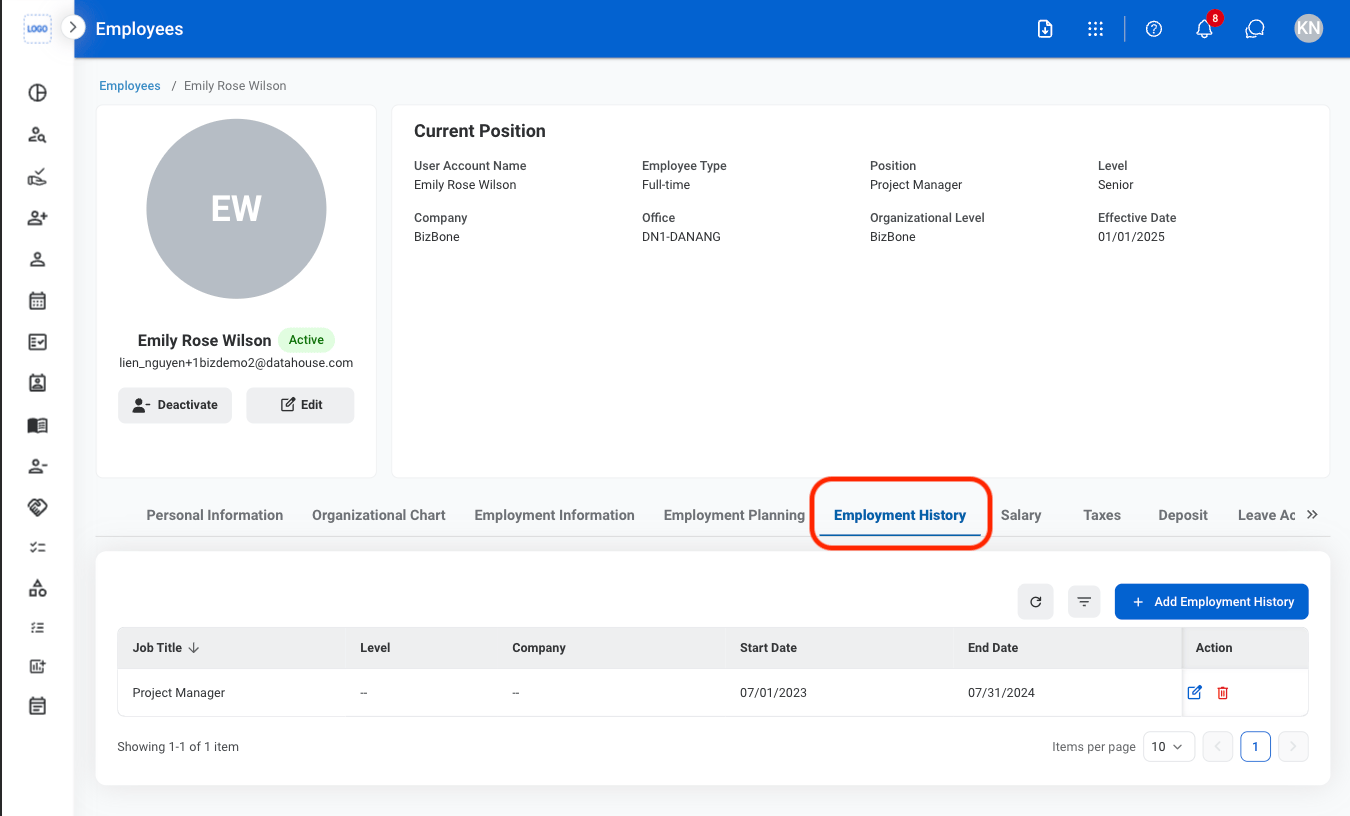
Select Add Employment History
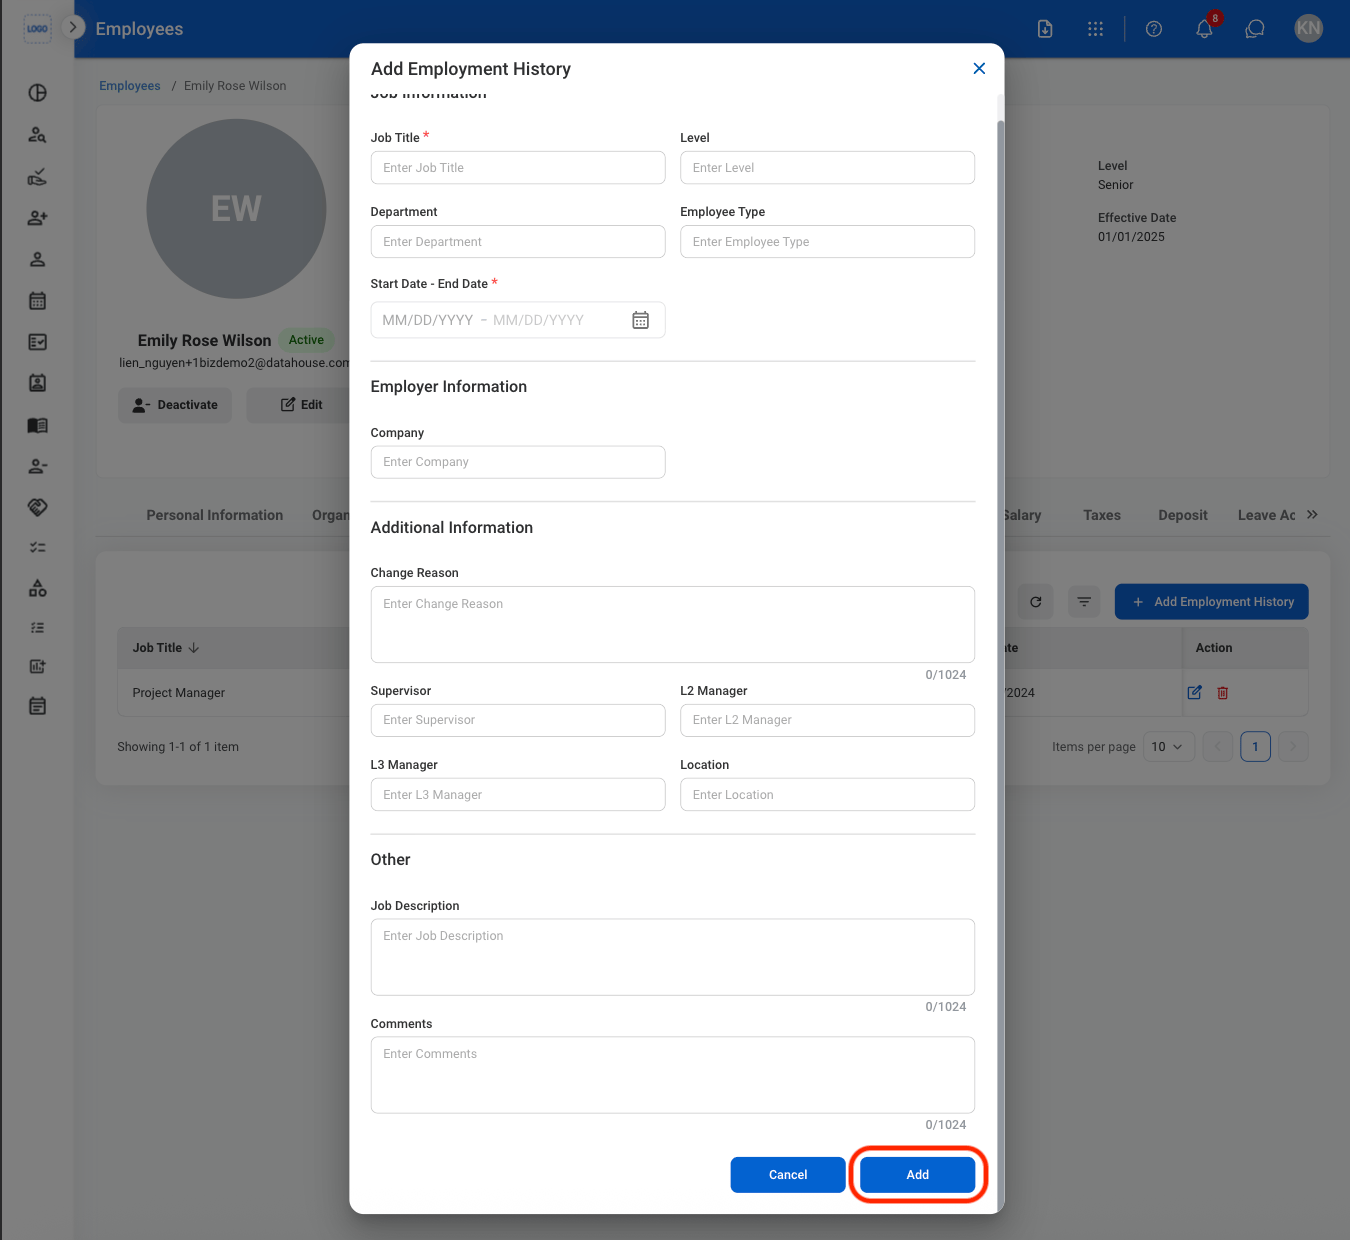
Fill in the required information
Modify Employment History
Select an action
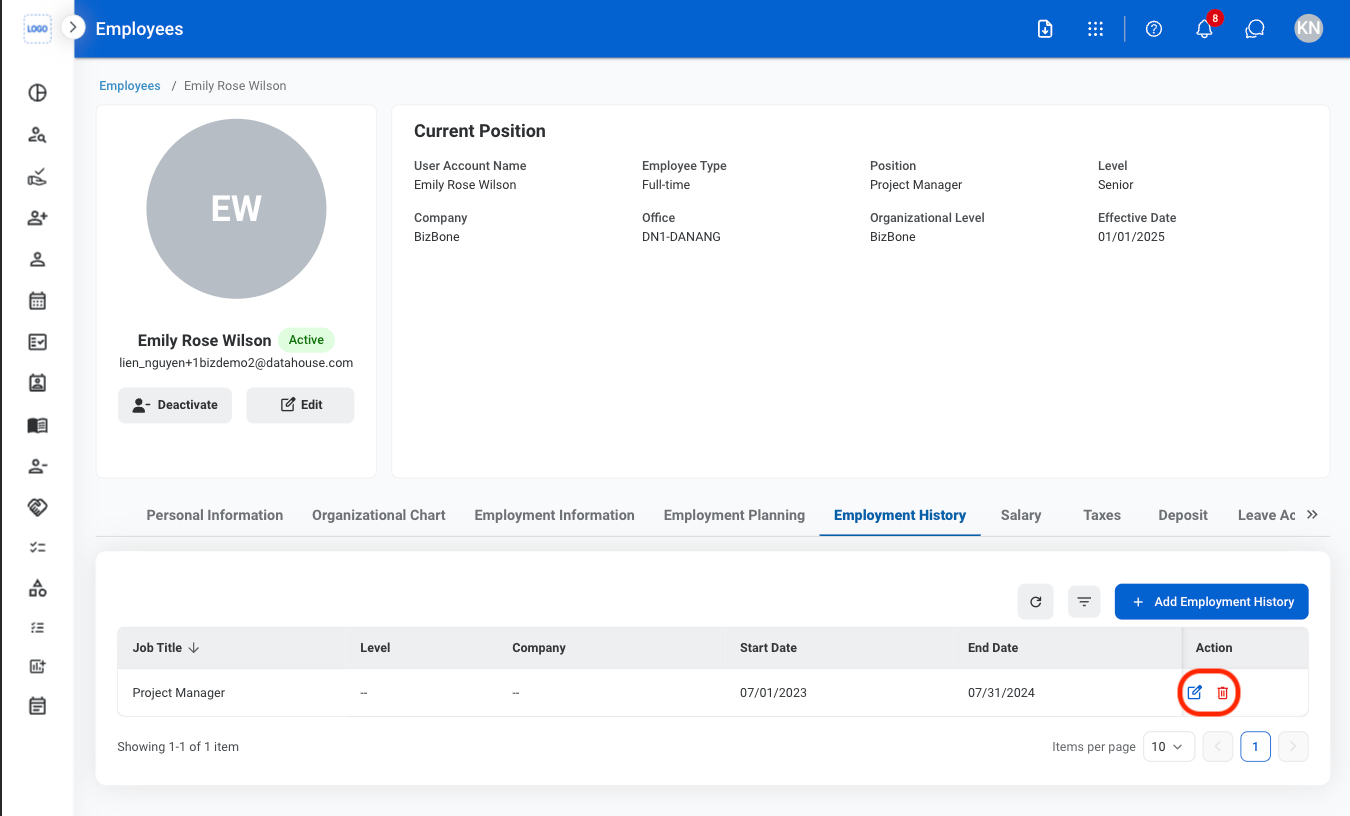
- Edit: Select the edit icon to update an existing entry
- Delete: Select the trash icon to delete an existing entry.
Confirm the action
- Edit: Fill in the required information. Select Update to complete or Cancel to exit without saving changes.
- Delete: Select Delete to complete or Cancel to exit without saving changes.
Salary
Manage employee salary information, record planned salary changes, and track salary history.Plan a Salary
Navigate to Salary
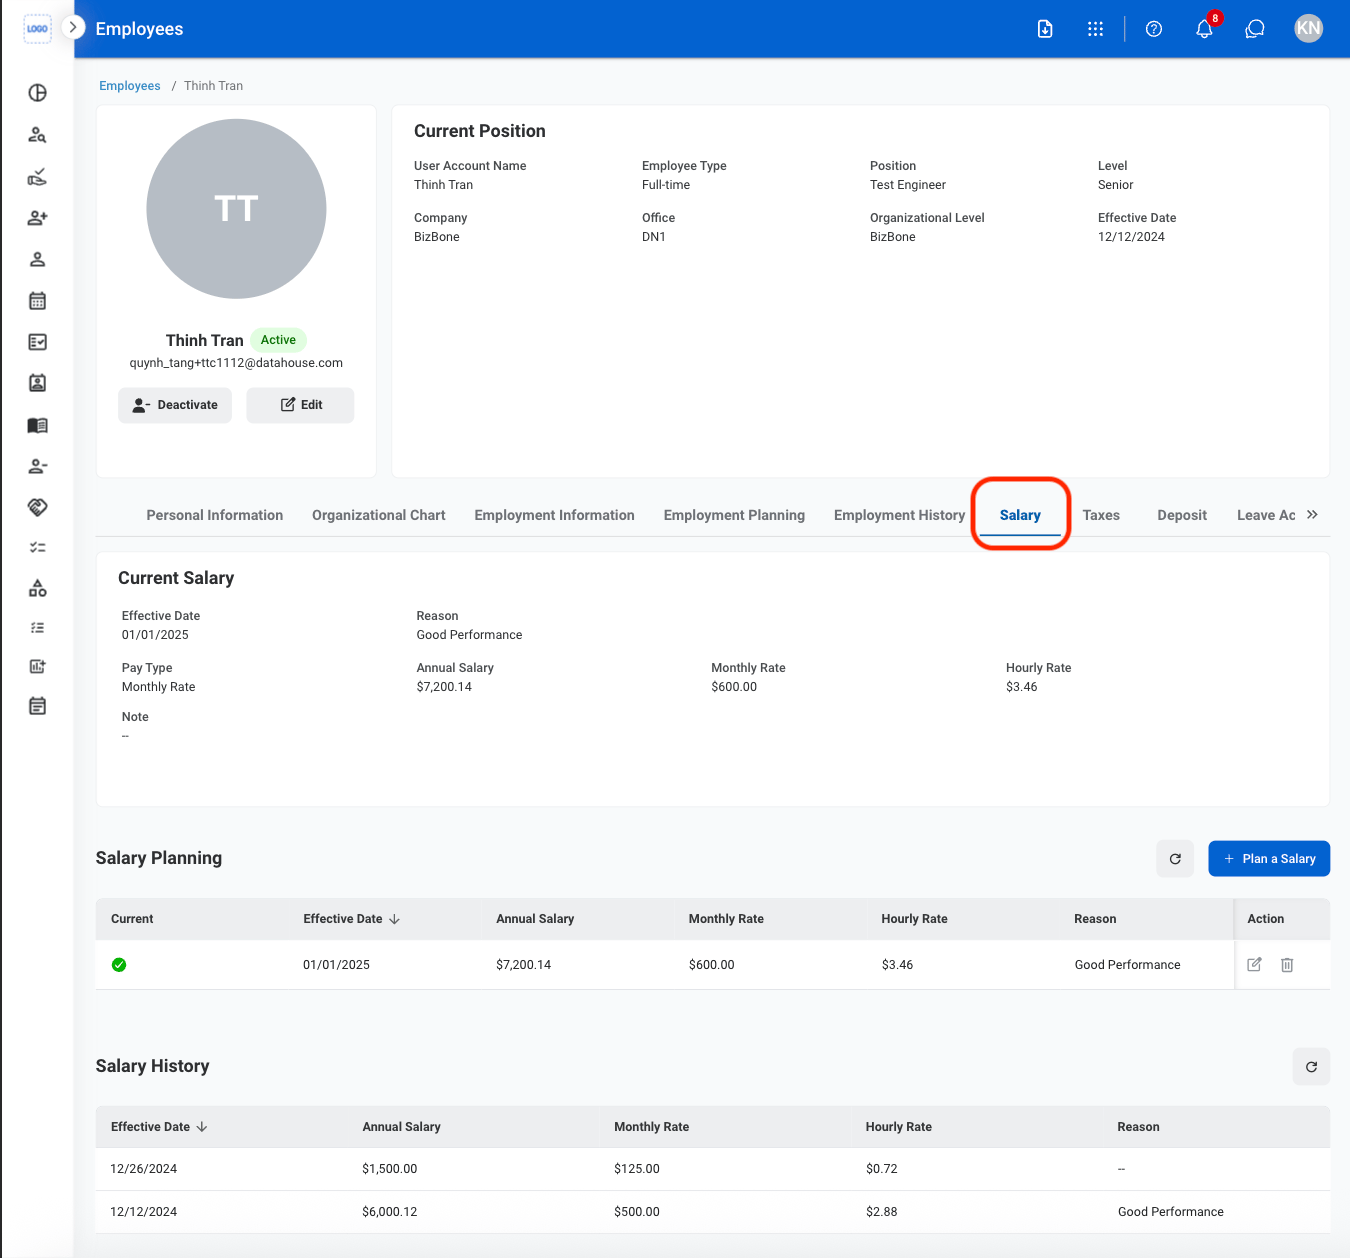
Select Plan a Salary
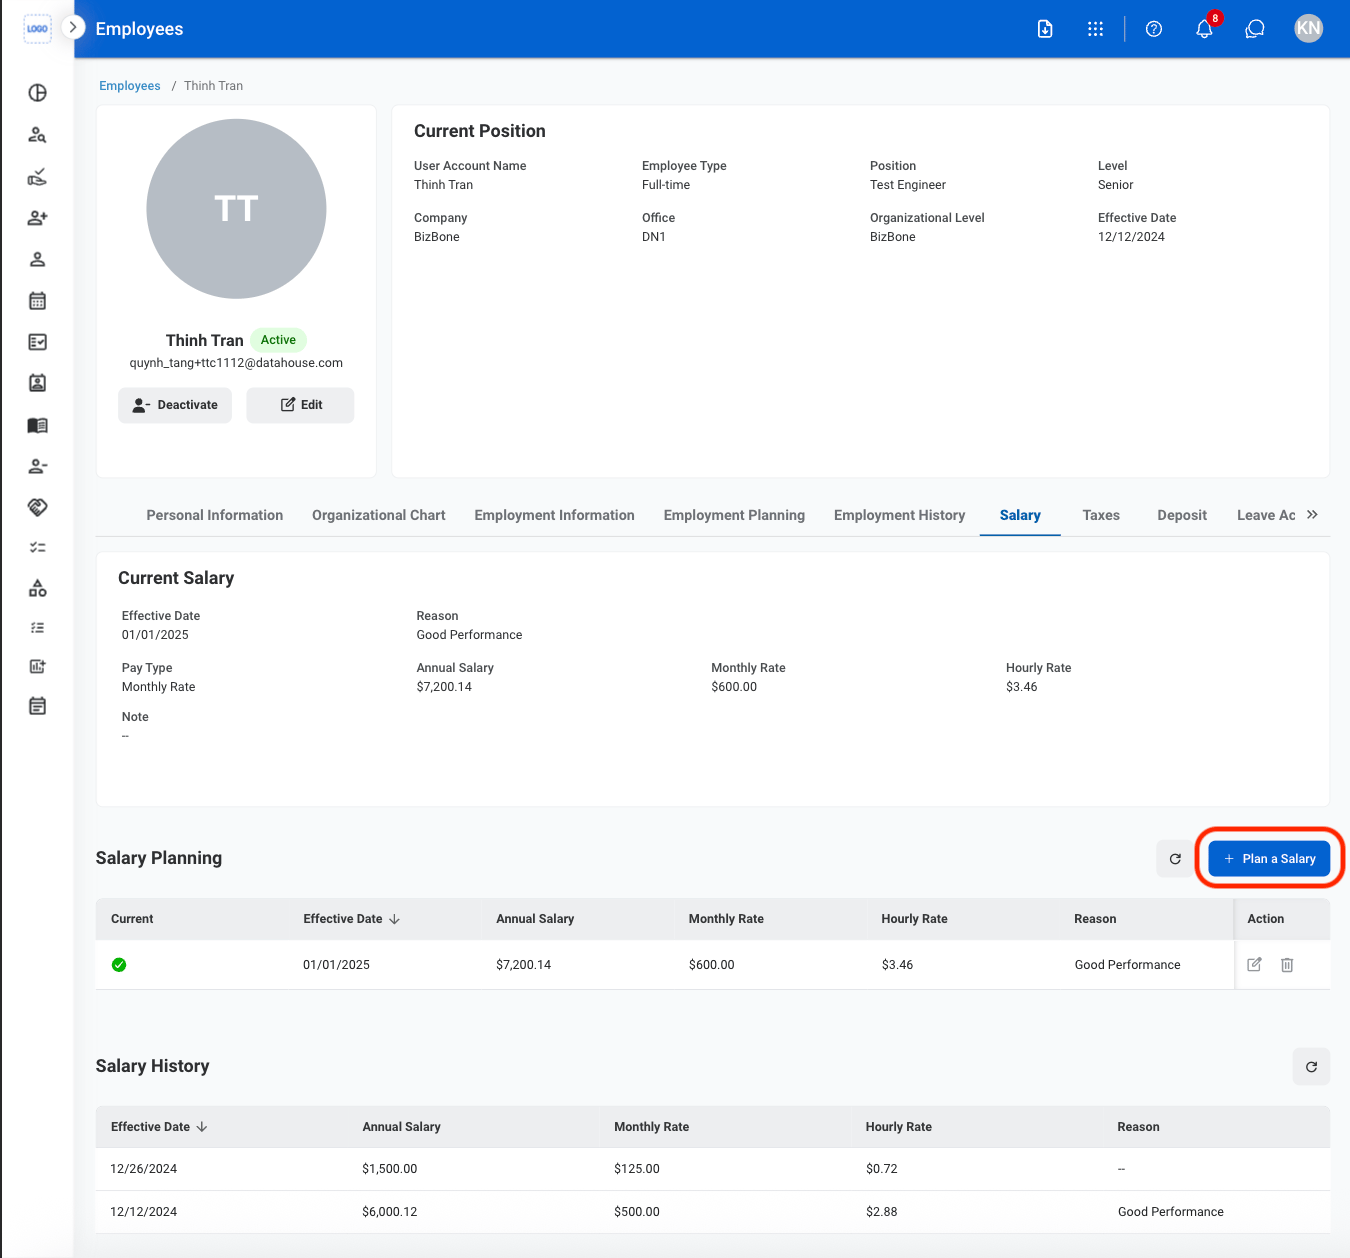
Fill in the required information
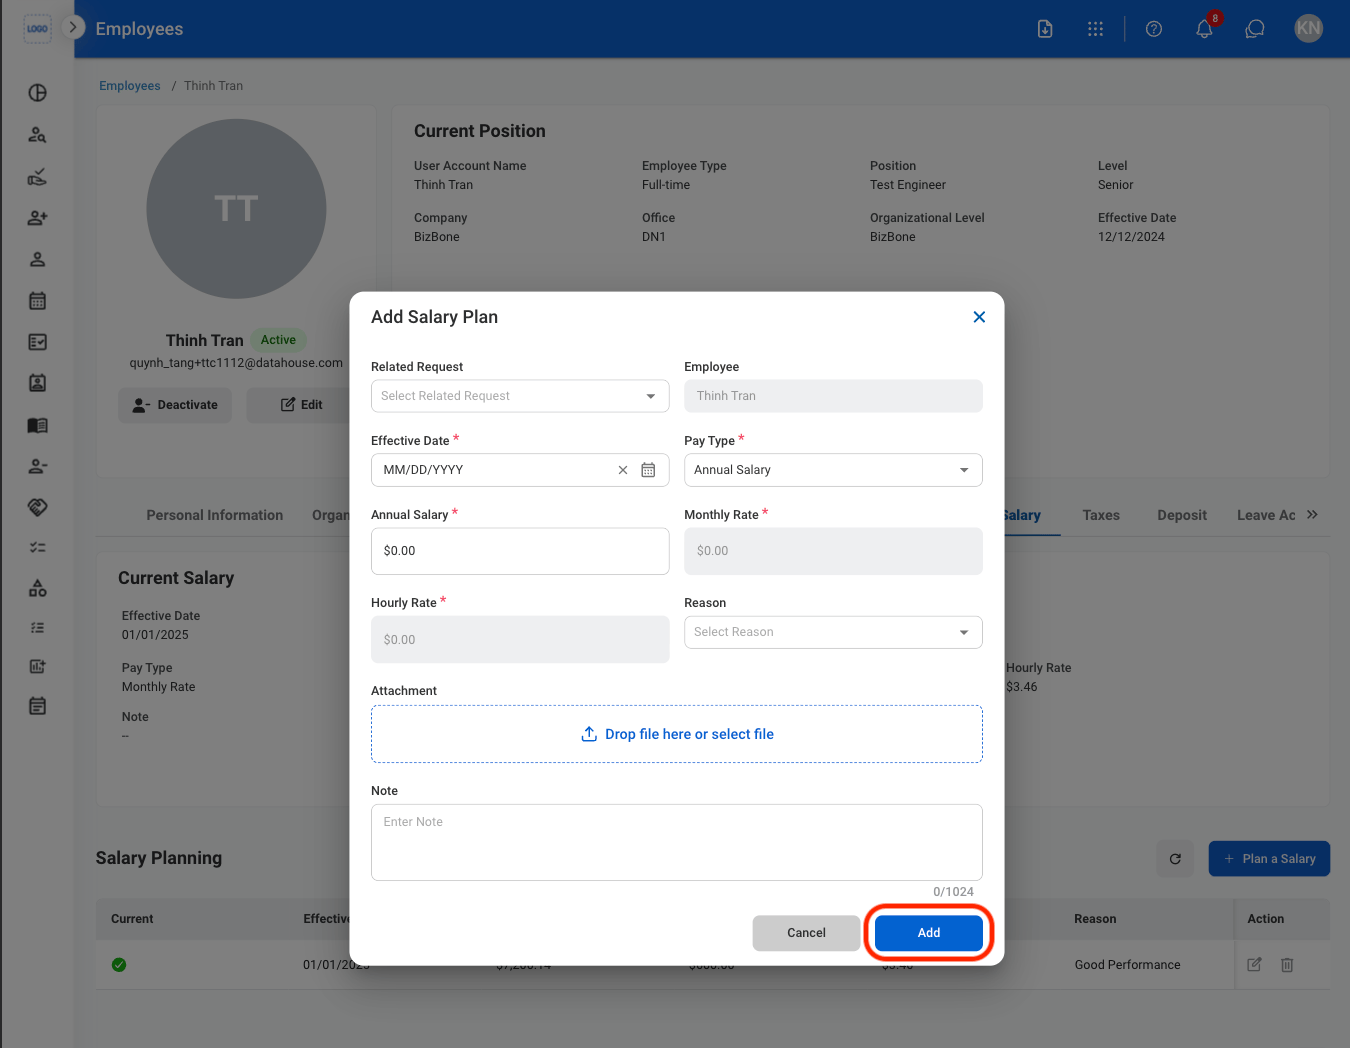
Modify a Salary Plan
Select an action
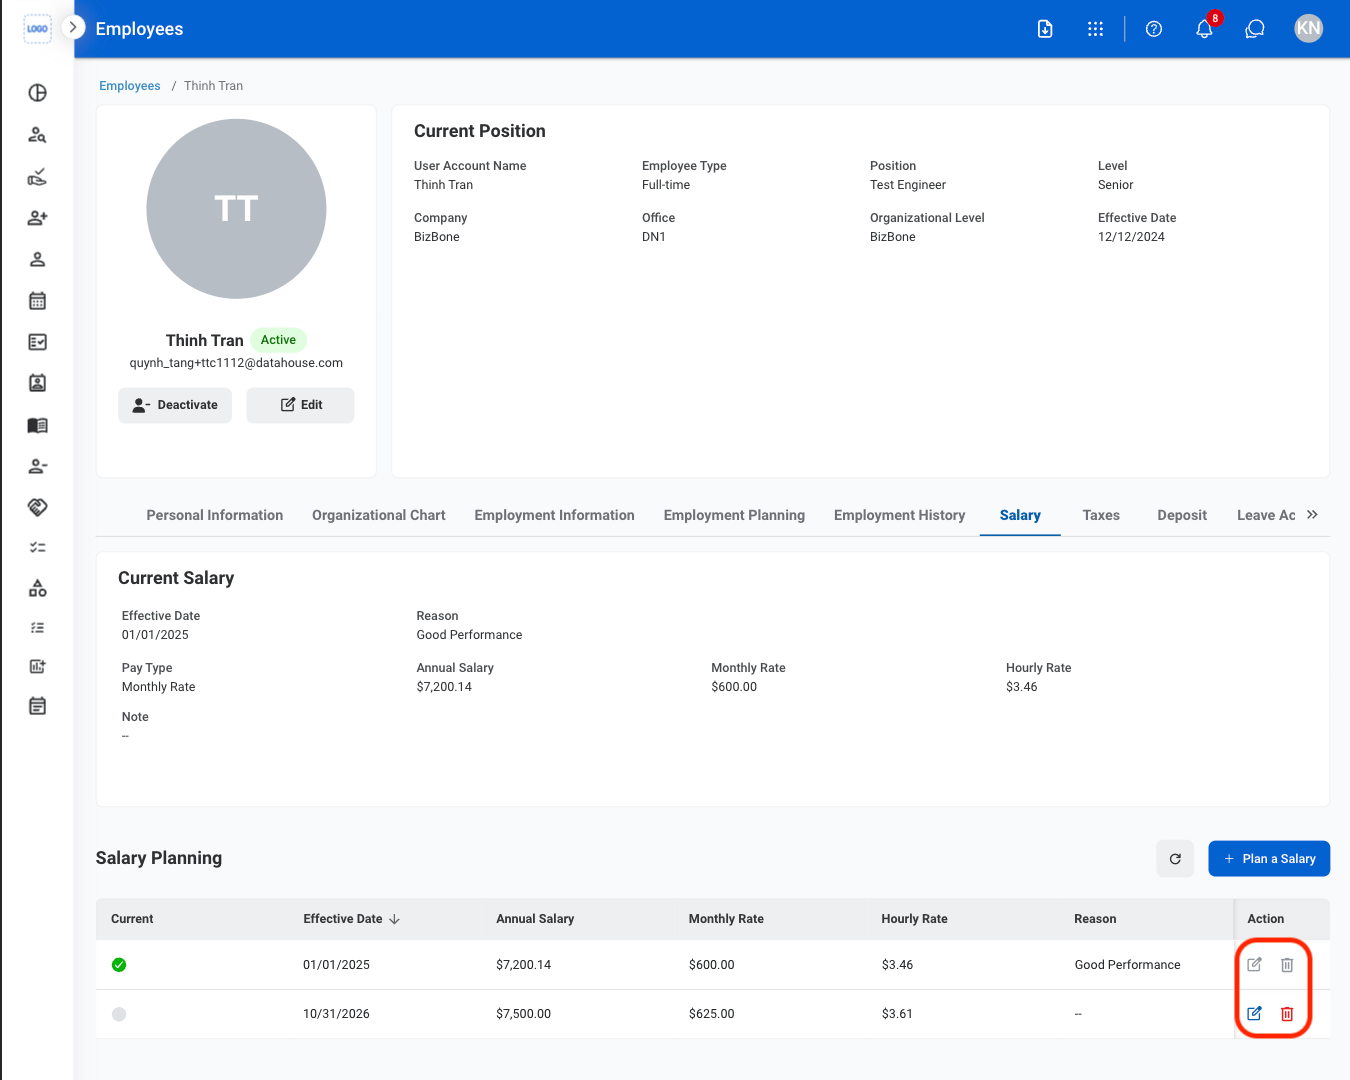
- Edit: Select the edit icon to update an existing entry.
- Delete: Select the trash icon to delete an existing entry.
Confirm the action
- Edit: Fill in the required information. Select Update to complete or Cancel to exit without saving changes.
- Delete: Select Delete to complete or Cancel to exit without saving changes.
Taxes
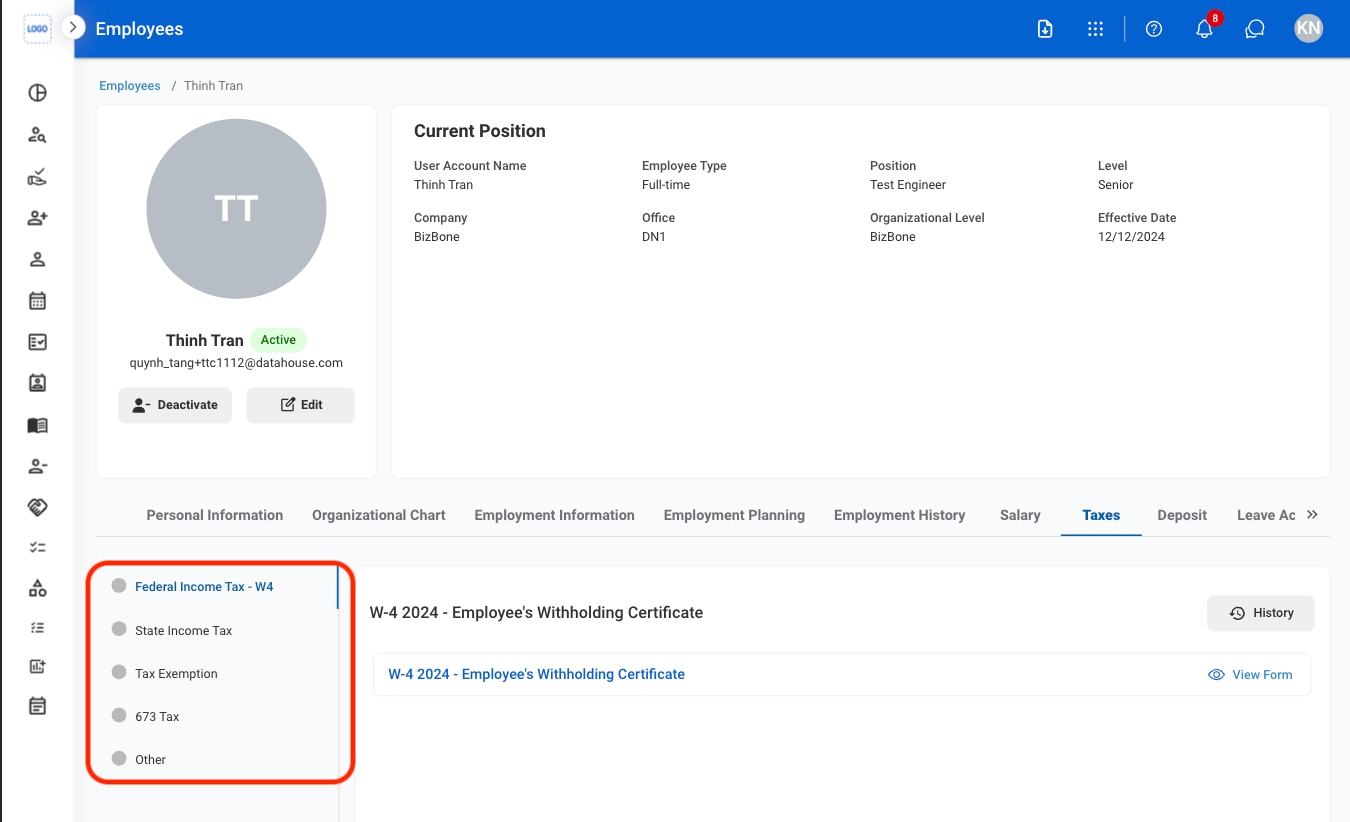
View employee tax certificates, exemptions, and uploaded tax documents. Tax information and forms are self-submitted by employees.View Current Tax Records
Navigate to Taxes
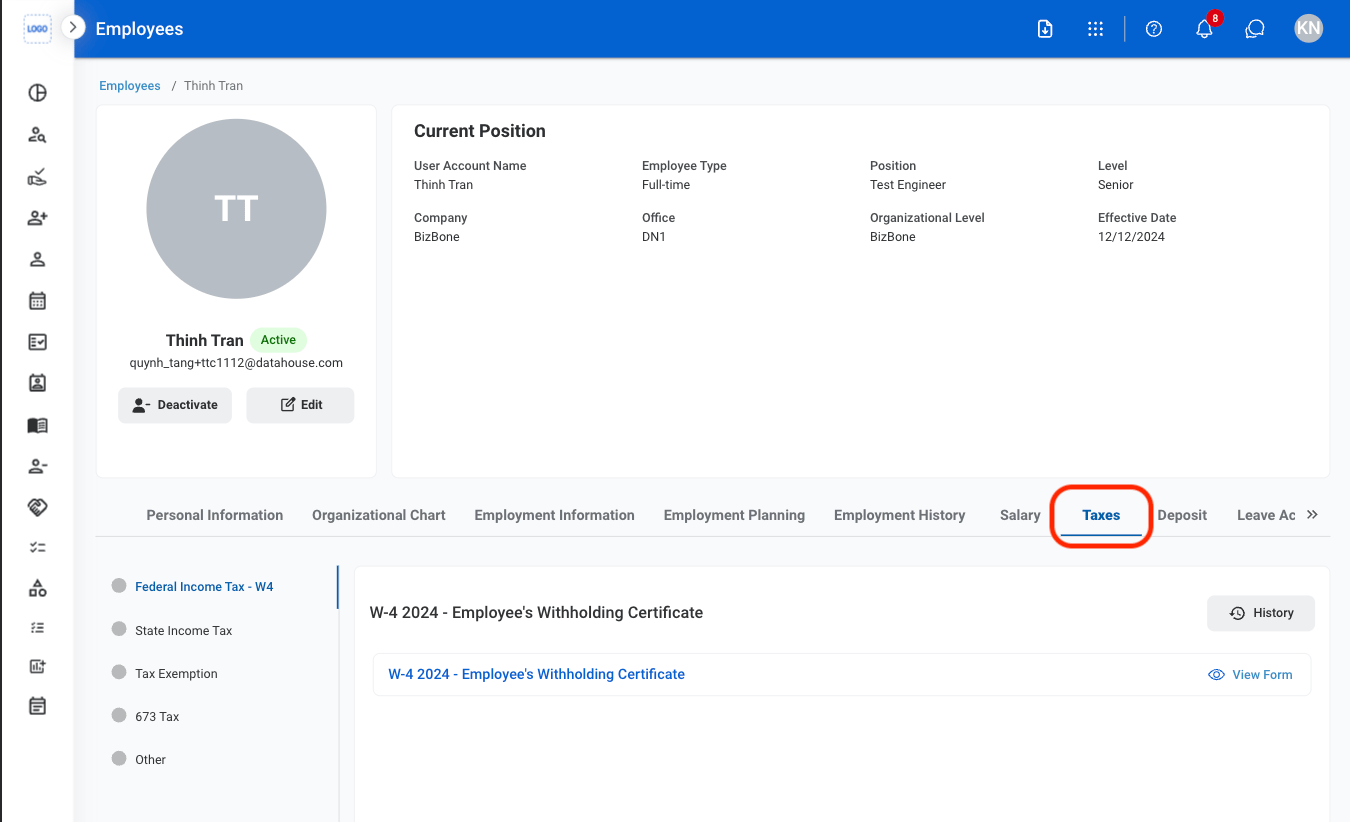
Select a form type
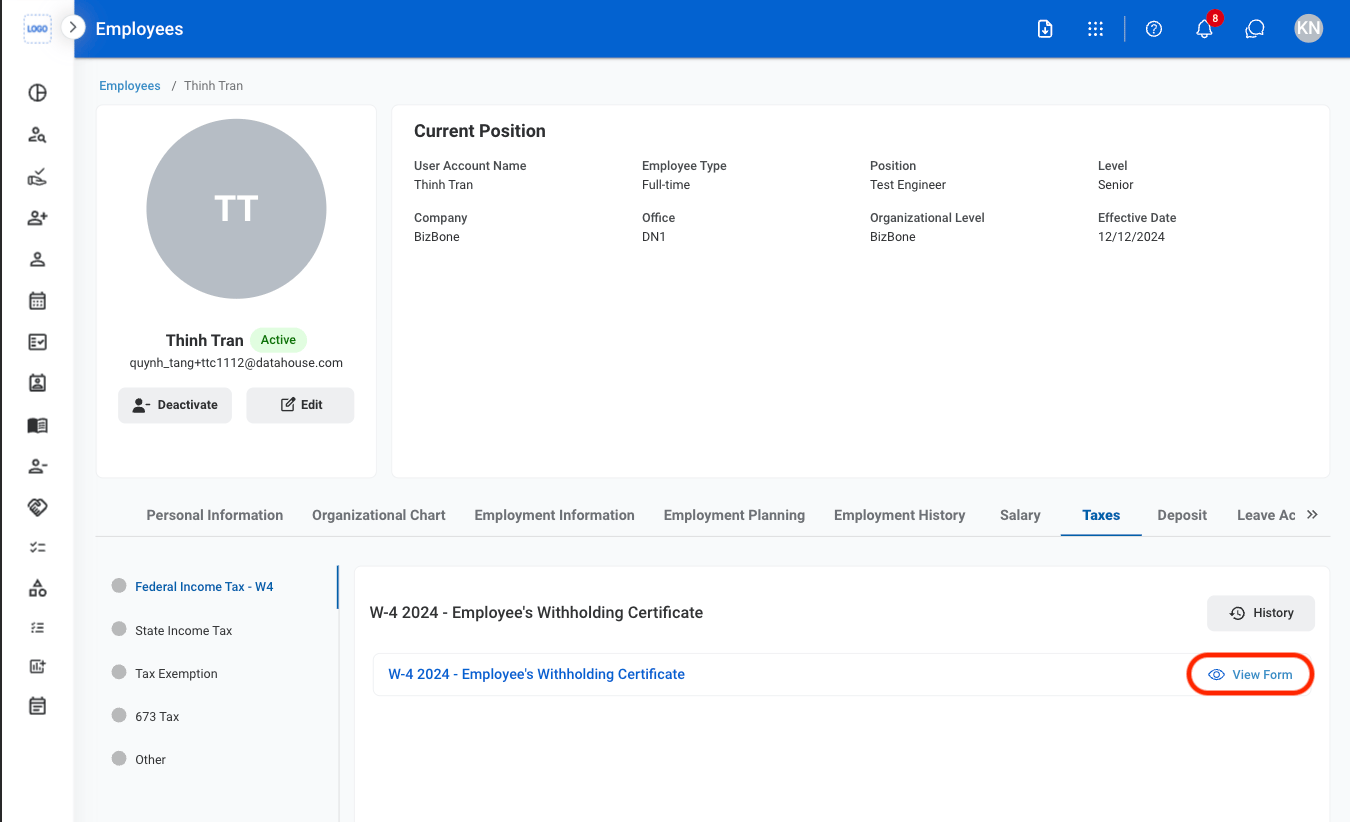
Select a form
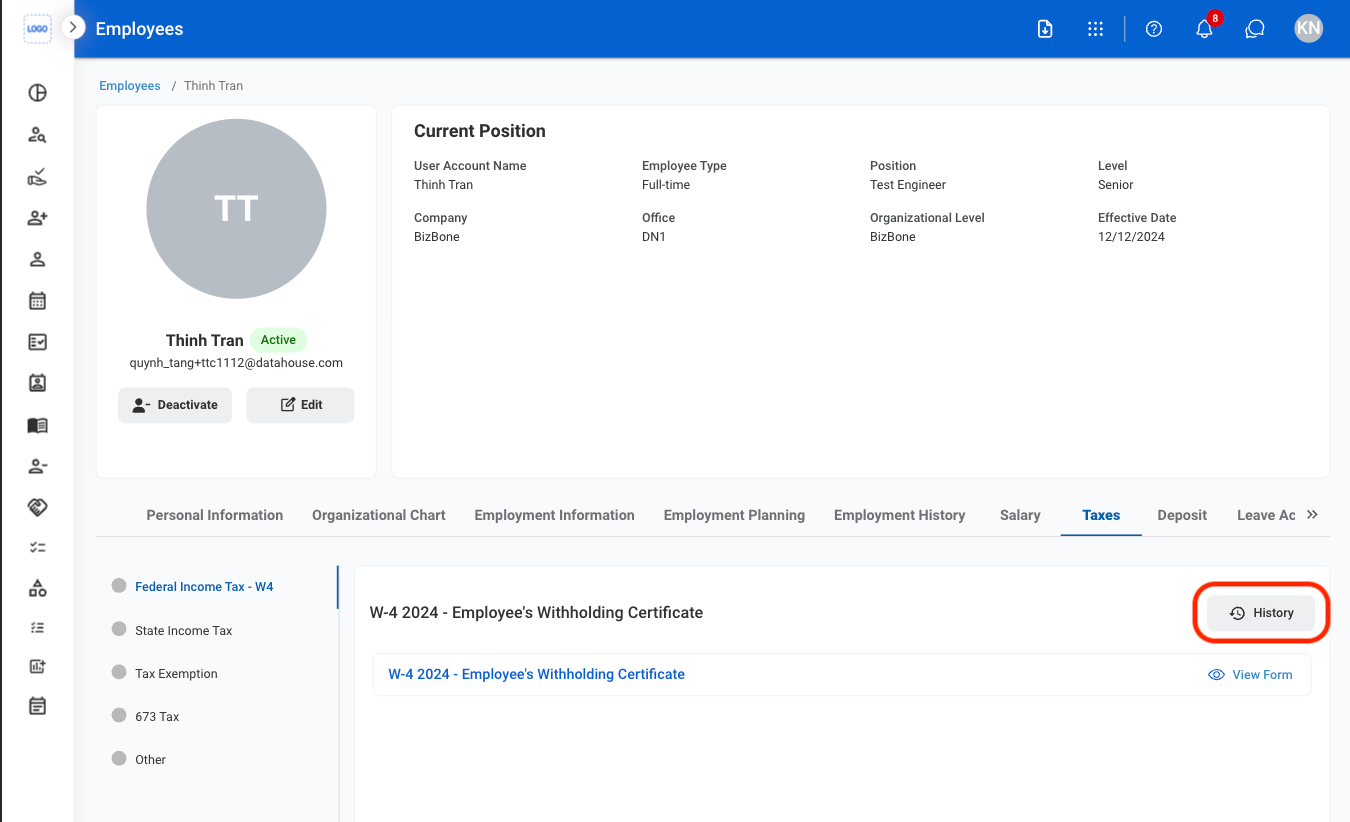
View Tax Record History
Select a form type
Select History
Deposit
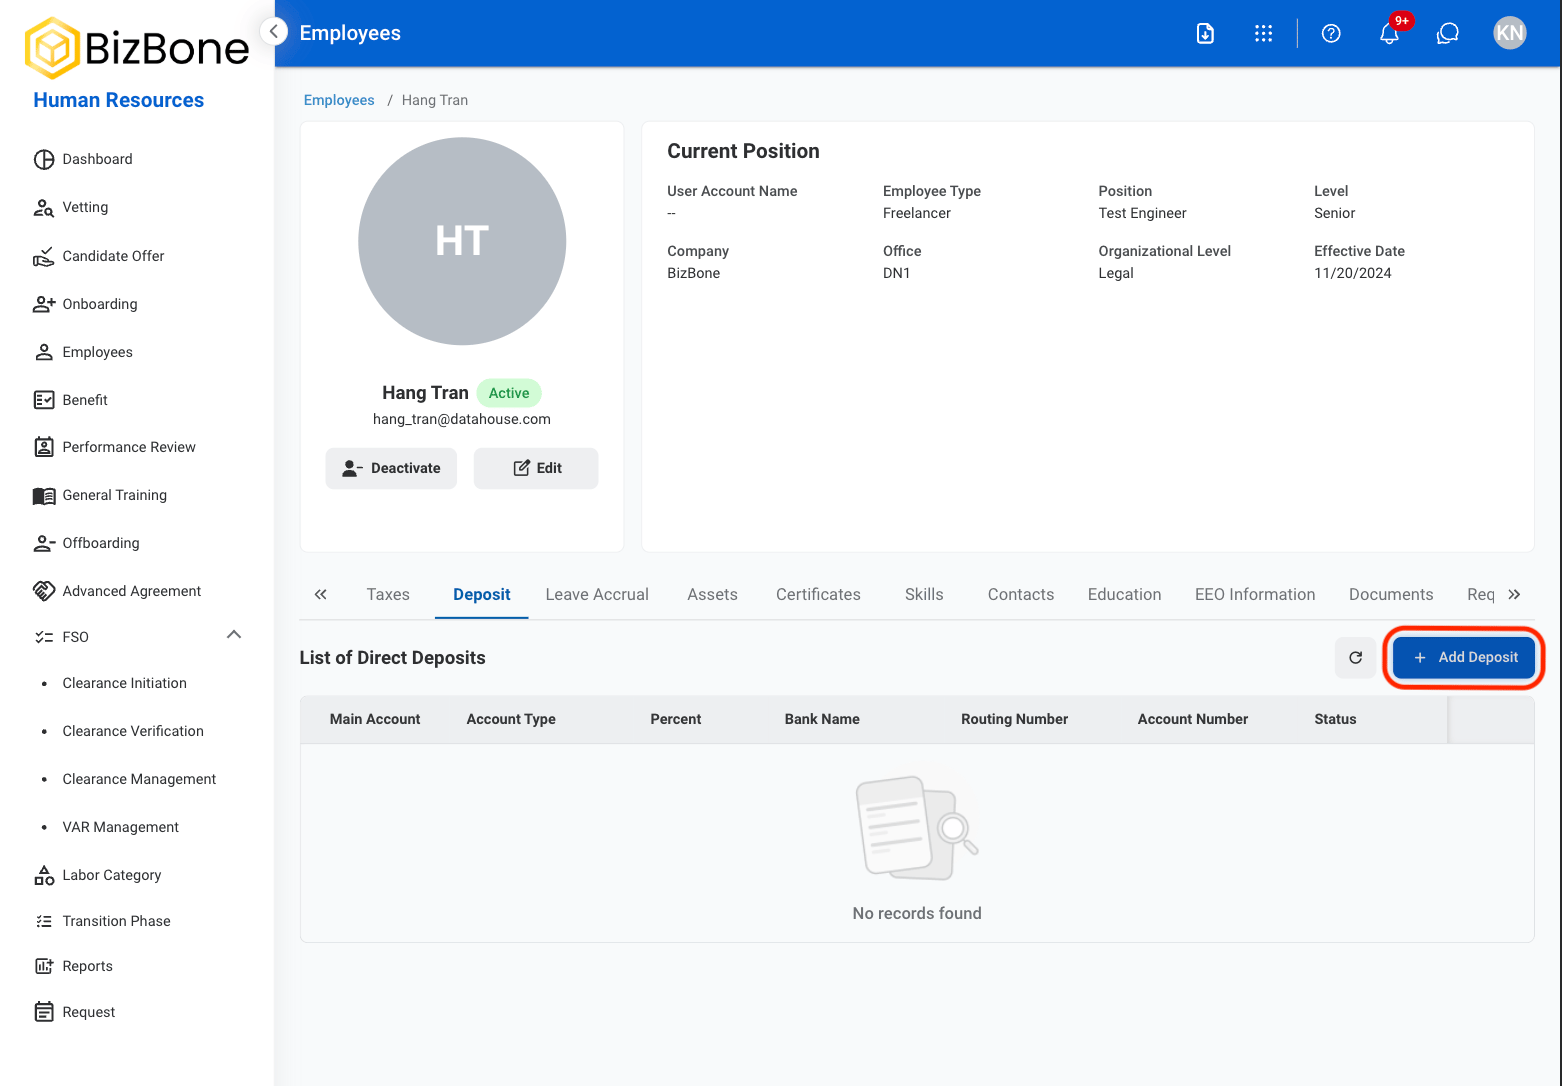
Add employee direct deposit information for payroll processing.Navigate to Deposit
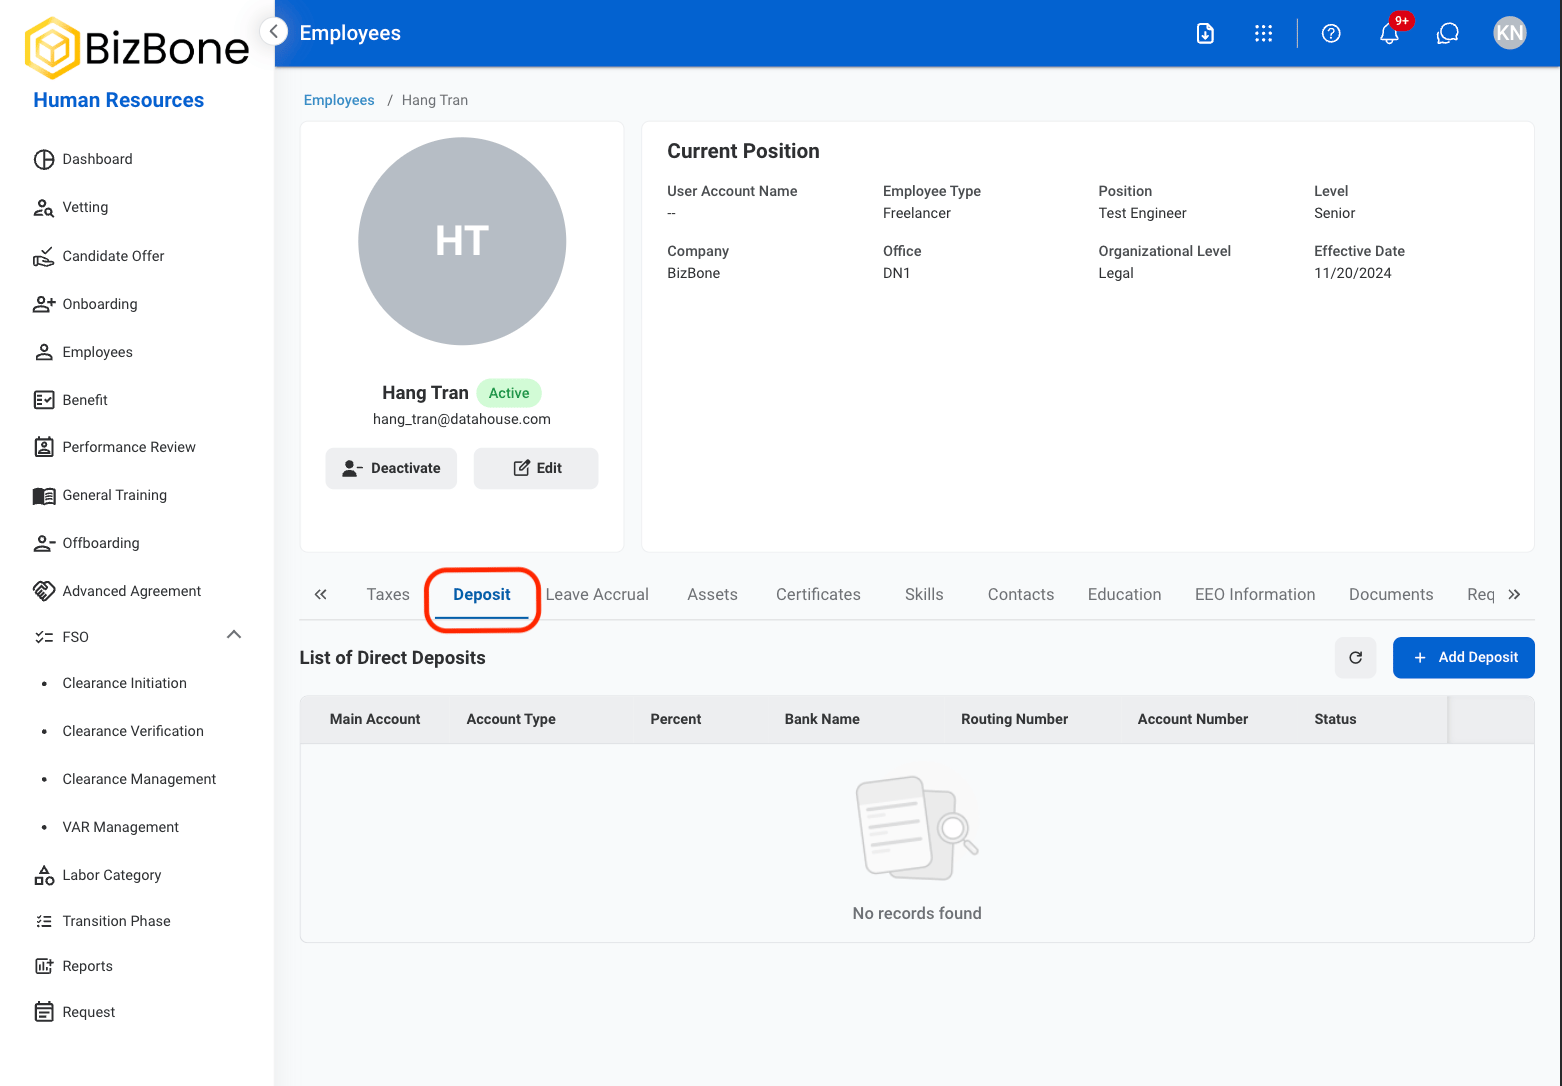
Select Add Deposit
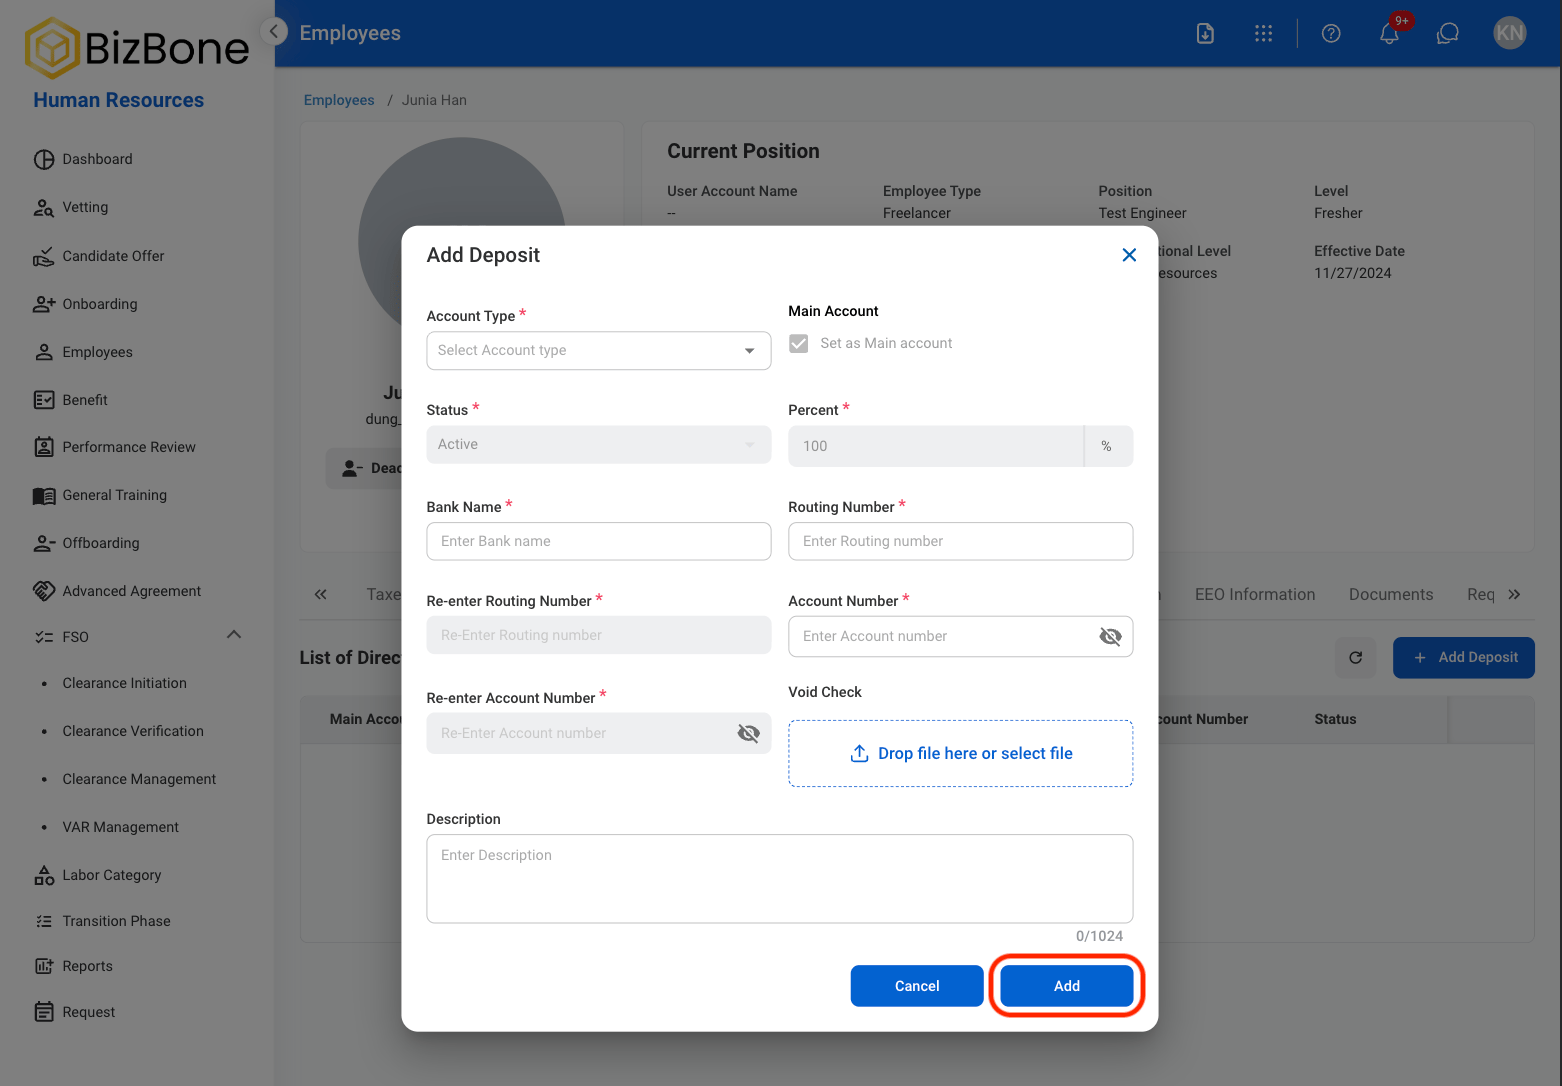
Fill in the required information
Leave Accrual
Track and manage employee leave balances, including accrued leave, carryover amounts, and usage within the current period.Glossary
Glossary
Edit Leave Accrual
Navigate to Leave Accrual
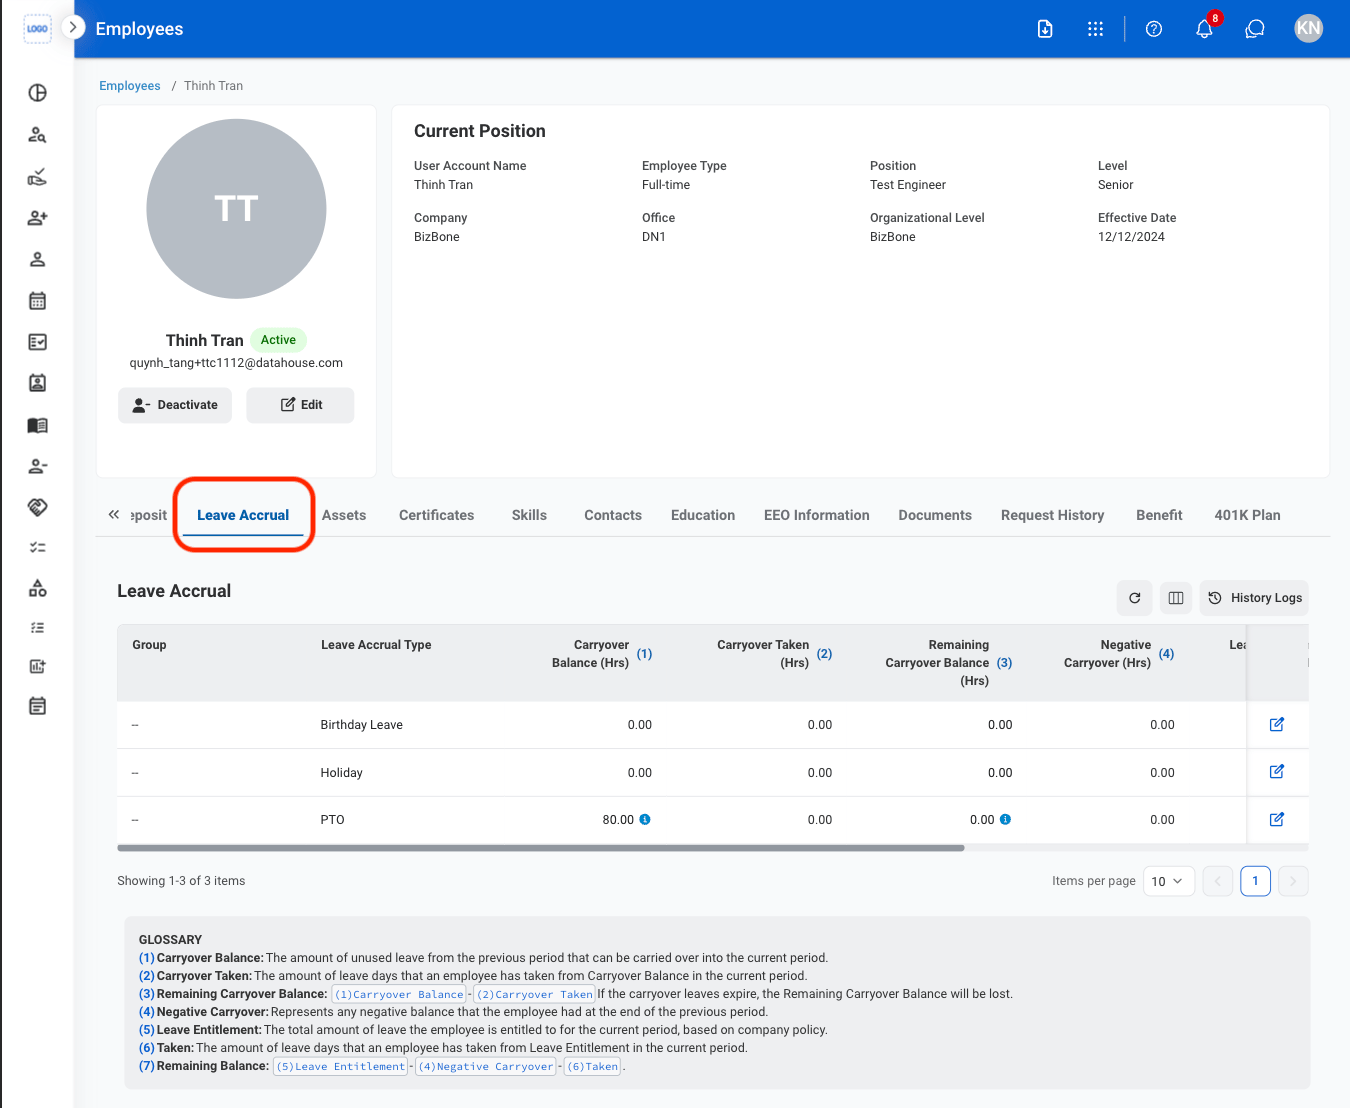
Select the edit icon

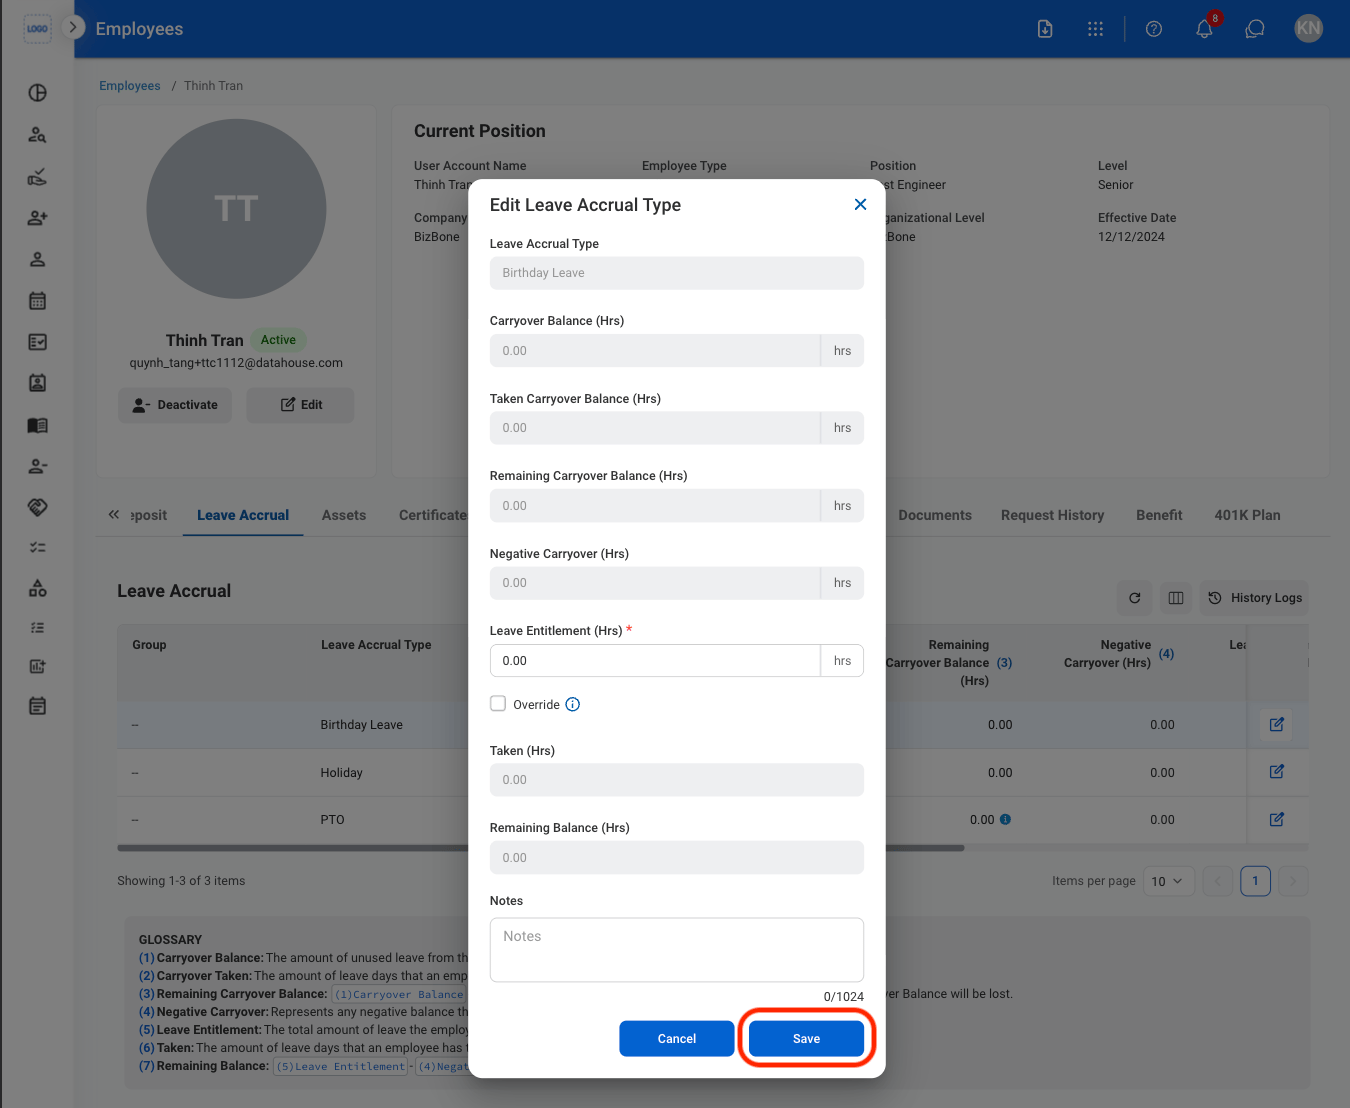
Fill in the required information
Assets
Create requests to assign employee work assets, including new assignments, loans, returns, and software installations.Navigate to Assets

Select Requests
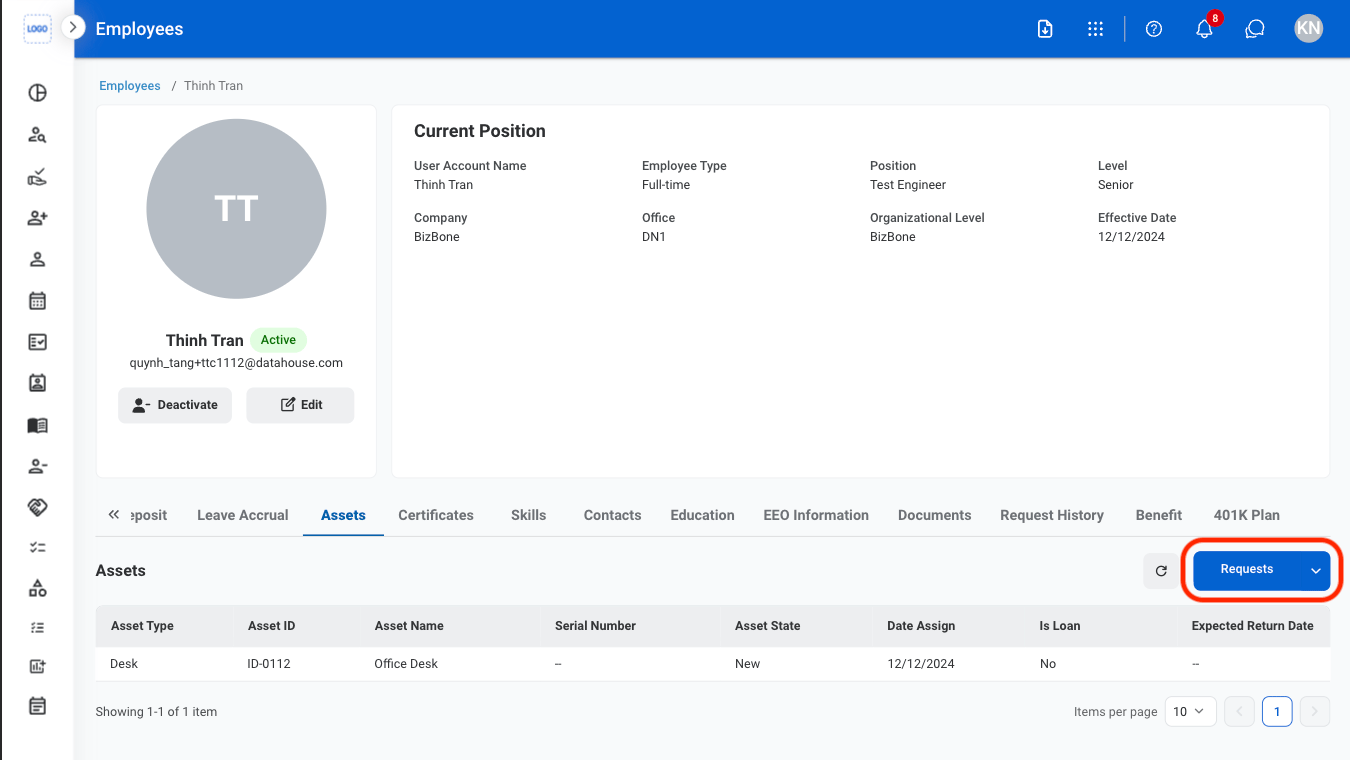
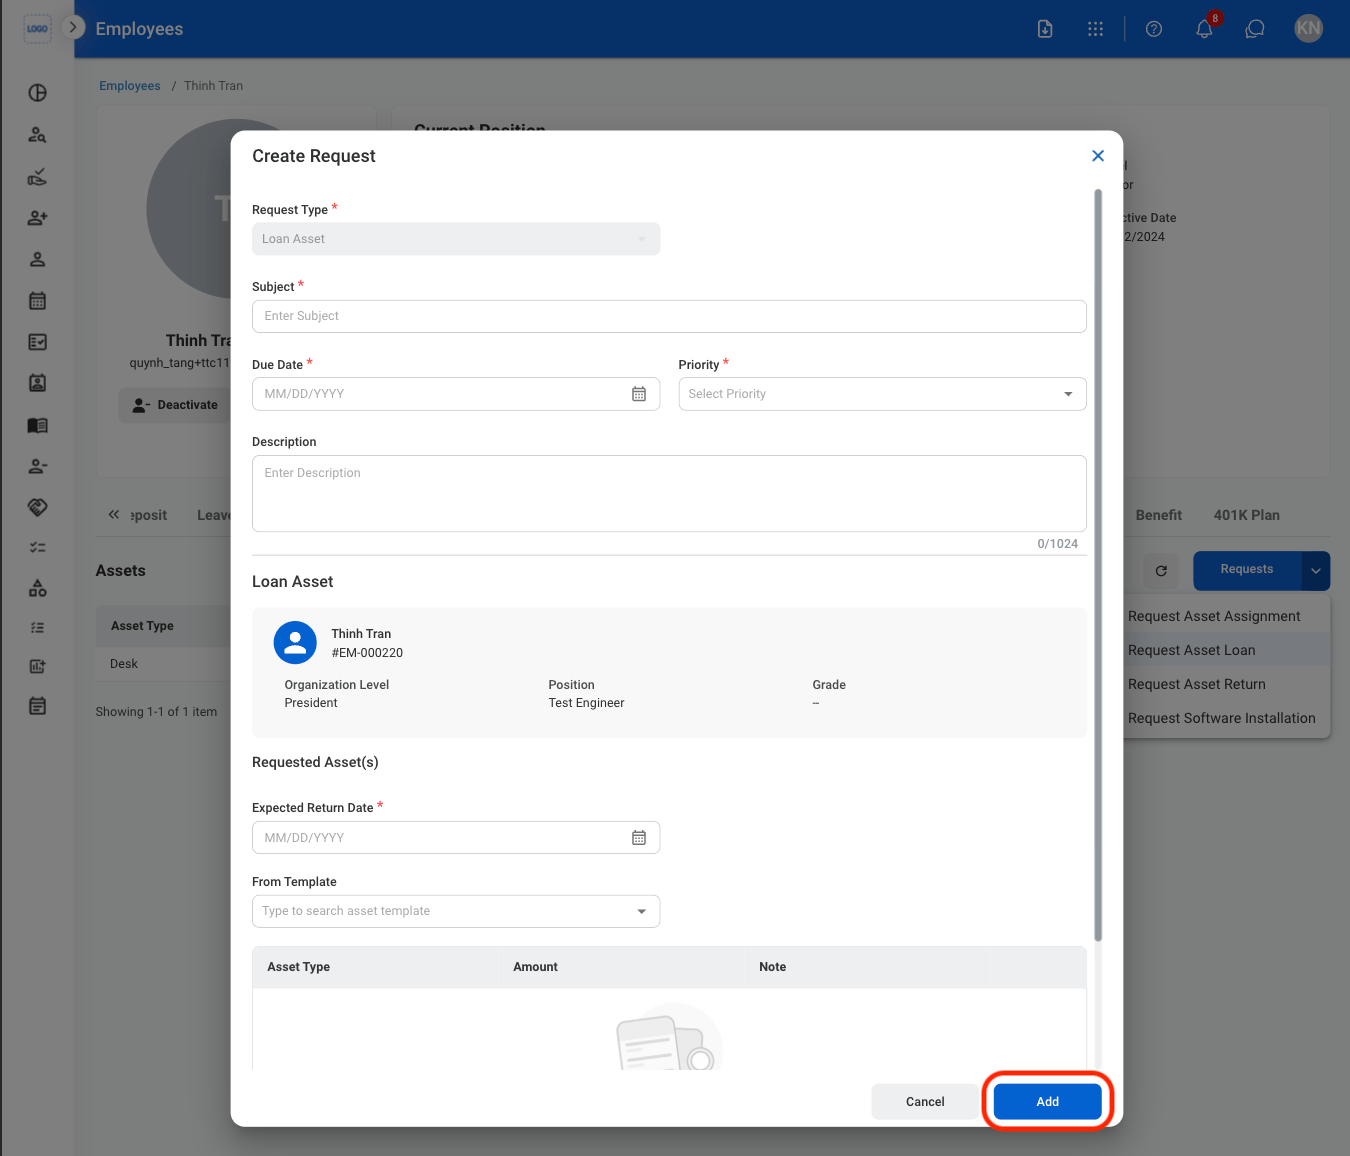
Select a request type

Fill in the required information
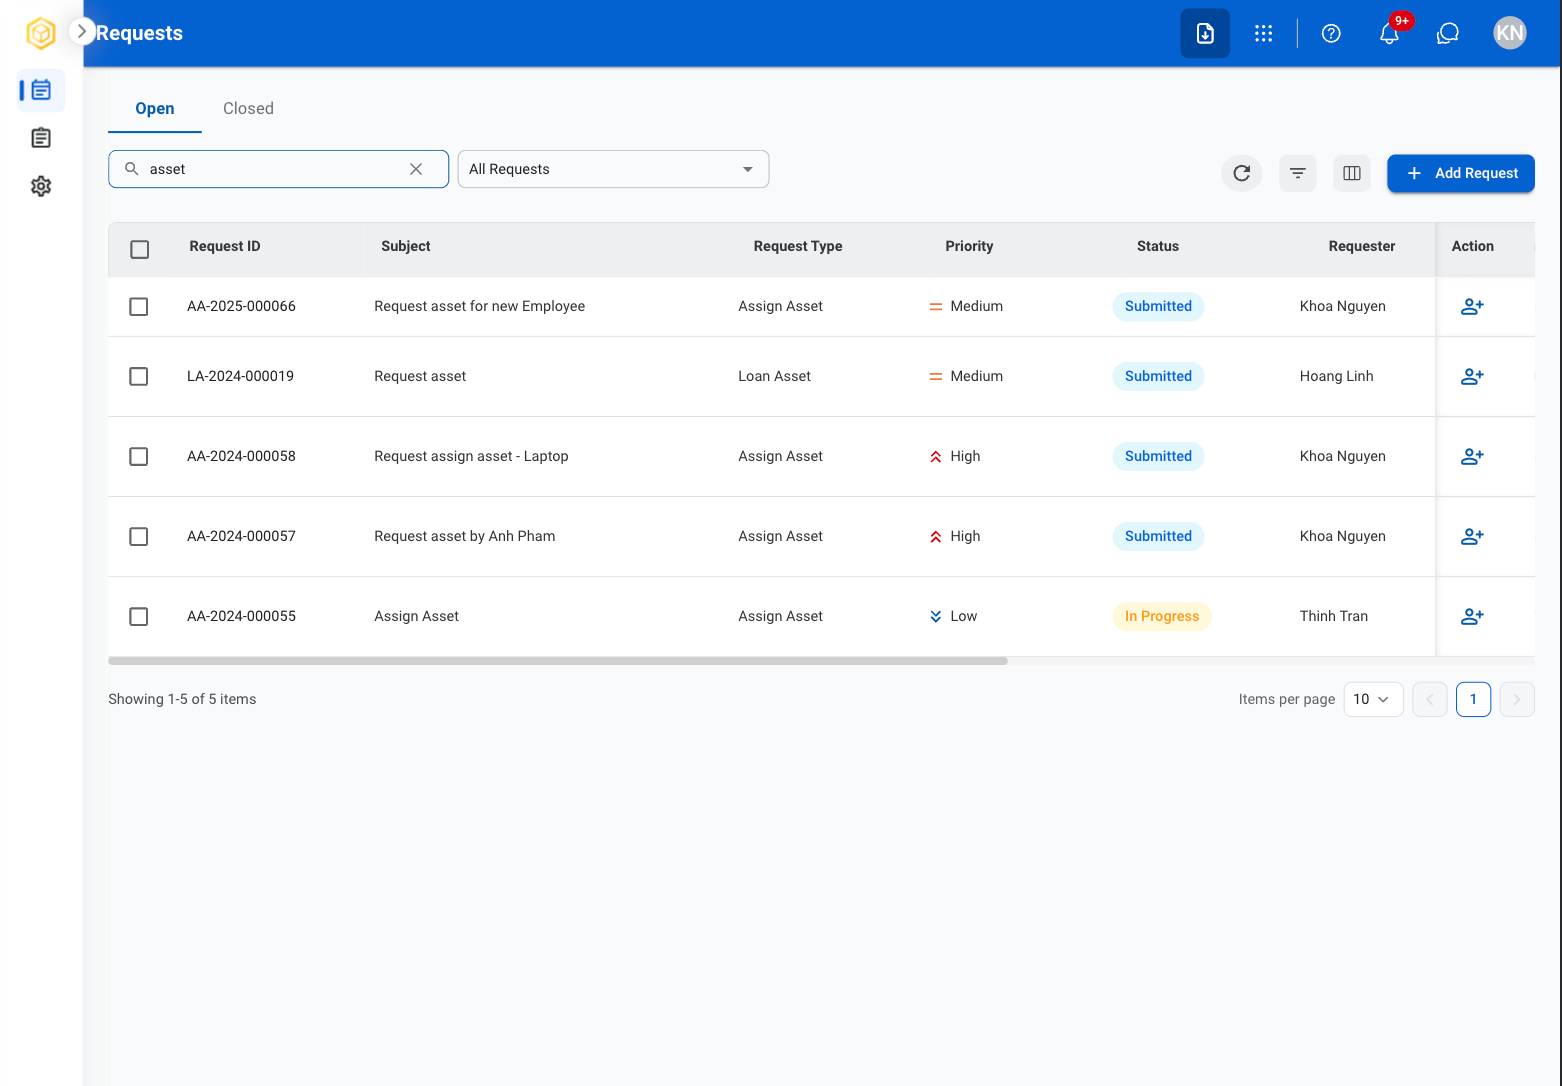
Approval and fulfillment
Completion
Certificates
Add a Certificate
Navigate to Certificates
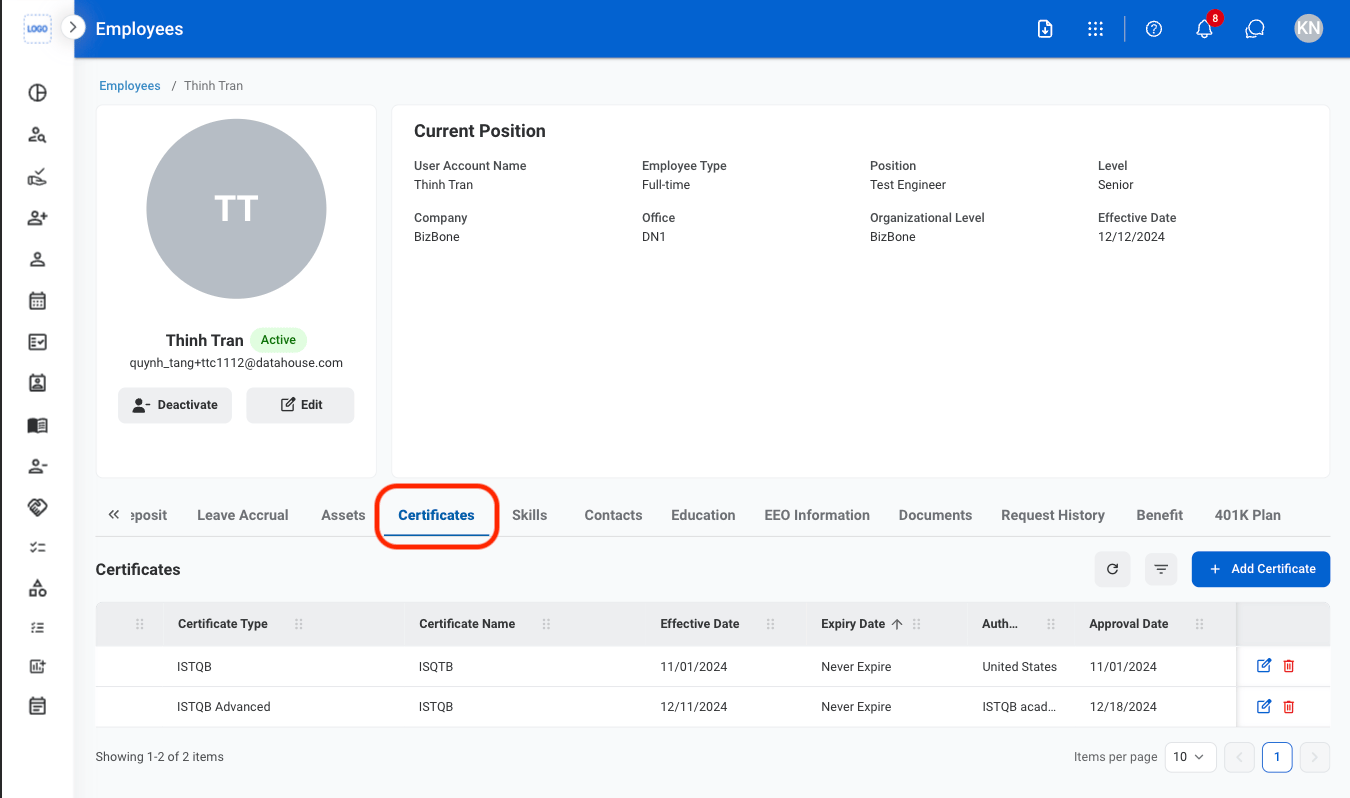
Select Add Certificate

Fill in the required information
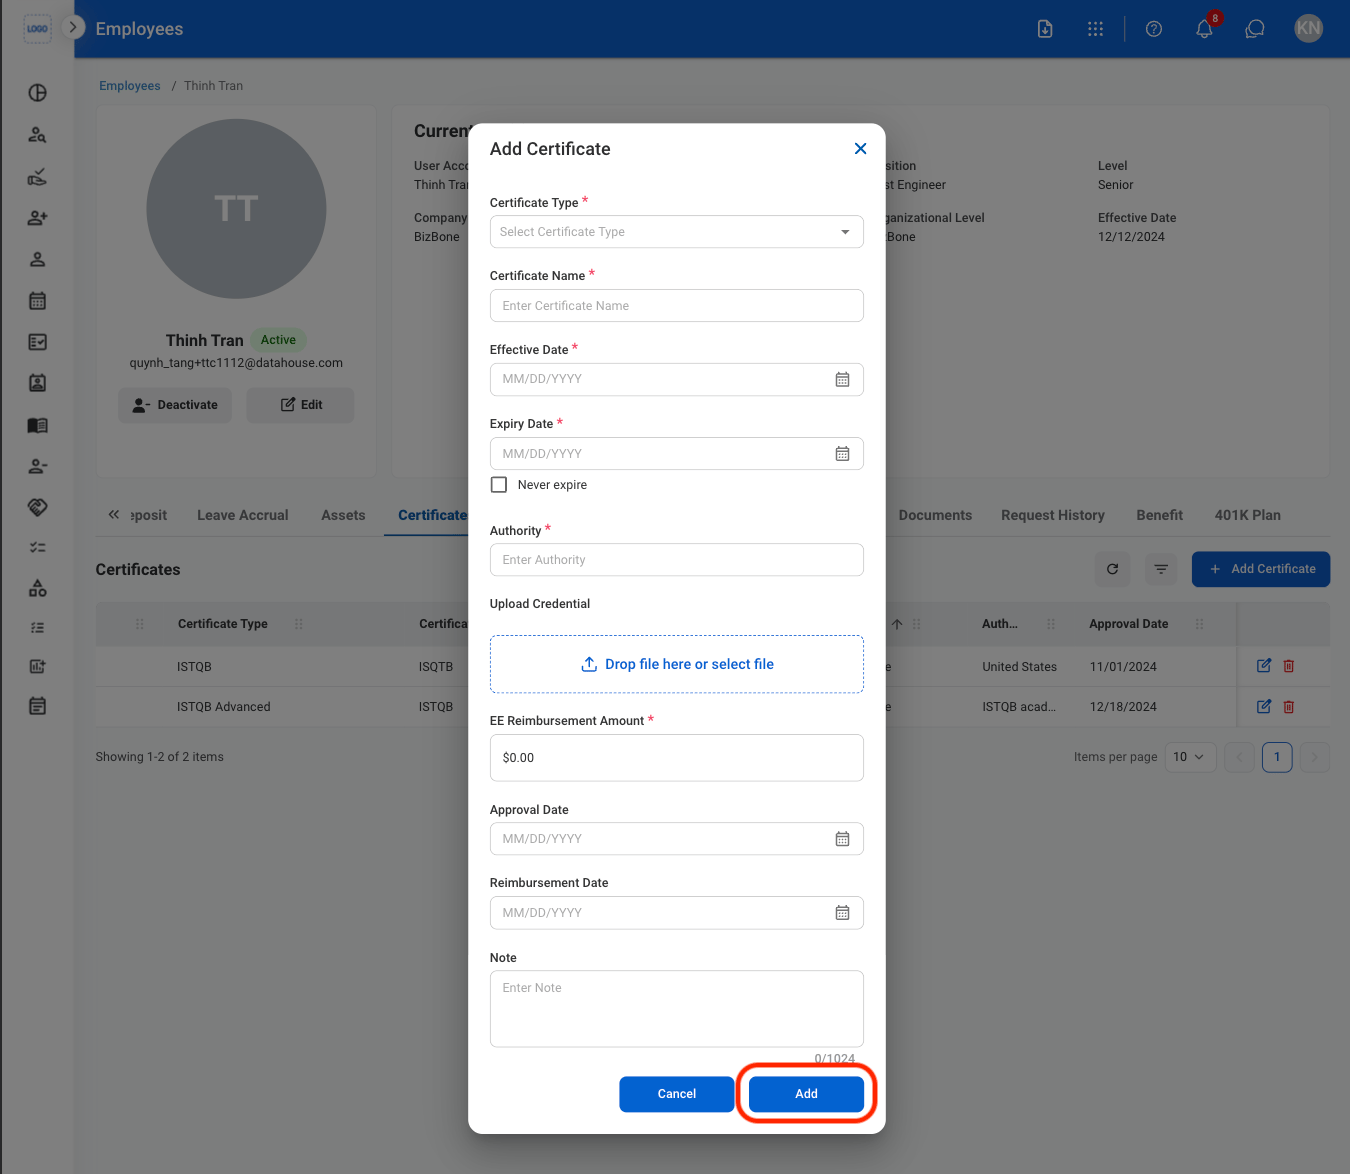
Modify a Certificate
Select an action
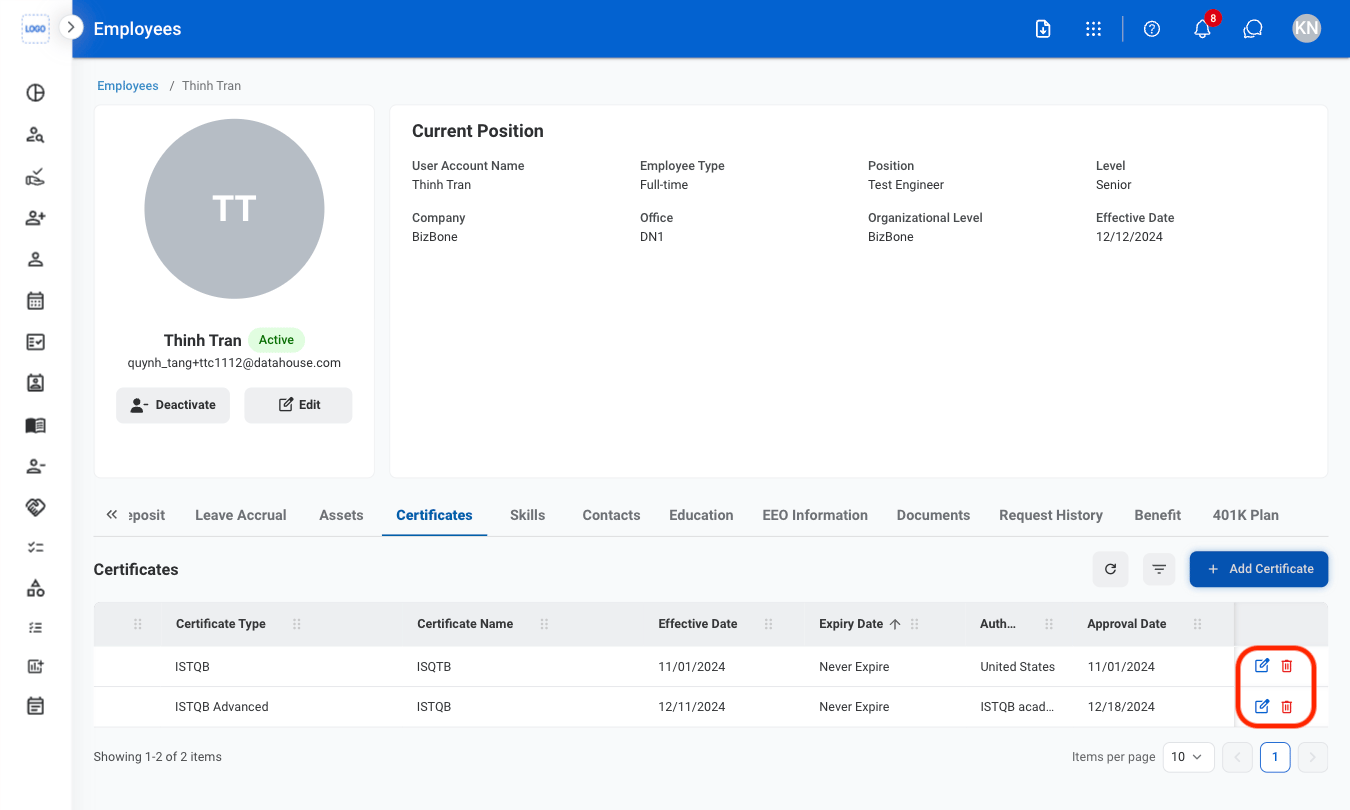
- Edit: Select the edit icon to update an existing entry.
- Delete: Select the trash icon to delete an existing entry.
Confirm the action
- Edit: Fill in the required information. Select Update to complete or Cancel to exit without saving changes.
- Delete: Select Delete to complete or Cancel to exit without saving changes.
Skills
Add a Skill
Navigate to Skills
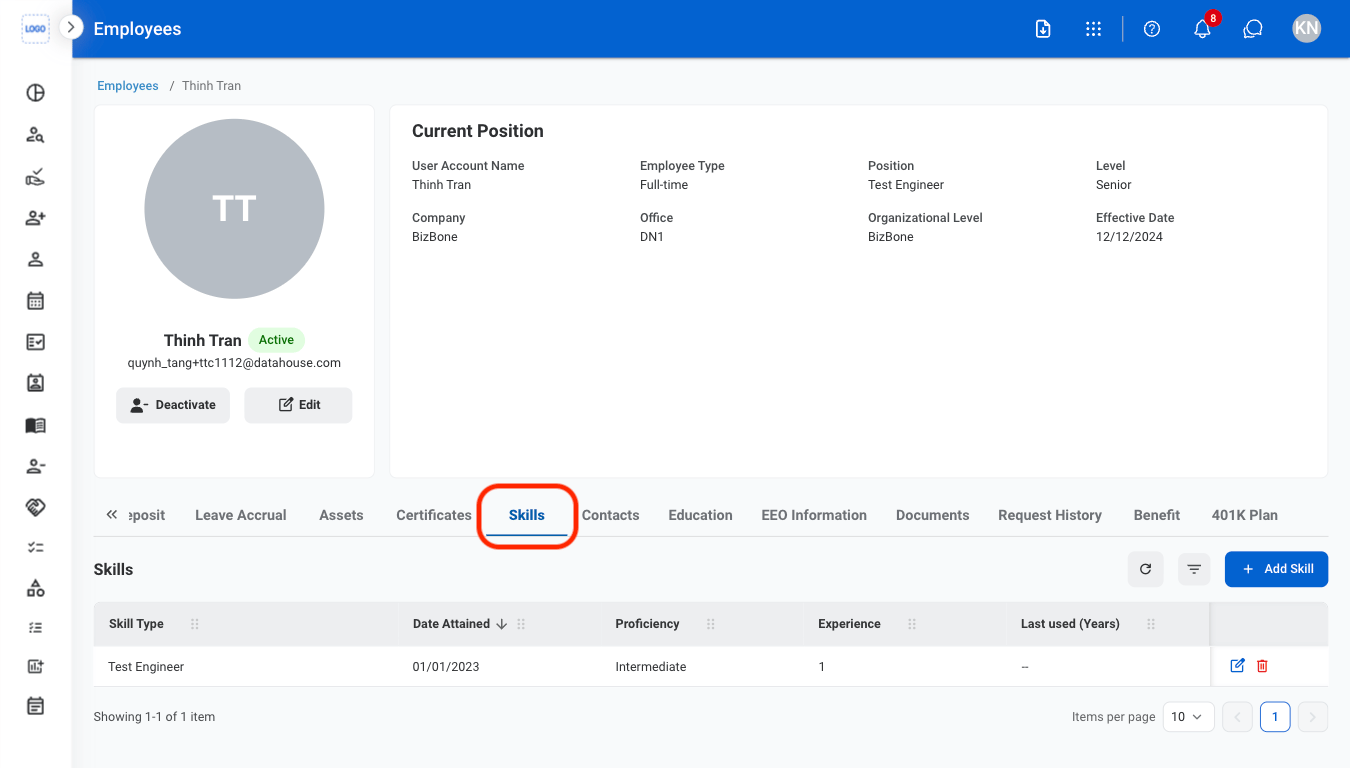
Select Add Skill
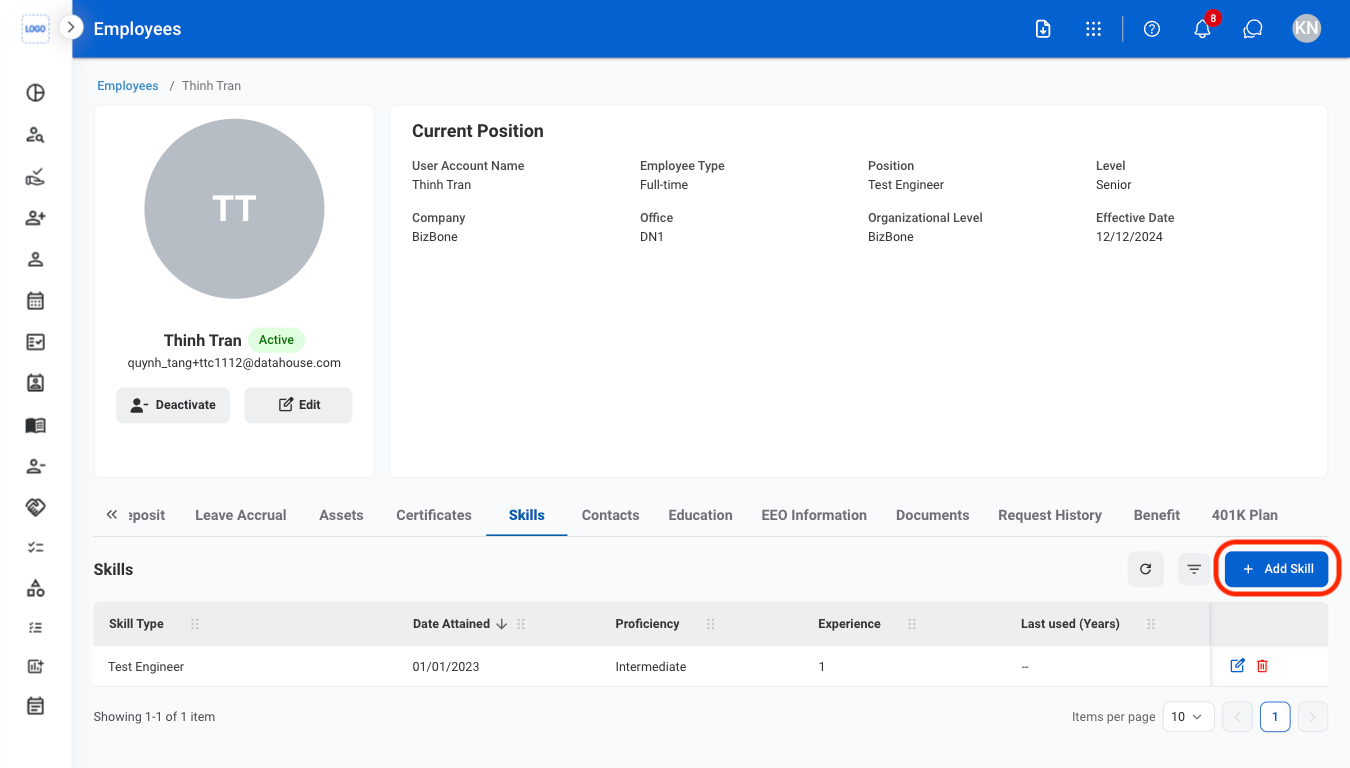
Fill in the required information
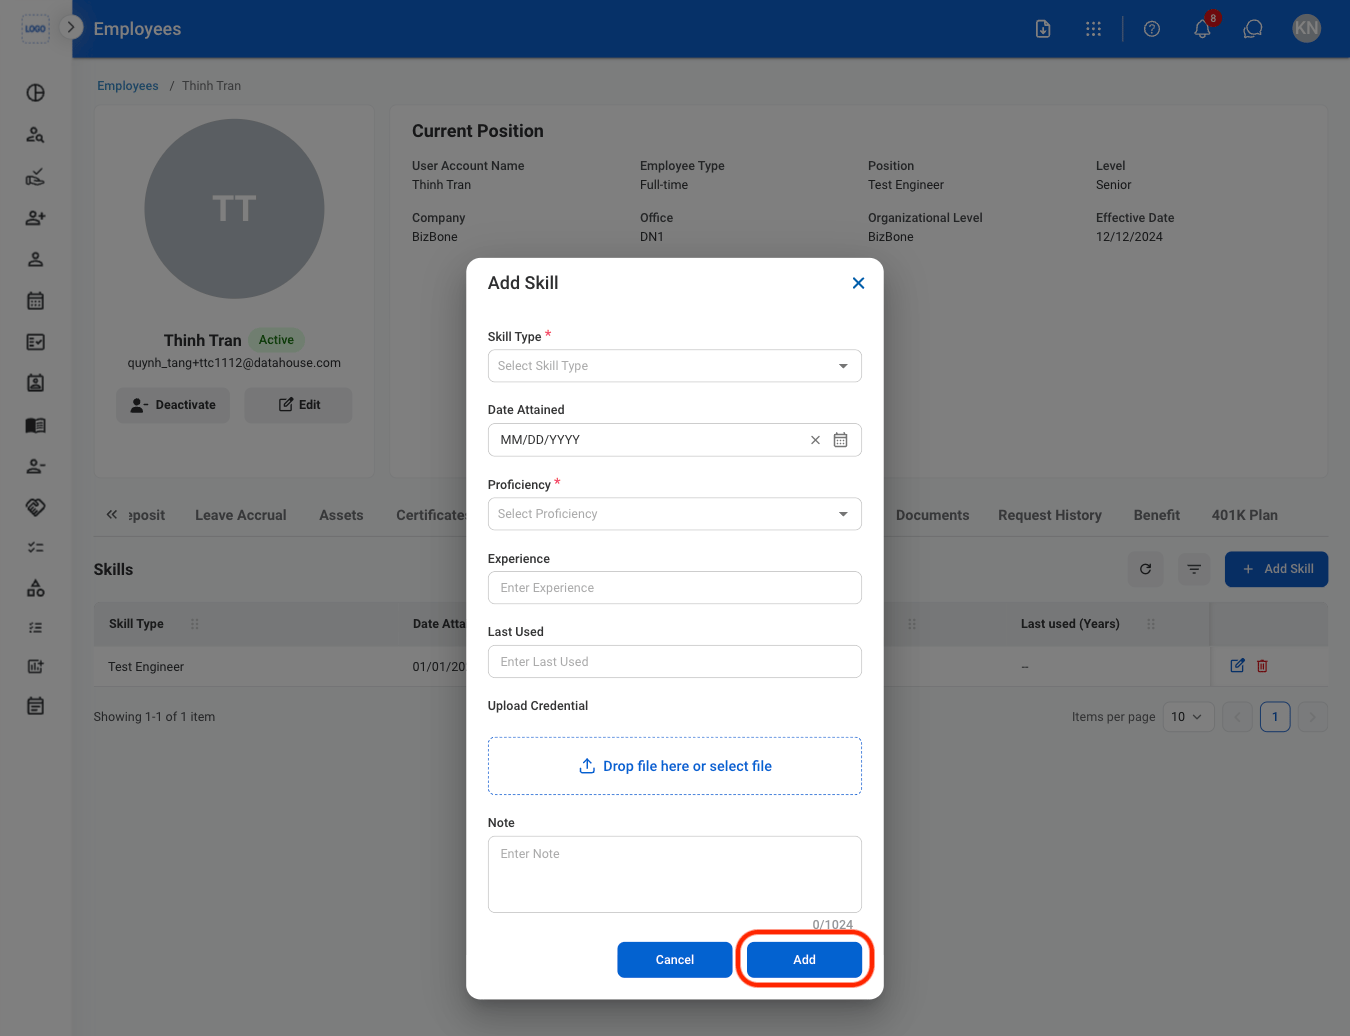
Modify a Skill
Select an action

- Edit: Select the edit icon to update an existing entry.
- Delete: Select the trash icon to delete an existing entry.
Confirm the action
- Edit: Fill in the required information. Select Update to complete or Cancel to exit without saving changes.
- Delete: Select Delete to complete or Cancel to exit without saving changes.
Contacts
View an employee’s emergency contacts, dependents, and beneficiaries. Contacts are self-submitted by employees.Navigate to Contacts
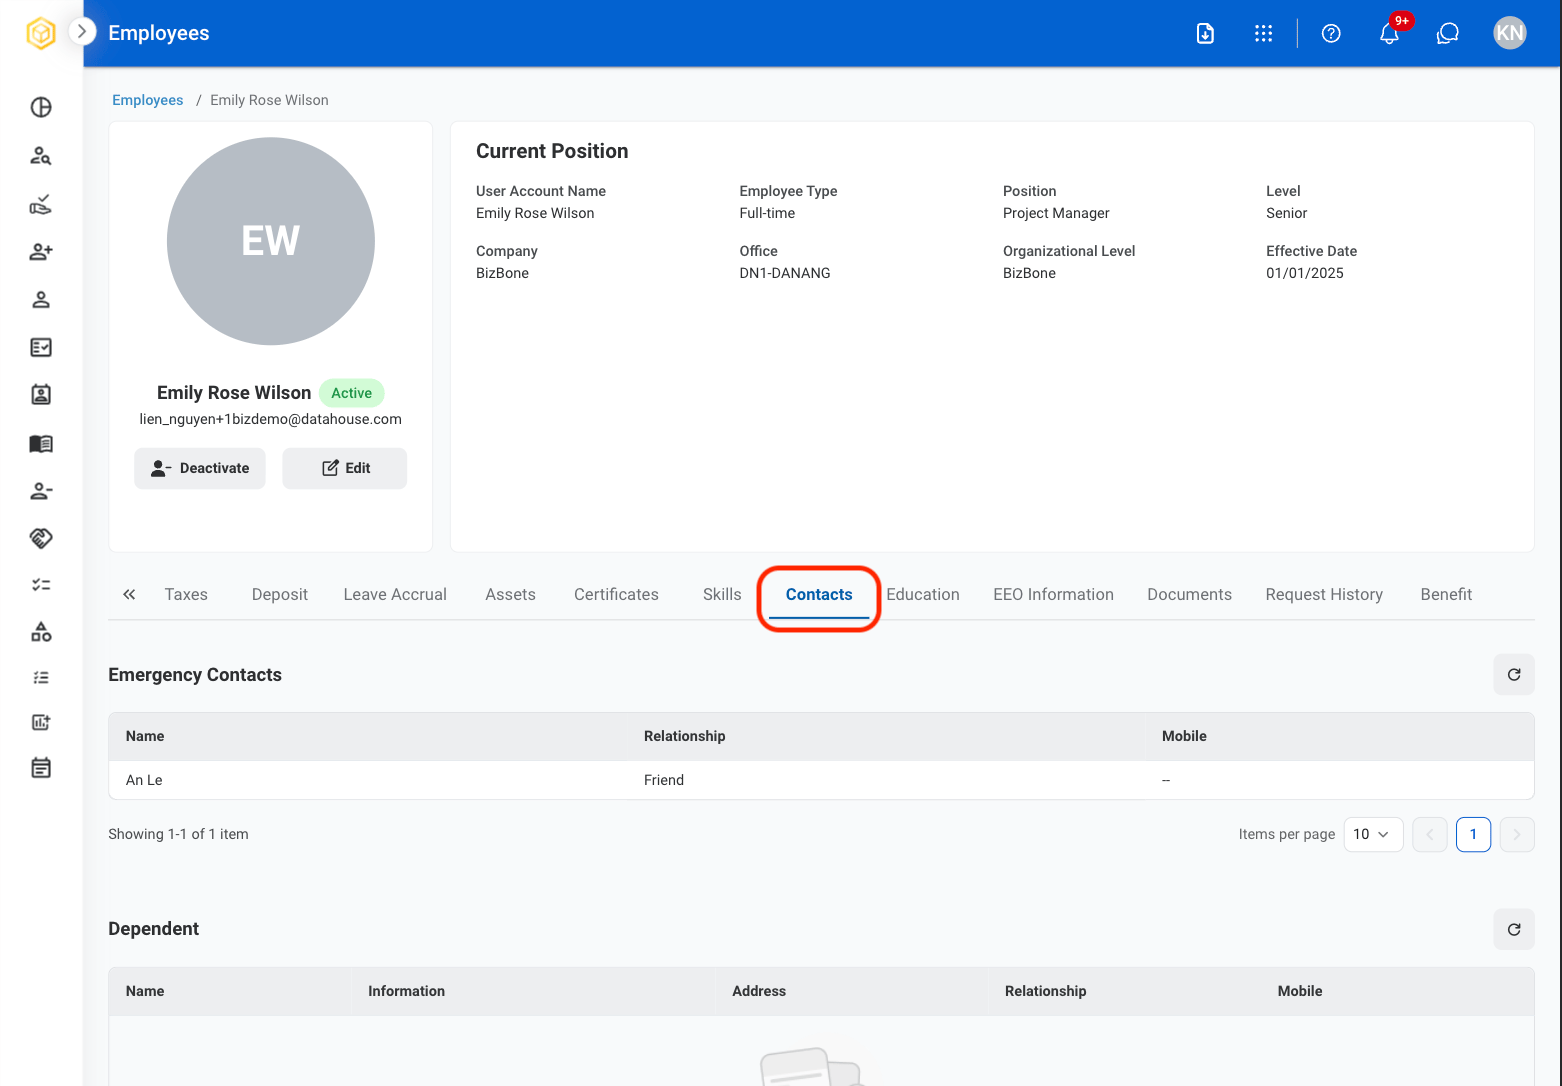
Scroll to view all employee contacts

Education
Add Education
Navigate to Education
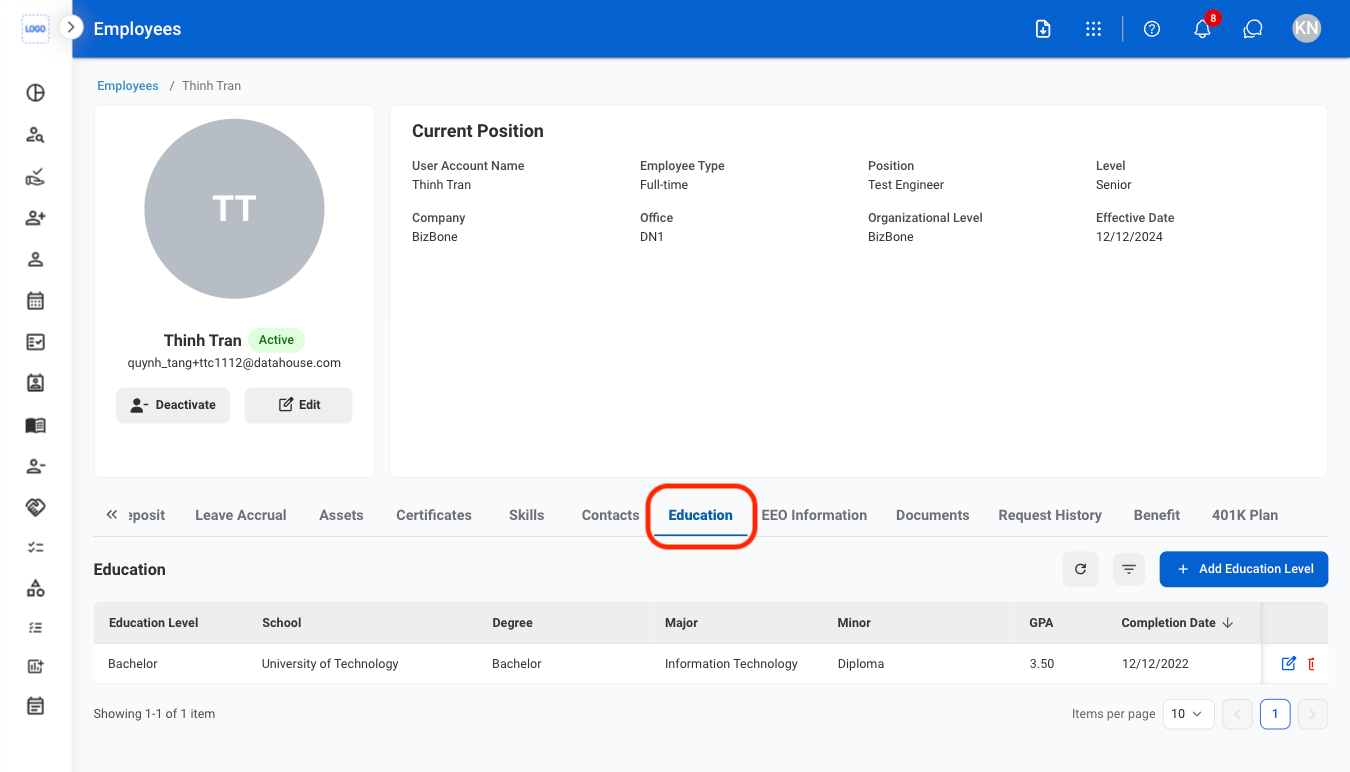
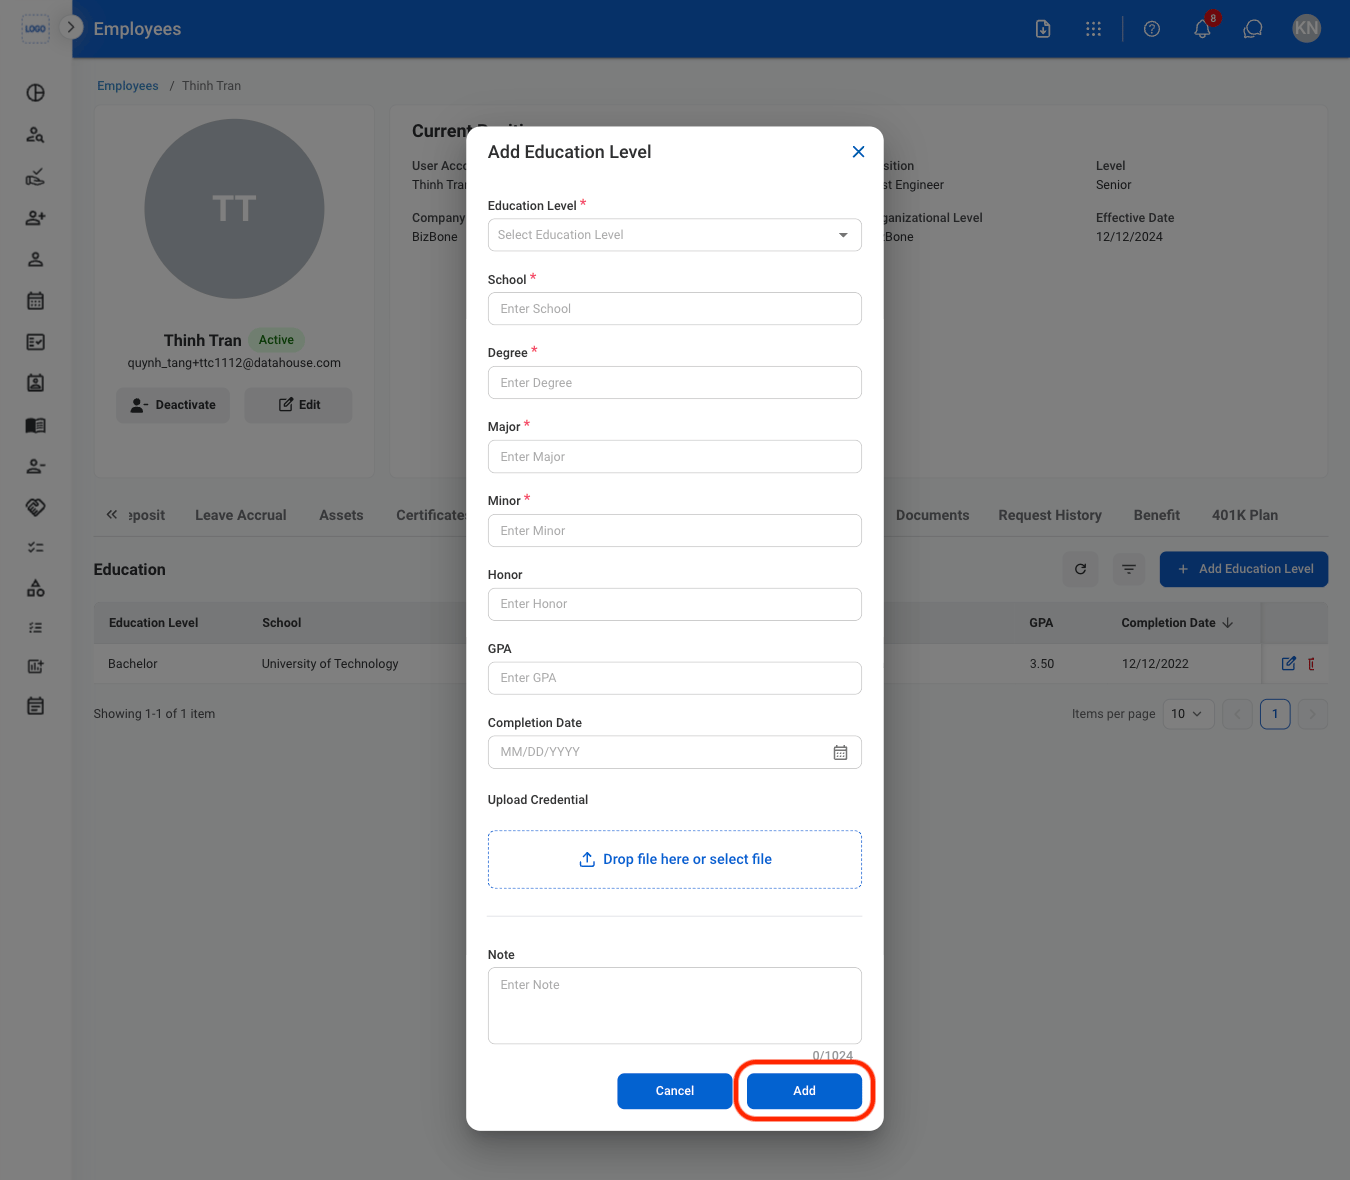
Select Add Education Level
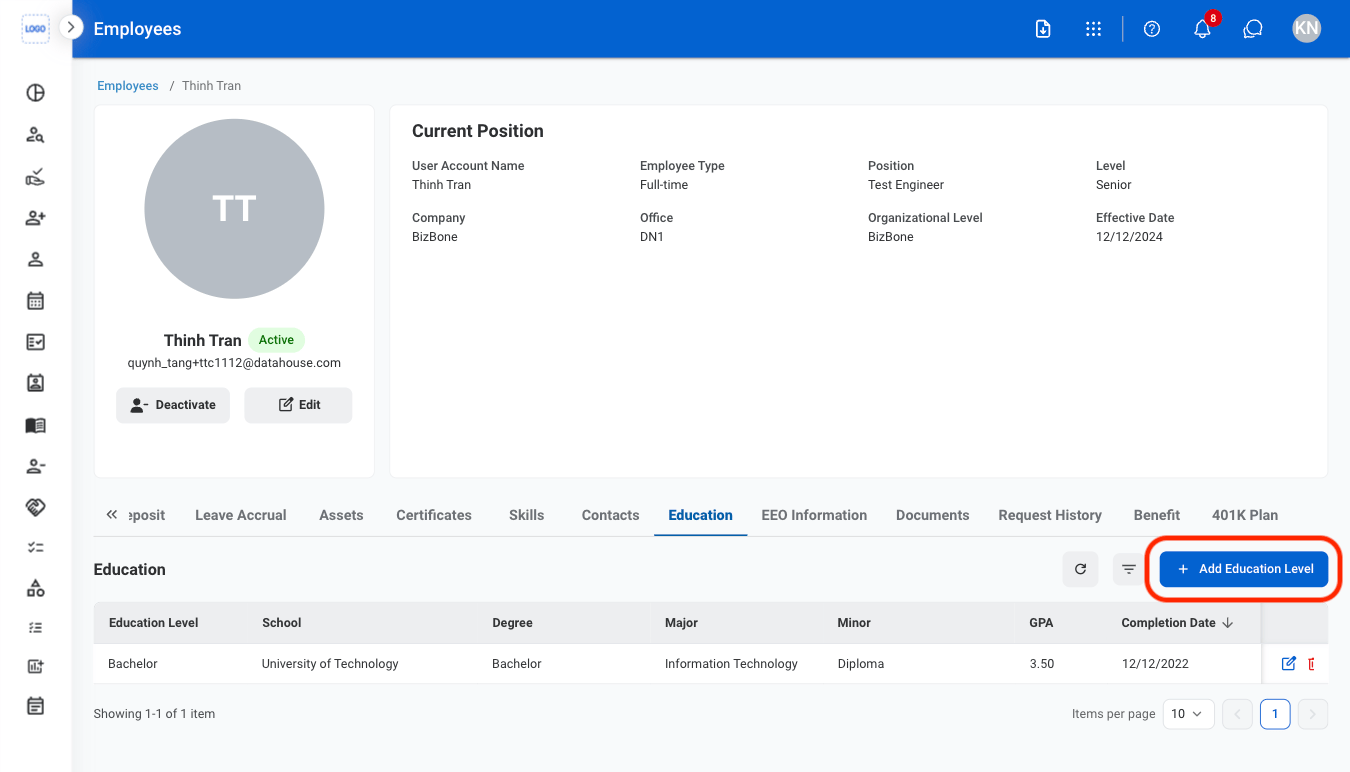
Fill in the required information
Modify an Education Entry
Select an action
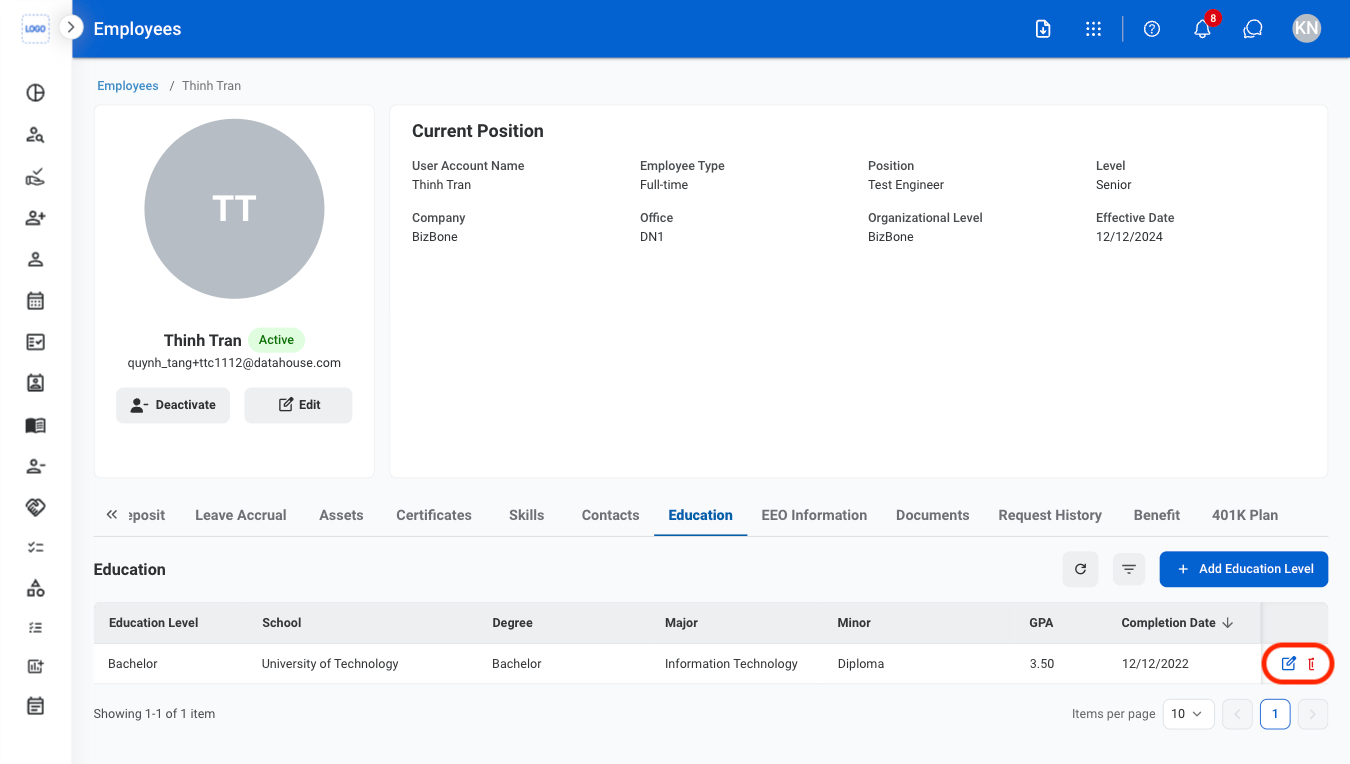
- Edit: Select the edit icon to update an existing entry.
- Delete: Select the trash icon to delete an existing entry.
Confirm the action
- Edit: Fill in the required information. Select Update to complete or Cancel to exit without saving changes.
- Delete: Select Delete to complete or Cancel to exit without saving changes.
EEO Information
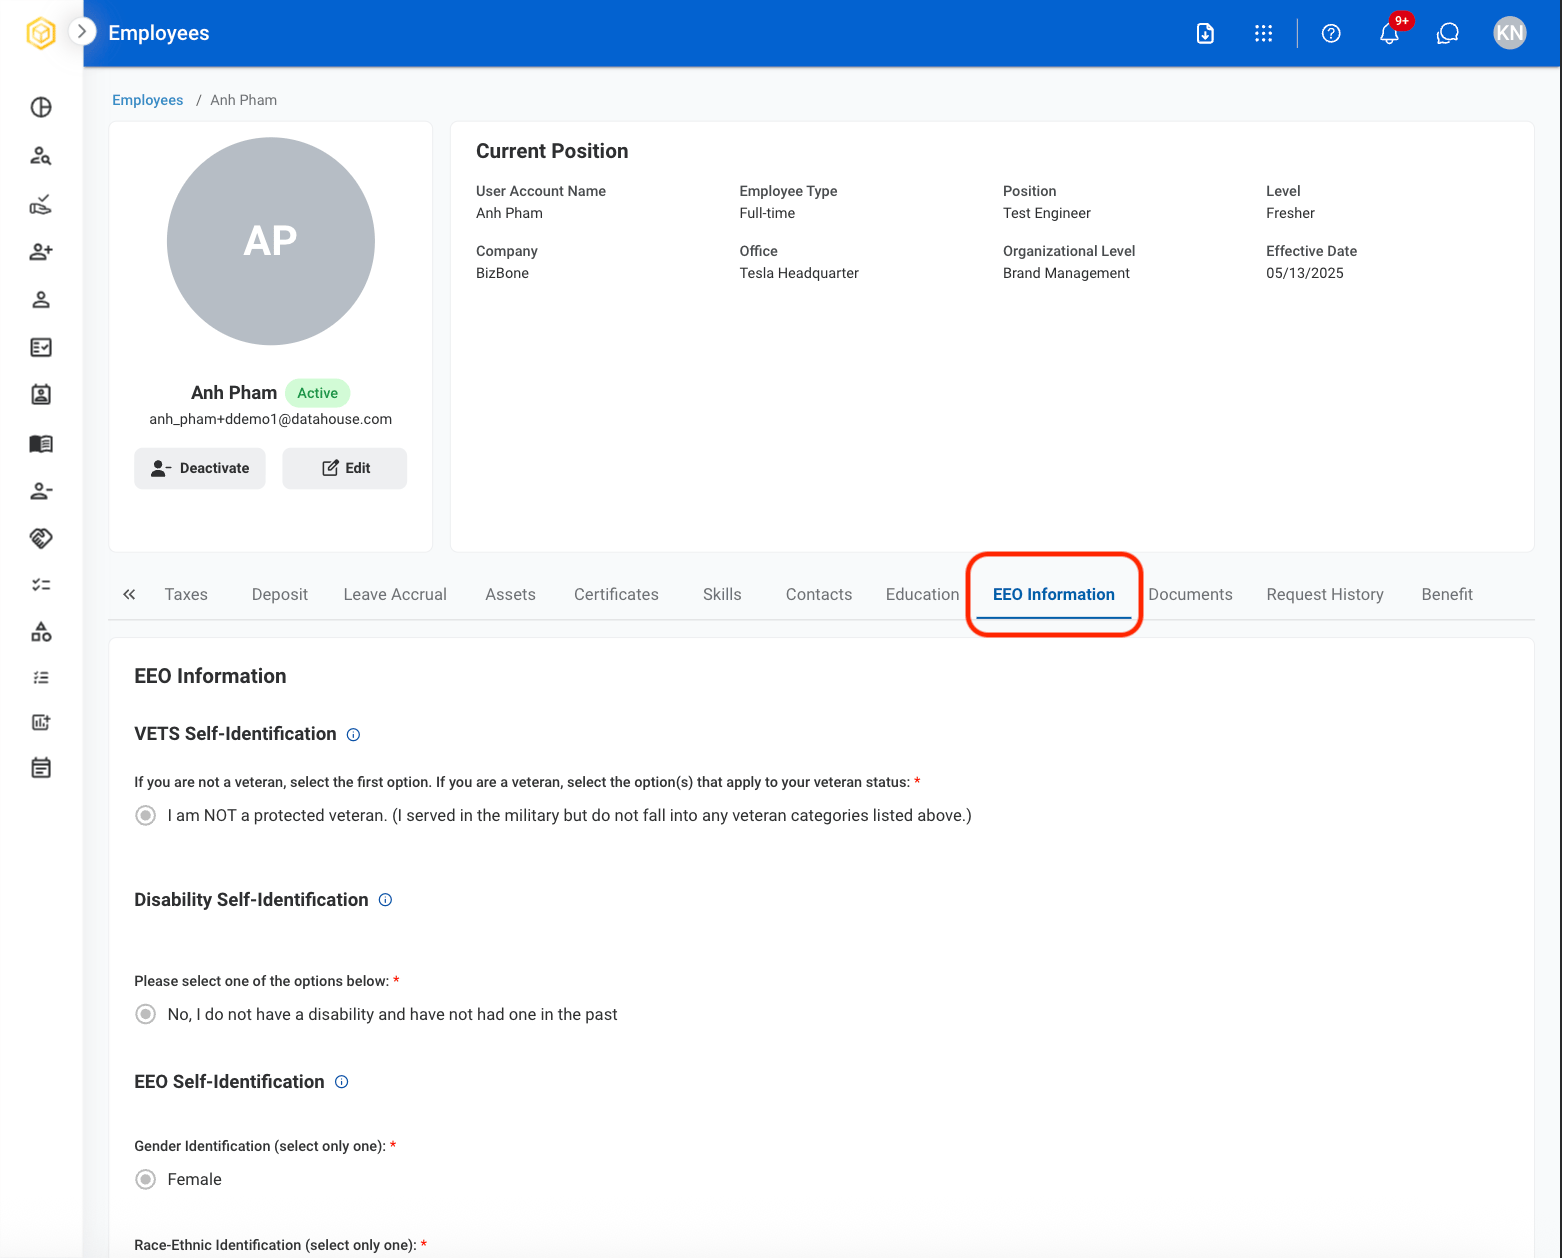
View an employee’s EEO Information. Self-identification is self-submitted by employees.Select the EEO Information tab in the employee profile
Documents
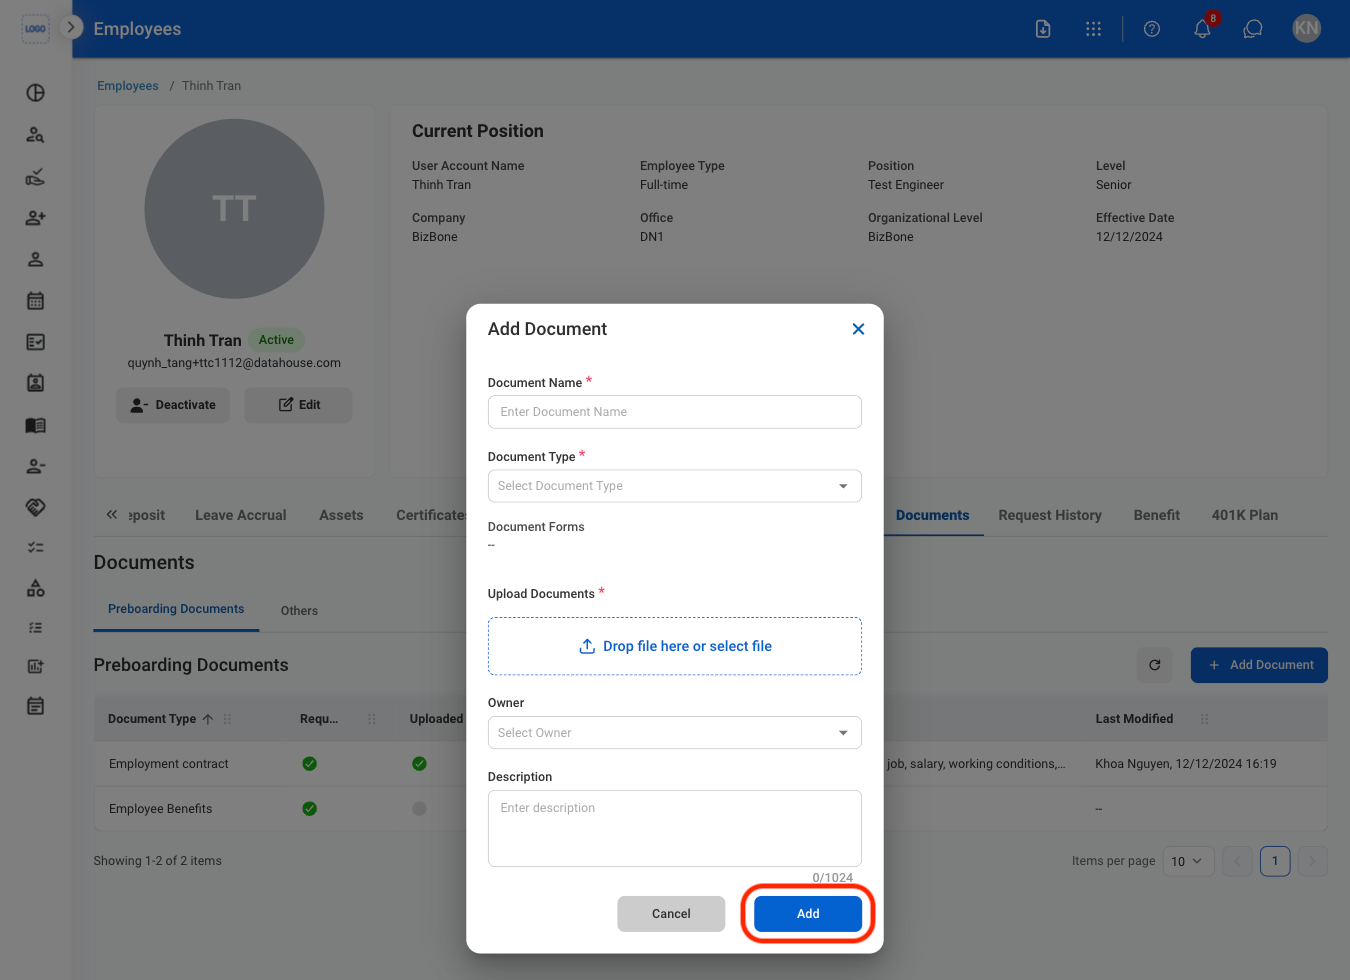
View and manage employee’s related documents.Add a Document
Navigate to Documents
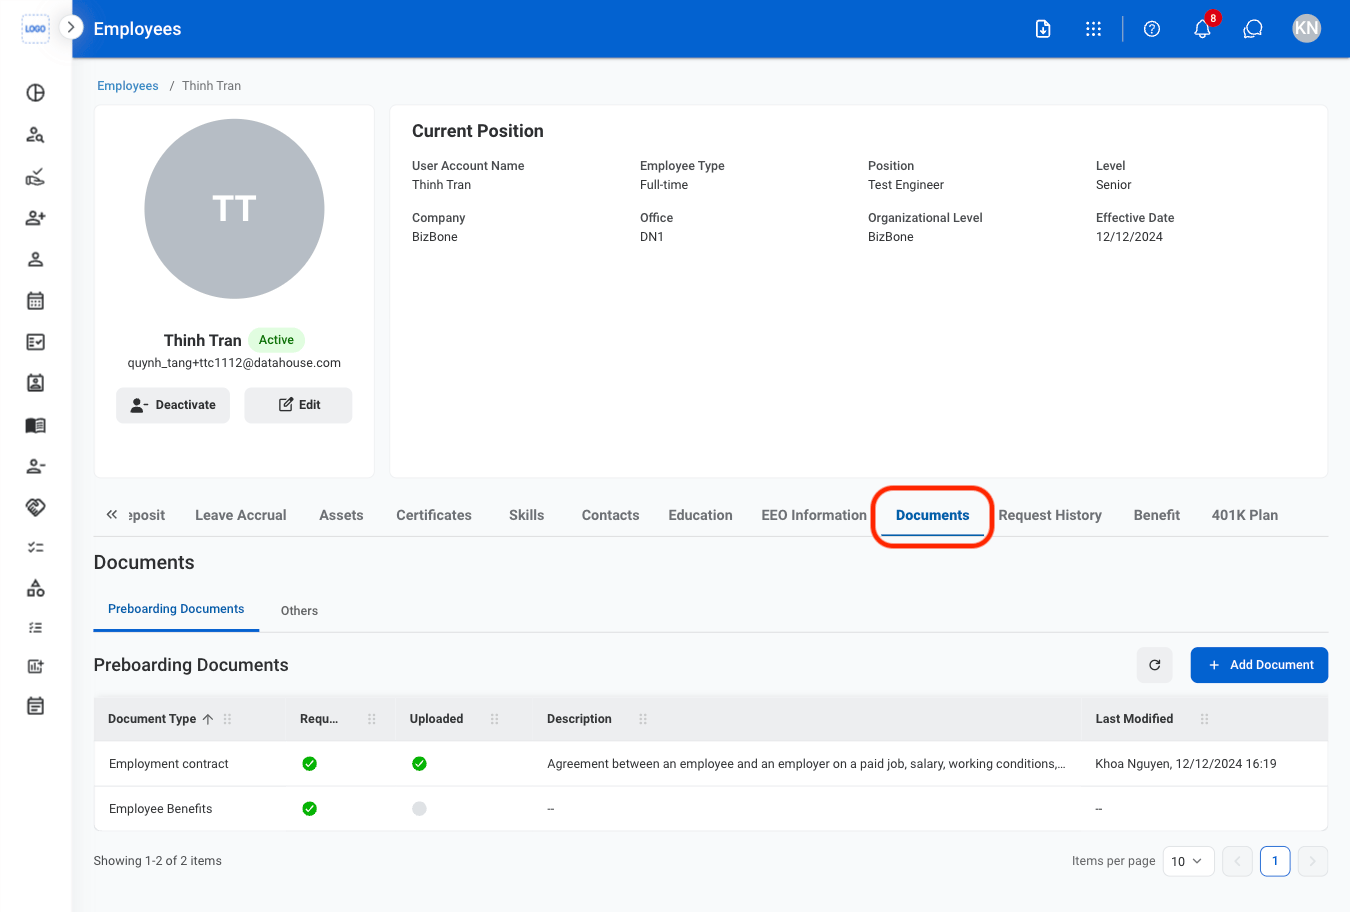
Select a document type

Select Add Document

Fill in the required information
Request History
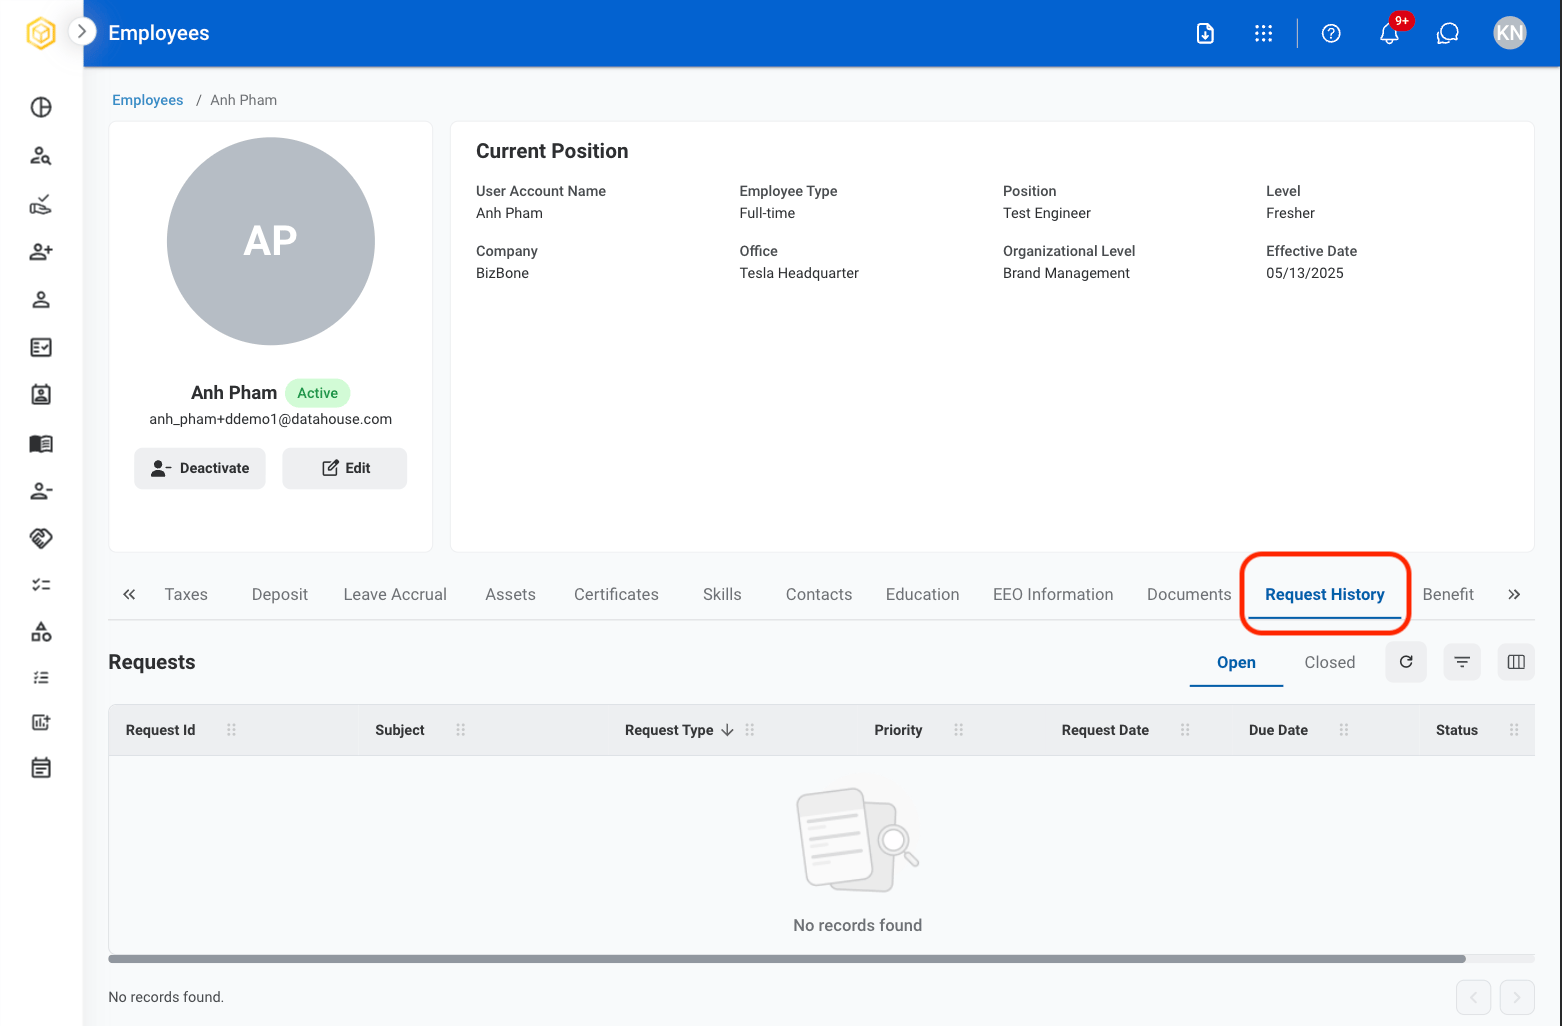
View an employee’s request history.Navigate to Request History
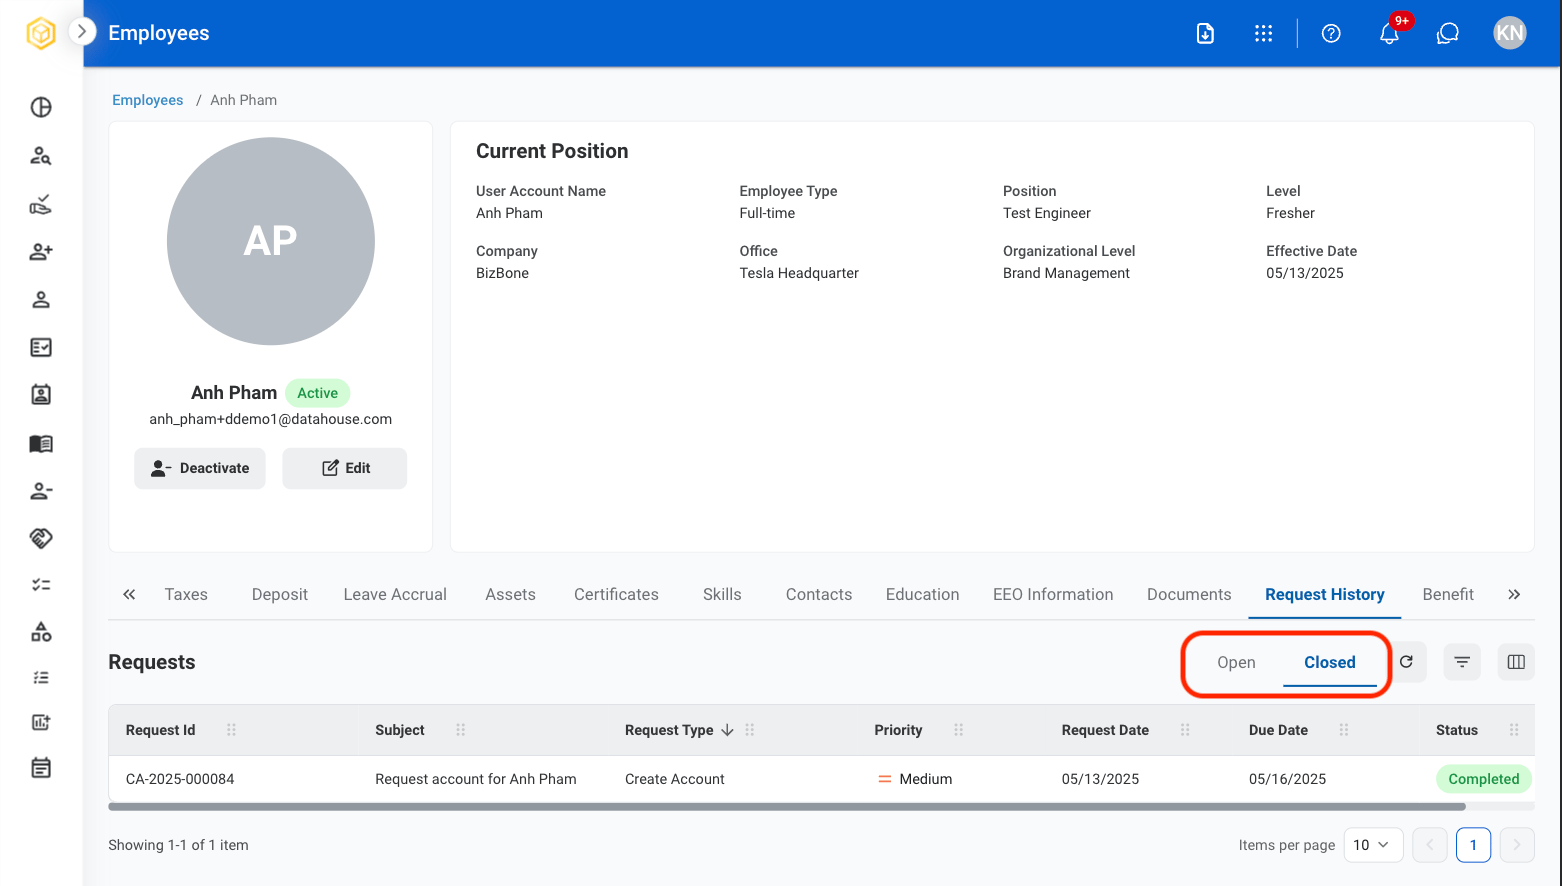
Select a view
Refresh, filter, and organize requests

Benefits
View assigned benefits for the employee.Navigate to Benefits
