
Changes to a business process only apply to new Leave Requests created after the workflow is published. Existing requests continue using the workflow version that was active when they were created.
Default Workflow
The default Leave Request workflow consists of the following steps:- Employee submits a Leave Request.
- Immediate Supervisor reviews the request.
- If approved, the request is routed to the L2 Manager.
- If approved again, the system automatically creates a Work Log.
- The request is completed.
- If rejected at any approval stage, the request ends with a Rejected status.
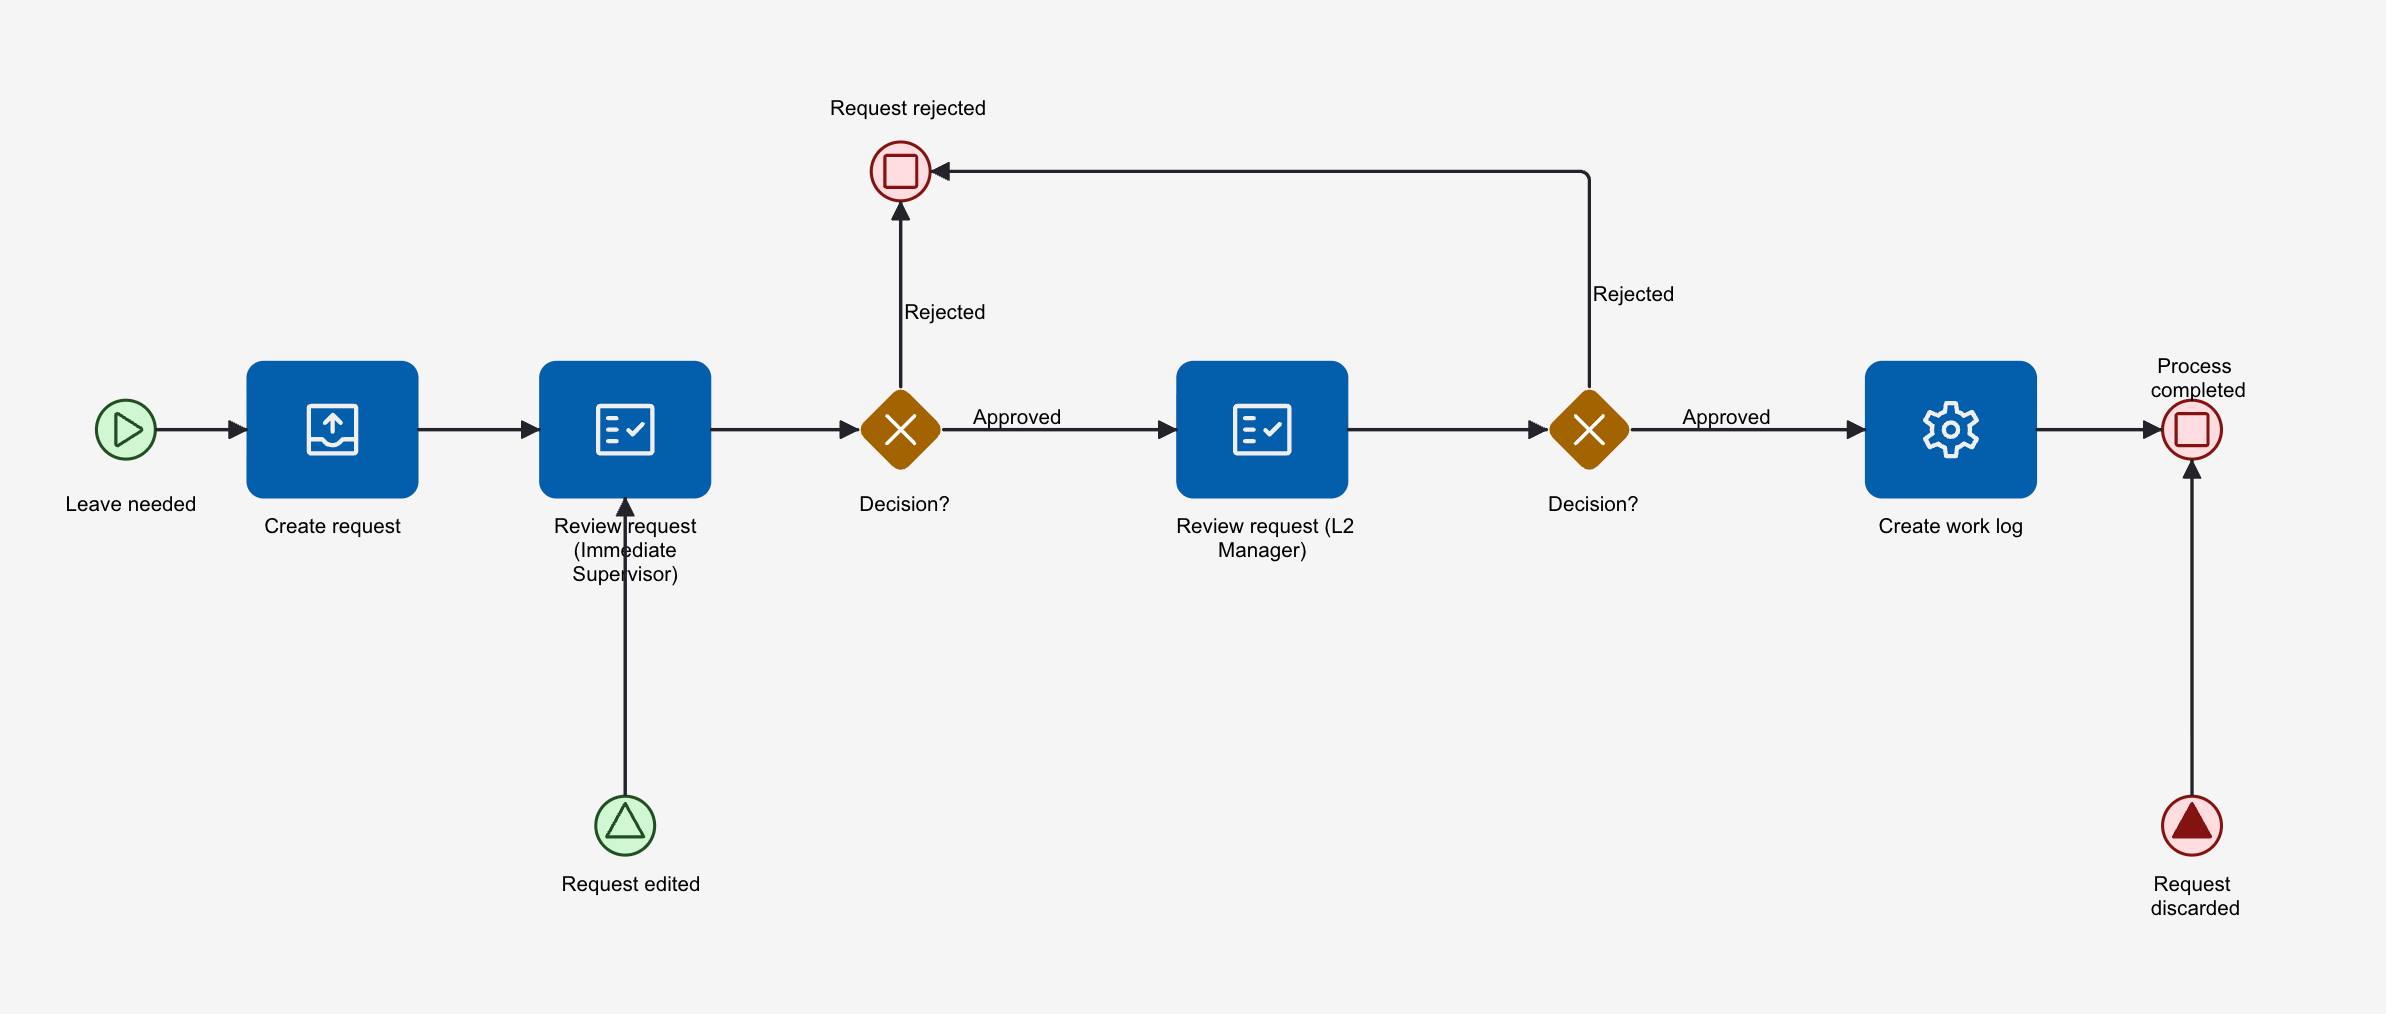
Default Leave Request Workflow
Workflow Steps
Approval Paths
- Approved
- Rejected by Immediate Supervisor
- Rejected by L2 Manager
Common Customizations
Administrators can modify the workflow to support their organization’s approval process.Add Additional Approvers
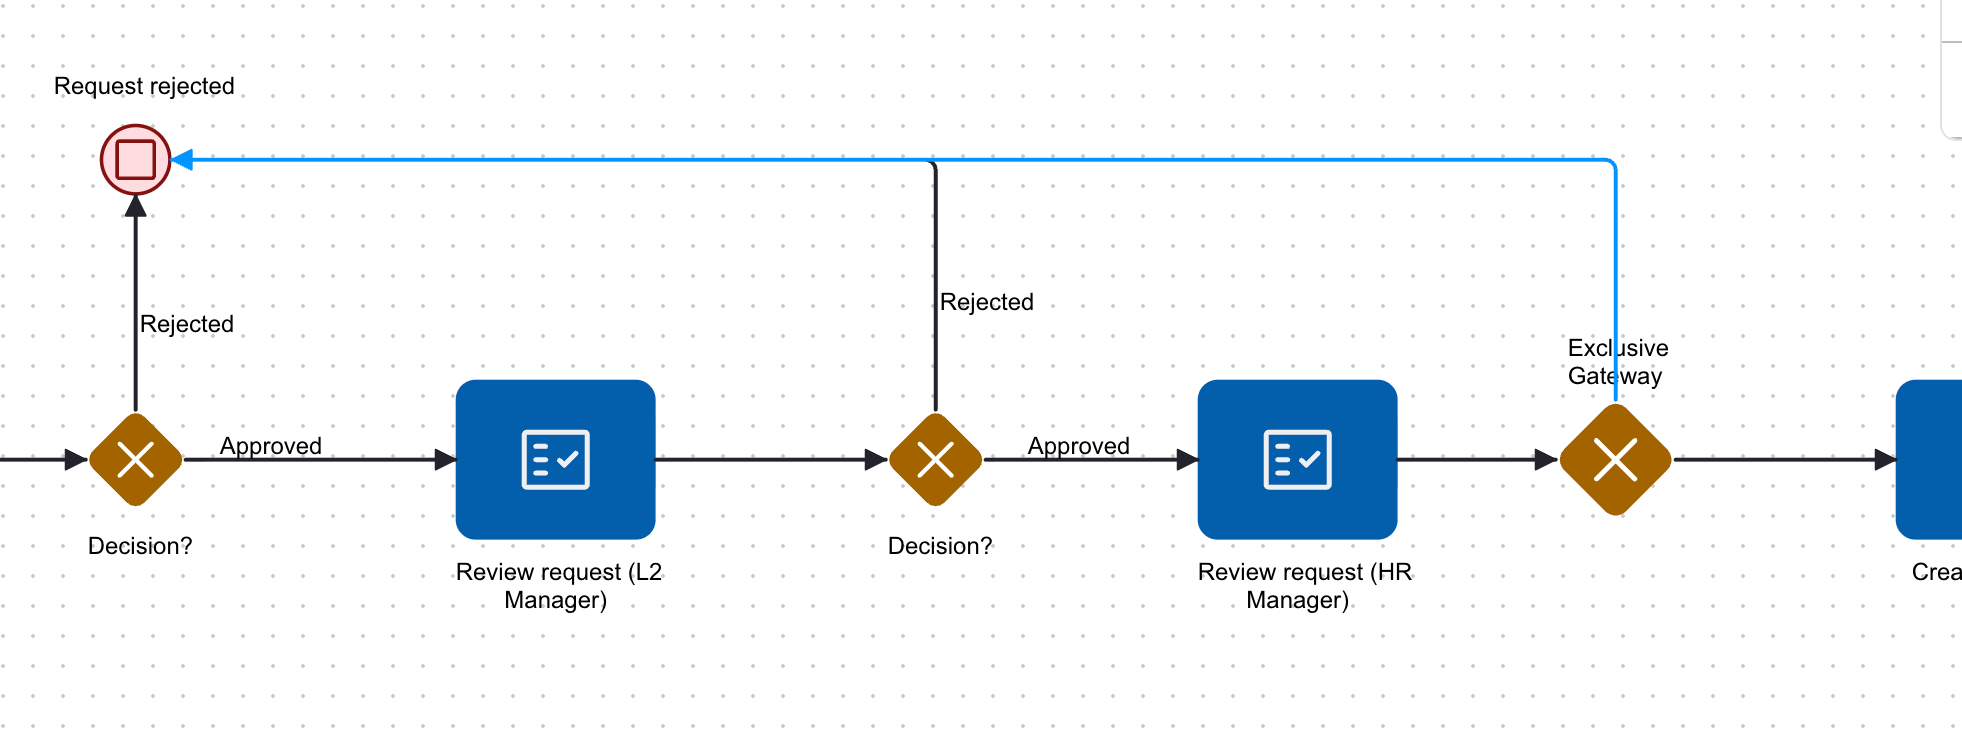
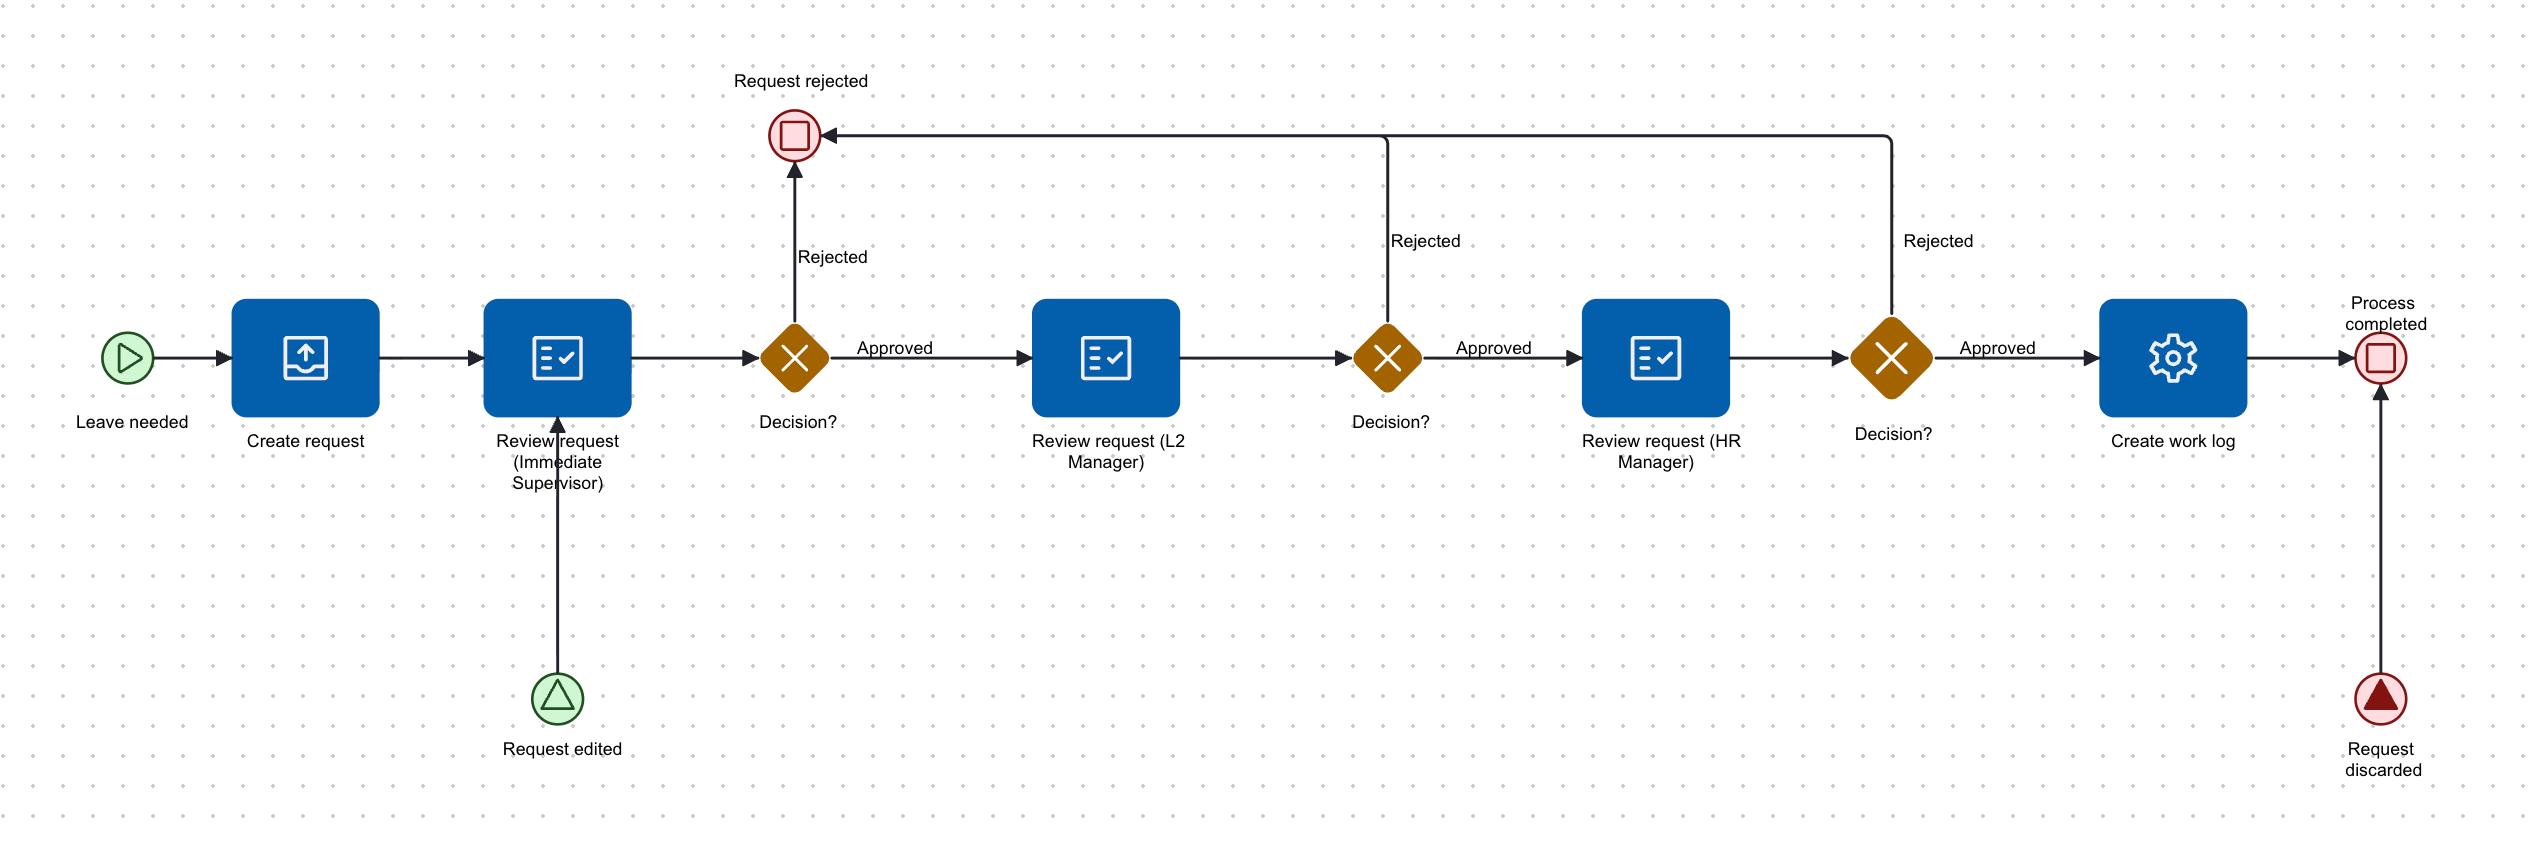
This example demonstrates how to add an HR approval after the L2 Manager review.1
Open the Leave Request business process
Navigate to Administration > Business Process, then open the Leave Request workflow and select Edit.
2
Add a Review Request task
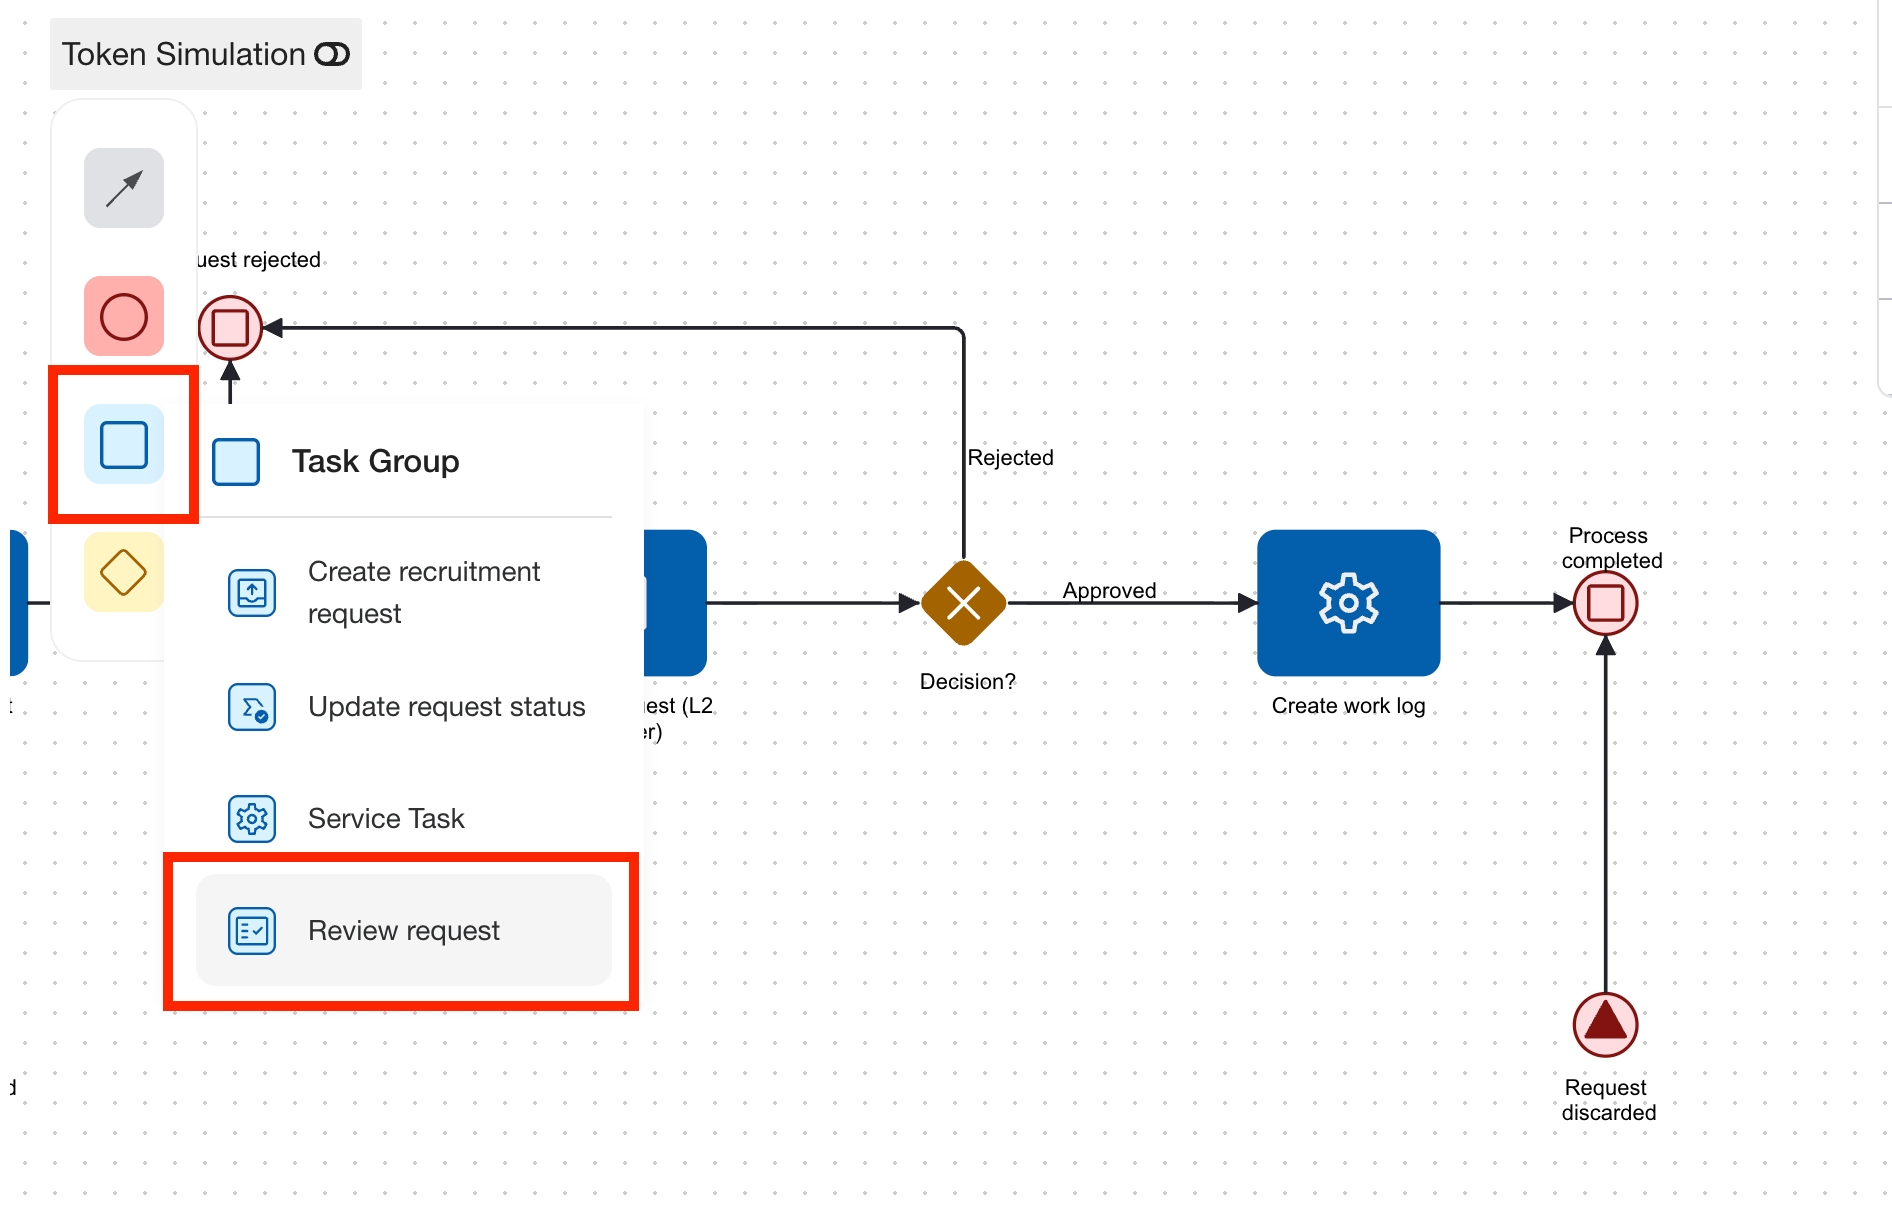
You may need to select and drag other tasks to make space for the new Review Request
3
From the component palette, drag a Review Request task onto the workflow canvas.
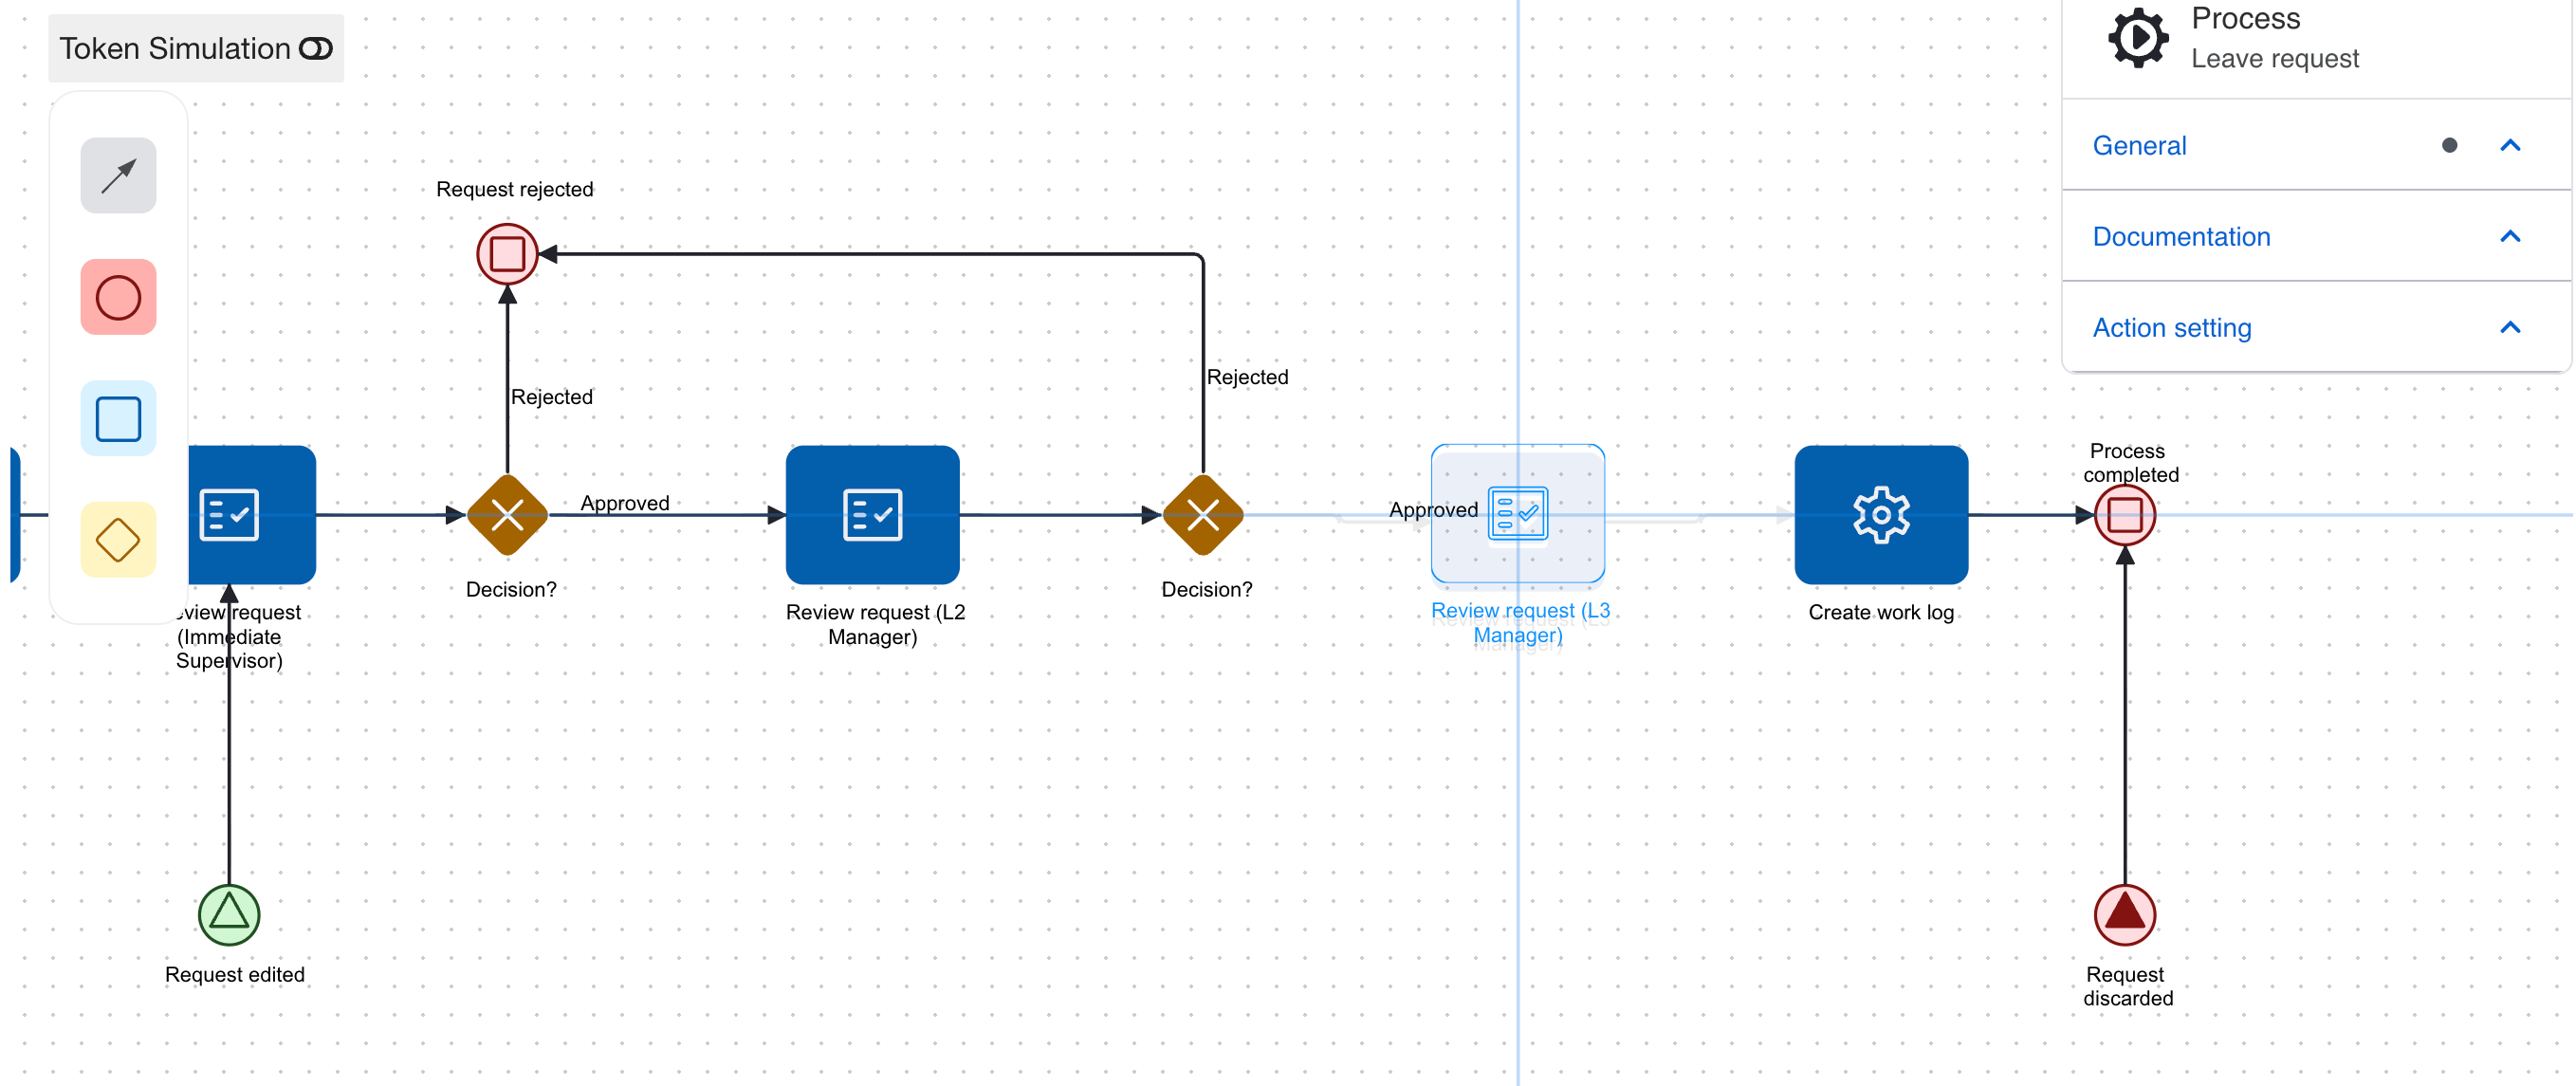
4
Connect the workflow
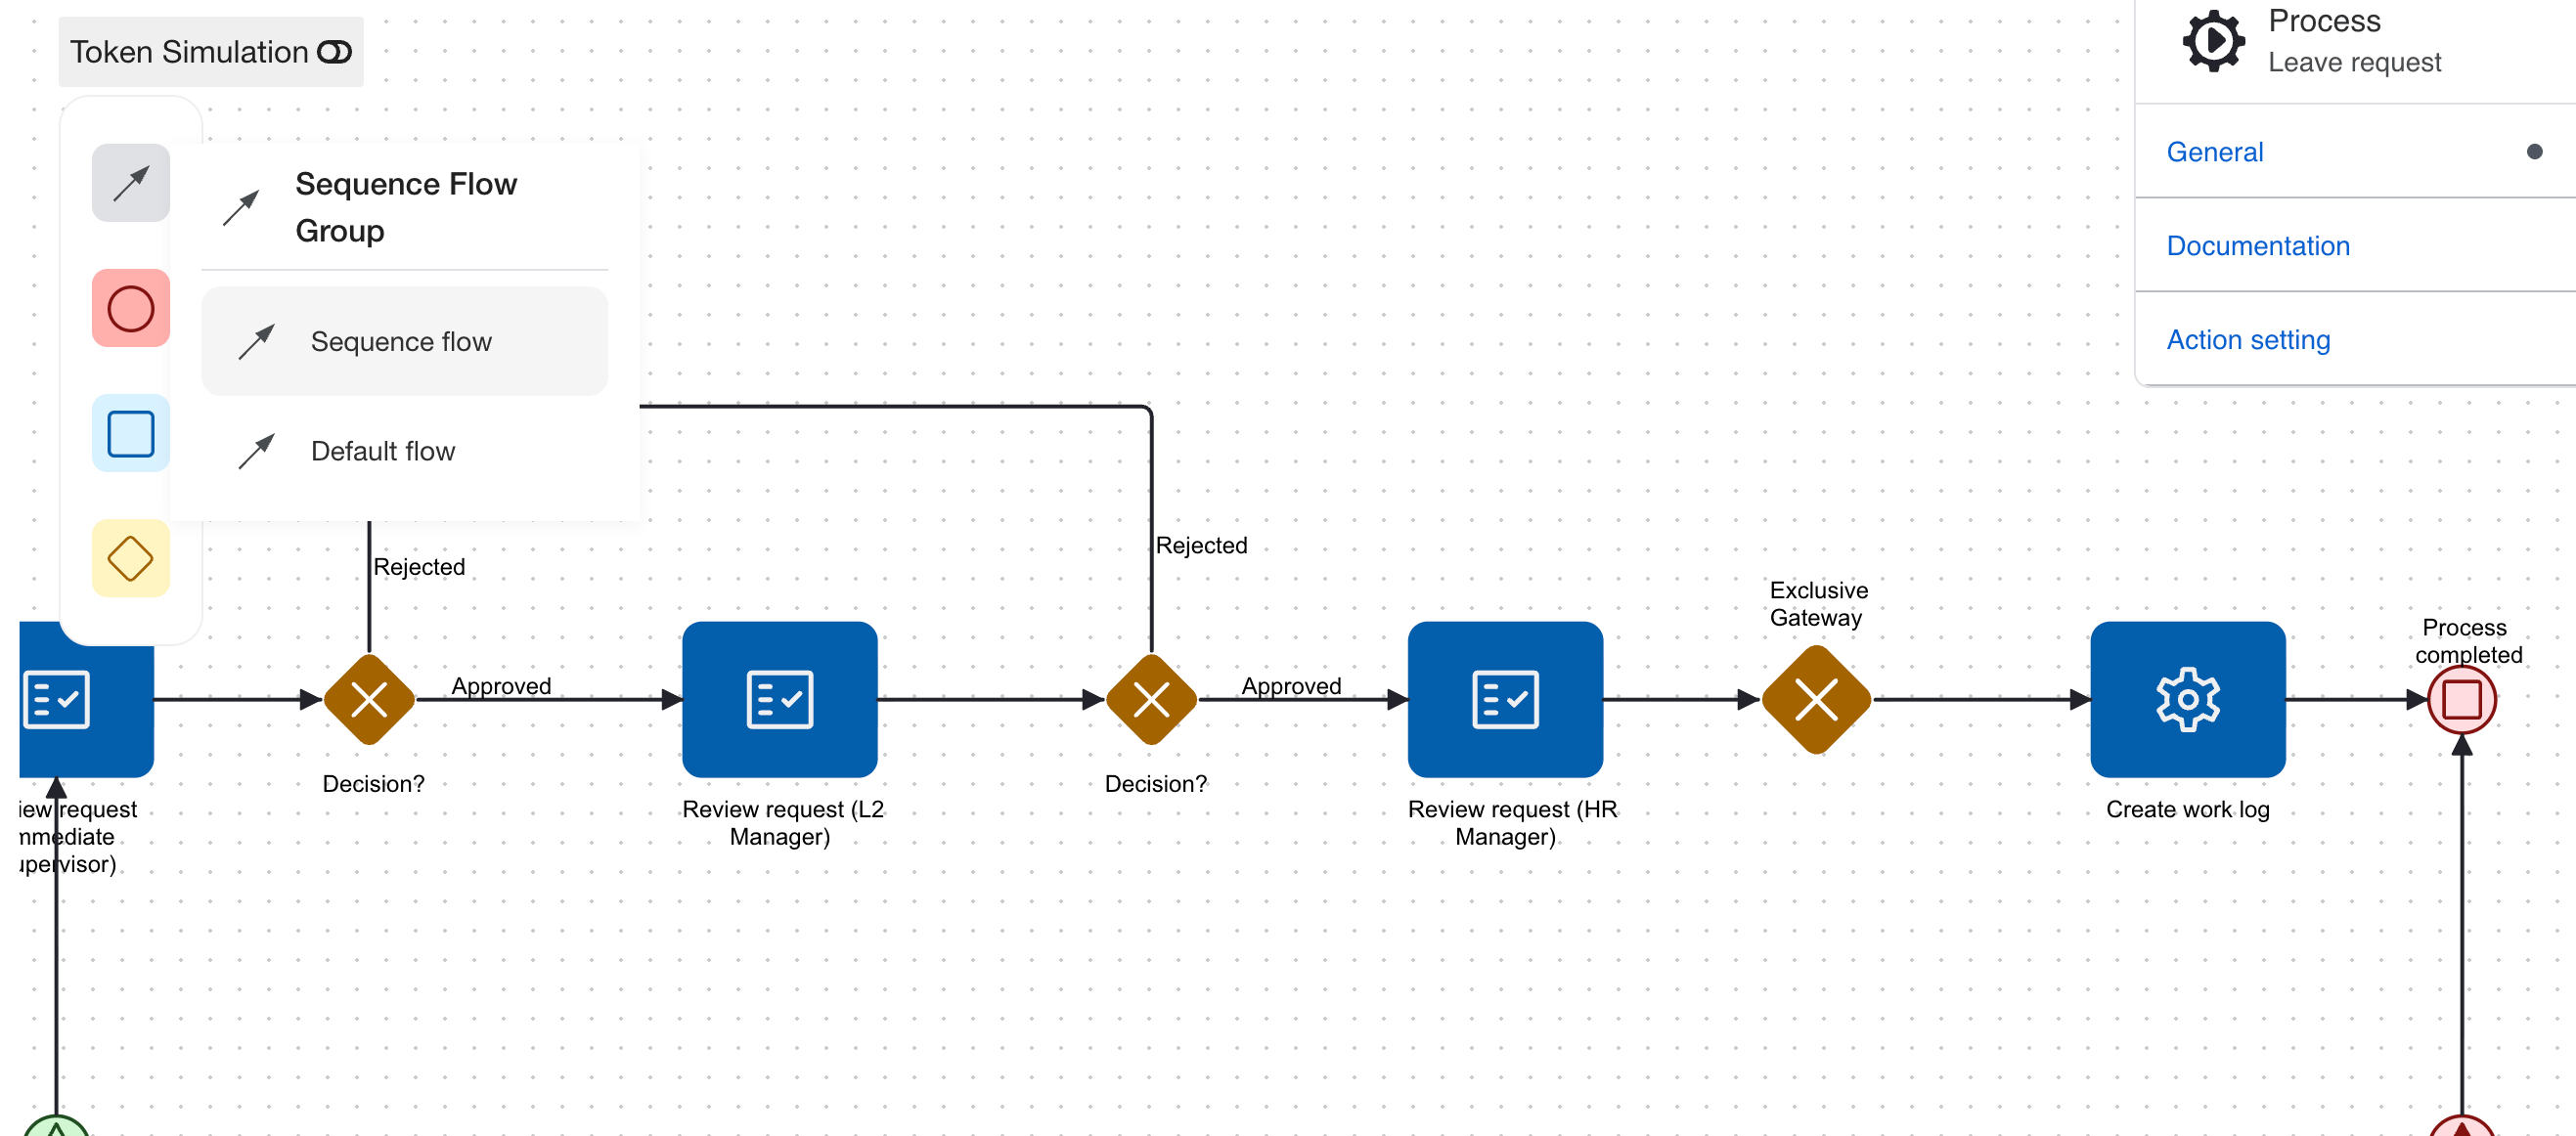
This should be done automatically if you positioned the new Review Request in between two steps.
5
Configure the Review Request task

6
Configure the decision outcome
7
Publish the workflow
Select Publish to activate the updated workflow.
Remove Approval Levels
Smaller organizations may only require a single approver.Add Automated Tasks
Automated tasks can be inserted anywhere in the workflow. Examples include:- Send email notifications
- Create Work Logs
- Update leave balances
- Notify Payroll
- Generate documents
- Call external systems
Change Decision Paths
Approval and rejection paths can be customized. For example:- Return to the employee for editing
- Allow resubmission
- Notify Human Resources
- Escalate to another approver
Editing the Workflow
To modify the Leave Request workflow:1
Navigate to Administration > Business Process
Open the Business Process module.
2
Select the Leave Request business process
Locate and open the Leave Request workflow.
3
Select Edit
Open the workflow designer.
4
Modify the workflow
Drag and drop workflow components to:
- Add or remove approval steps
- Change approval routing
- Add automated tasks
- Configure rejection paths
- Modify notifications
5
Publish the workflow
Select Publish to make the new workflow active.