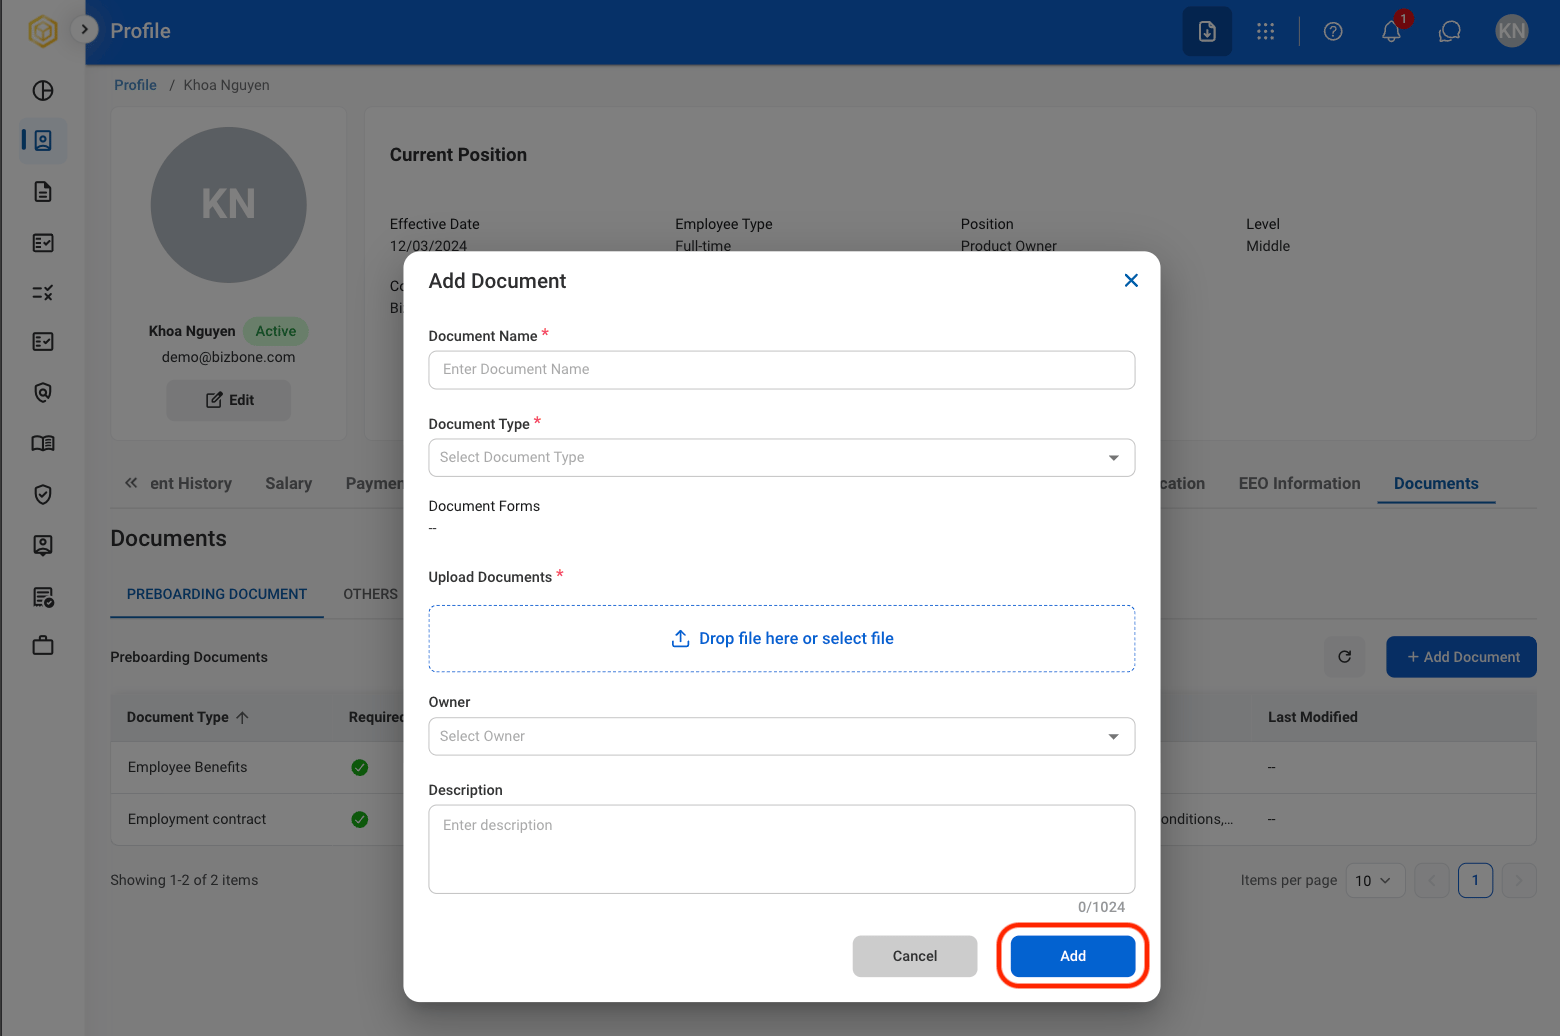
View and Update Employee Information
Personal Information
Edit Personal Information
Make edits to first, middle, and last name.Navigate to Profile

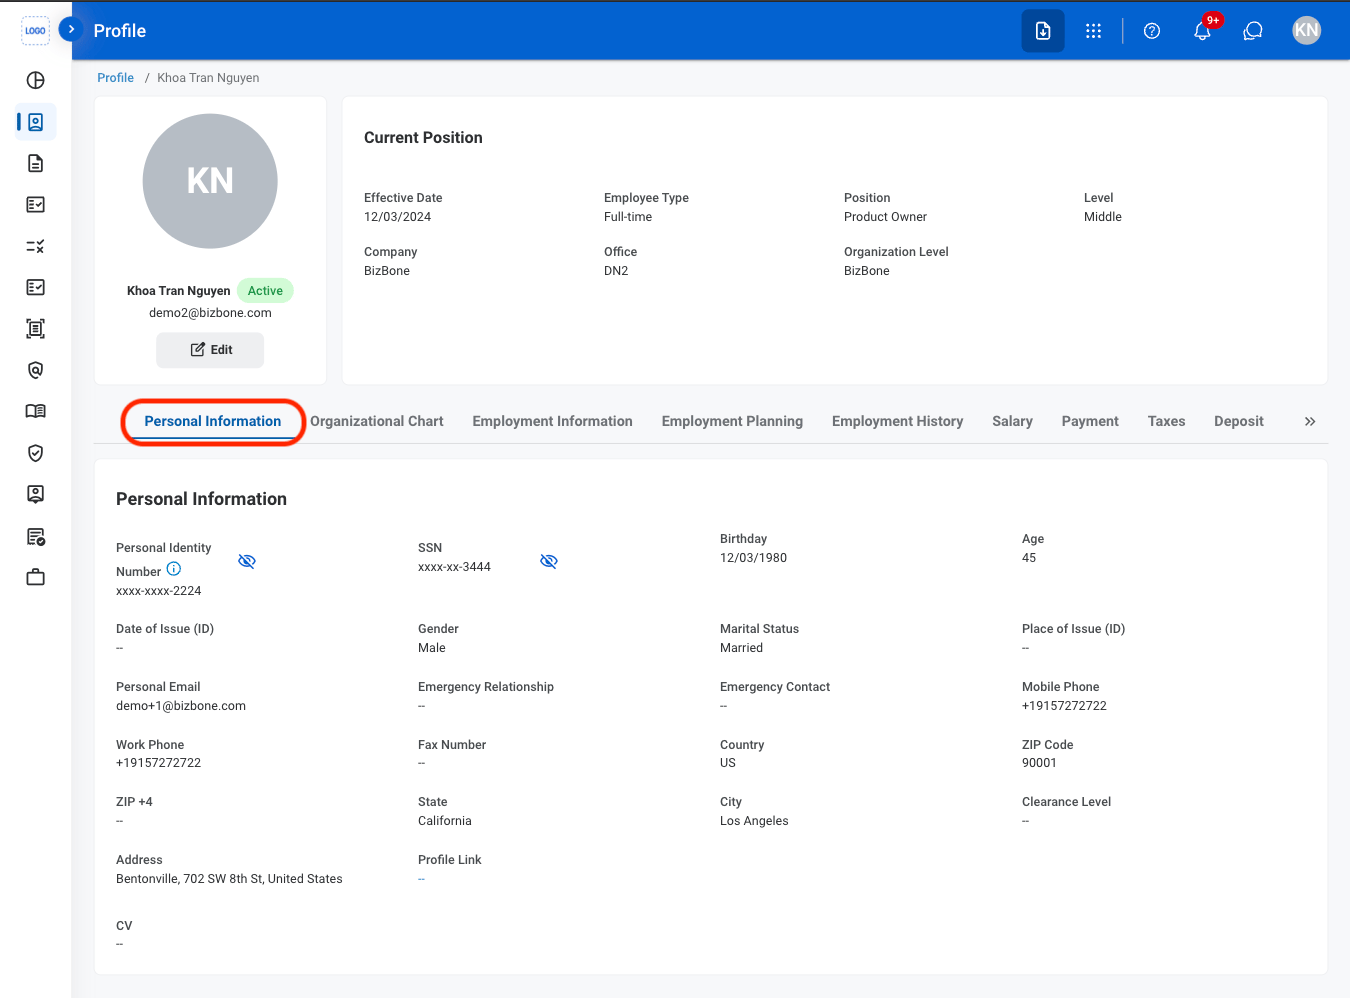
Navigate to Personal Information
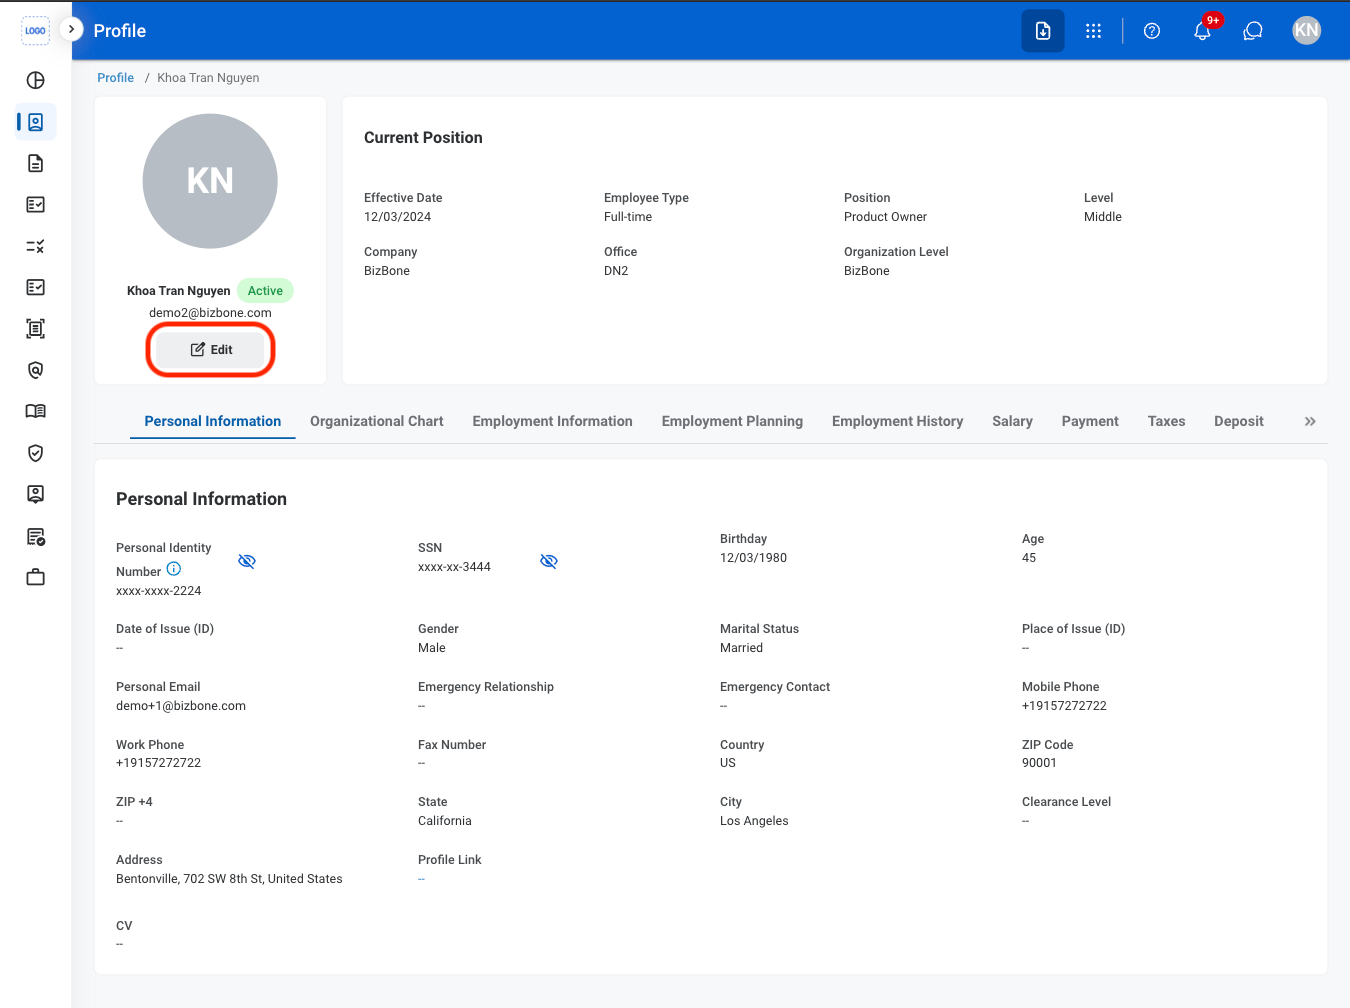
Select Edit
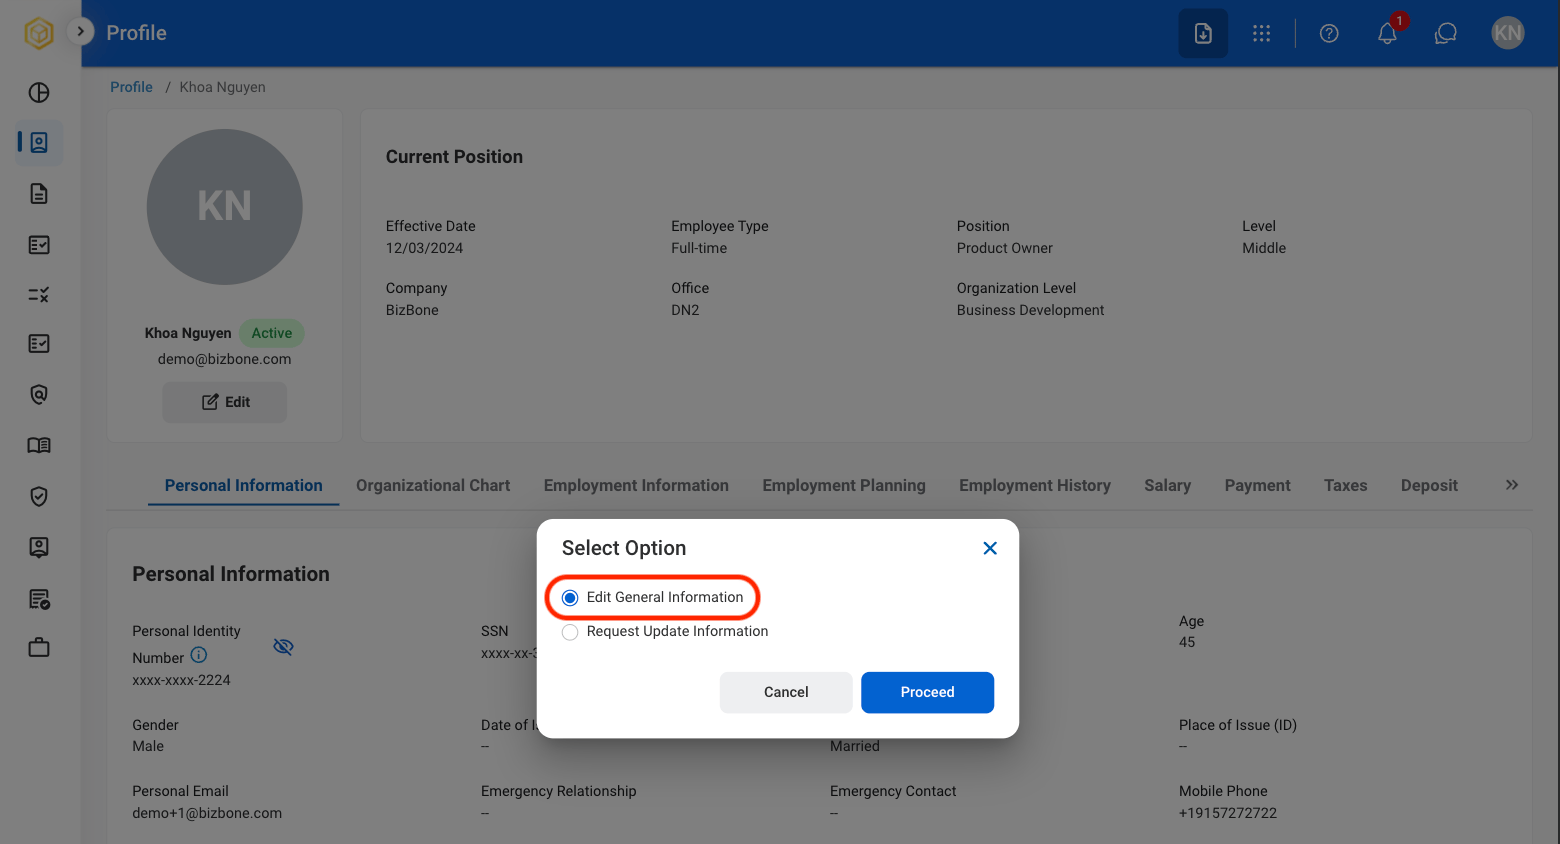
Select Edit General Information
Fill in the required information
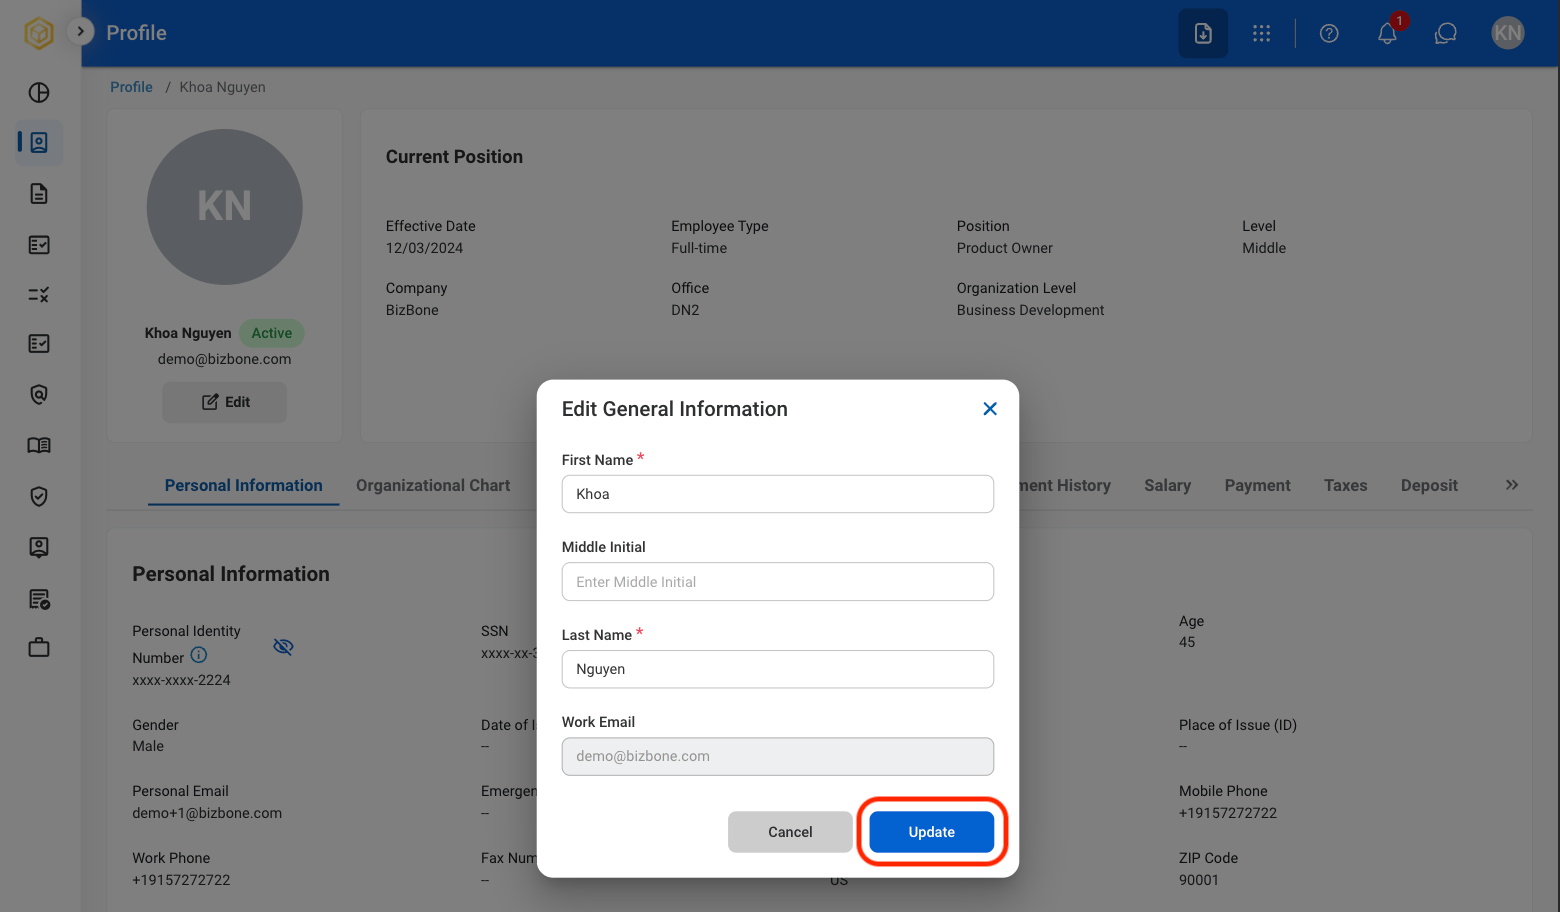
Request to Edit Personal Information
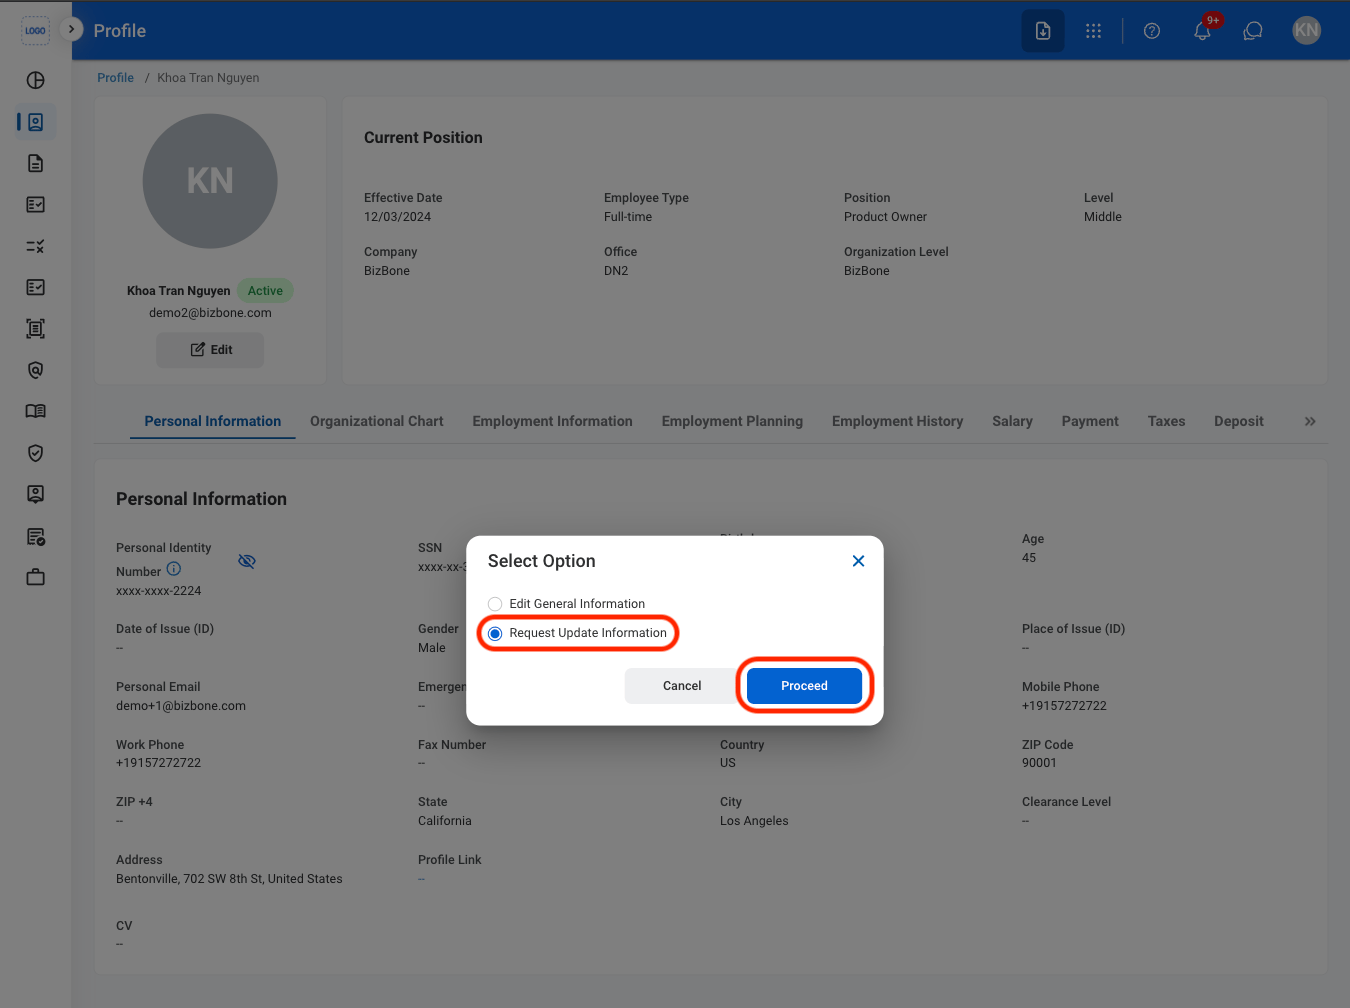
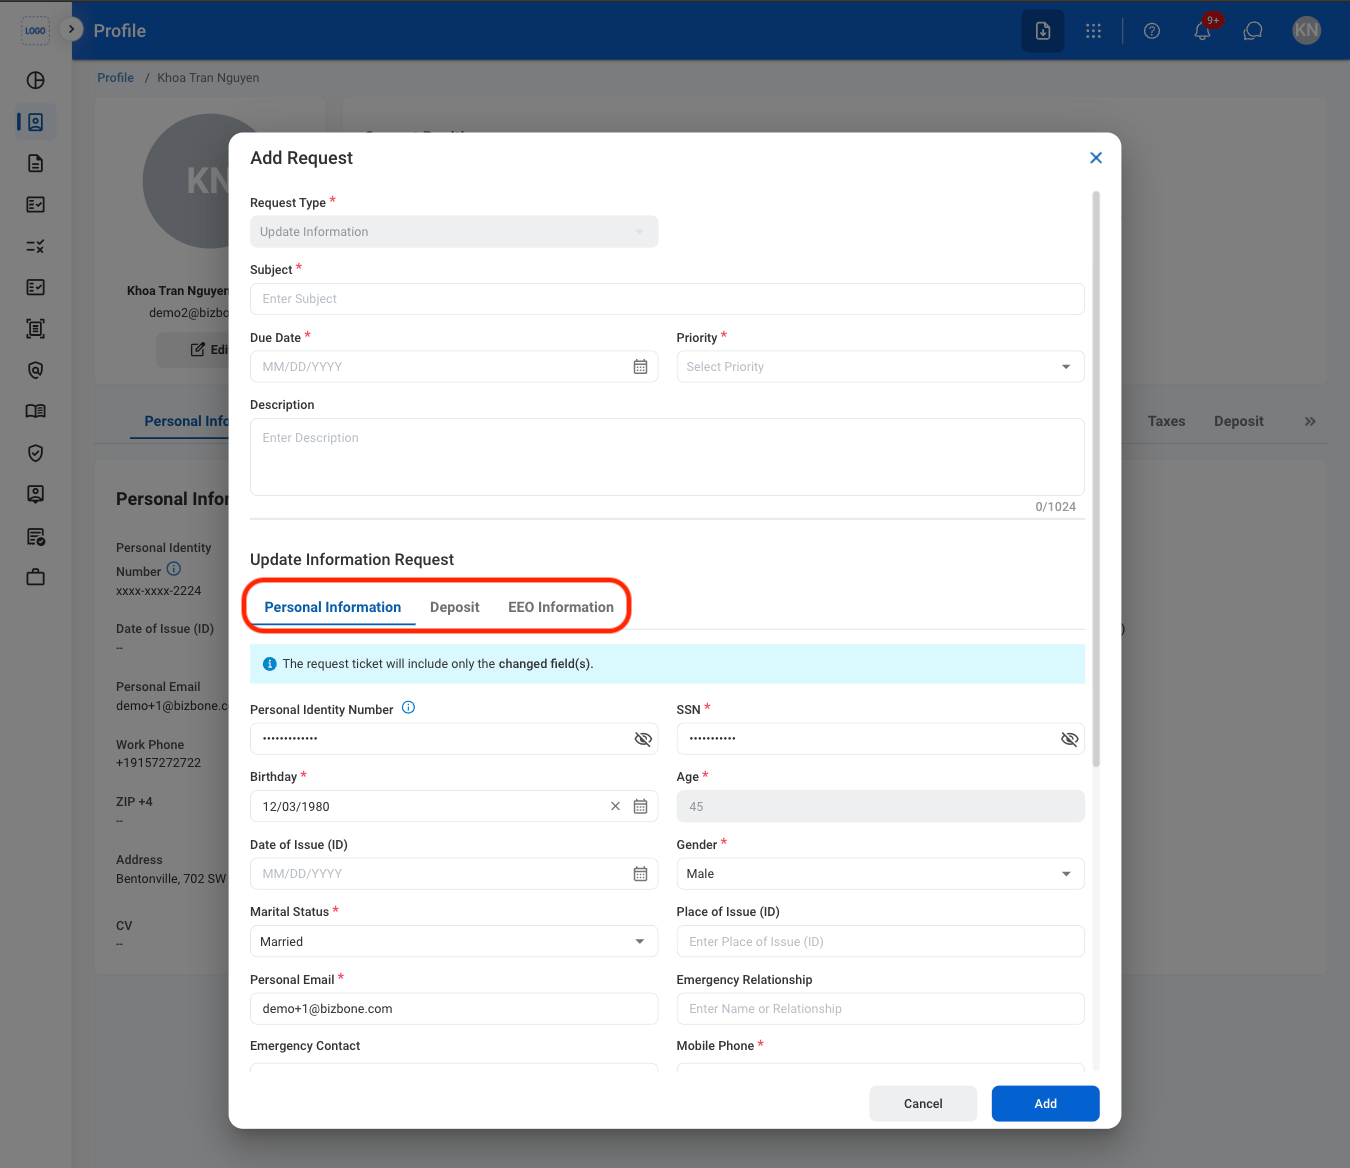
Submit a request to update personal information fields, direct deposit information, and EEO information.Select Edit
Select Request Update Information
Select a tab
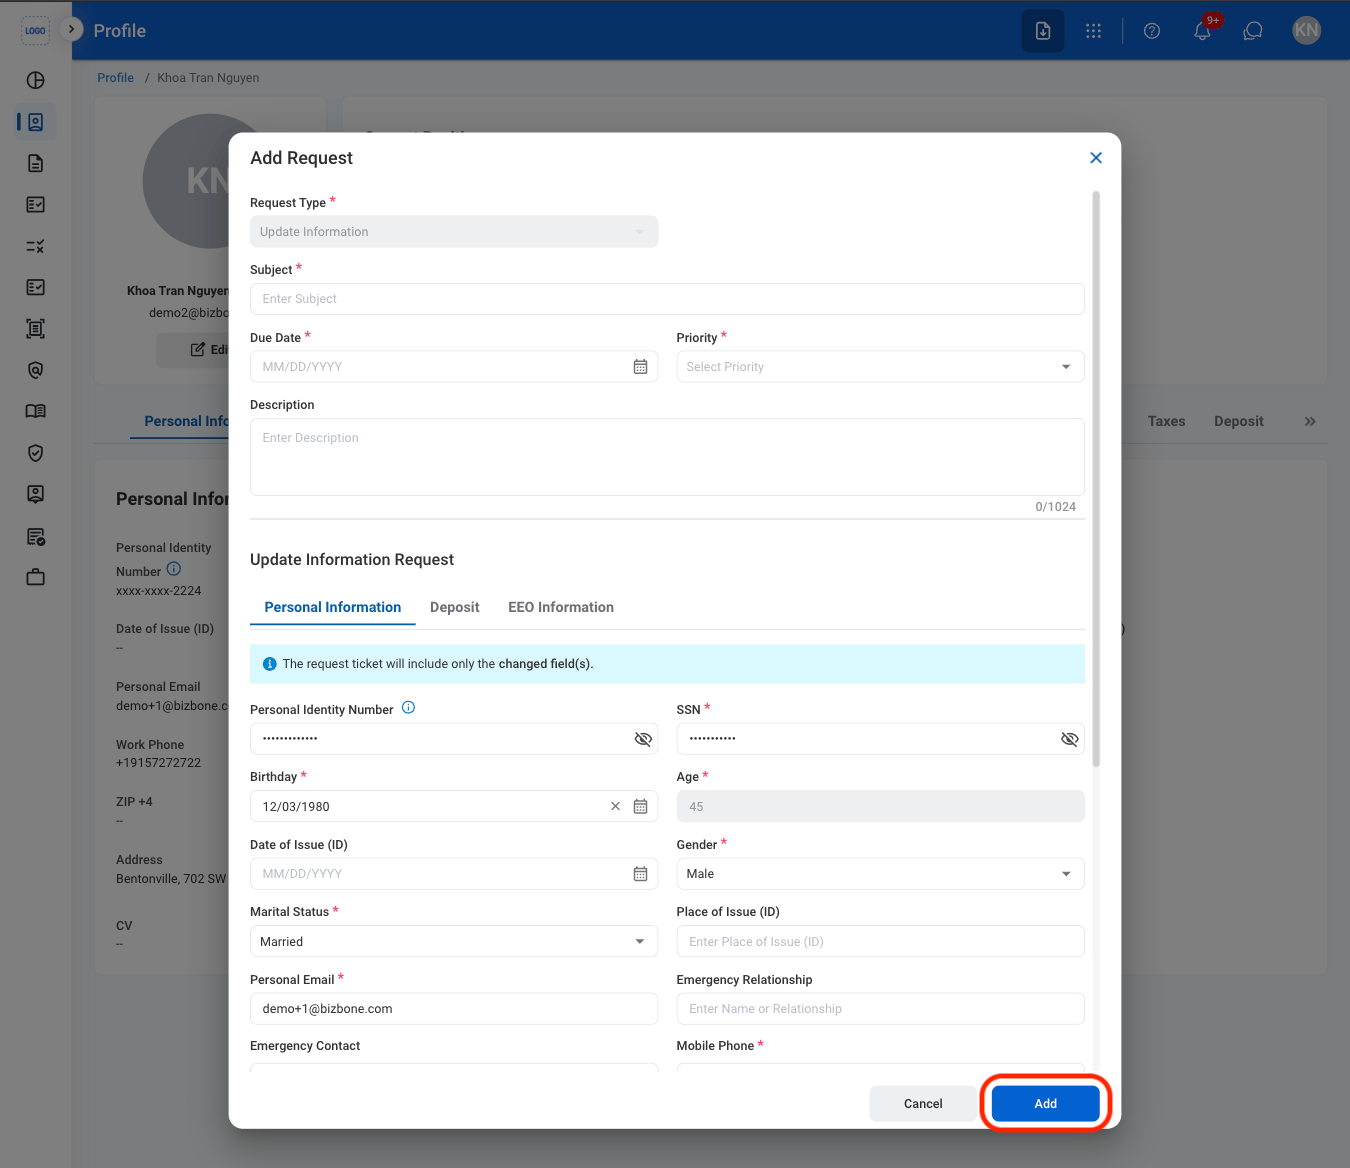
Fill in the required information
Organizational Chart
View Organizational Chart
Navigate to Organizational Chart
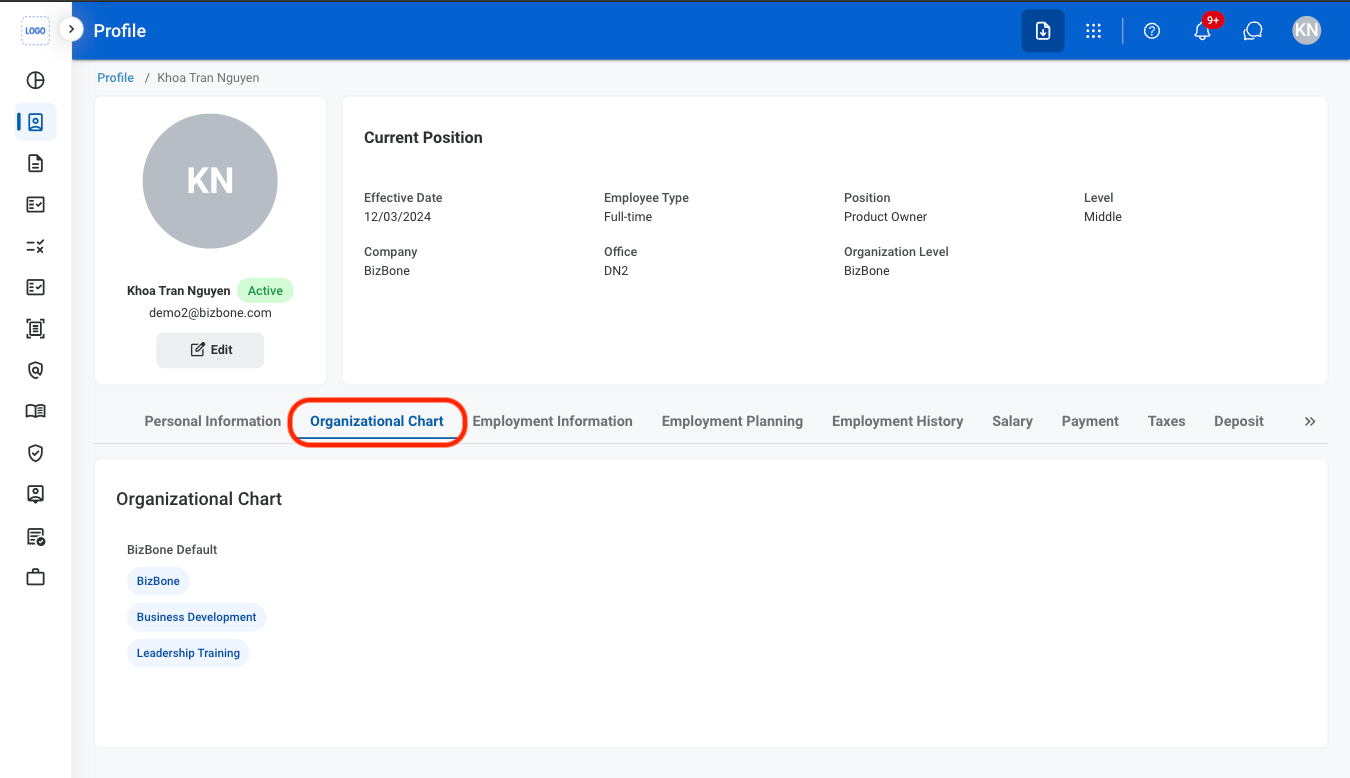
Select a chip
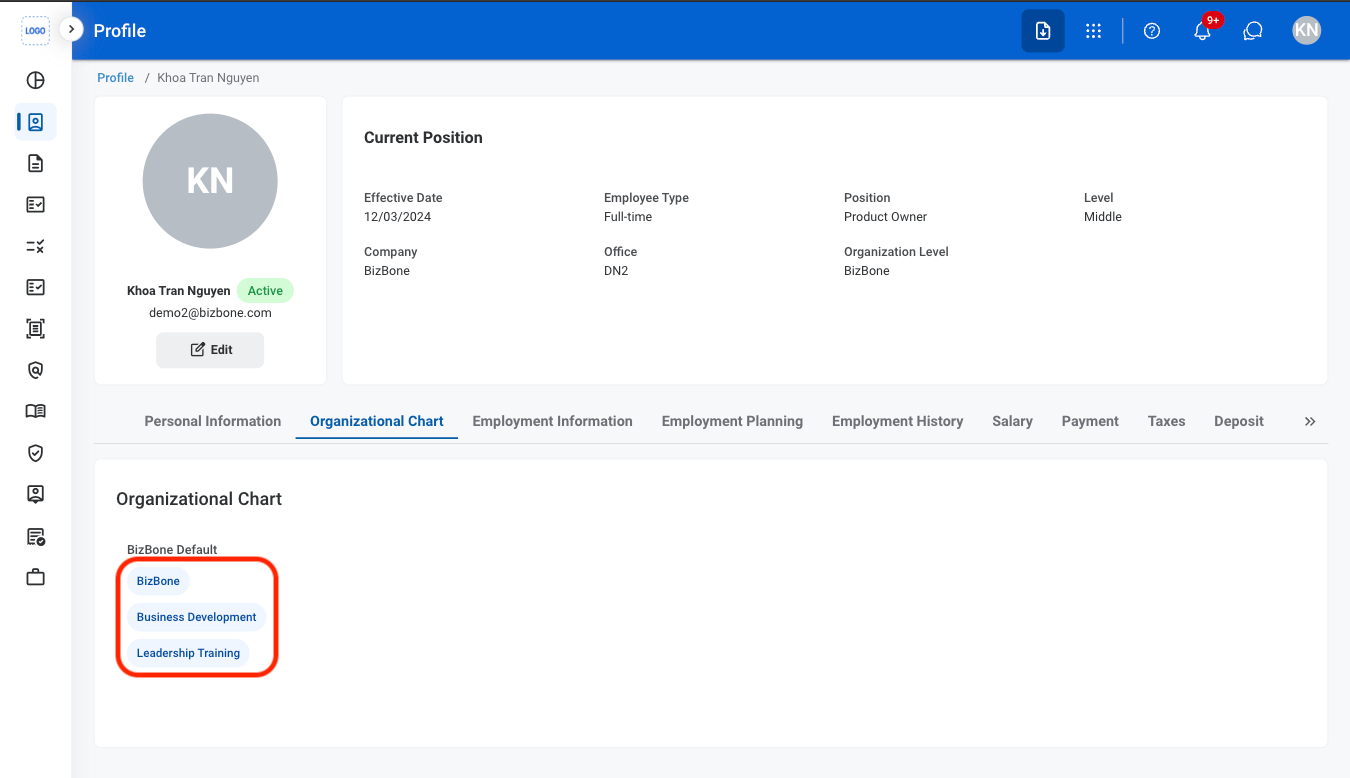
View organizational chart
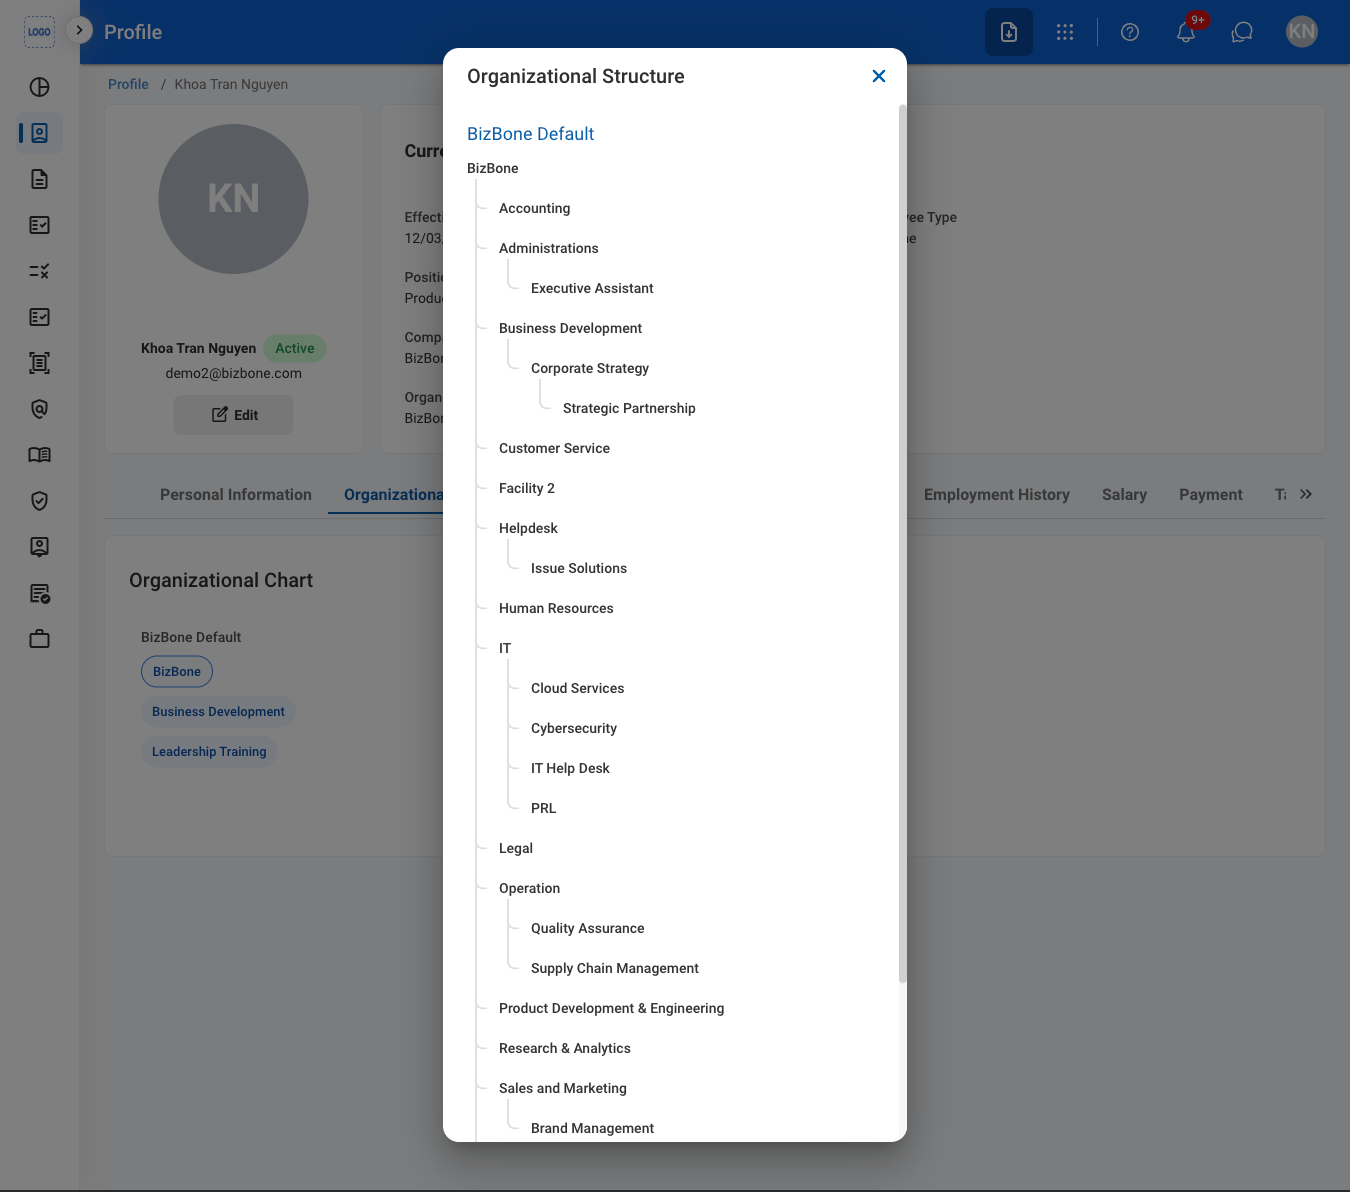
Employment Information
View Employment Information
Navigate to Employment Information
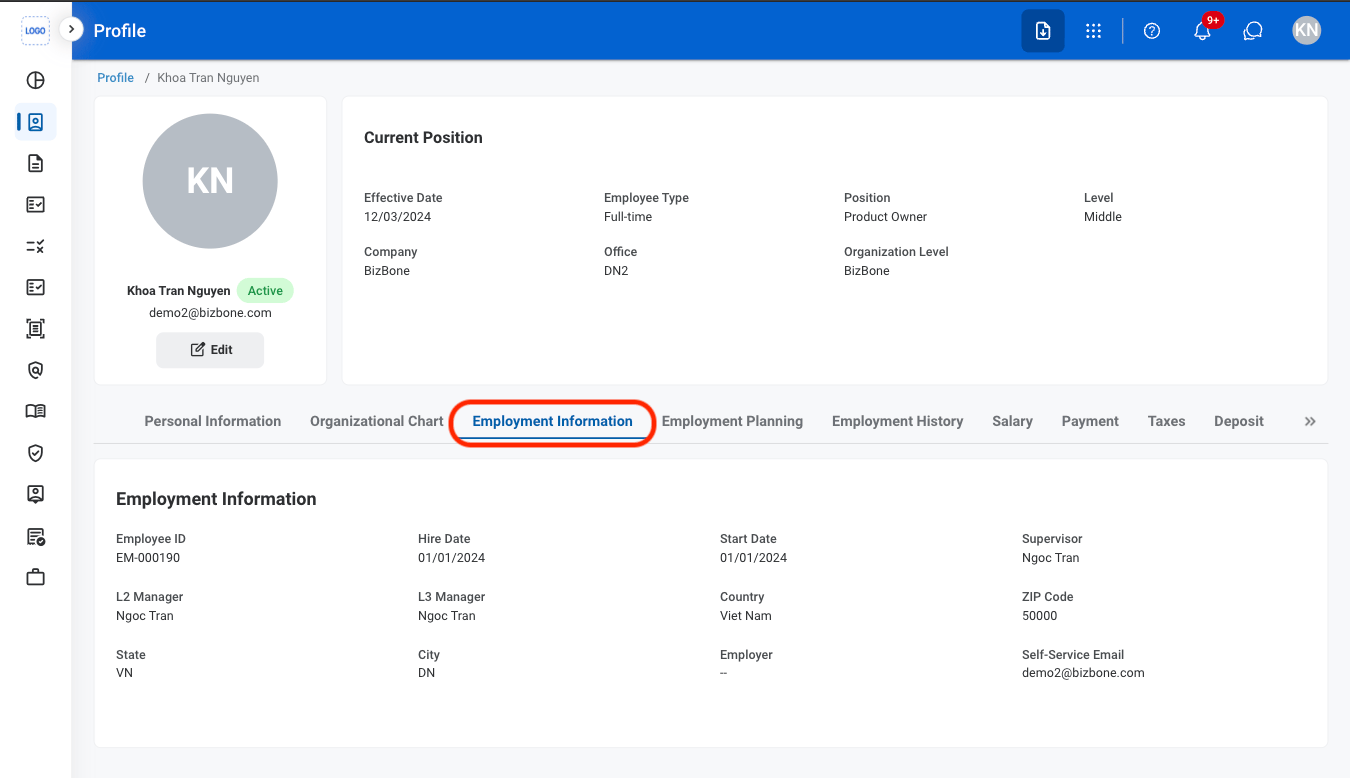
Employment Planning
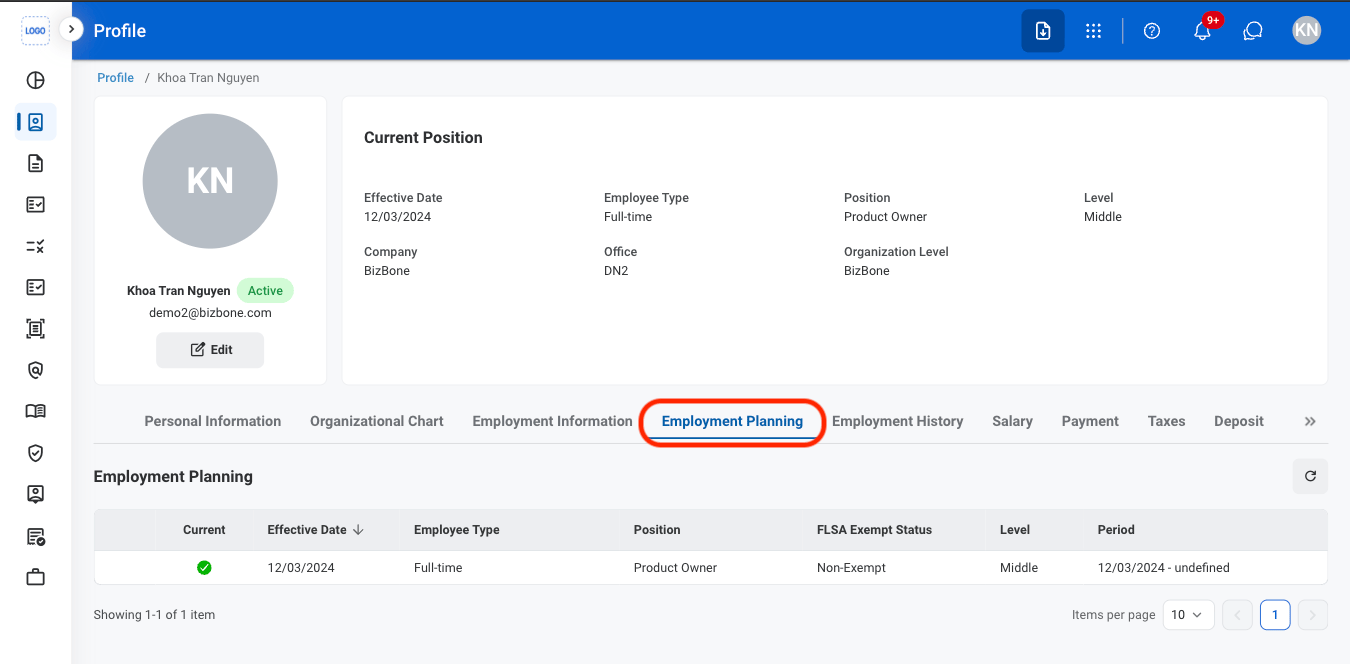
View Employment Planning
Navigate to Employment Planning
Employment History
Add Employment History
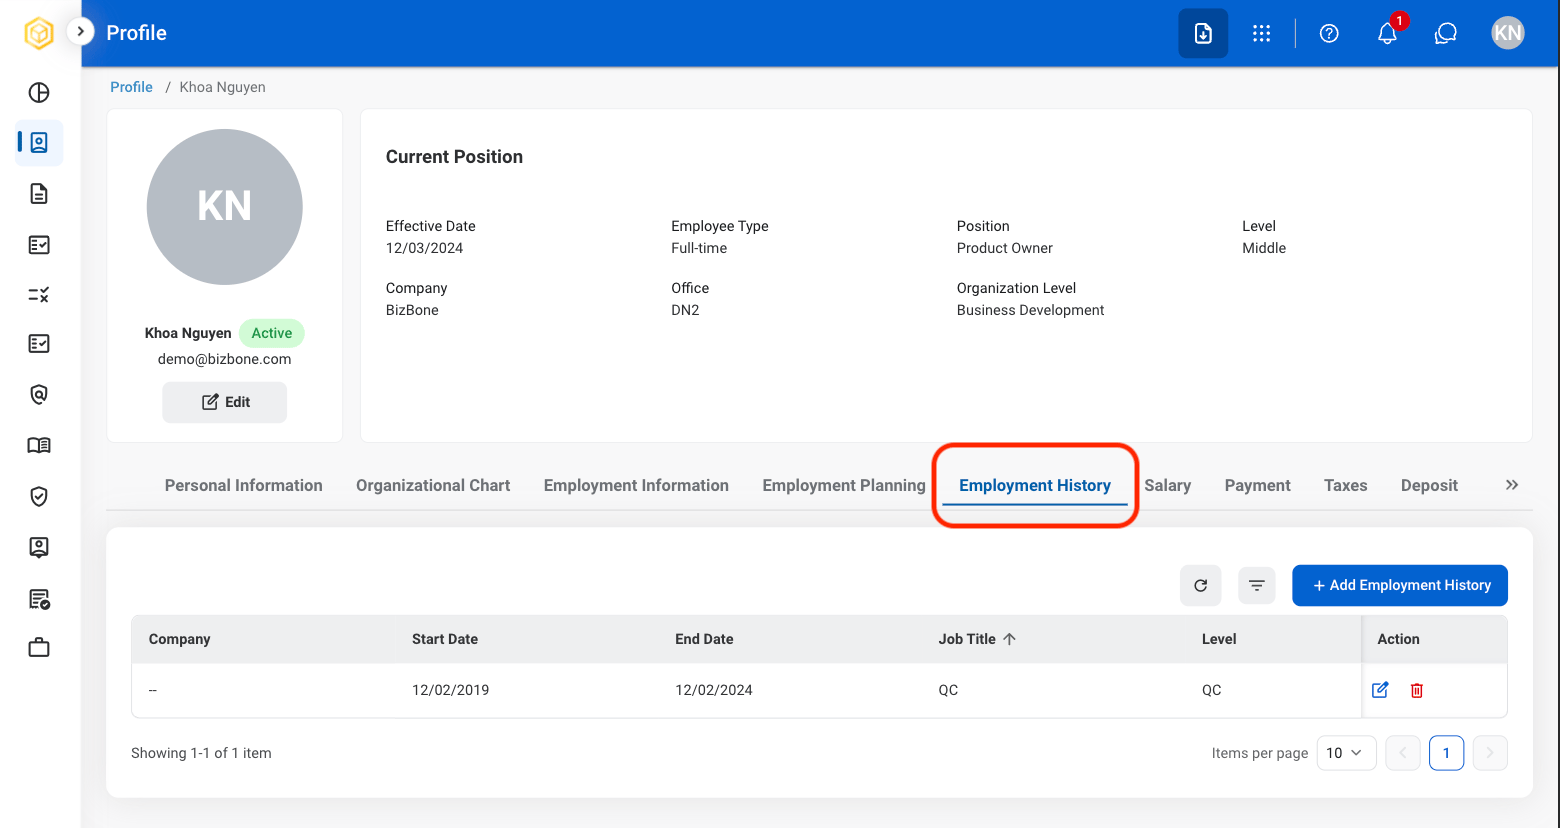
Navigate to Employment History
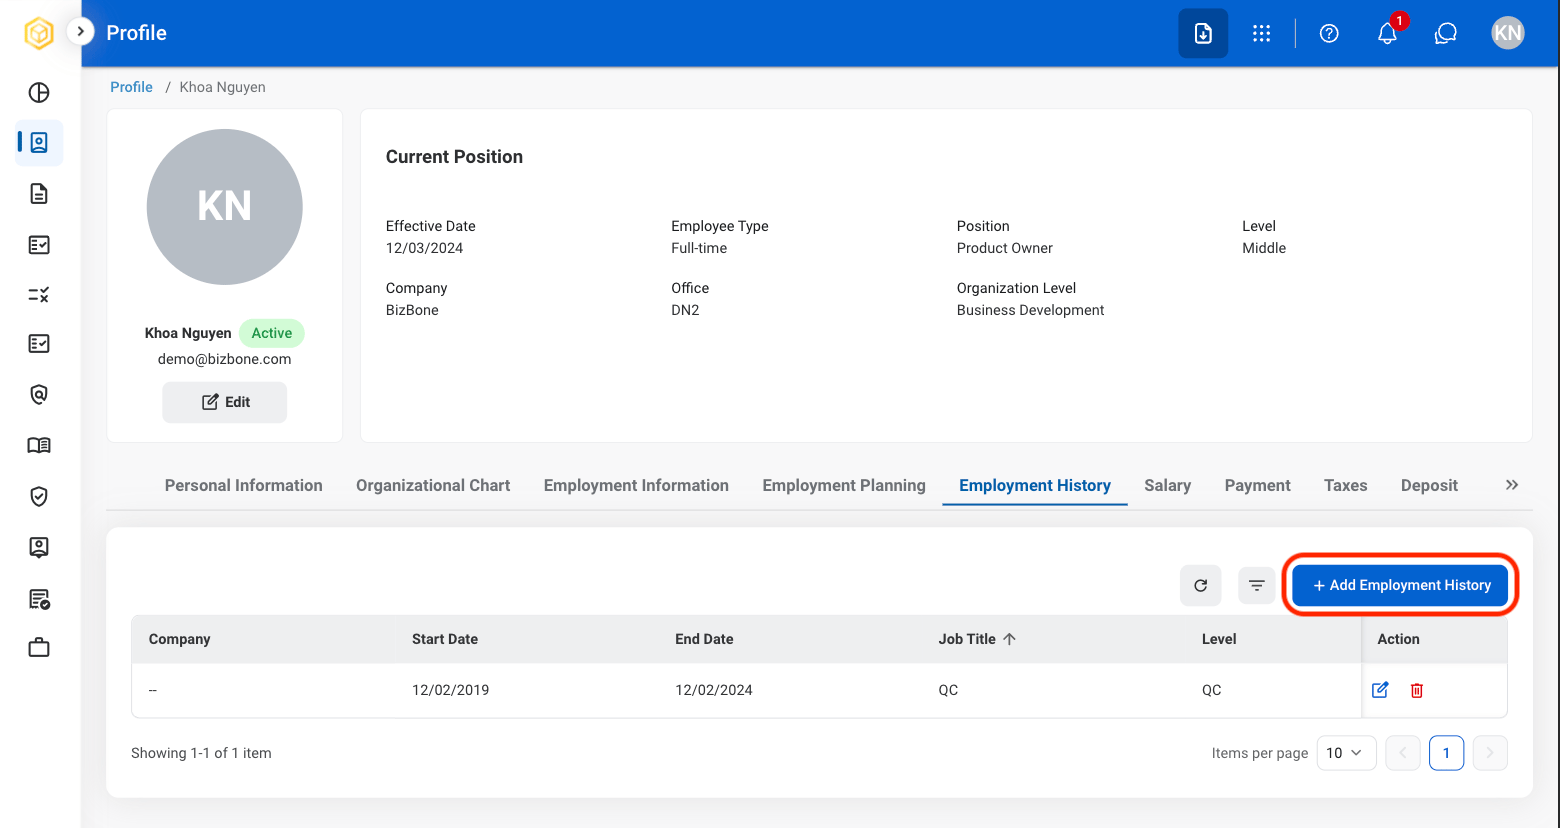
Select Add Employment History
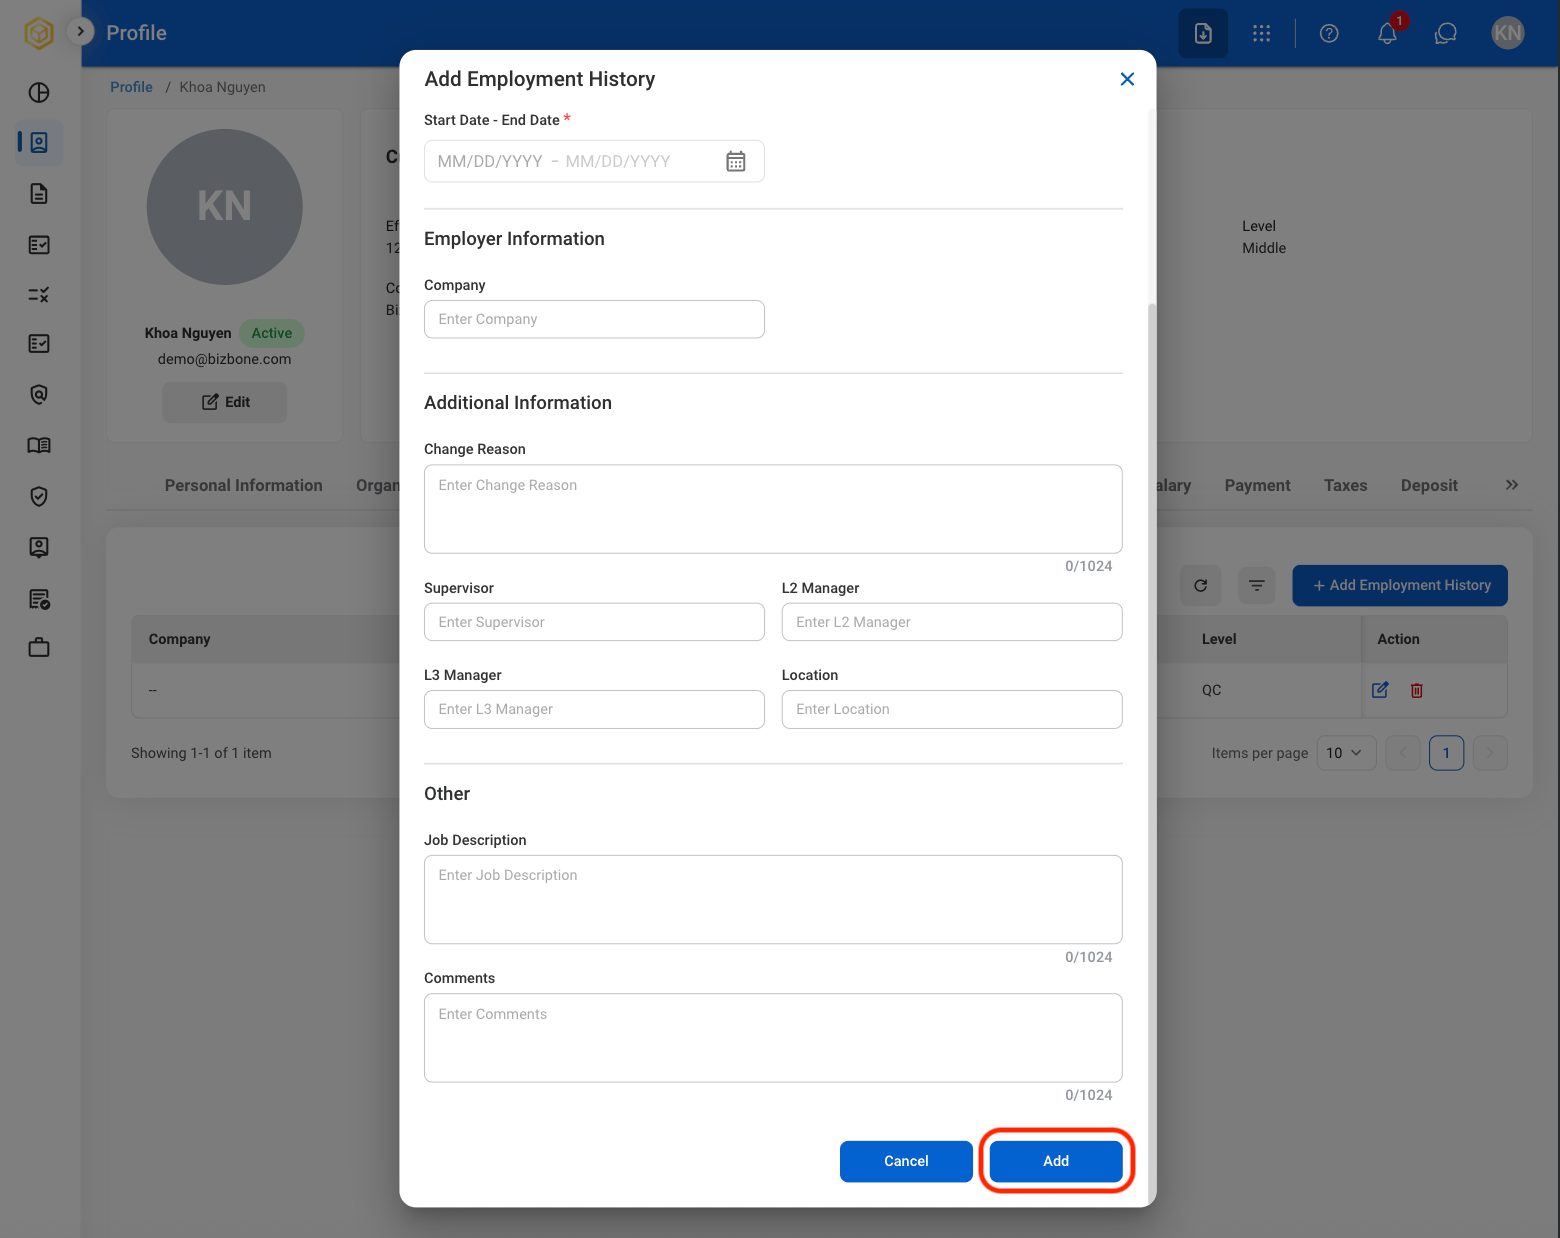
Fill in the required information
Modify Employment History
Select an action
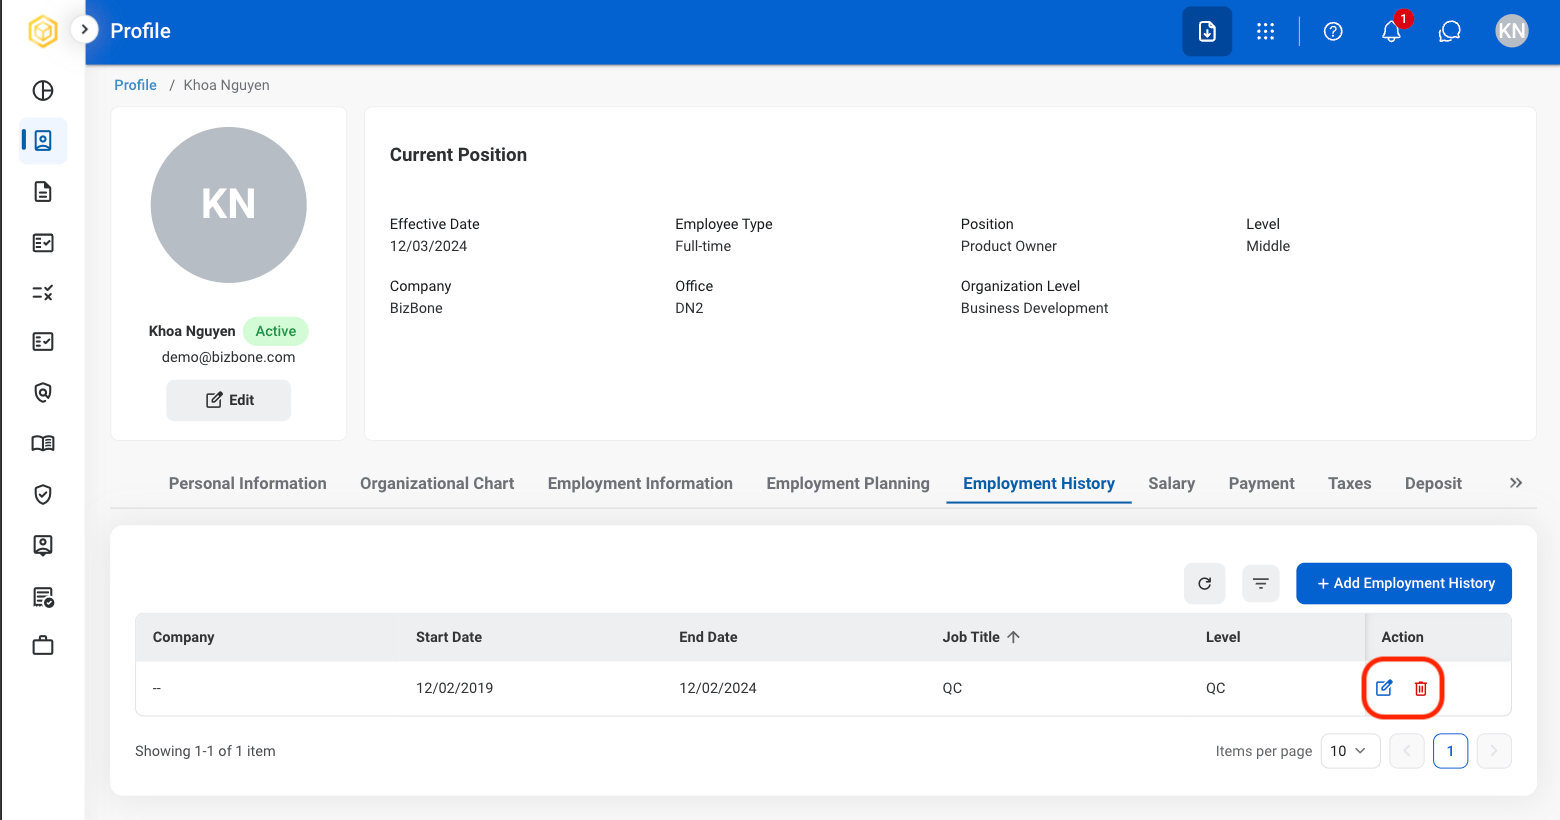
- To Edit: Select the edit icon to update an existing entry.
- To Delete: Select the trash icon to delete an existing entry.
Confirm the action
- Edit: Fill in the required information. Select Update to complete or Cancel to exit without saving changes.
- Delete: Select Delete to complete or Cancel to exit without saving changes.
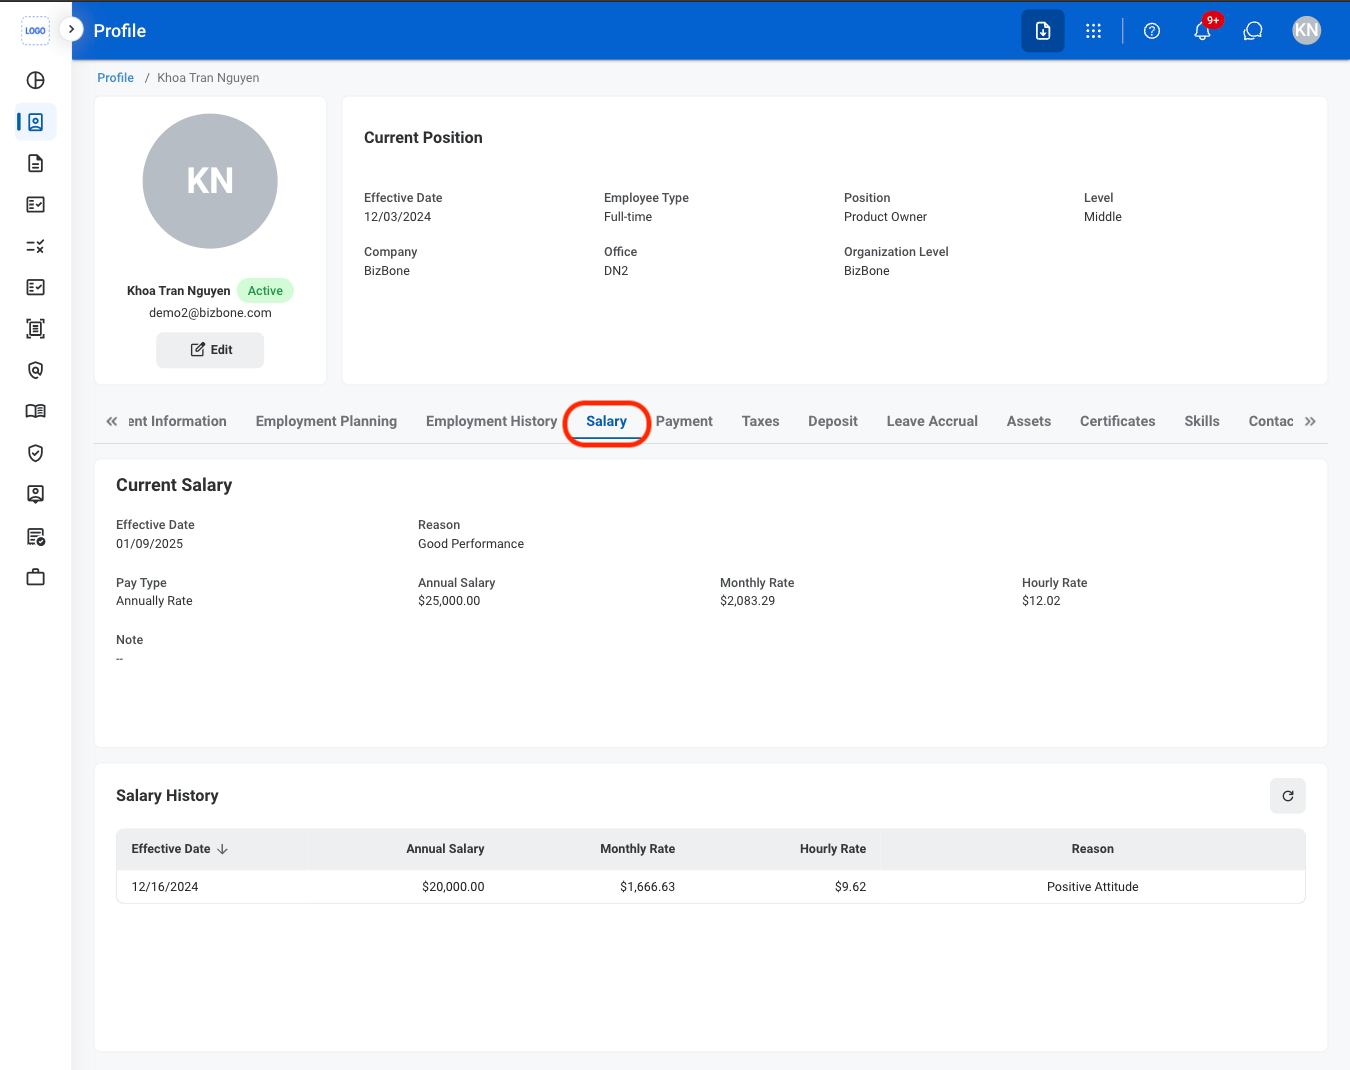
Salary
View Salary Information
Navigate to Salary
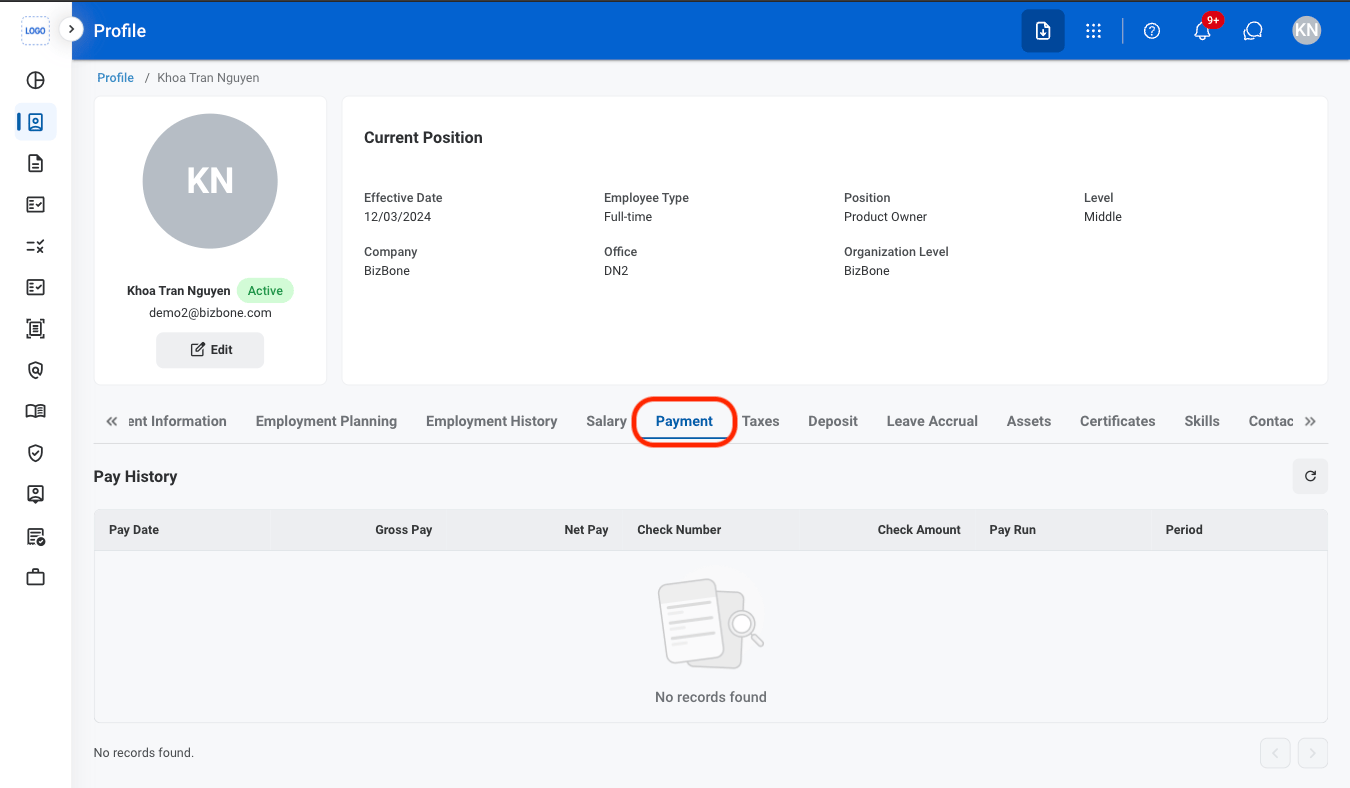
Payment
View Pay History
Navigate to Payment
Taxes
View Uploaded Tax Forms
Navigate to Taxes
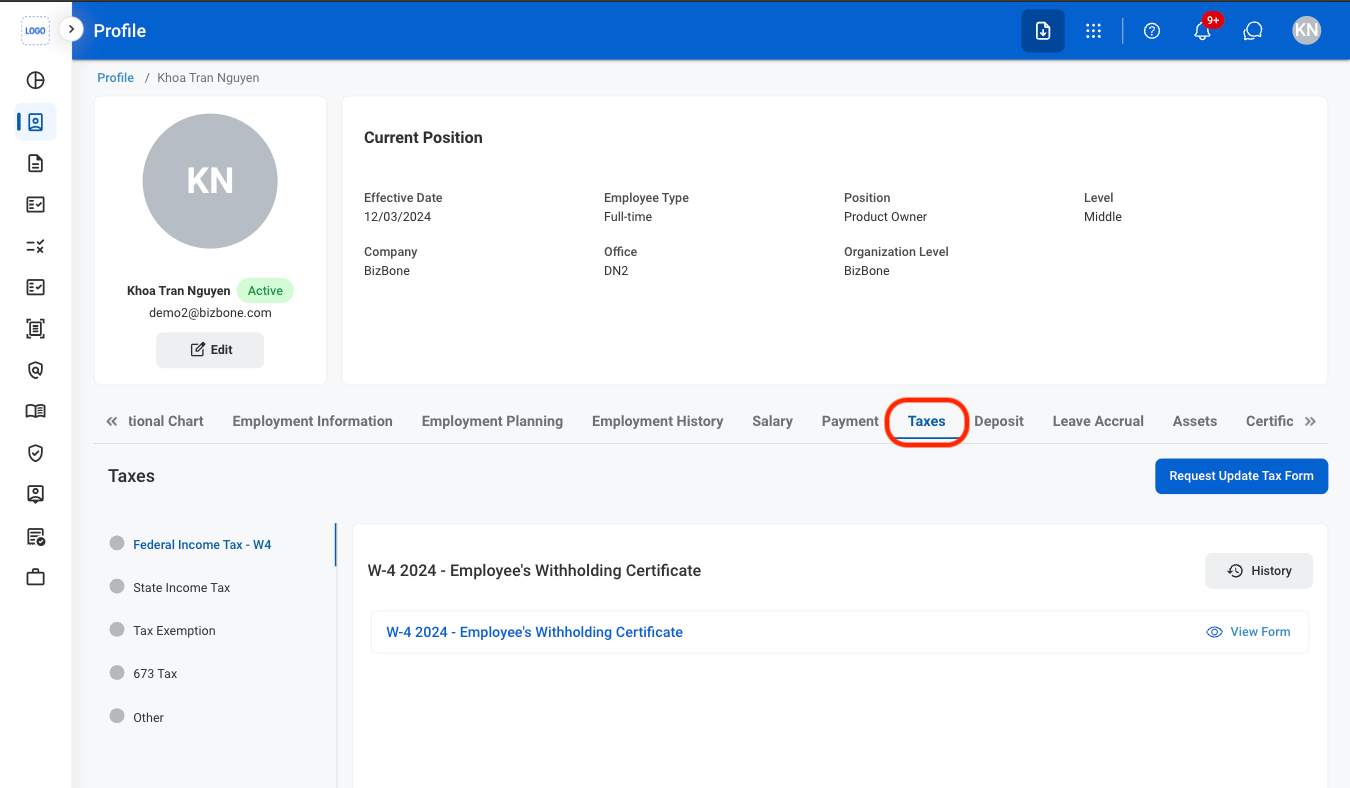
Select a tab
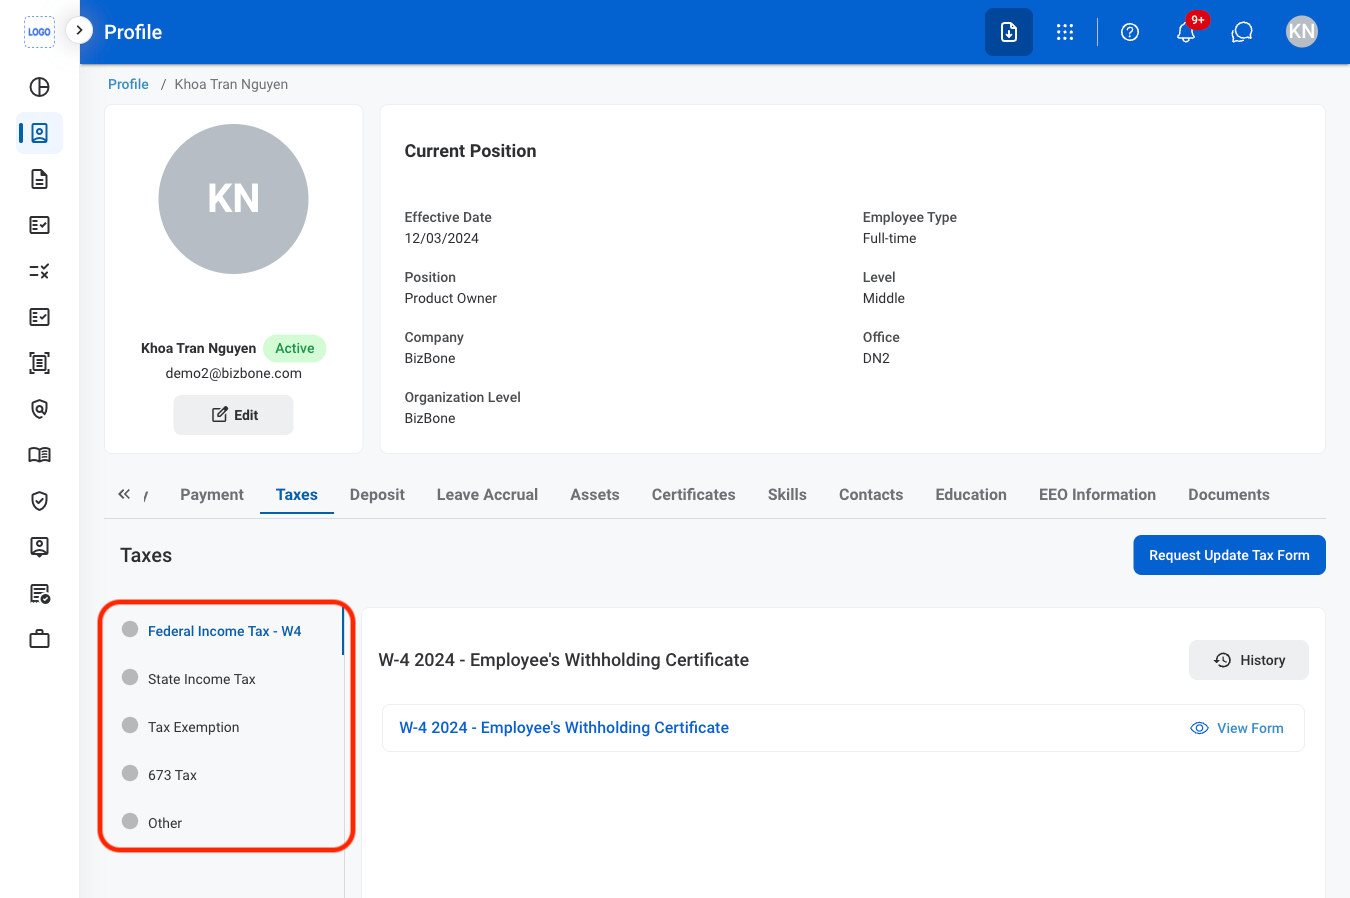
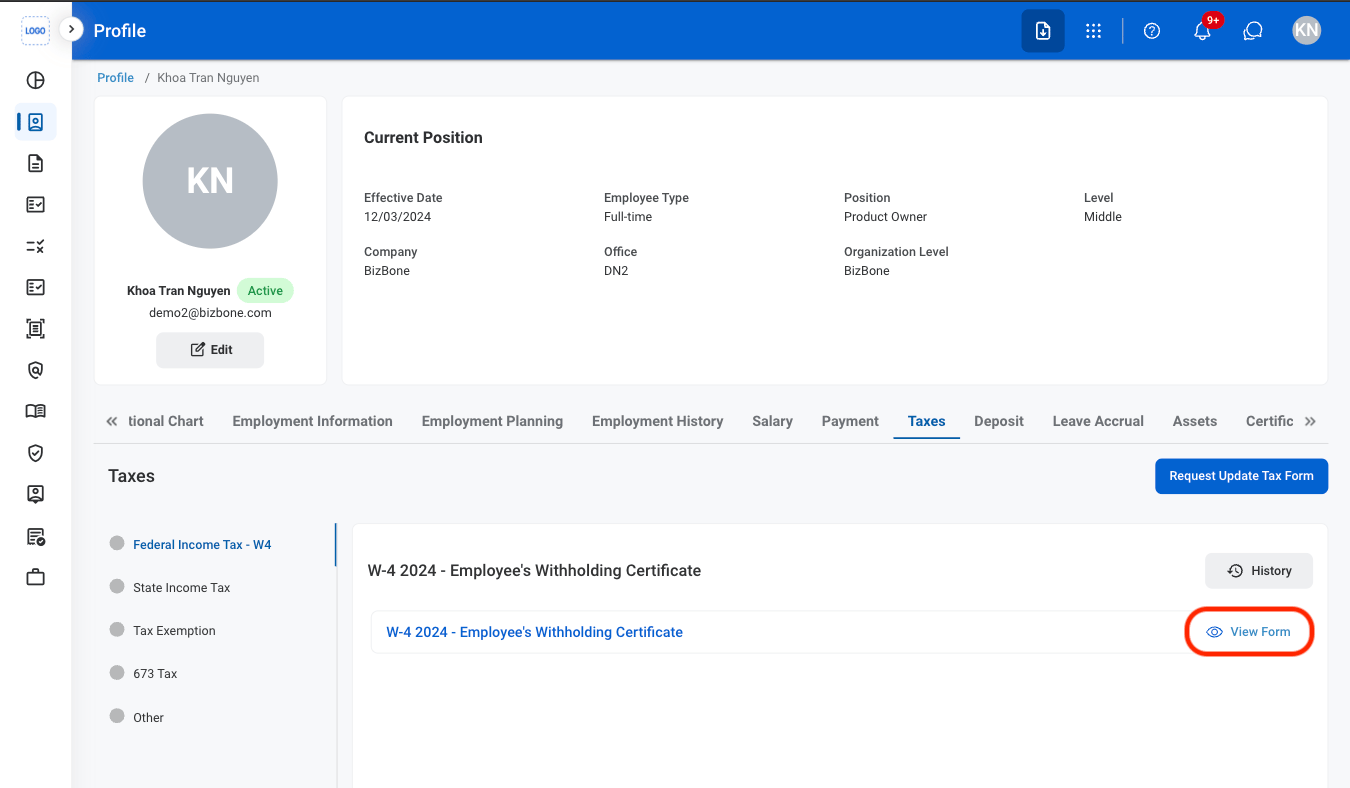
Select View Form
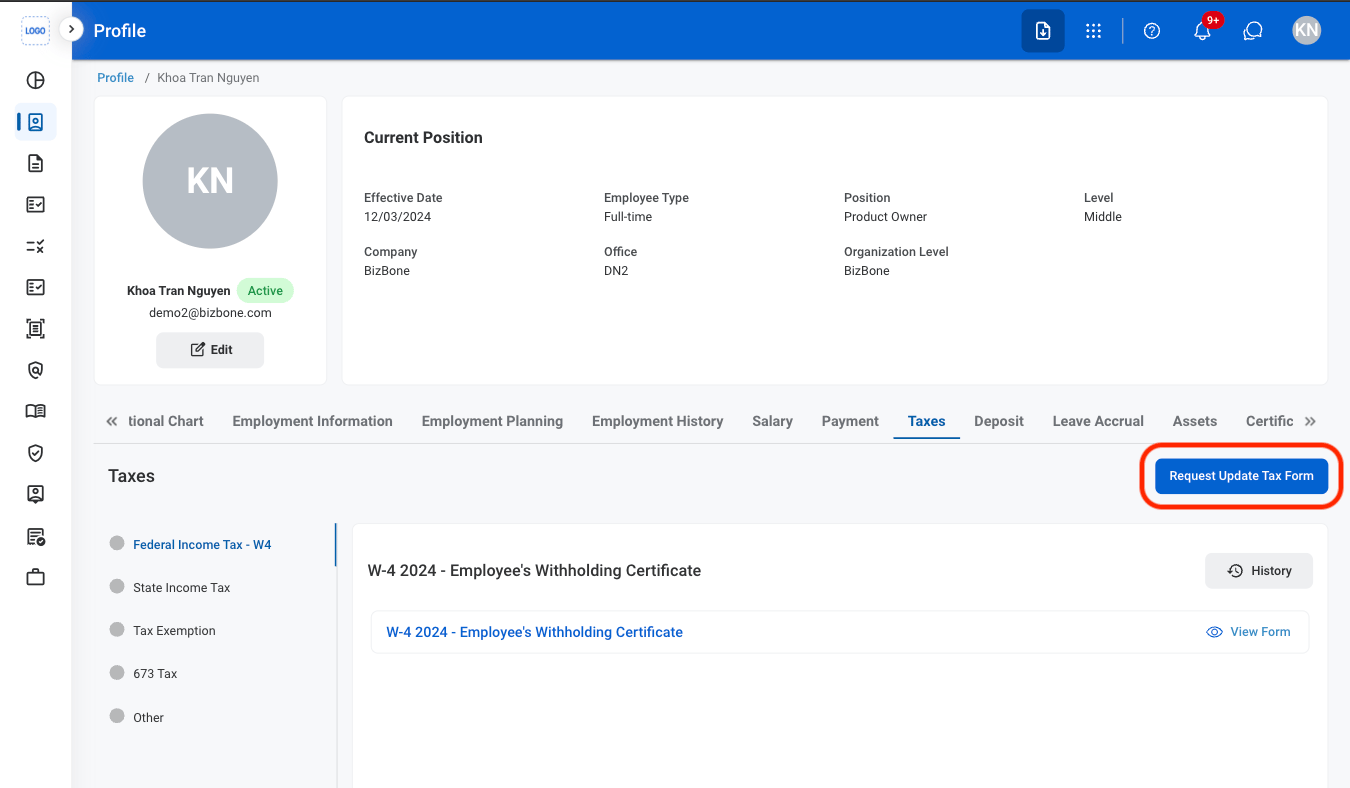
Request to Update Tax Forms
Select Request Update Tax Form
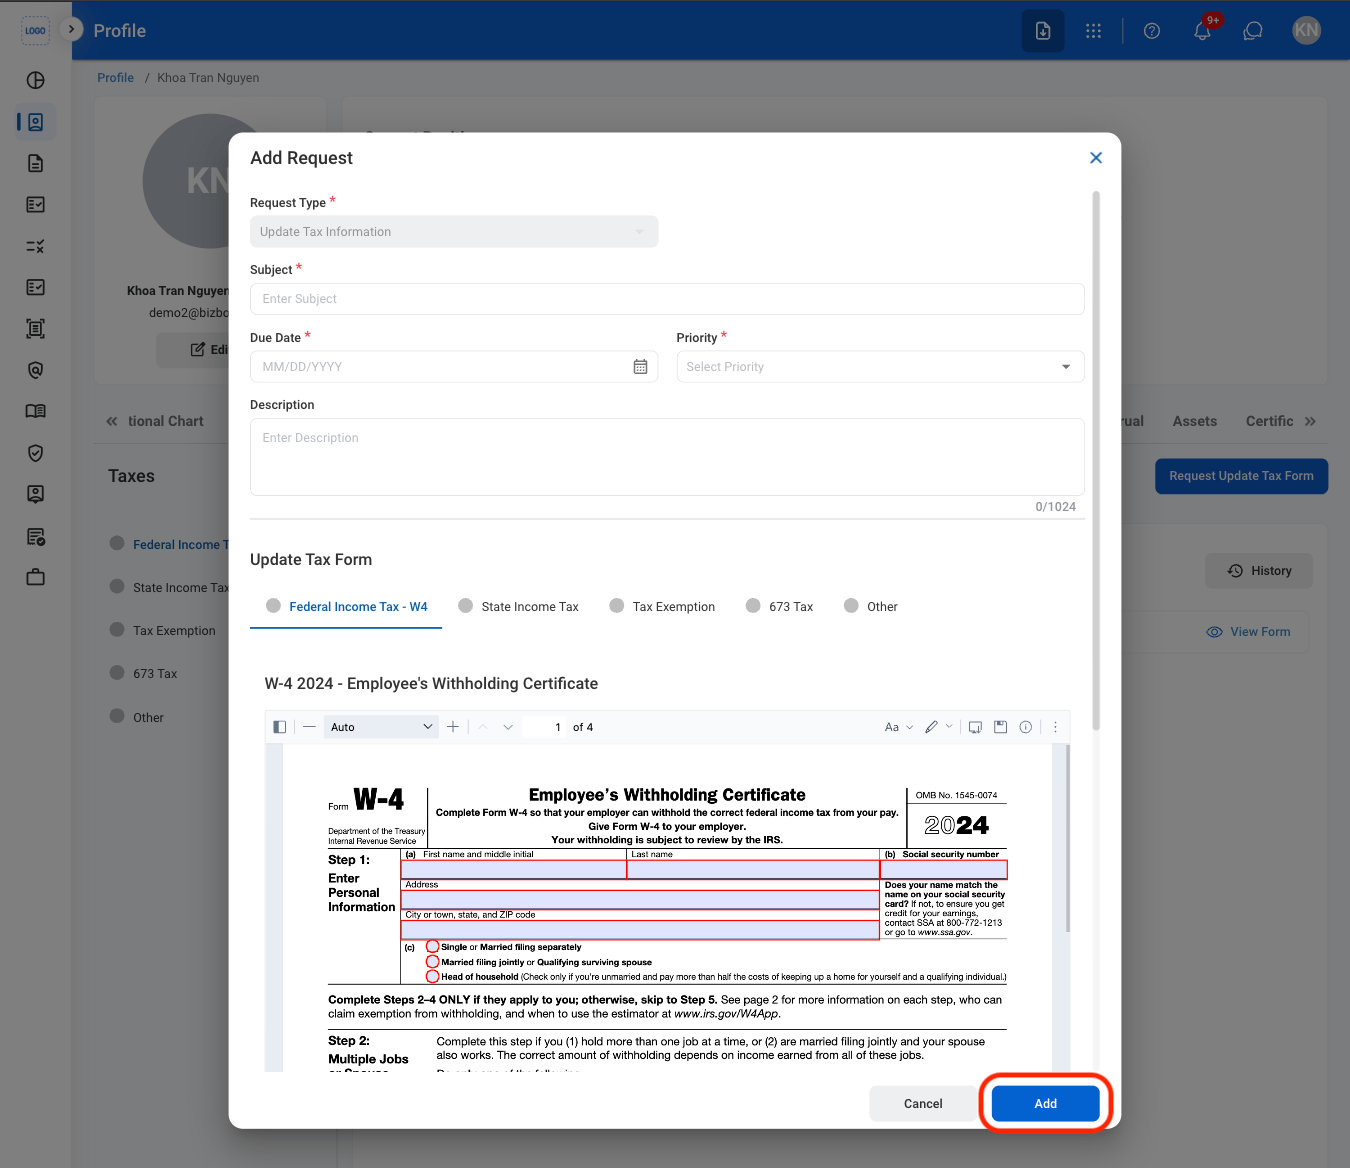
Fill in the required information
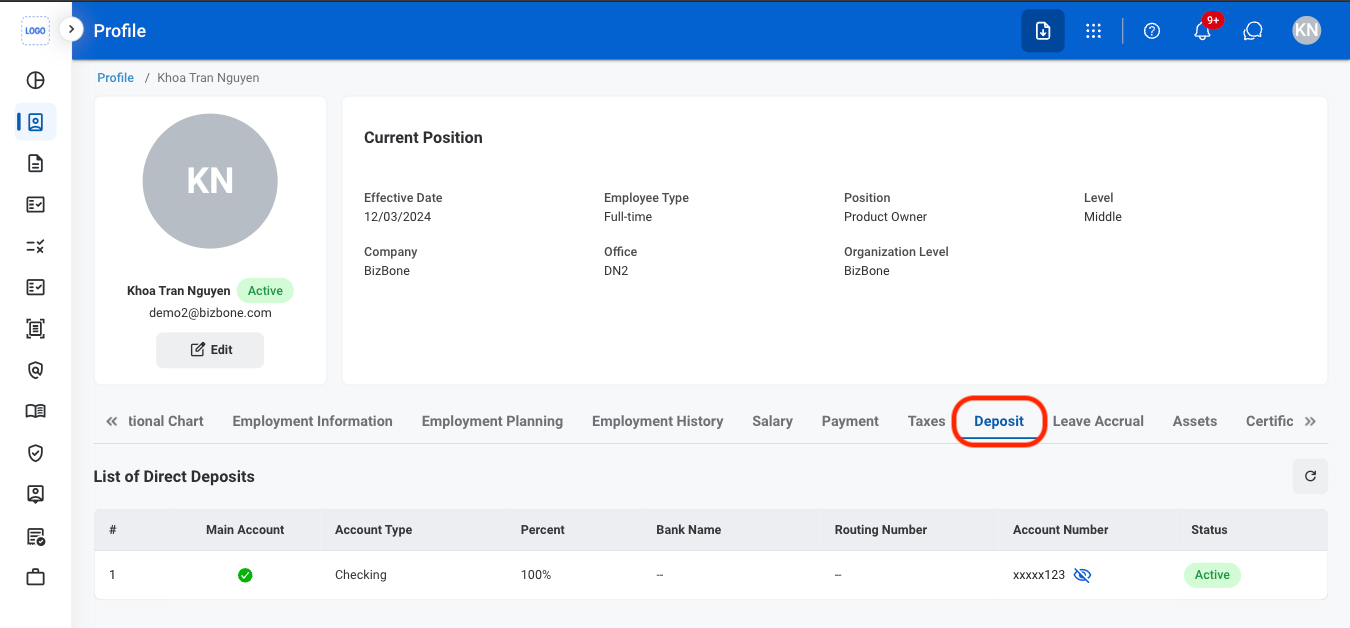
Deposit
View Direct Deposit Information
Navigate to Deposit
Leave Accrual
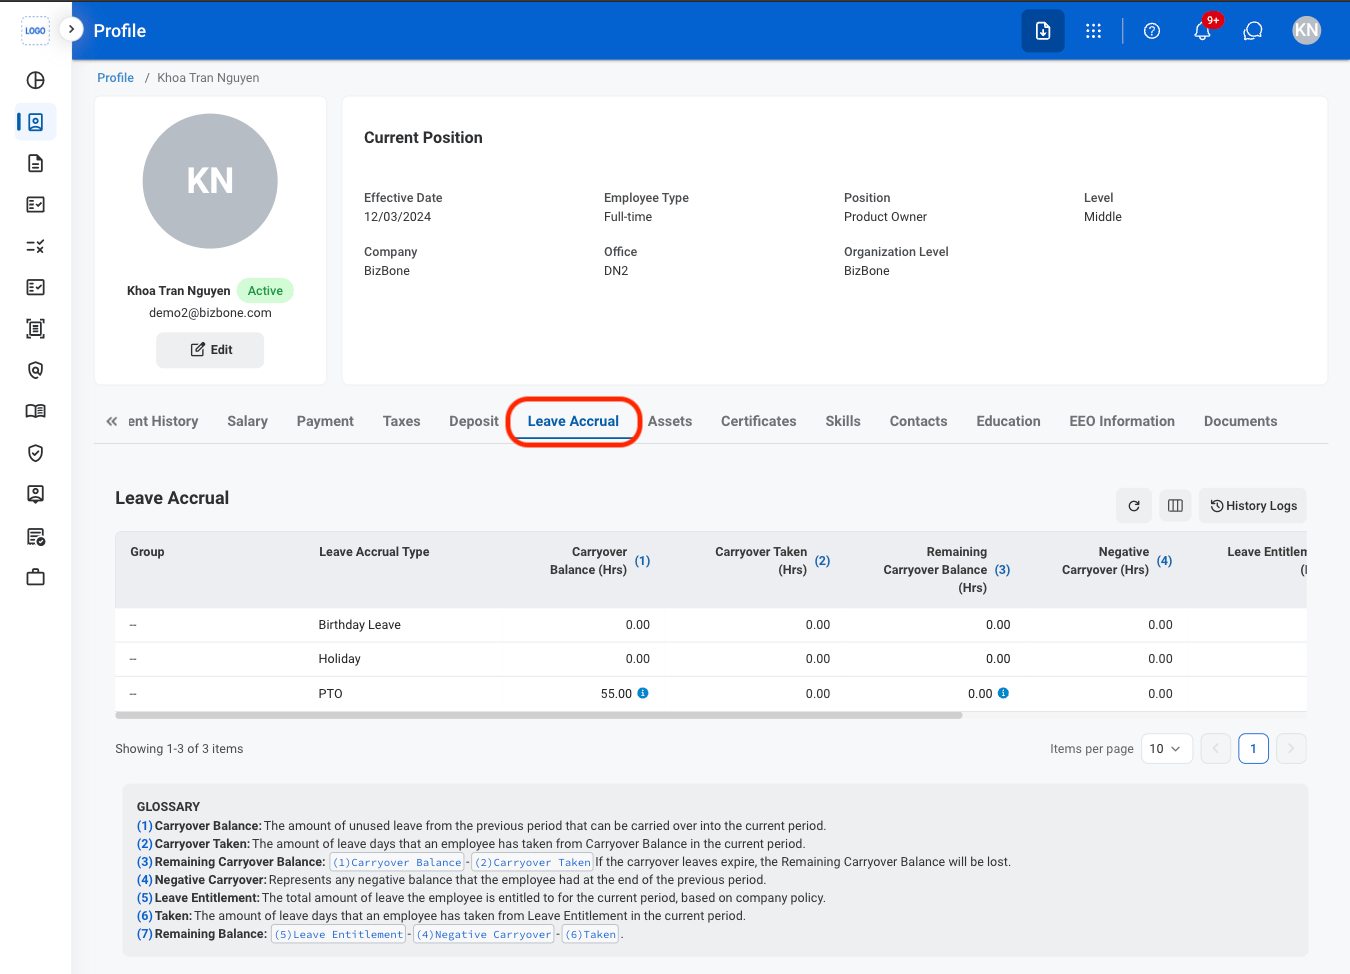
Glossary
Glossary
Carryover Balance
Carryover Balance
Taken Carryover Leaves
Taken Carryover Leaves
Remaining Carryover Balance
Remaining Carryover Balance
Negative Carryover
Negative Carryover
Leave Entitlement
Leave Entitlement
Taken Leaves
Taken Leaves
Remaining Balance
Remaining Balance
View Leave Accrual
Navigate to Leave Accrual
Assets
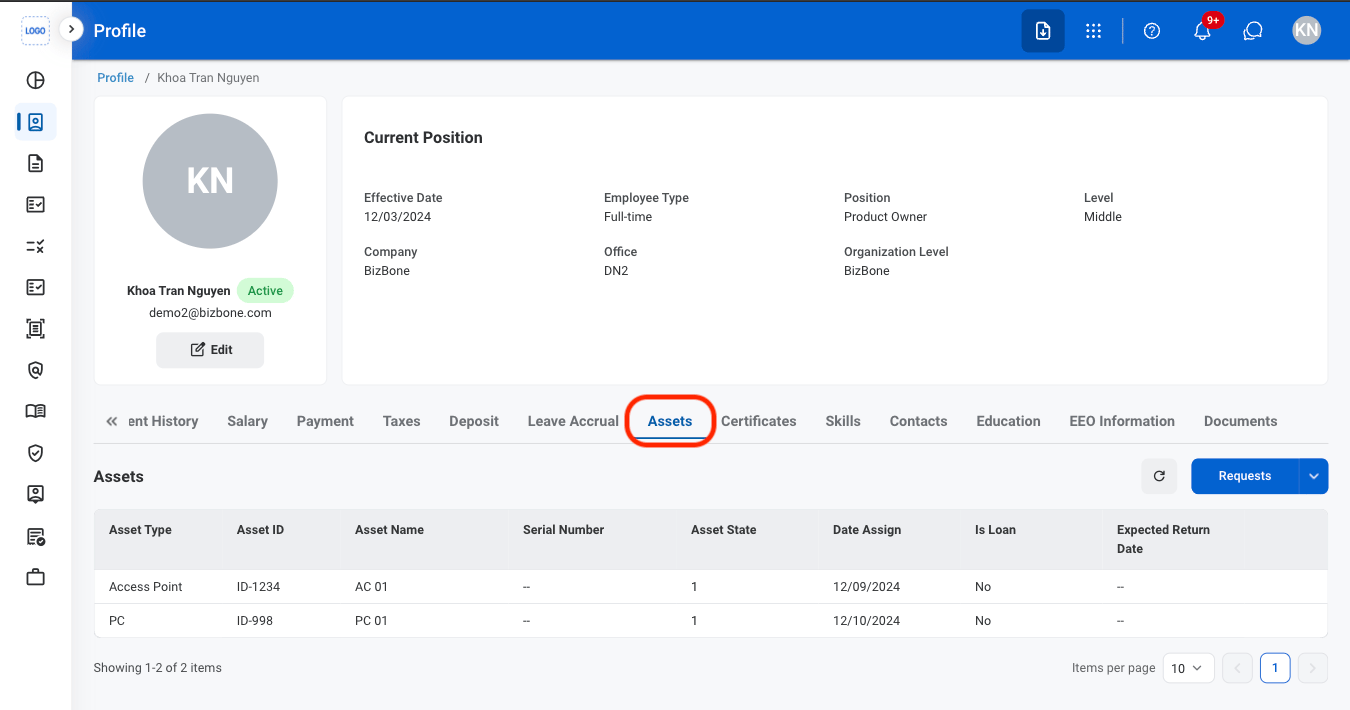
Request an Asset
Navigate to Assets
Select Requests
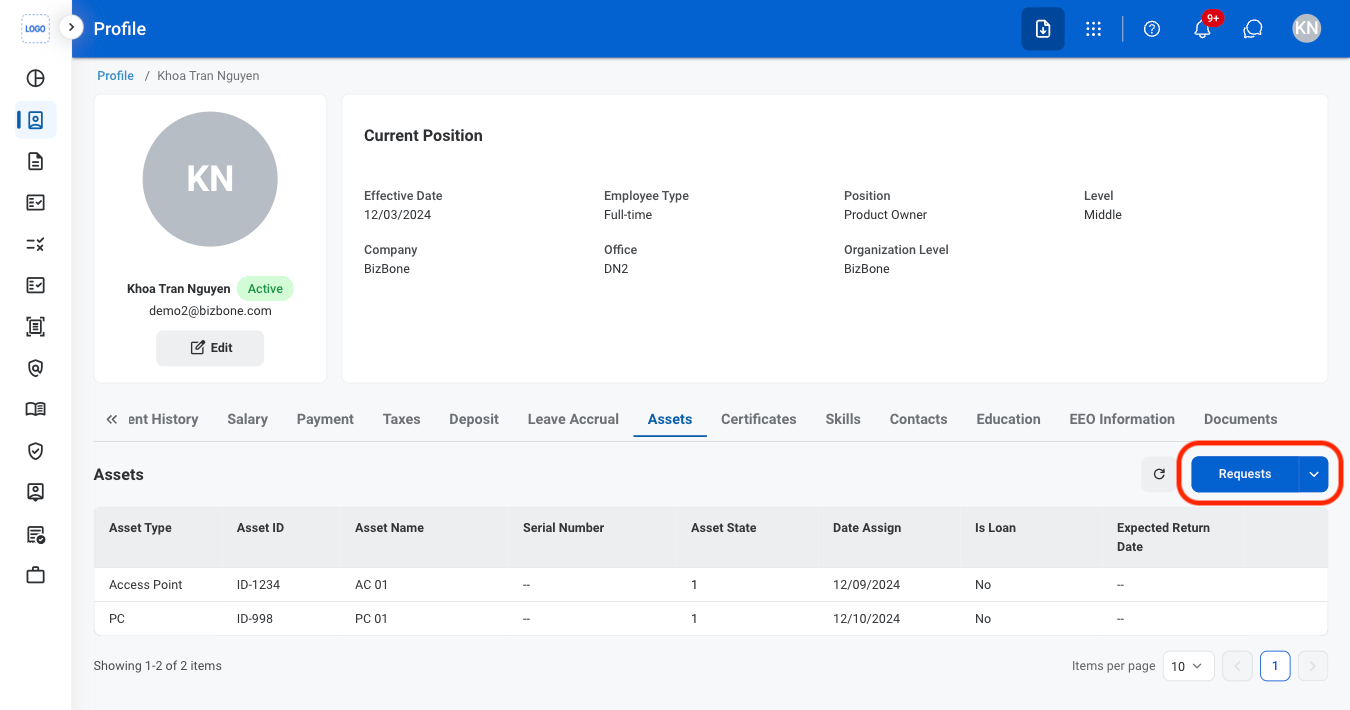
Select an asset type
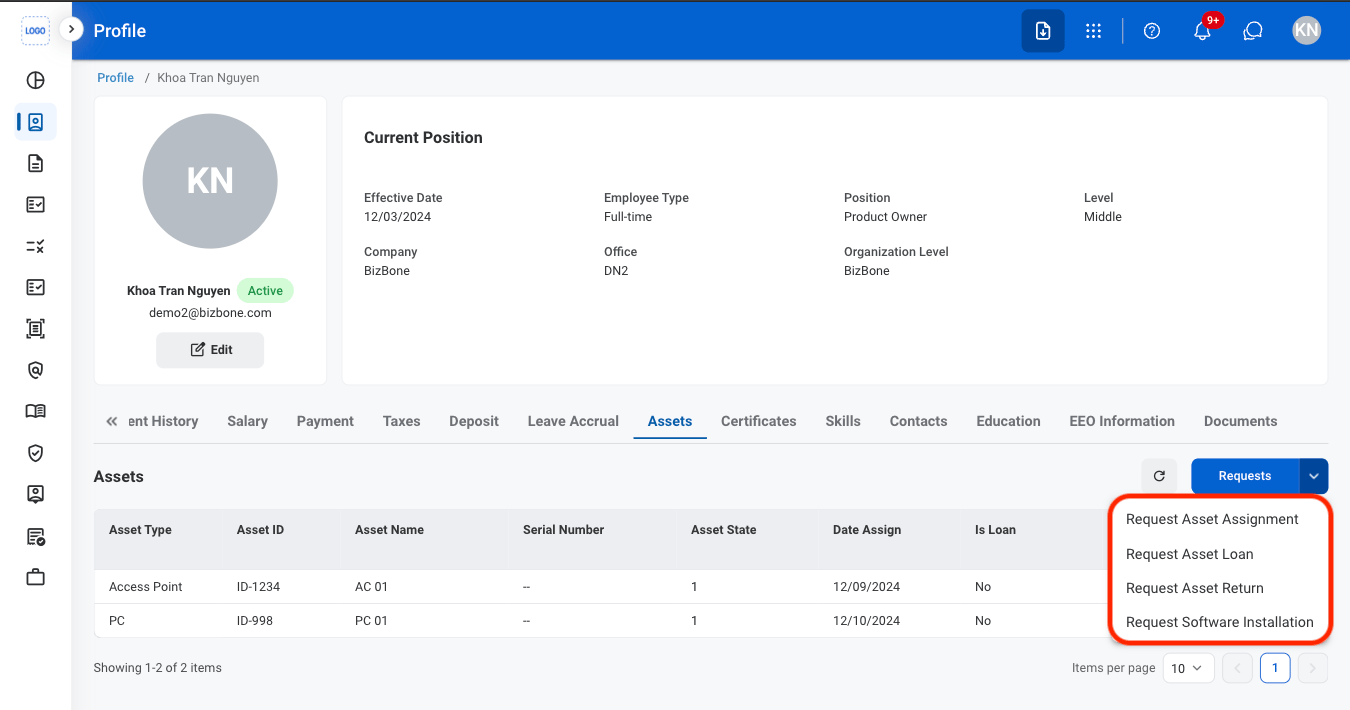
- Request Asset Assignment: Request an IT asset to be assigned to you for ongoing use.
- Request Asset Loan: Request an IT asset for temporary use and return at a later date.
- Request Asset Return: Request to return an IT asset currently assigned or loaned to you.
- Request Software Installation: Request software to be installed on your assigned device.
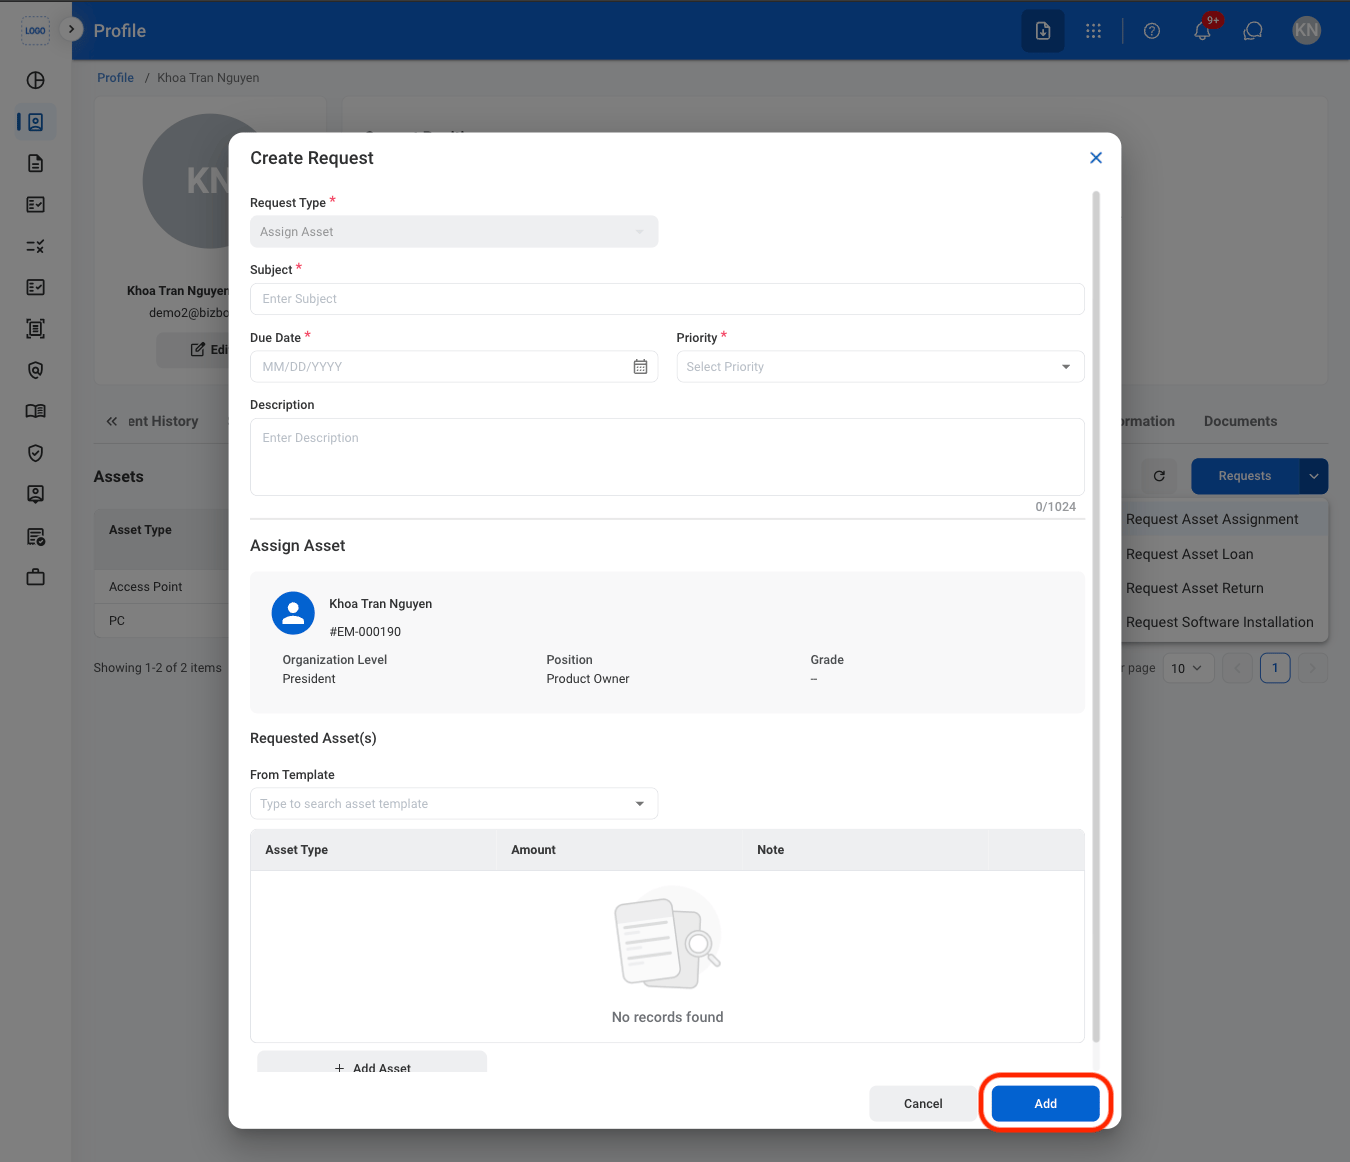
Fill in the required information
Certificates
Add a Certificate
Navigate to Certificates
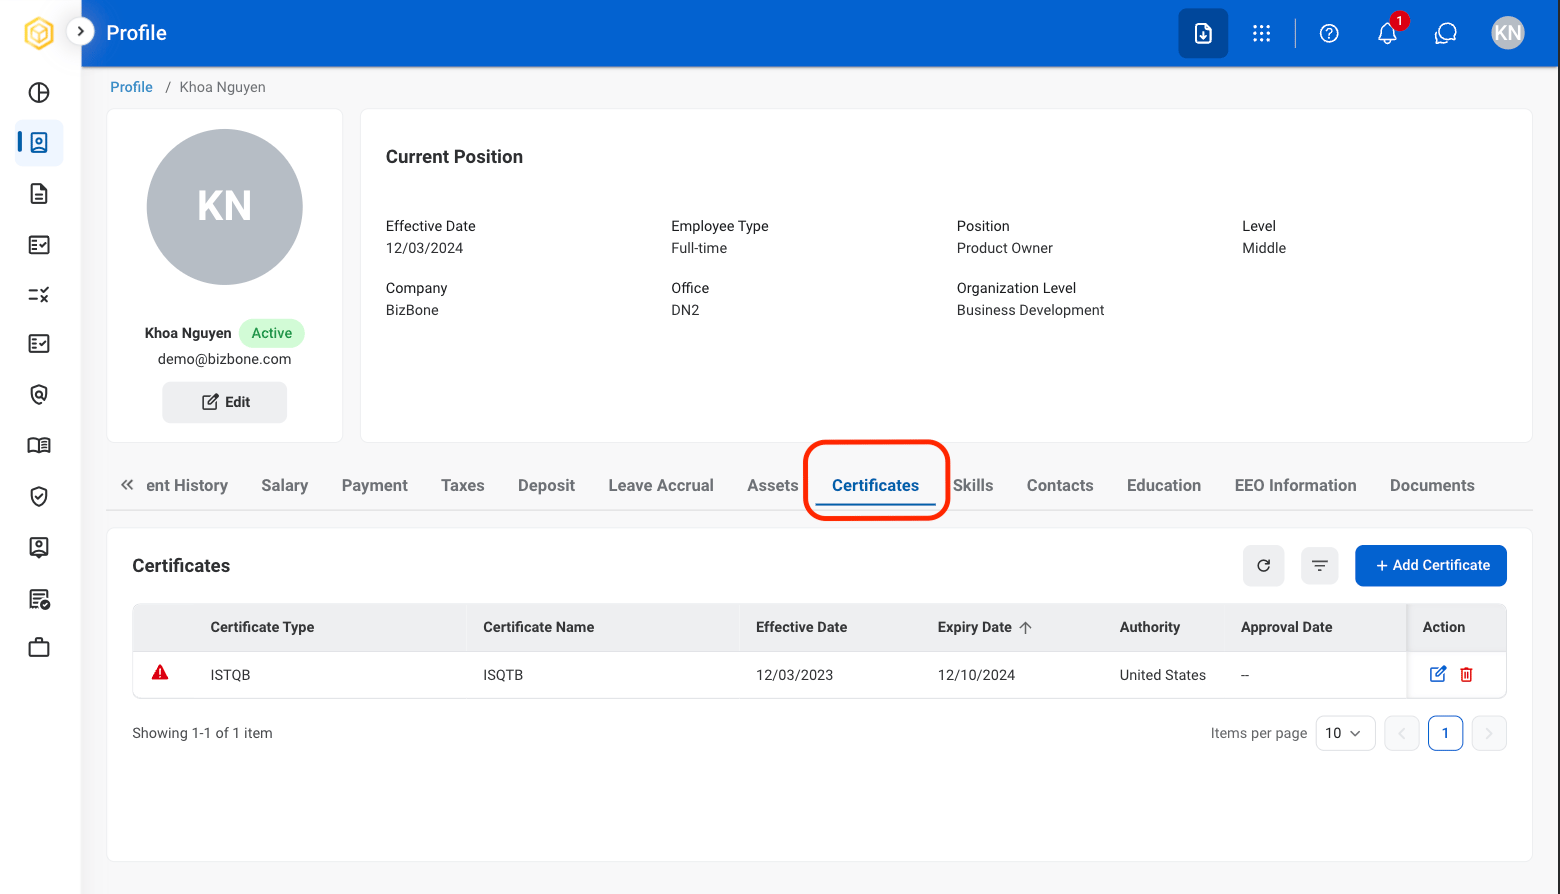
Select Add Certificate
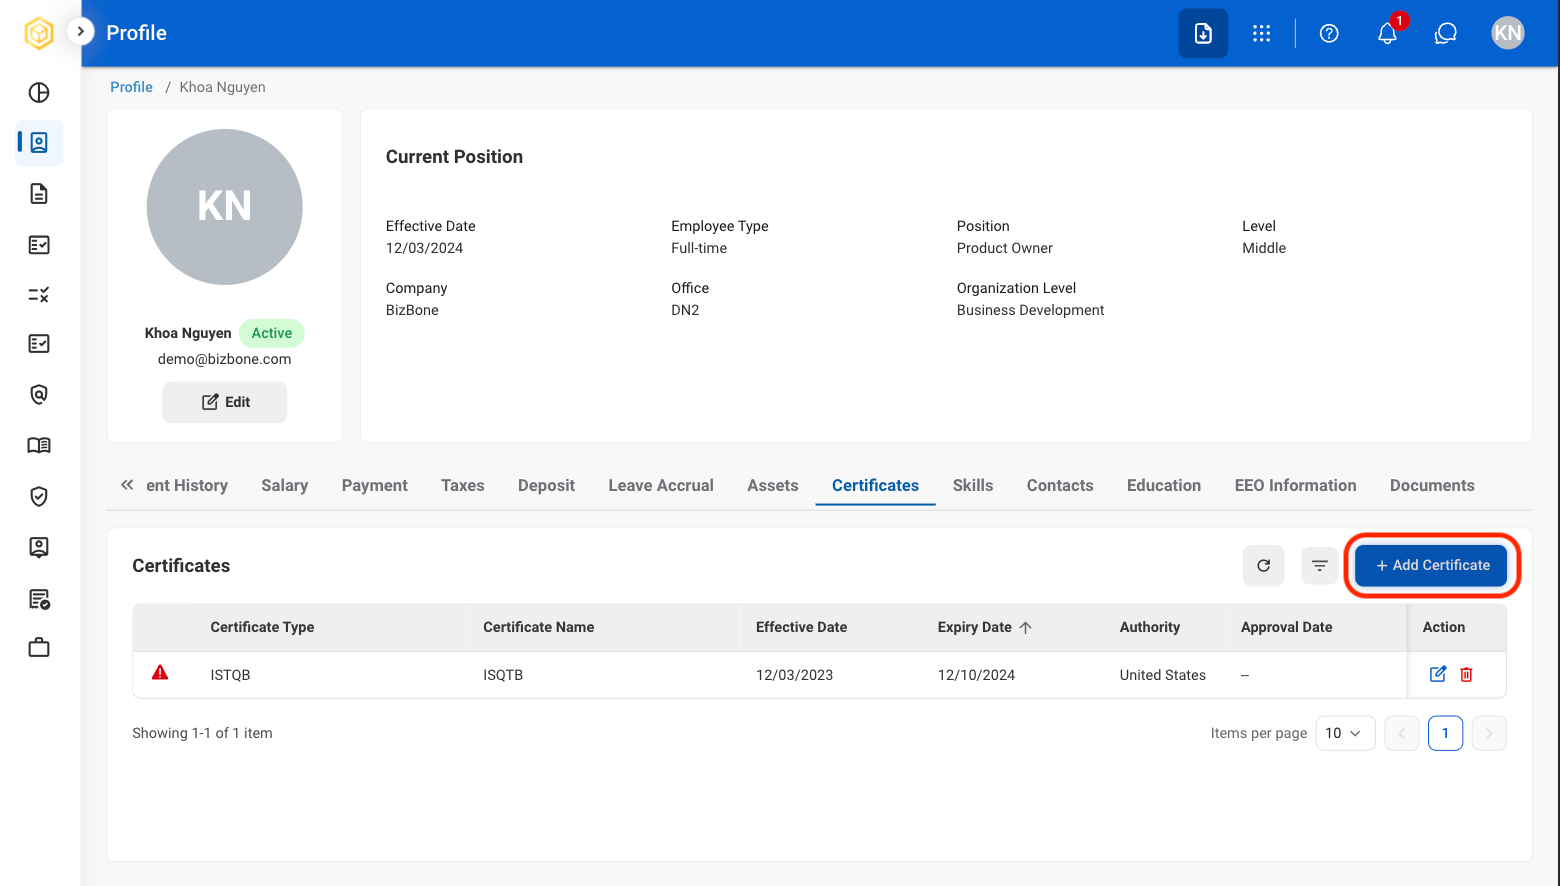
Fill in the required information
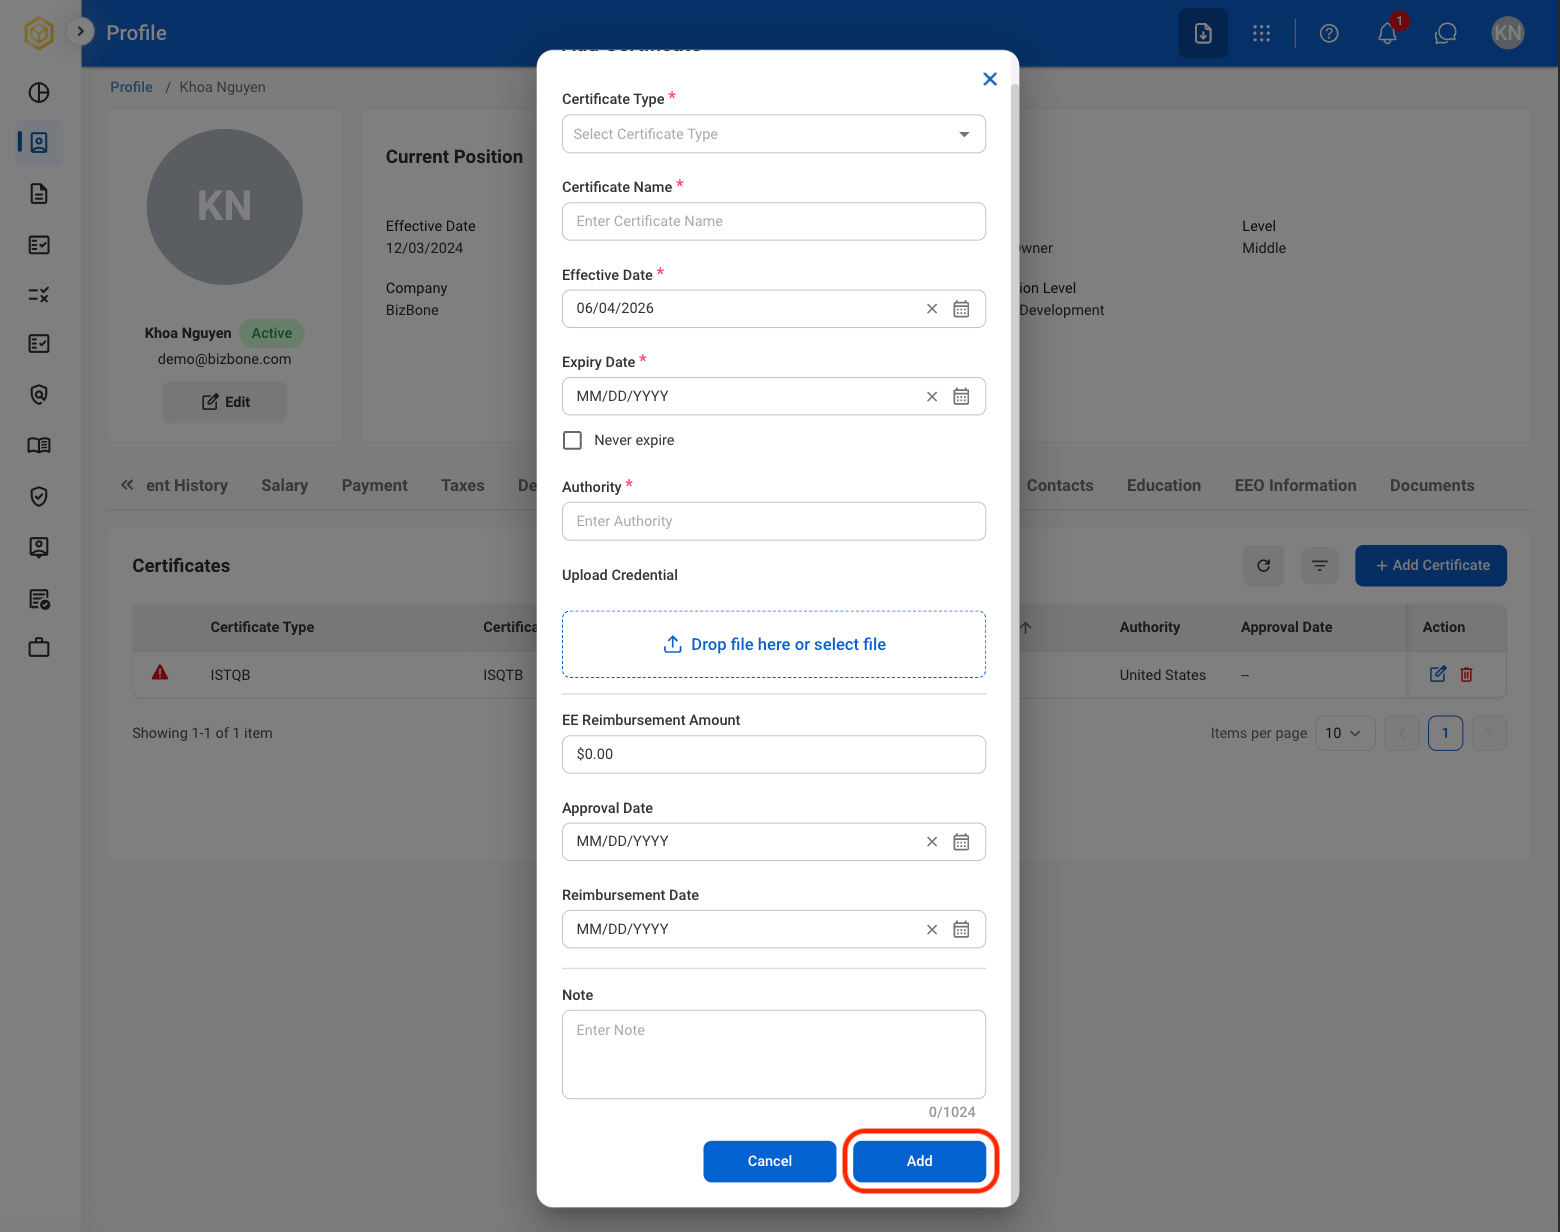
Modify a Certificate
Select an action

- Edit: Select the edit icon to update an existing entry.
- Delete: Select the trash icon to delete an existing entry.
Confirm the action
- Edit: Fill in the required information. Select Save to complete or Cancel to exit without saving changes.
- Delete: Select Delete to complete or Cancel to exit without saving changes.
Skills
Add a Skill
Navigate to Skills
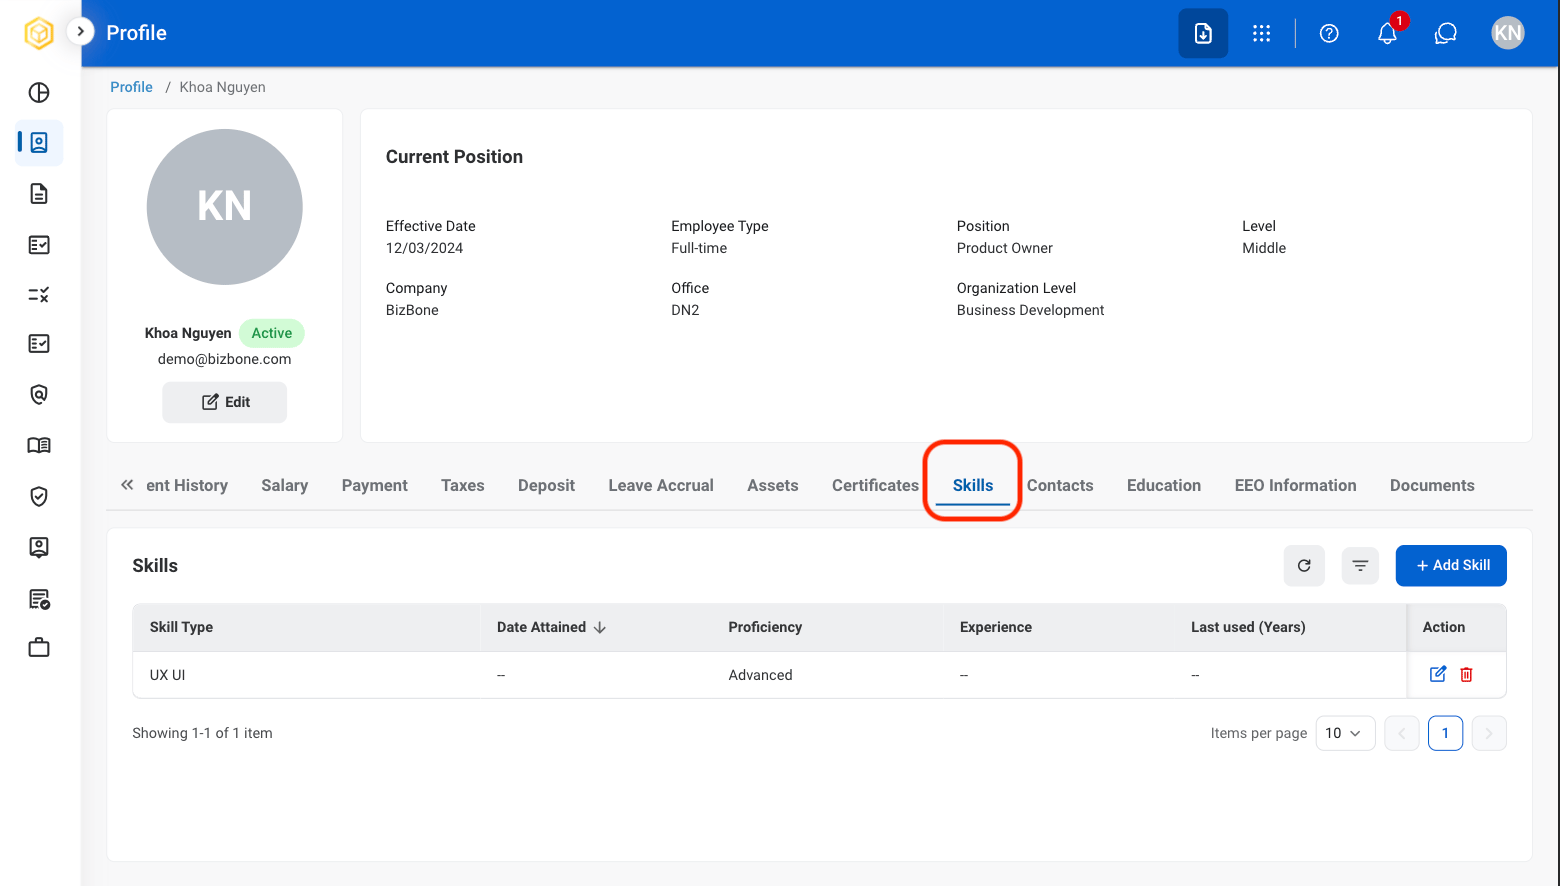
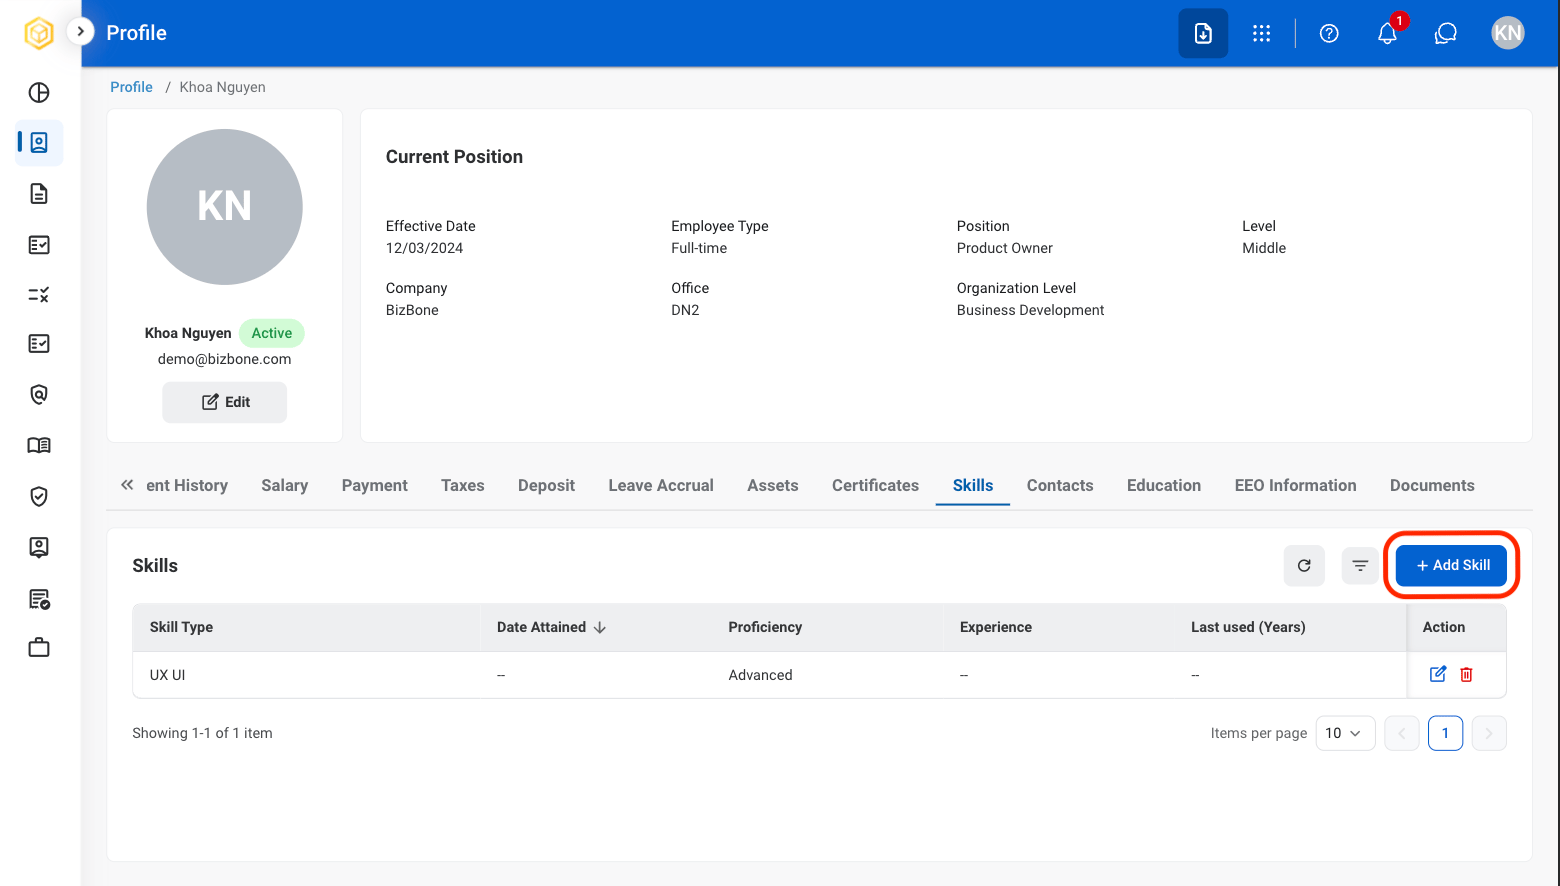
Select Add Skill
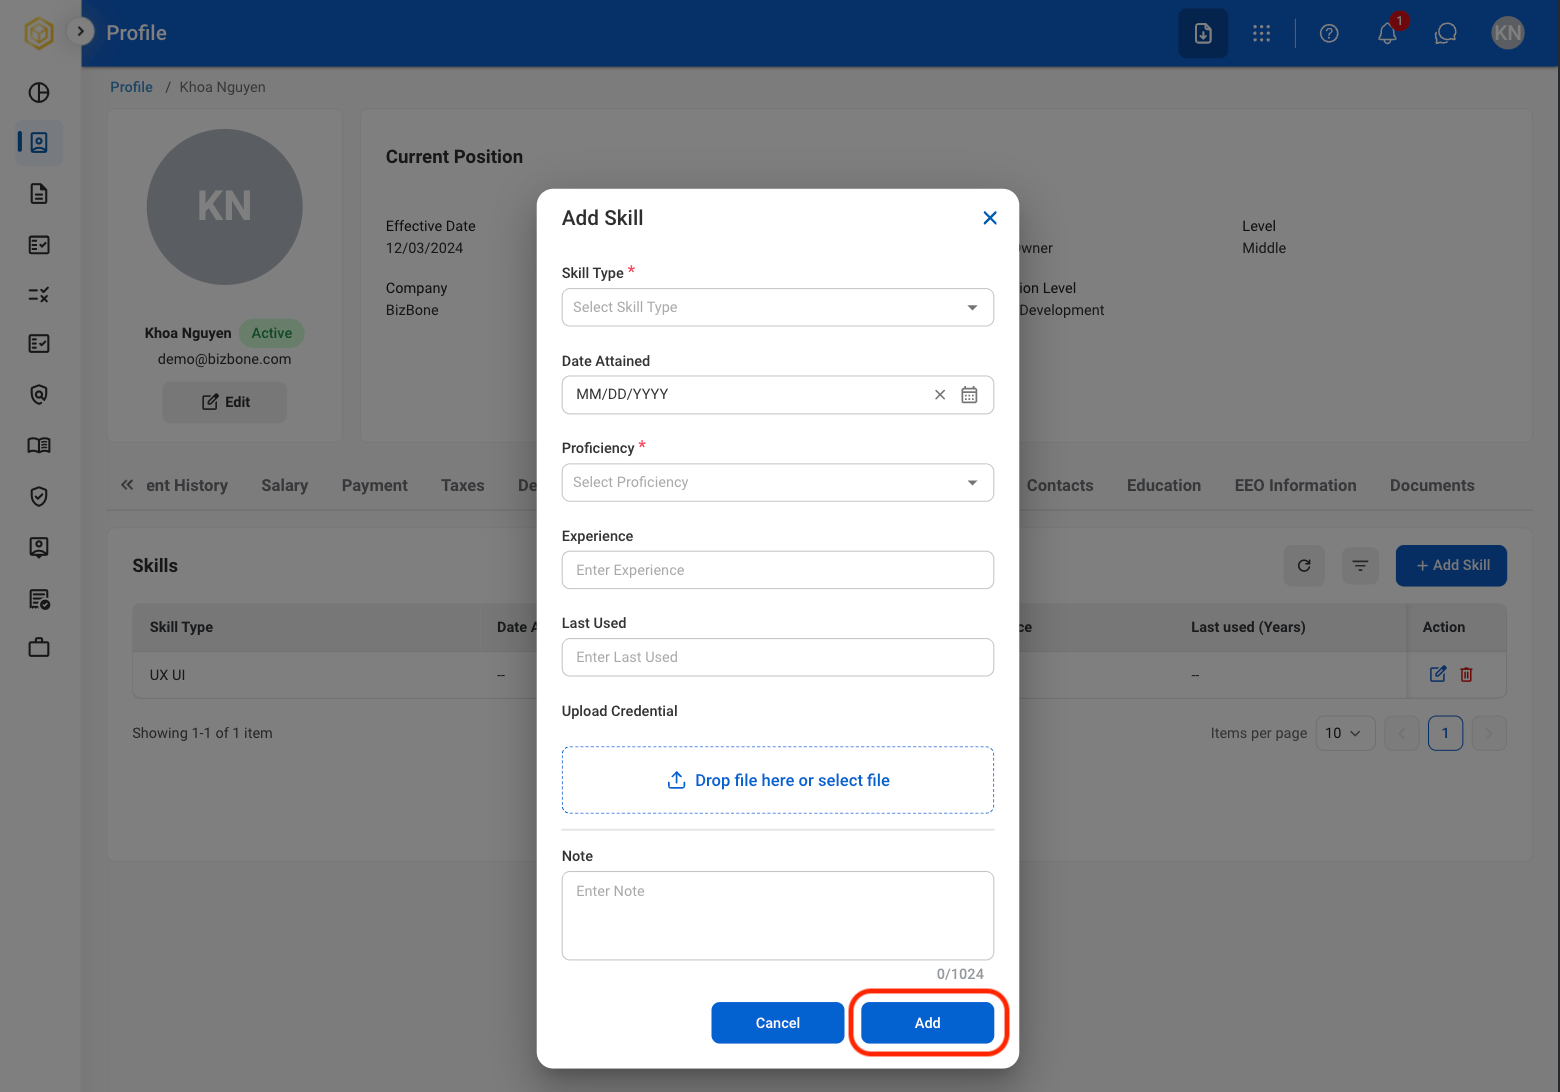
Fill in the required information
Modify a Skill Entry
Select an action
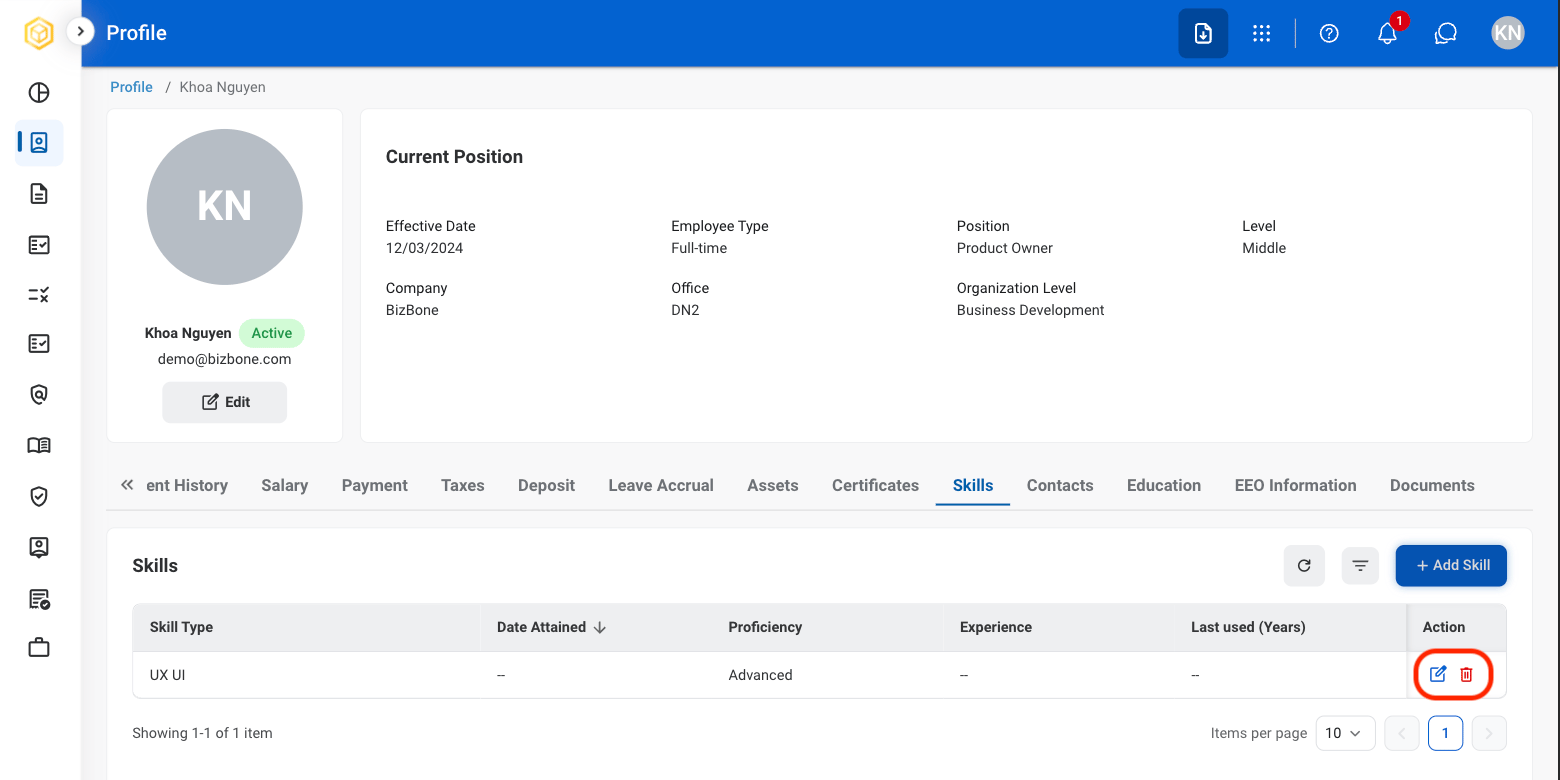
- Edit: Select the edit icon to update an existing entry.
- Delete: Select the trash icon to delete an existing entry.
Confirm the action
- Edit: Fill in the required information. Select Update to complete or Cancel to exit without saving changes.
- Delete: Select Delete to complete or Cancel to exit without saving changes.
Contacts
Add a Contact
Select the Contacts tab

Select a category
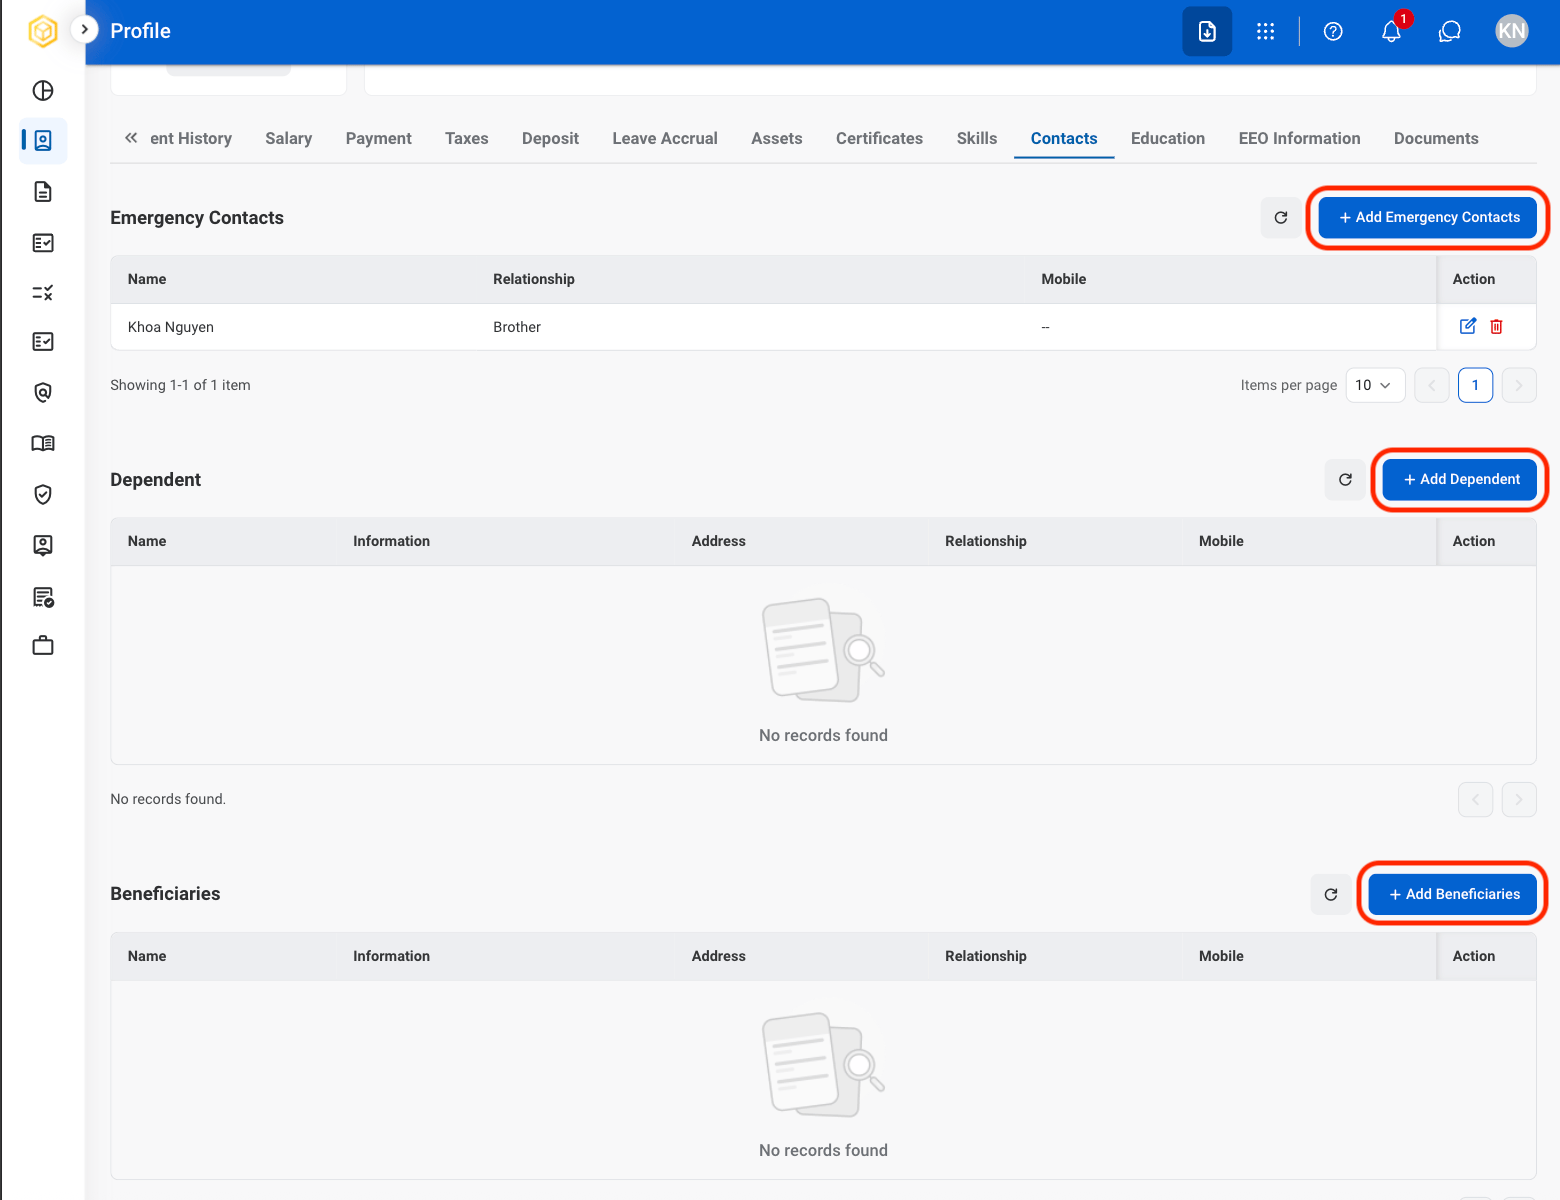
Fill in the required information
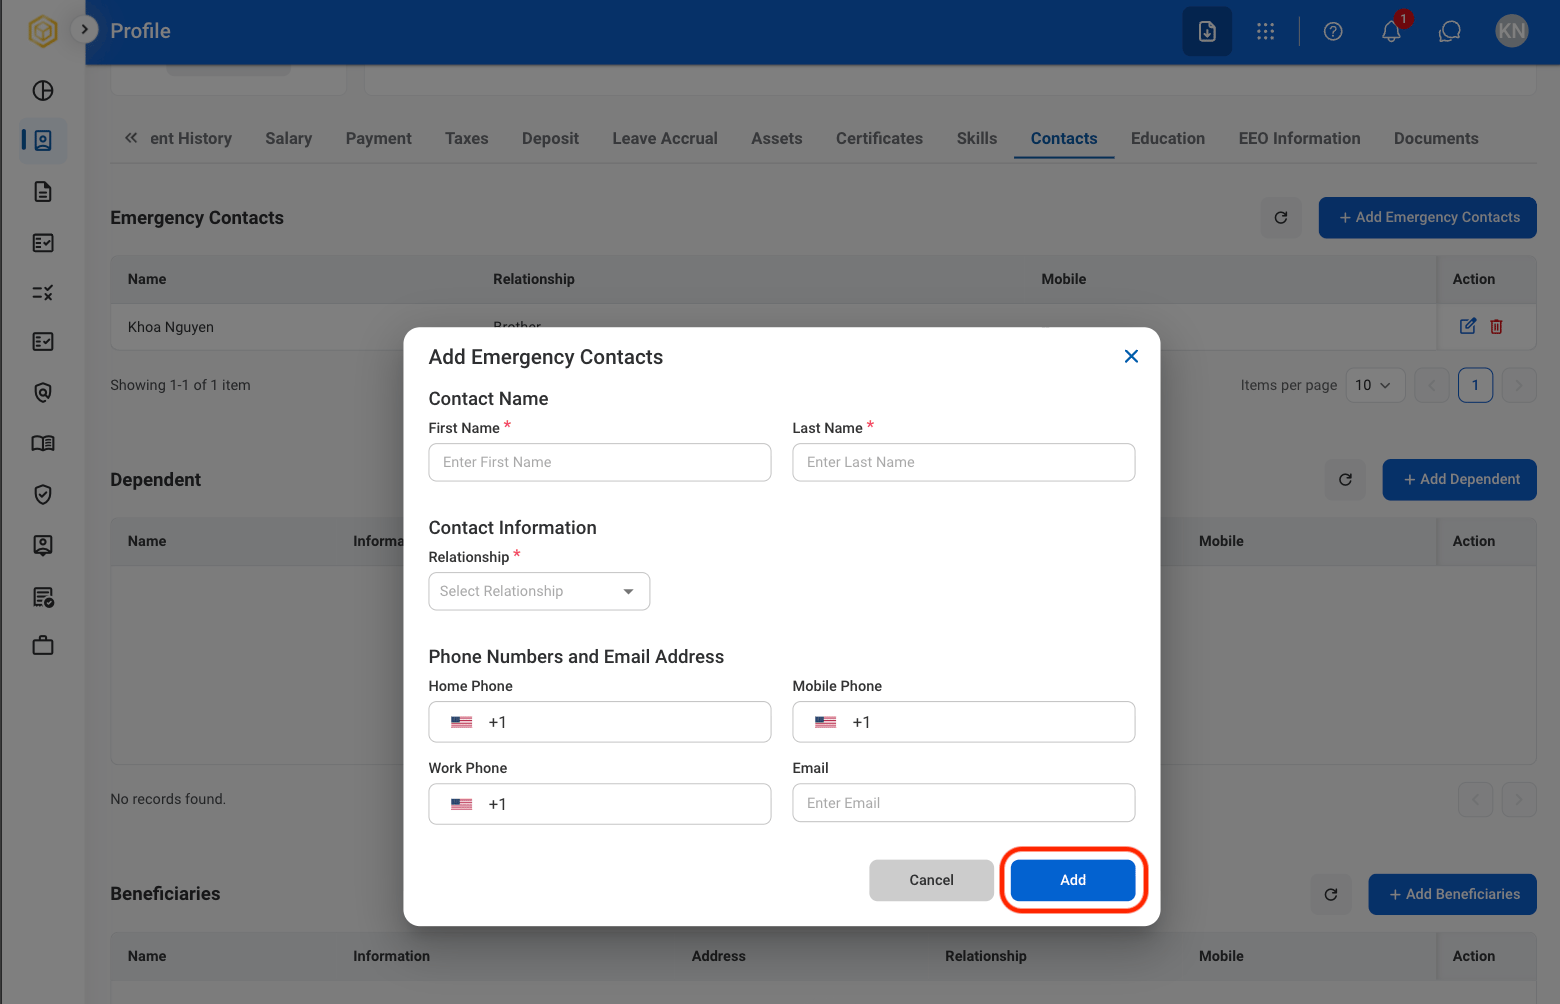
To make changes
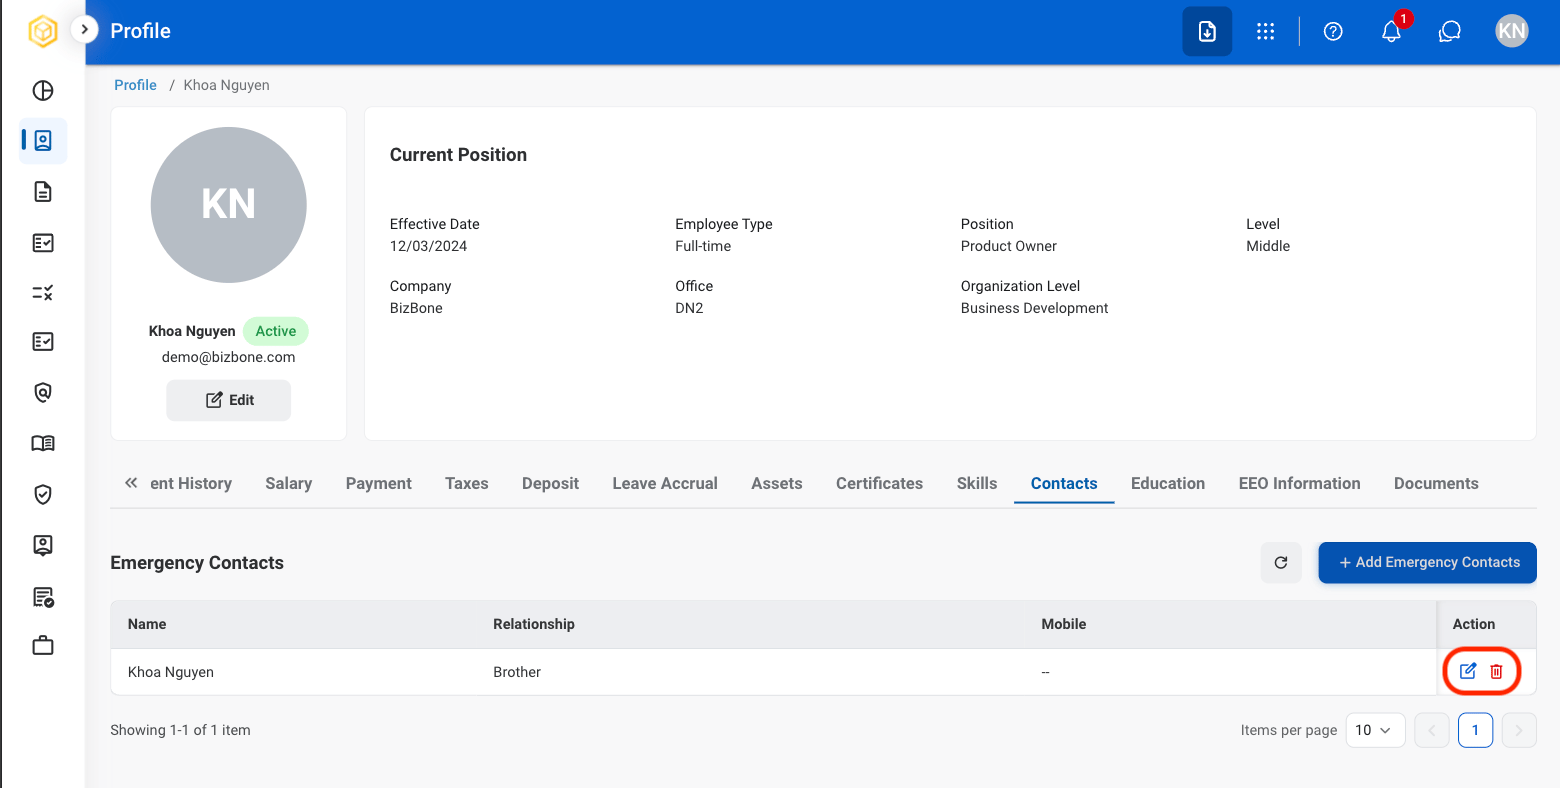
- To Edit: Select the edit icon to update an existing entry.
- To Delete: Select the trash icon to delete an existing entry.
Modify a Contact
Select an action
- Edit: Select the edit icon to update an existing entry.
- Delete: Select the trash icon to delete an existing entry.
Confirm the action
- Edit: Fill in the required information. Select Update to complete or Cancel to exit without saving changes.
- Delete: Select Delete to complete or Cancel to exit without saving changes.
Education
Add Education
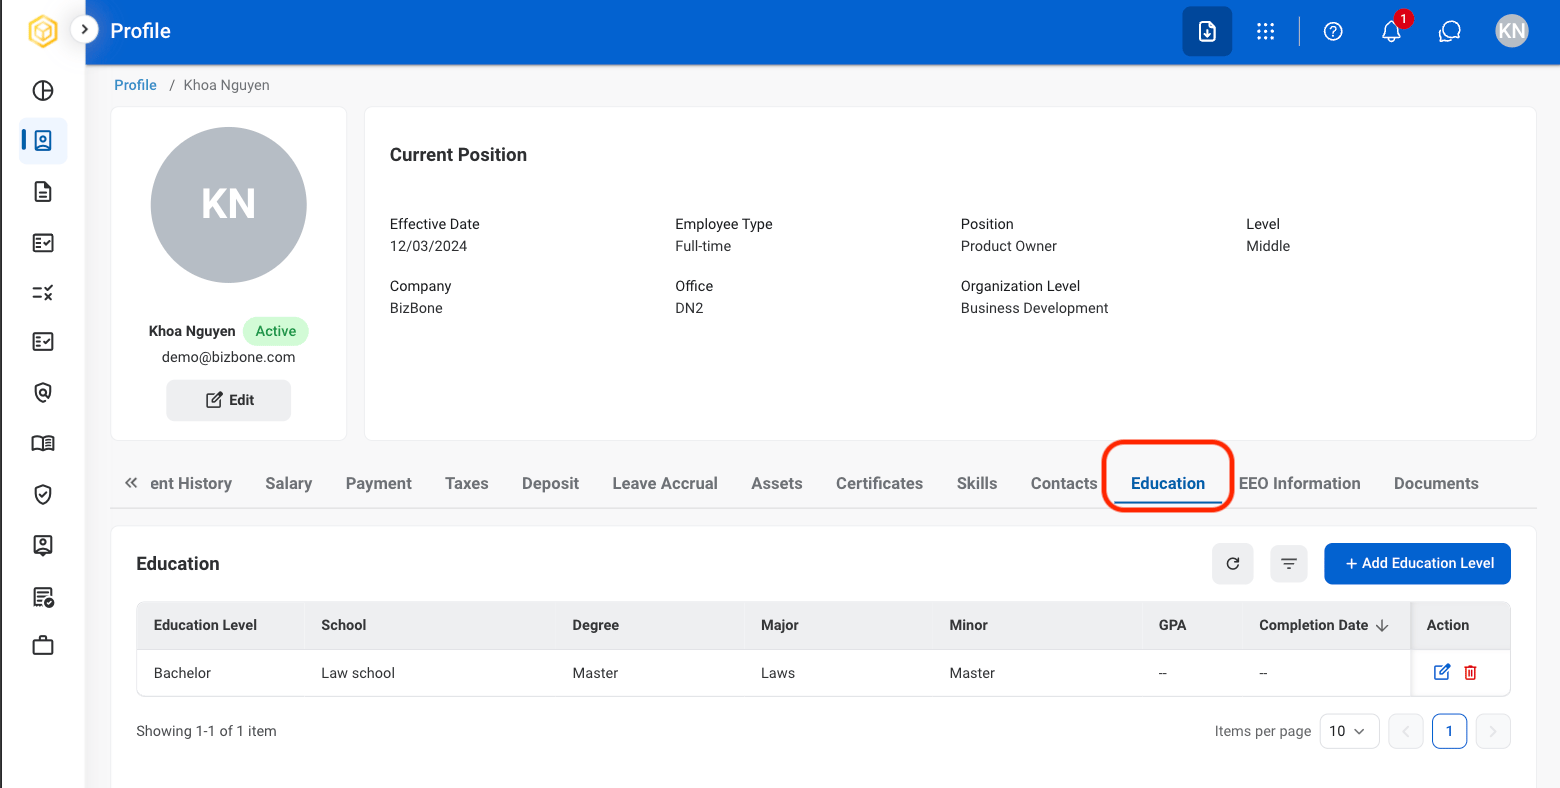
Navigate to Education
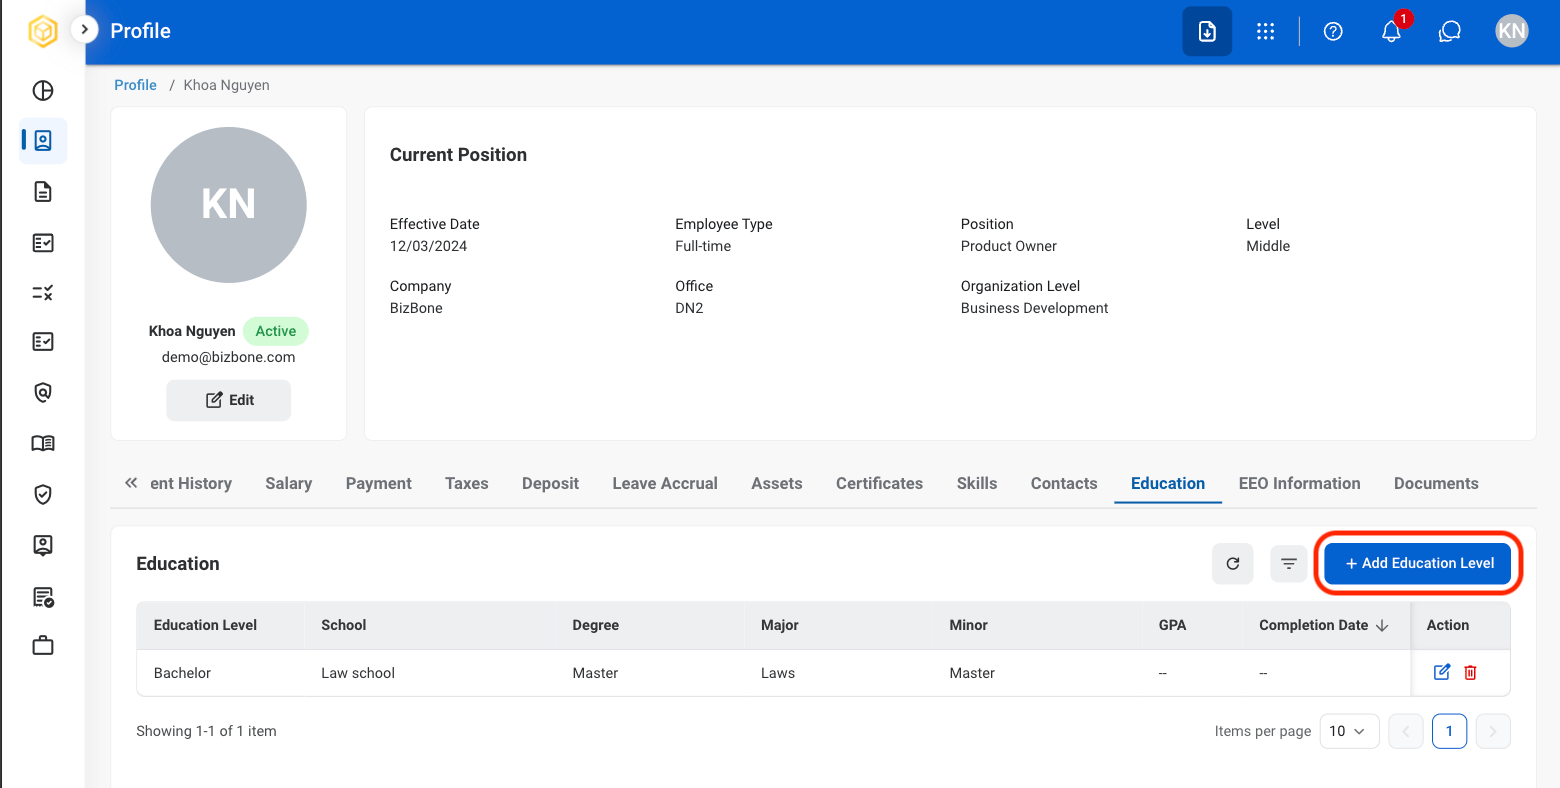
Select Add Education Level
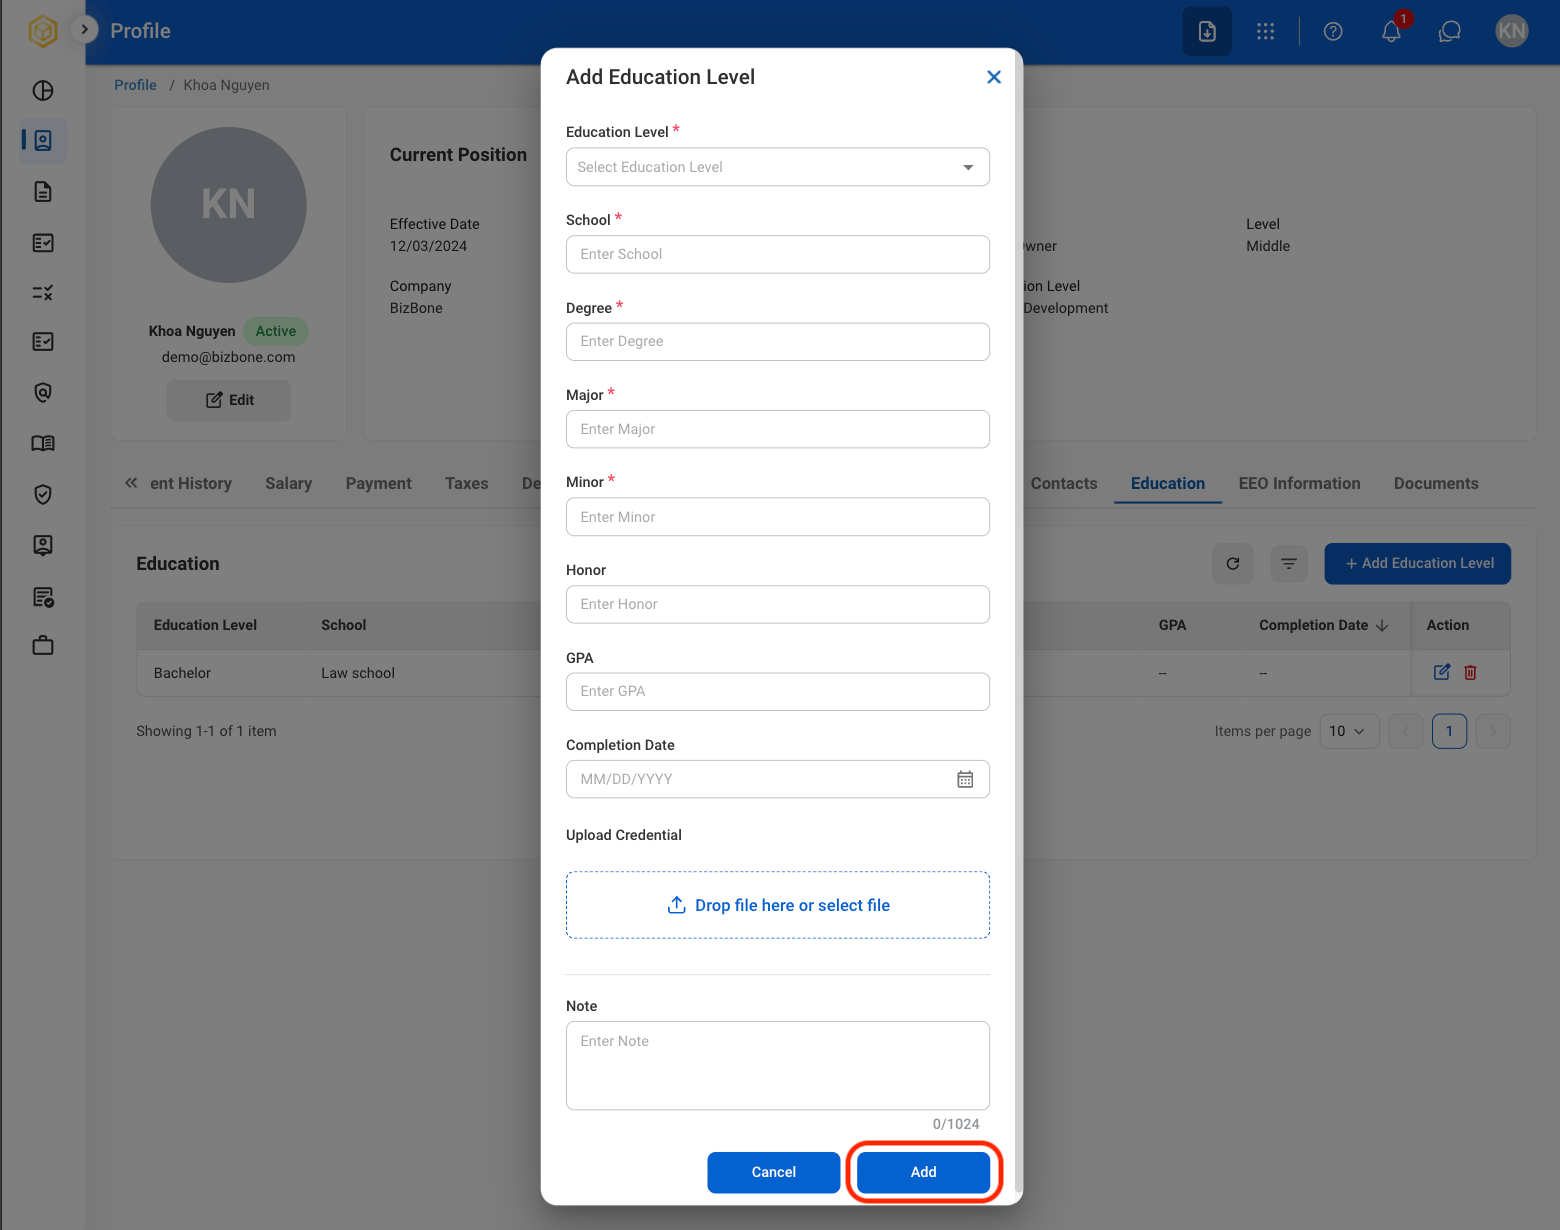
Fill in the required information
Modify an Education Entry
Select an action
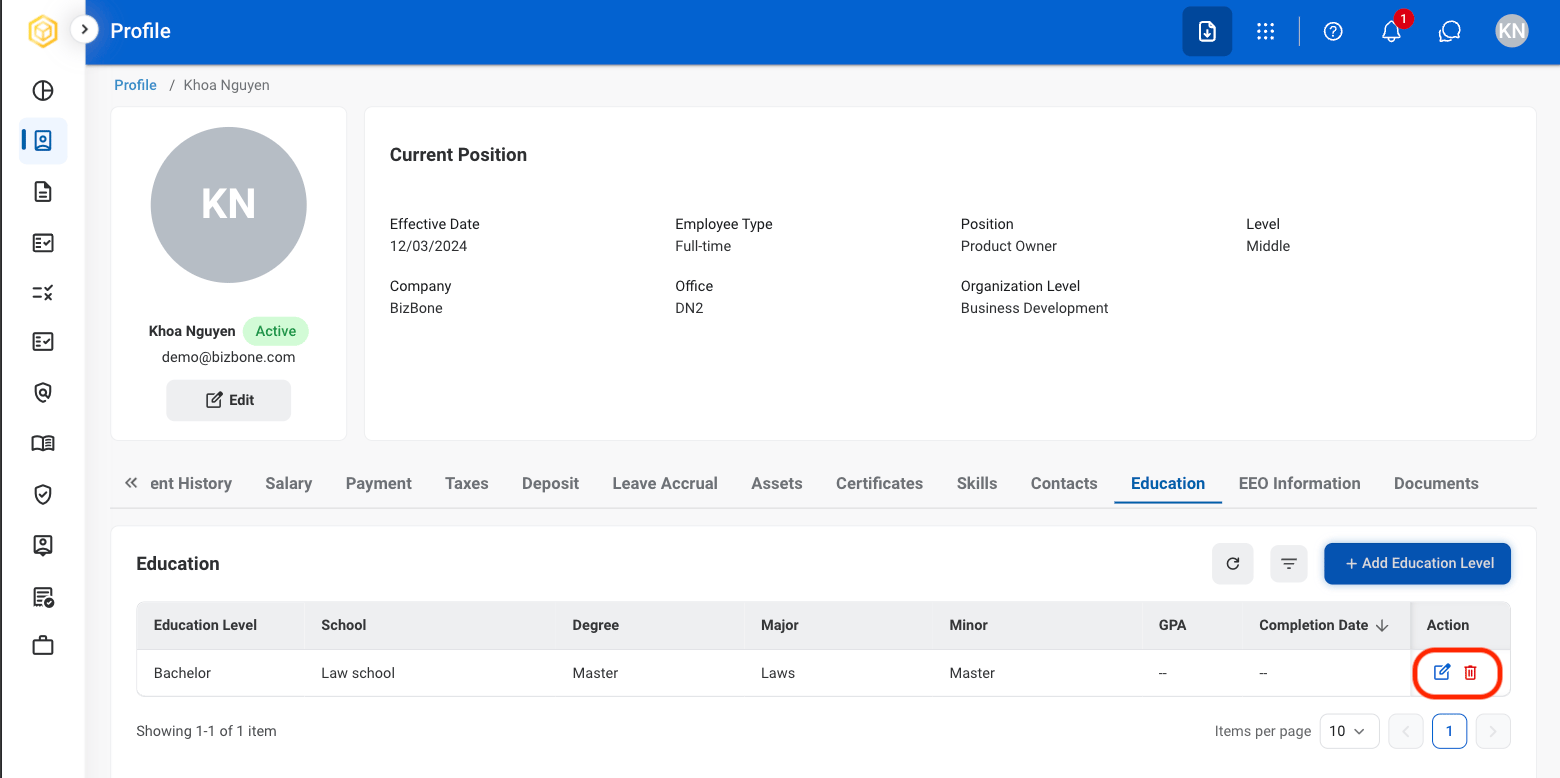
- Edit: Select the edit icon to update an existing entry.
- Delete: Select the trash icon to delete an existing entry.
Confirm the action
- Edit: Fill in the required information. Select Update to complete or Cancel to exit without saving changes.
- Delete: Select Delete to complete or Cancel to exit without saving changes.
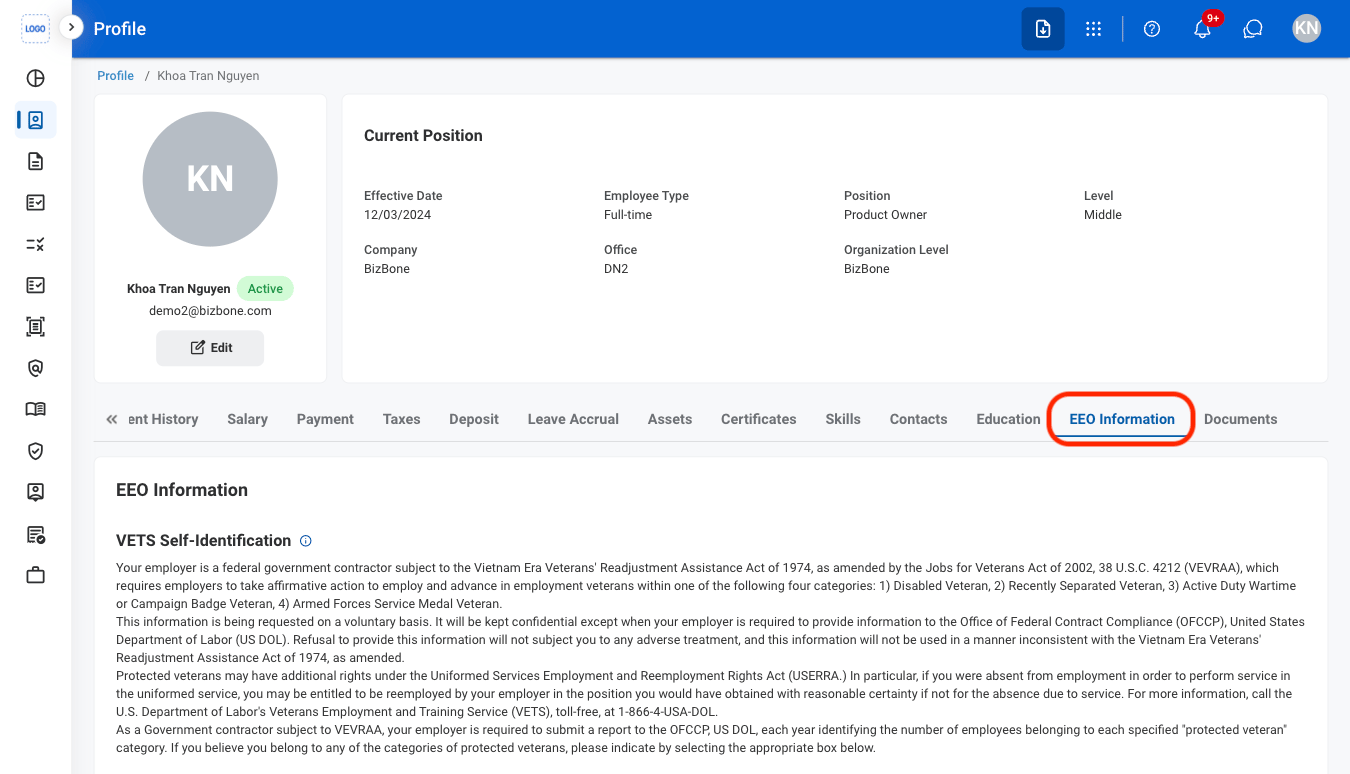
EEO Information
View EEO Information
Navigate to EEO Information
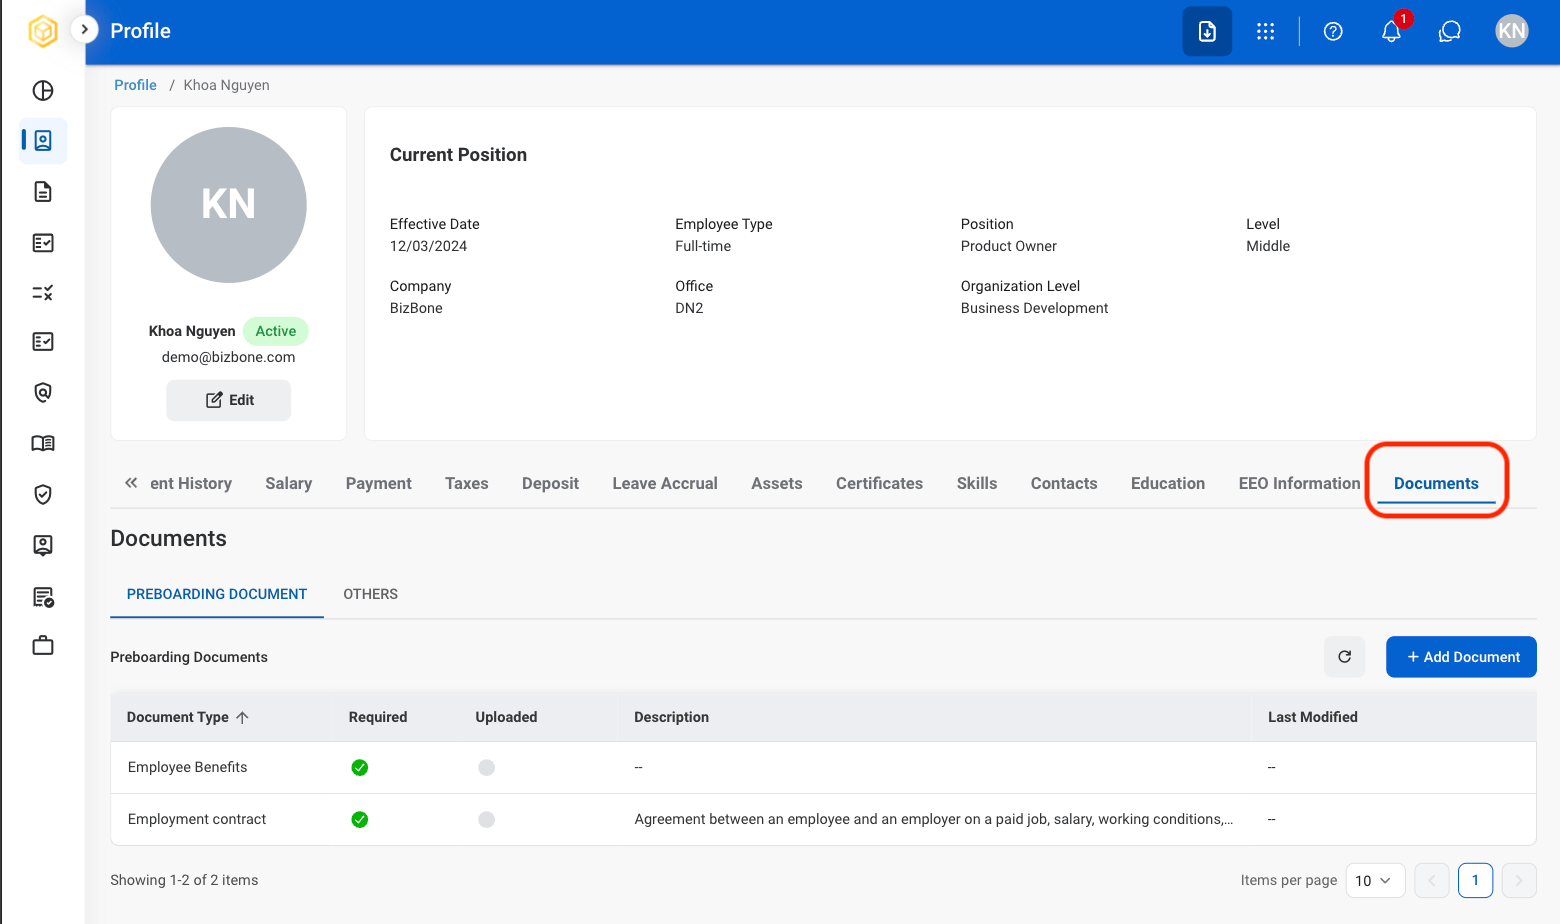
Documents
Add Documents
Navigate to Documents
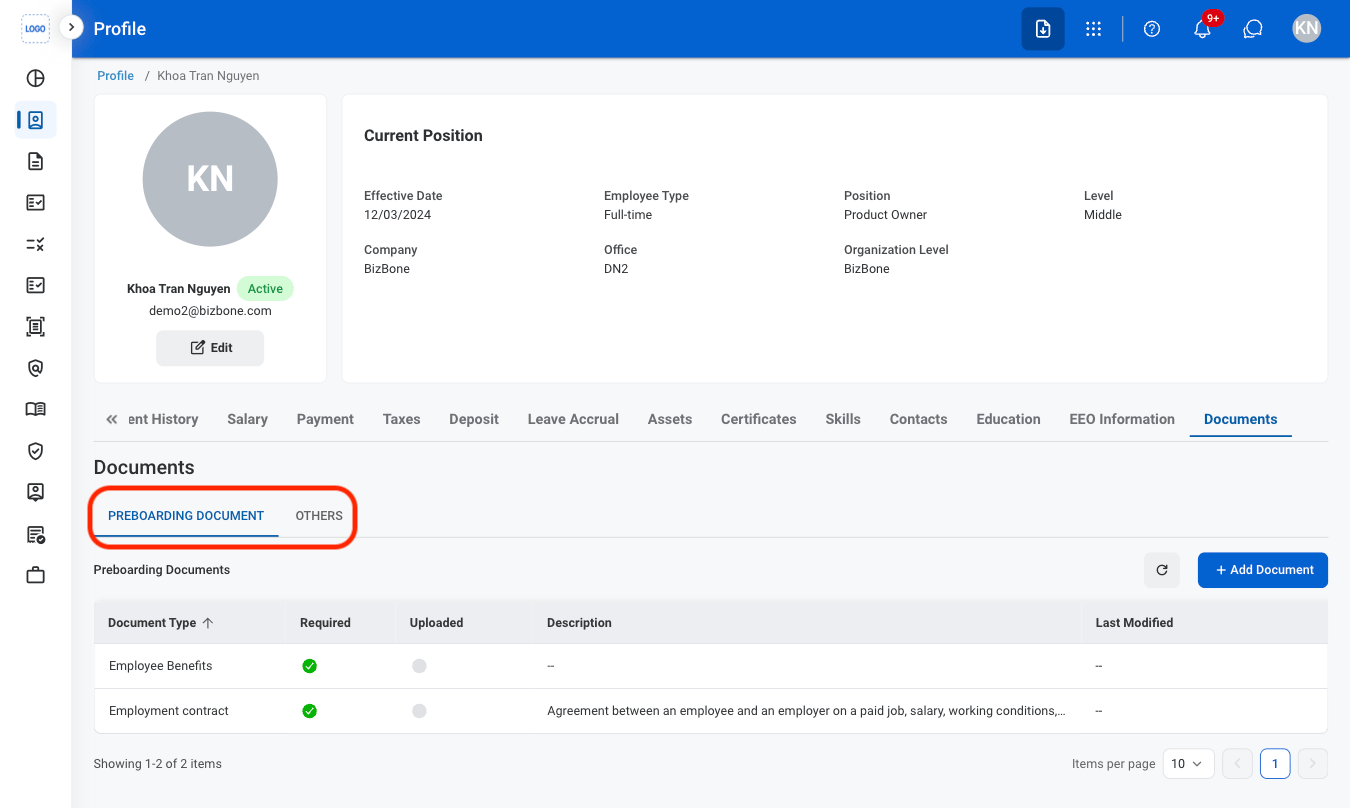
Select a tab
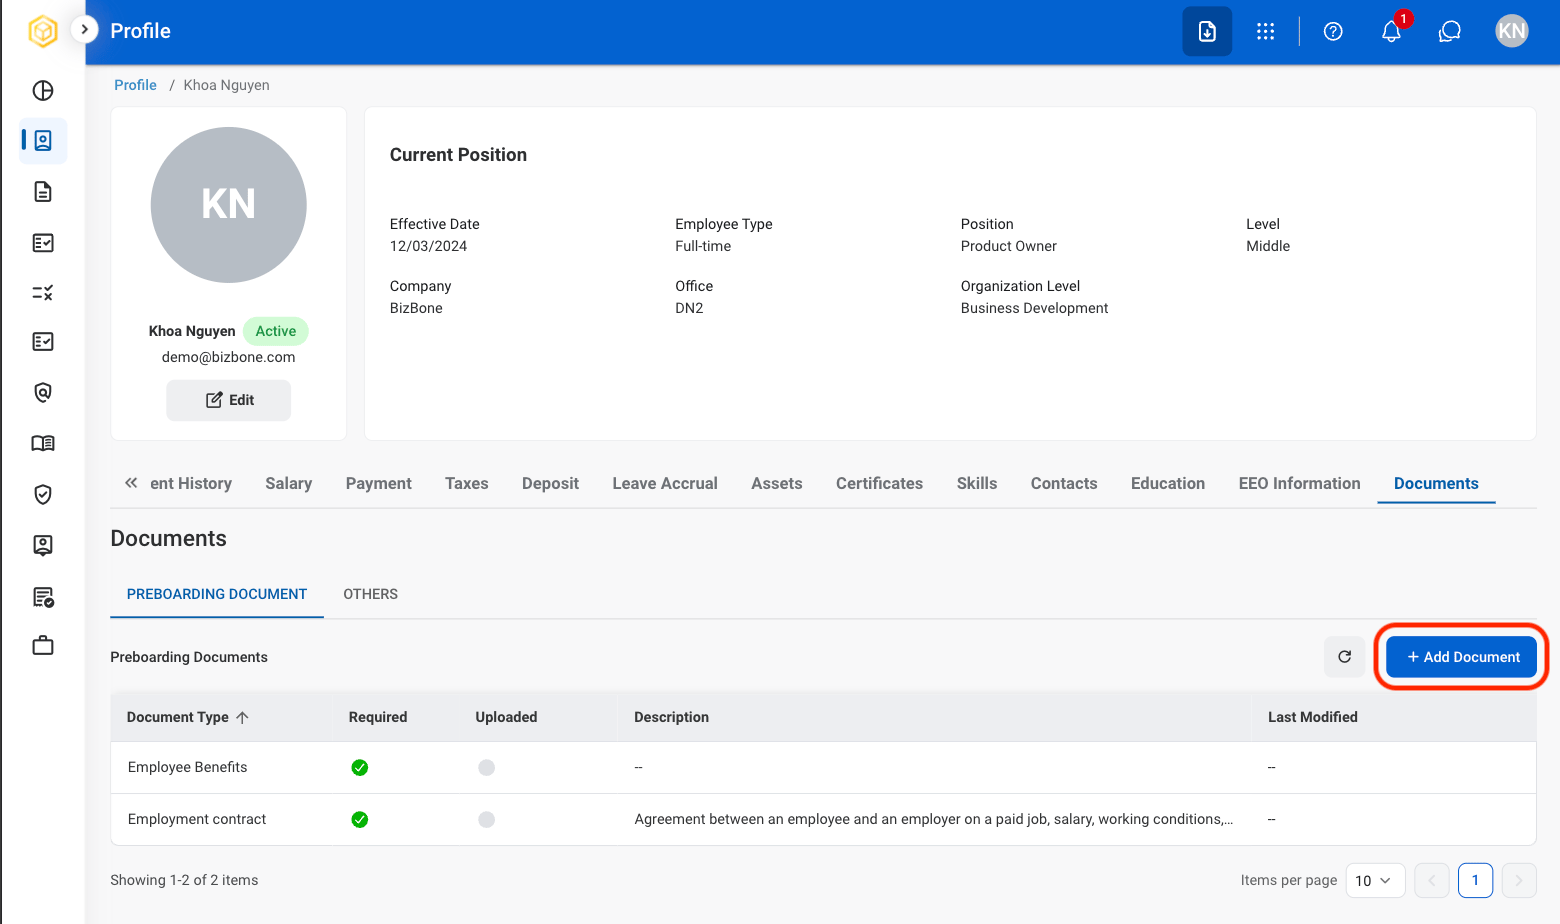
Select Add Document
Fill in the required fields