
Add an Ad-Hoc Program
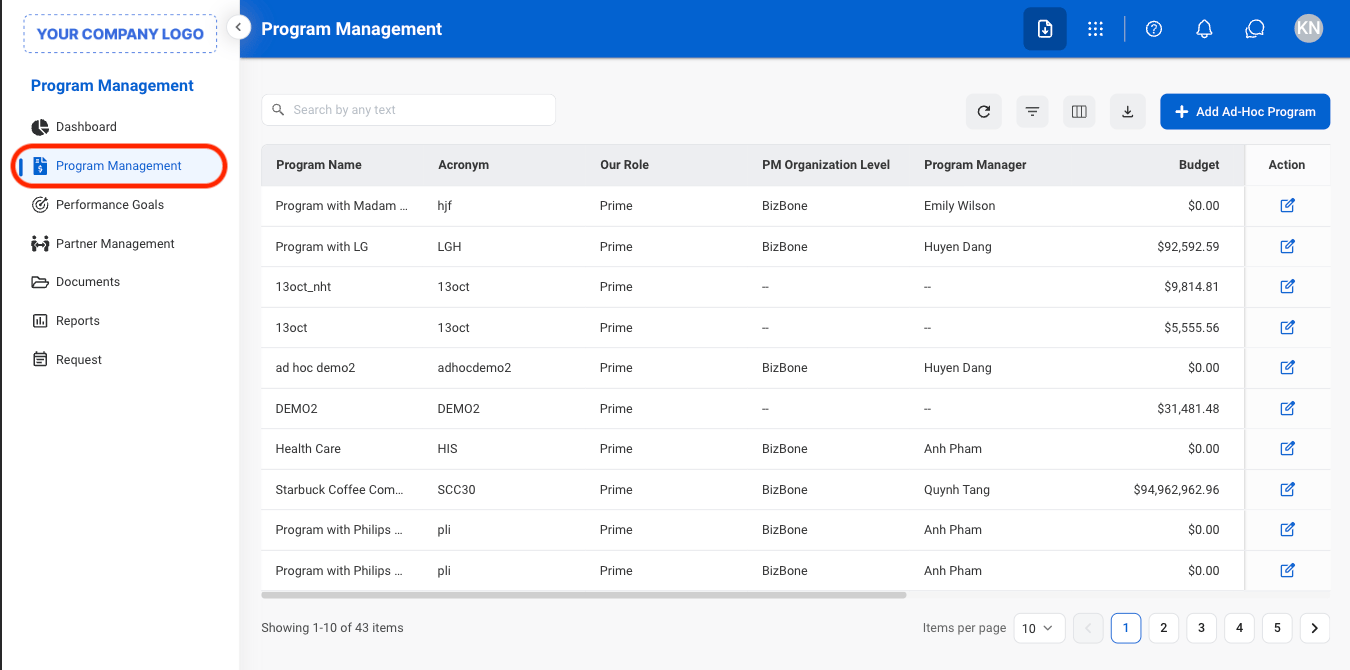
Navigate to Program Management
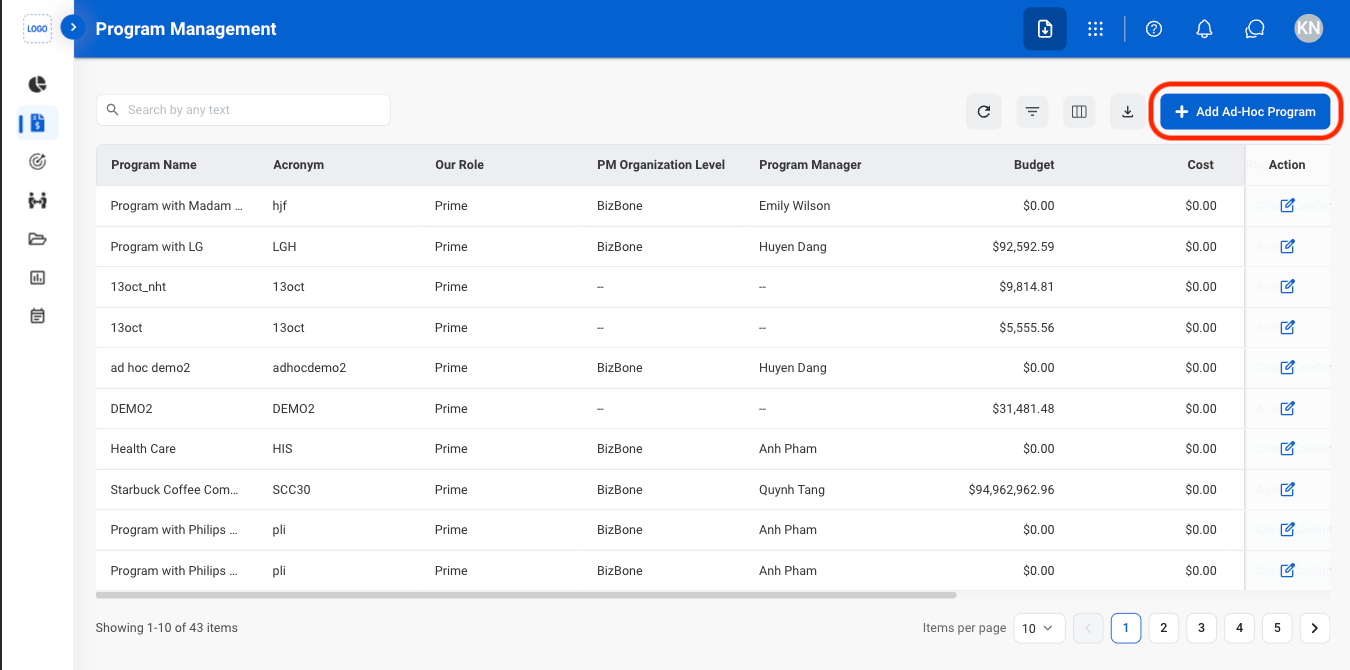
Select Add Ad-Hoc Program
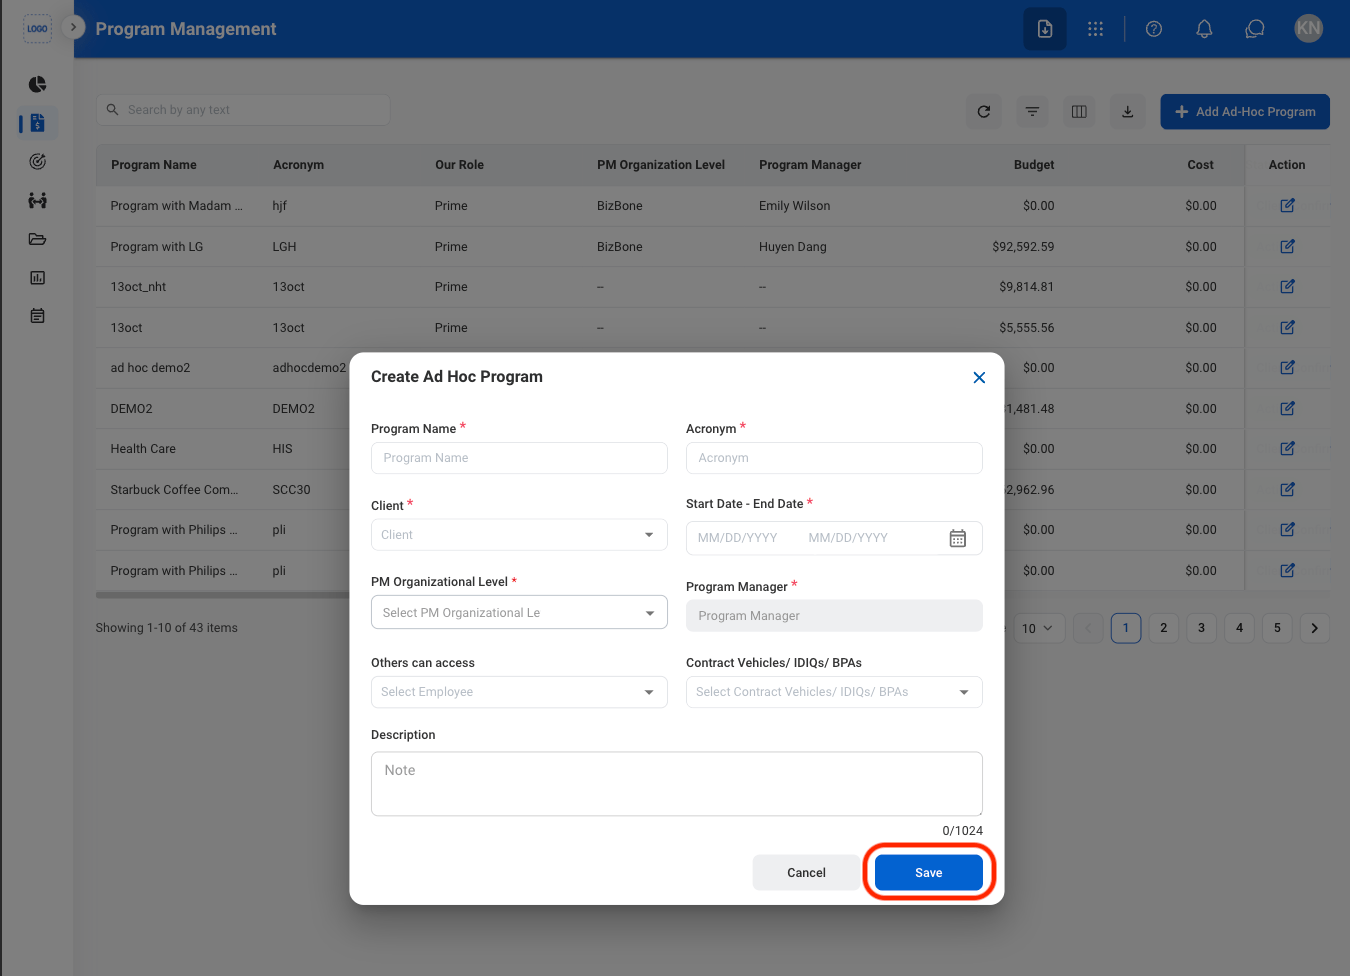
Fill in the required information
View a Charge Code
Select a program
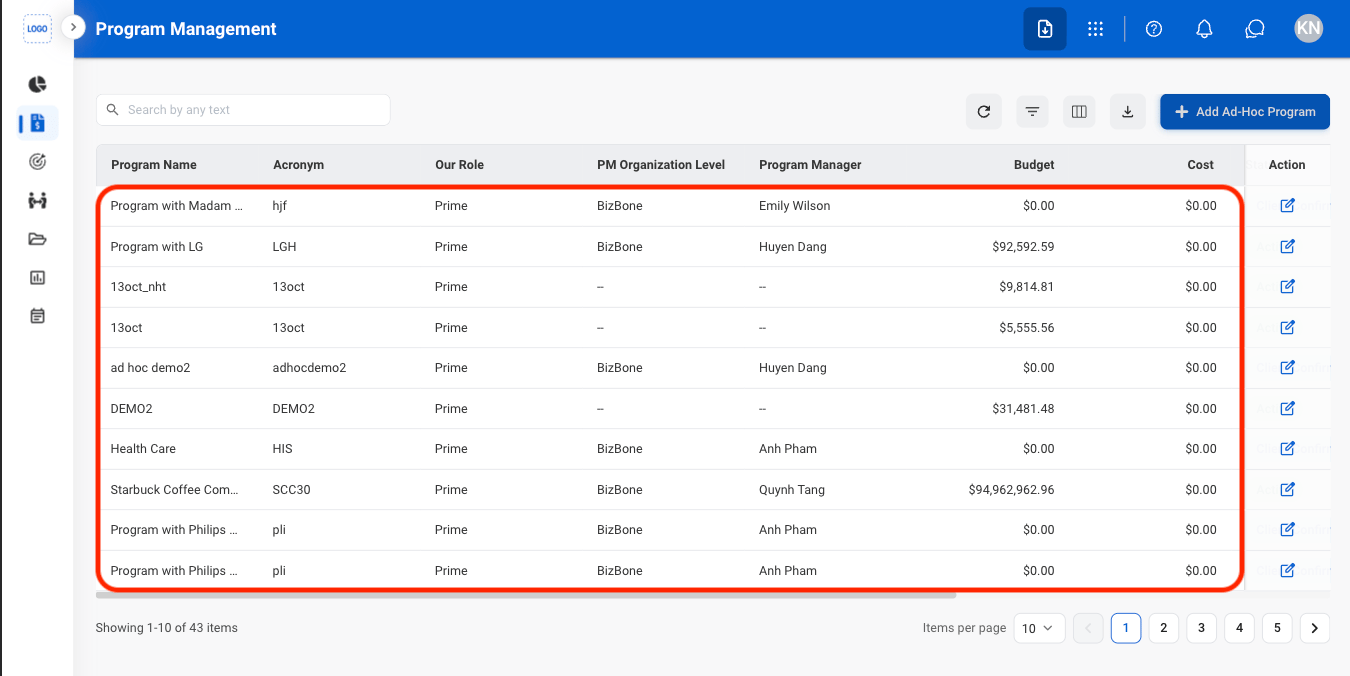
Select Charge Code
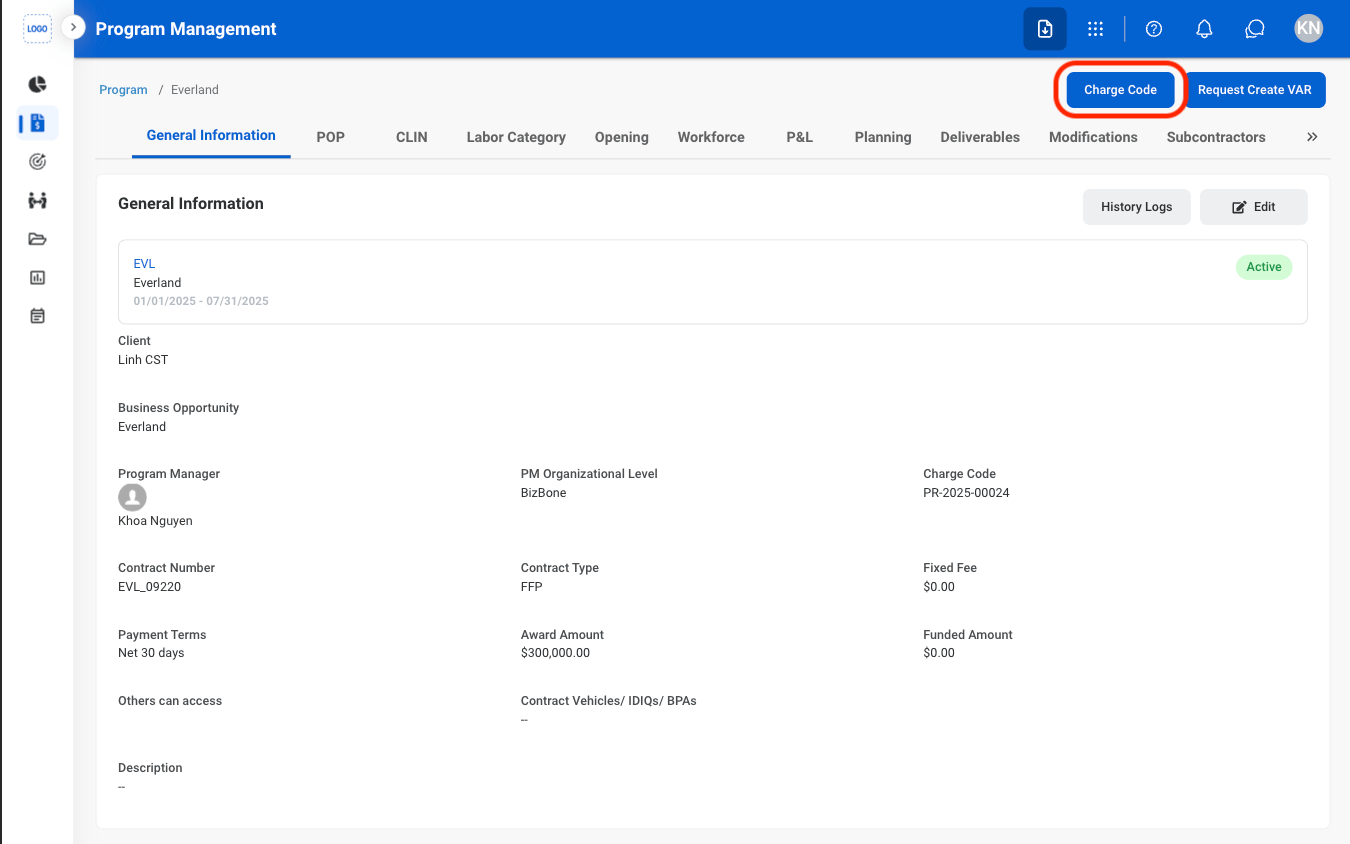
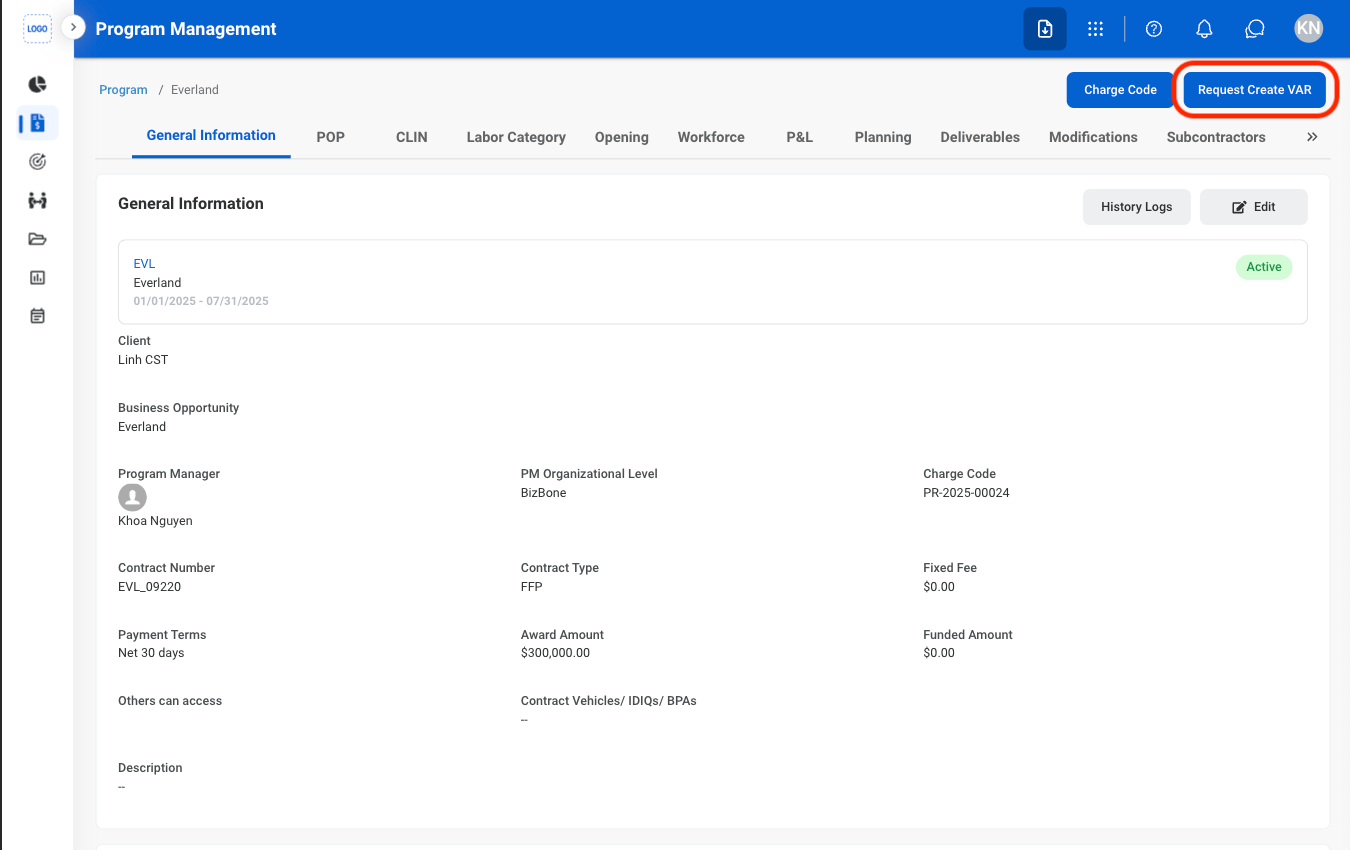
Request to Create a VAR
Select Request Create VAR
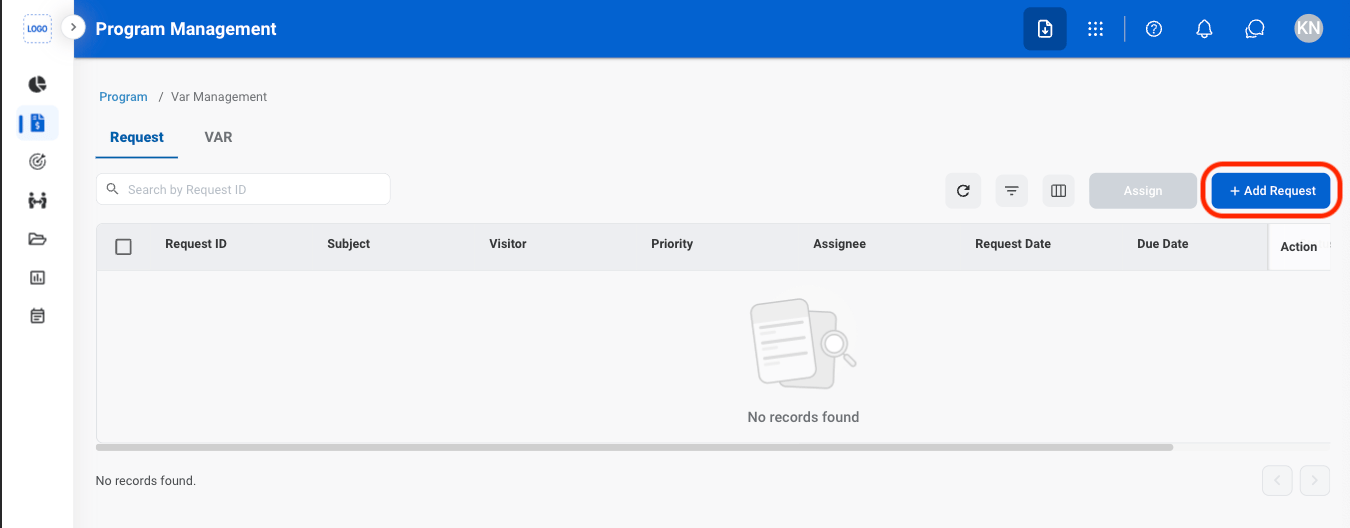
Select Add Request
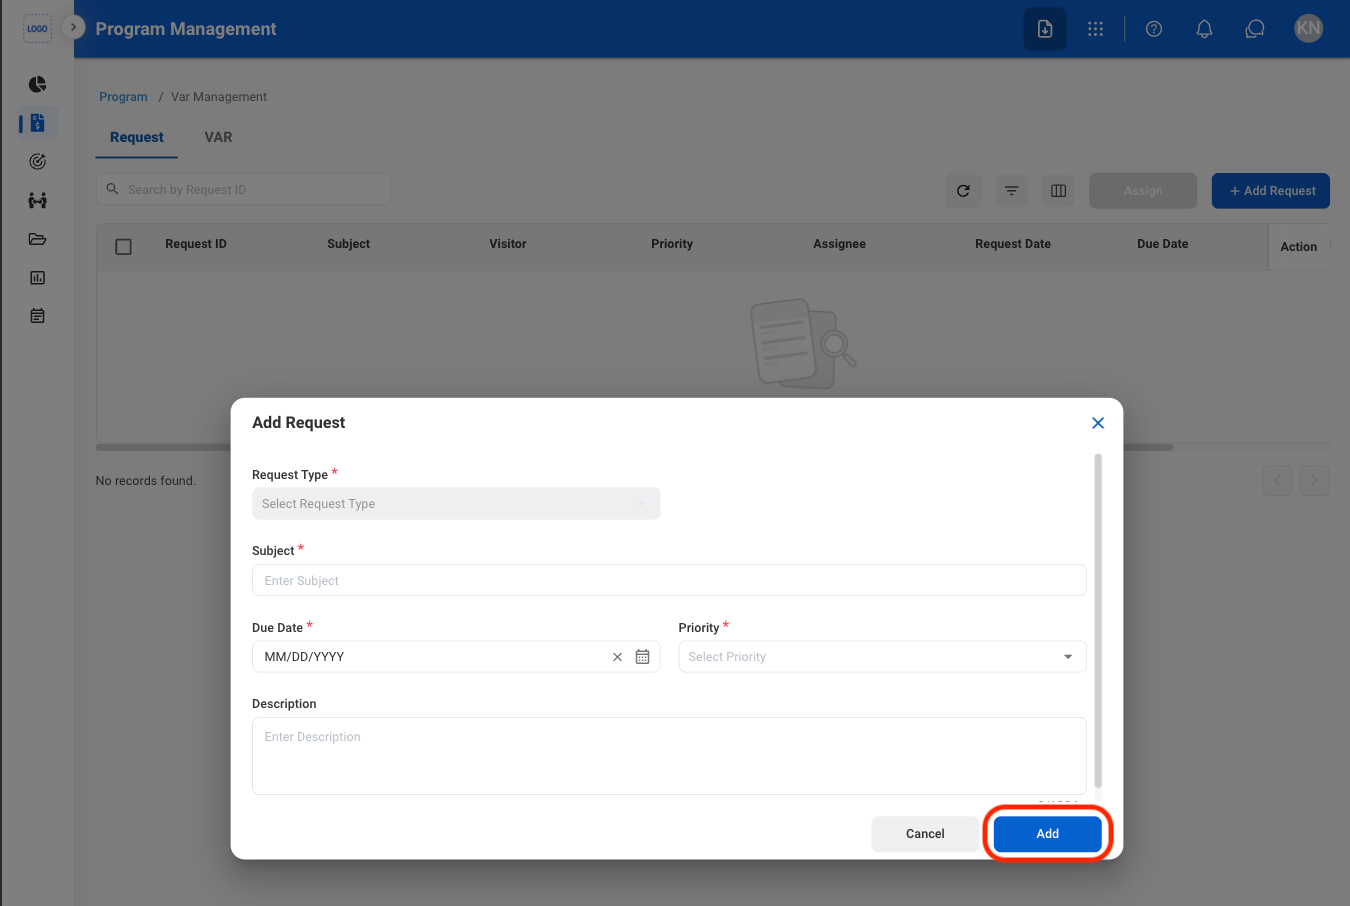
Fill in the required information
General Information
Edit General Information
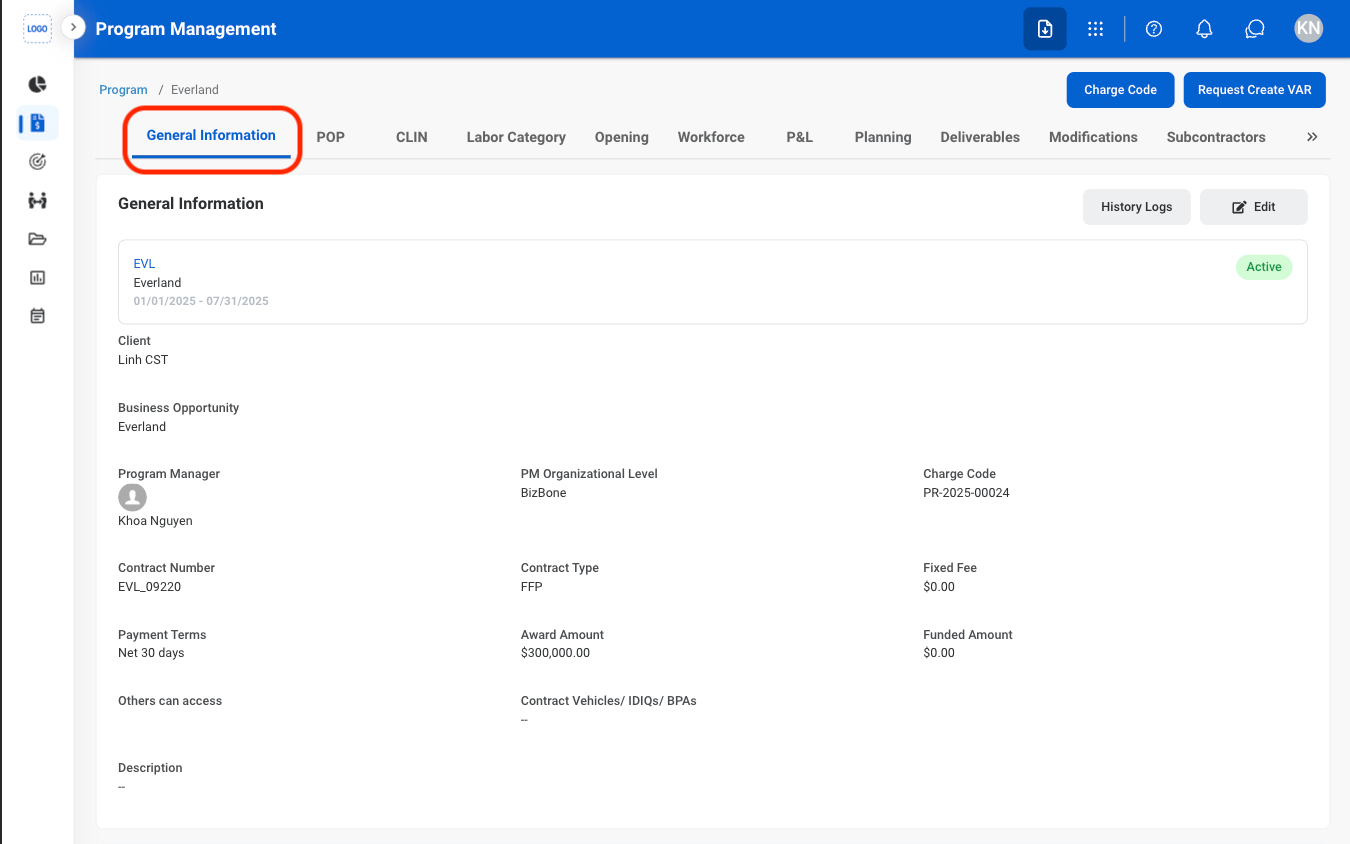
Navigate to General Information
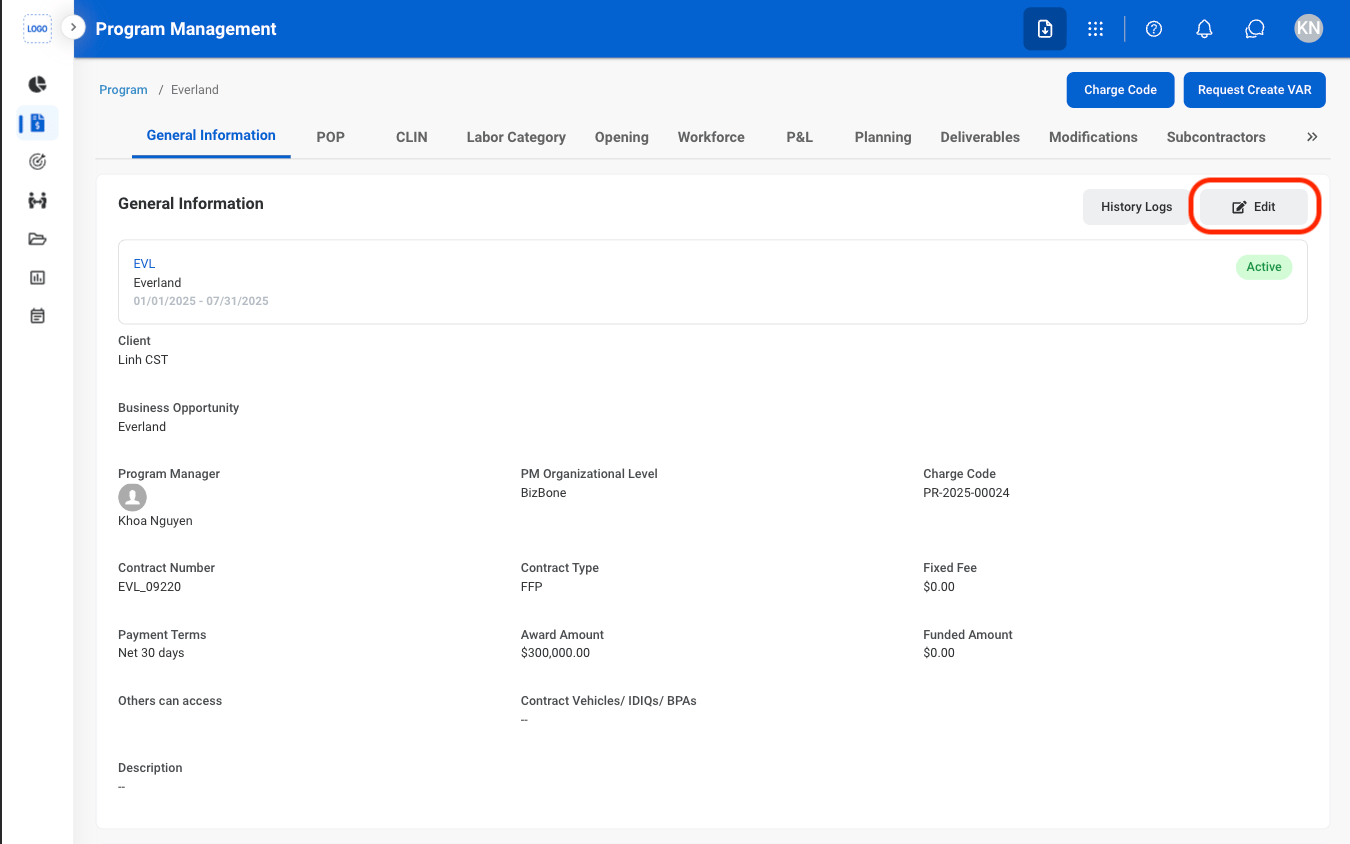
Select Edit
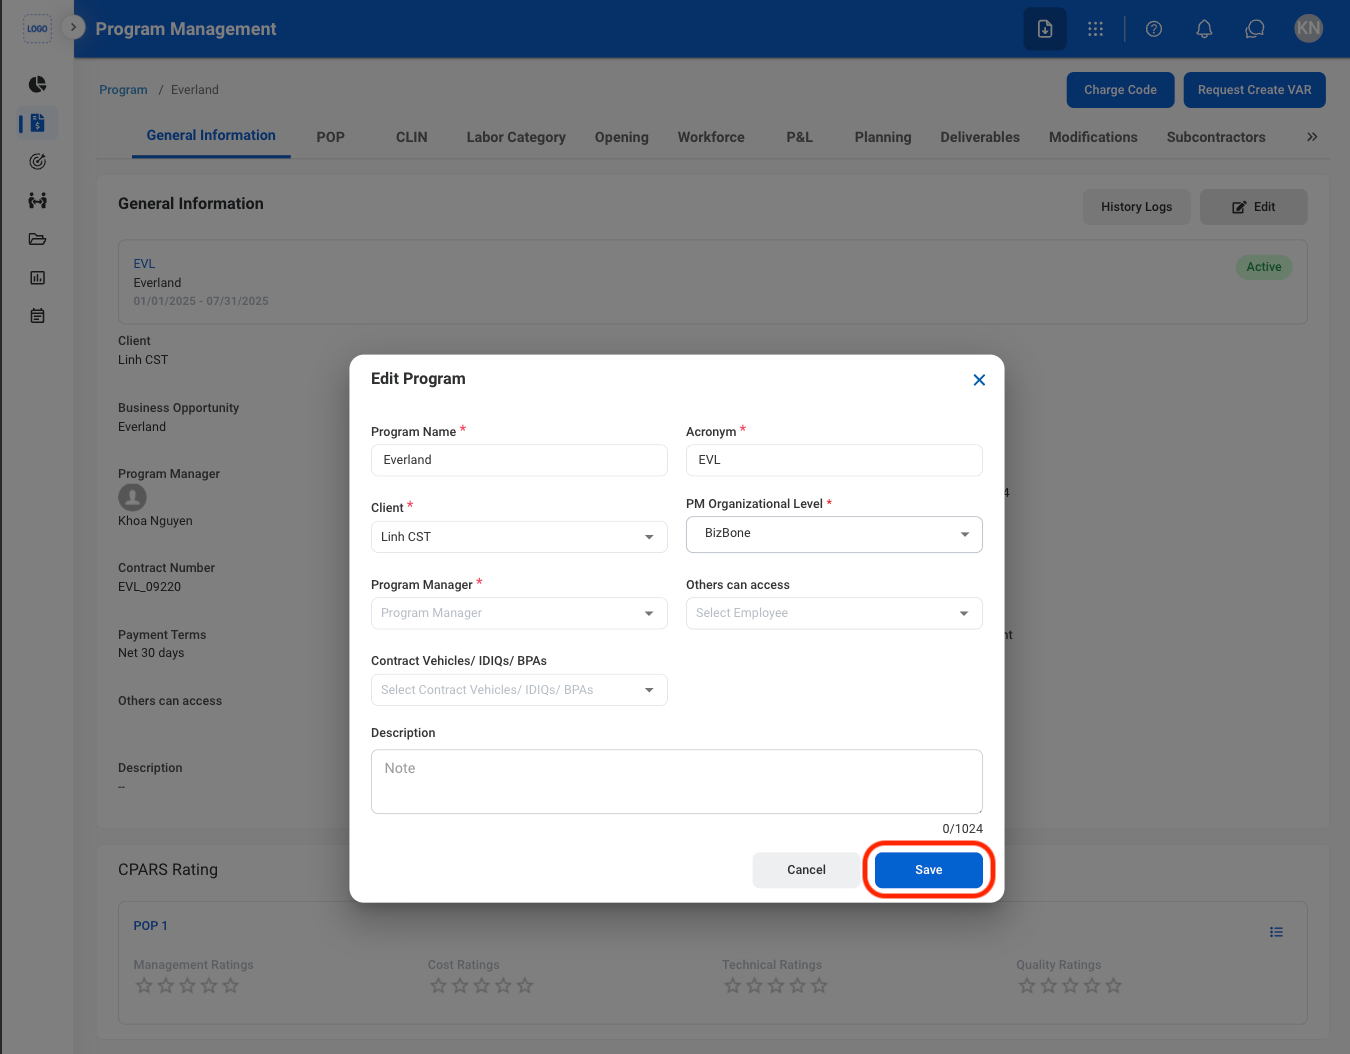
Fill in the required information
Add a Document
Navigate to General Information
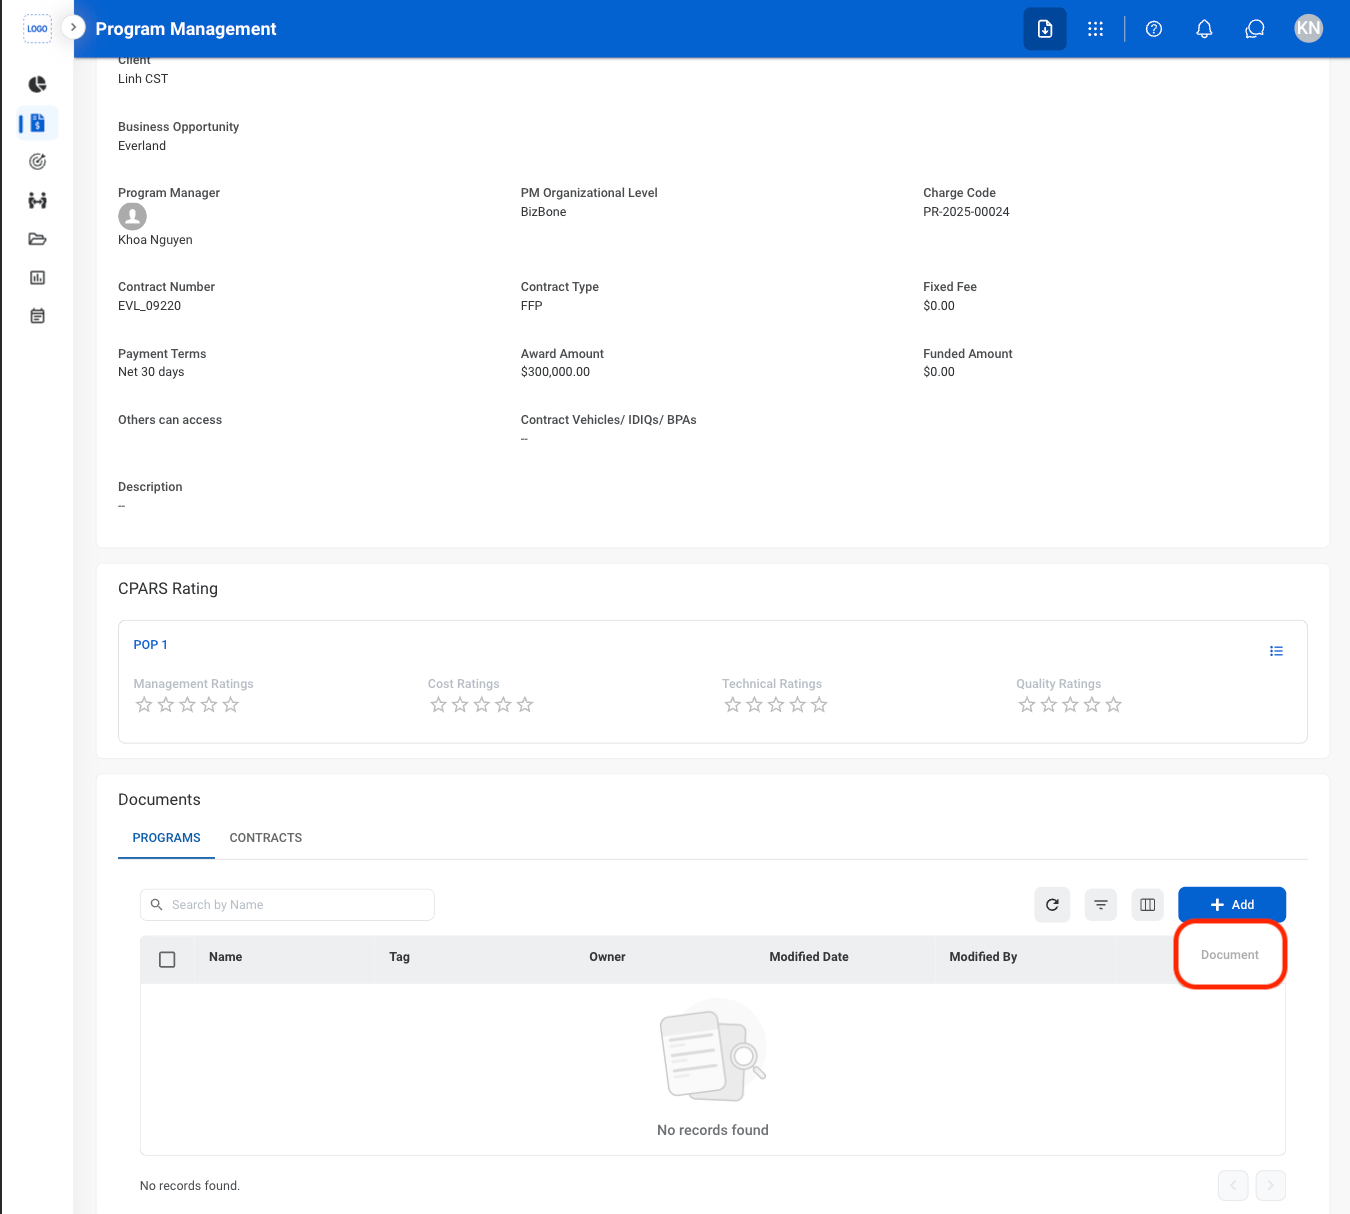
Under Documents, Select Add

Select Document
Fill in the required information
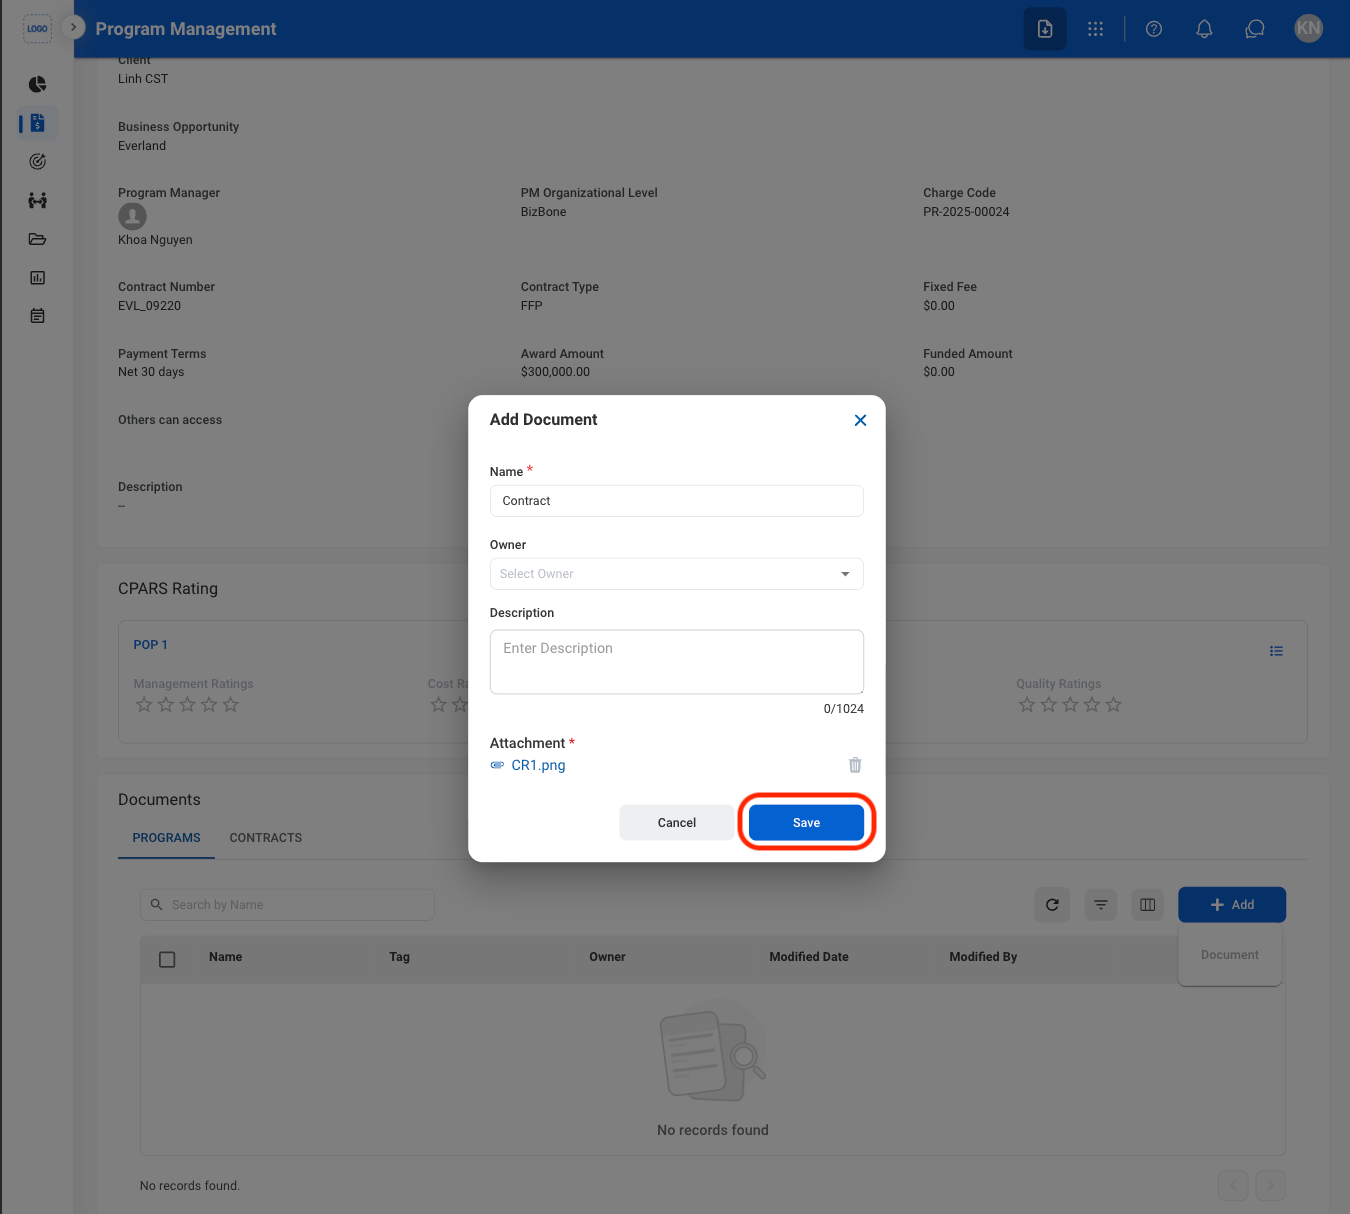
Document Actions
Select an action

- Edit: Replace or modify the uploaded document.
- Download: Download the uploaded documents to the local device.
- Delete: Remove the uploaded document.
Confirm the action
- Edit: Fill in the required information. Select Save to complete or Cancel to exit without saving changes.
- Download: Download will start automatically after selection.
- Delete: Select Delete to complete or Cancel to exit without saving changes.
Period of Performance
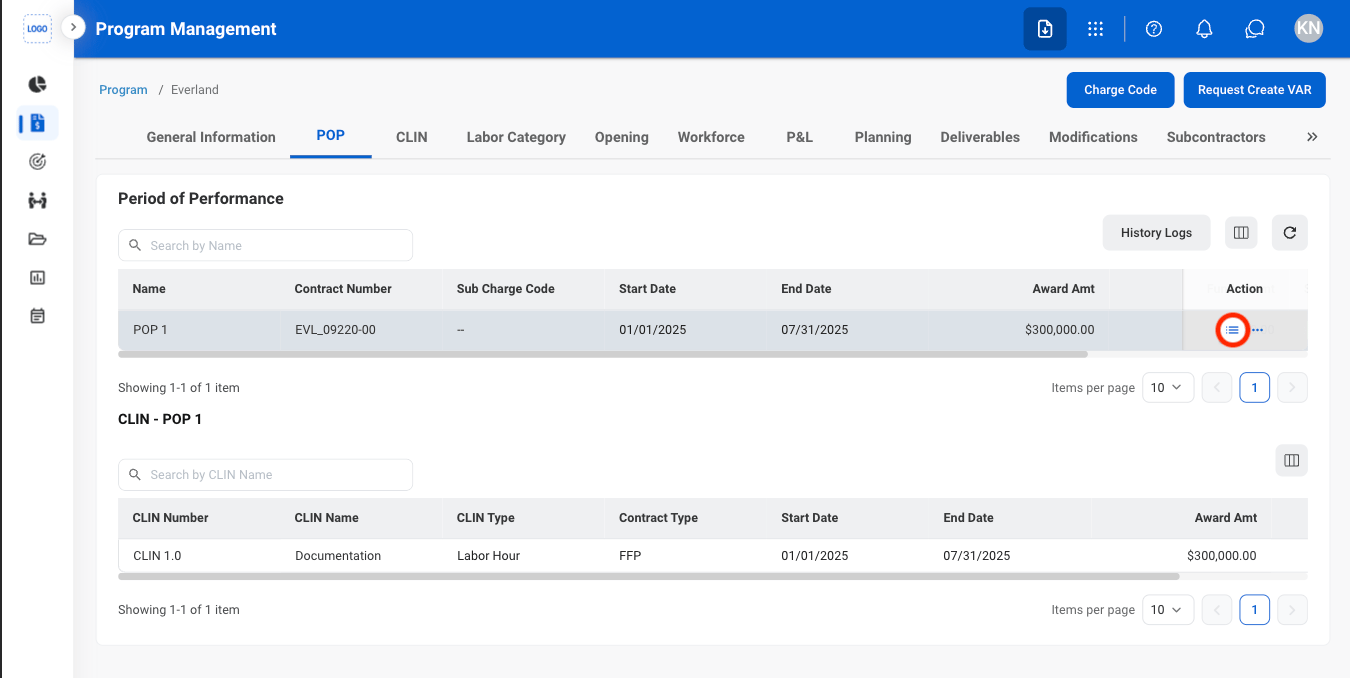
View POP CLINs
Navigate to POP
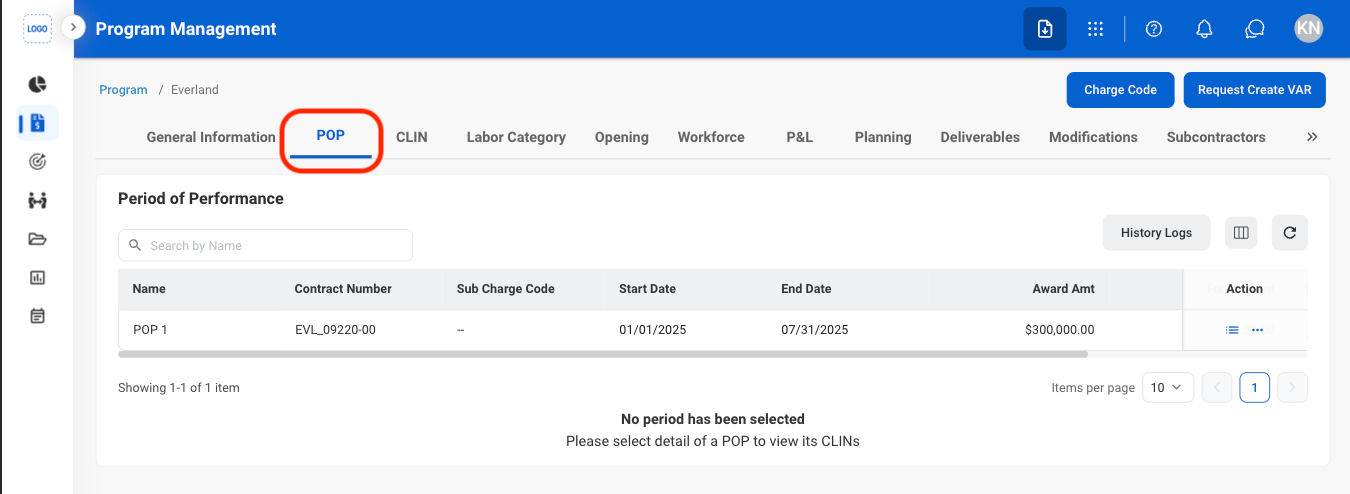
Select the list icon
POP Actions
Select the ellipsis icon
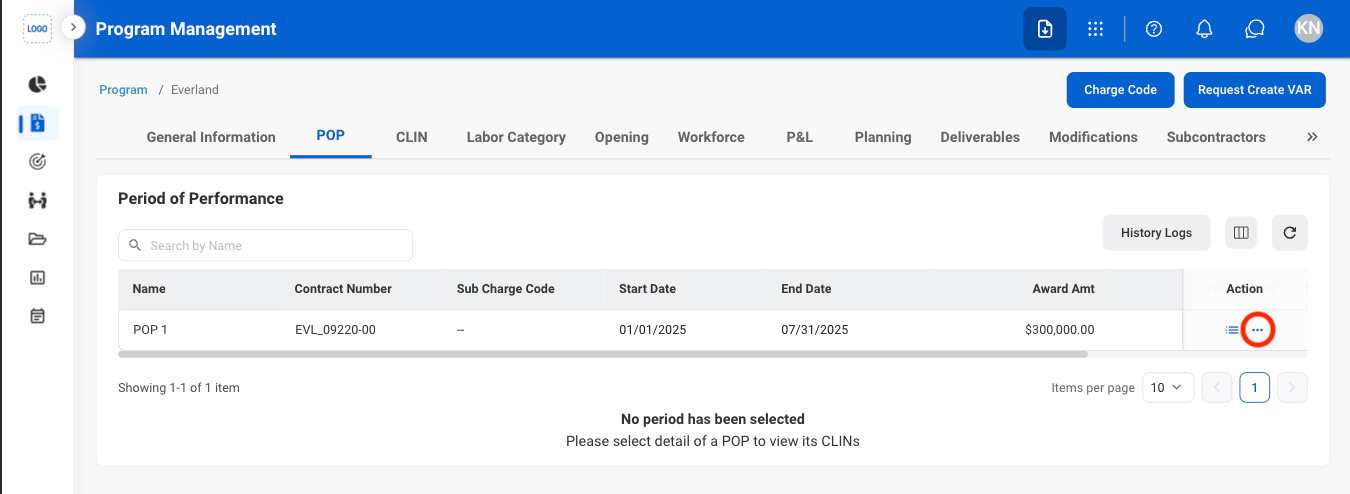
Select the desired action
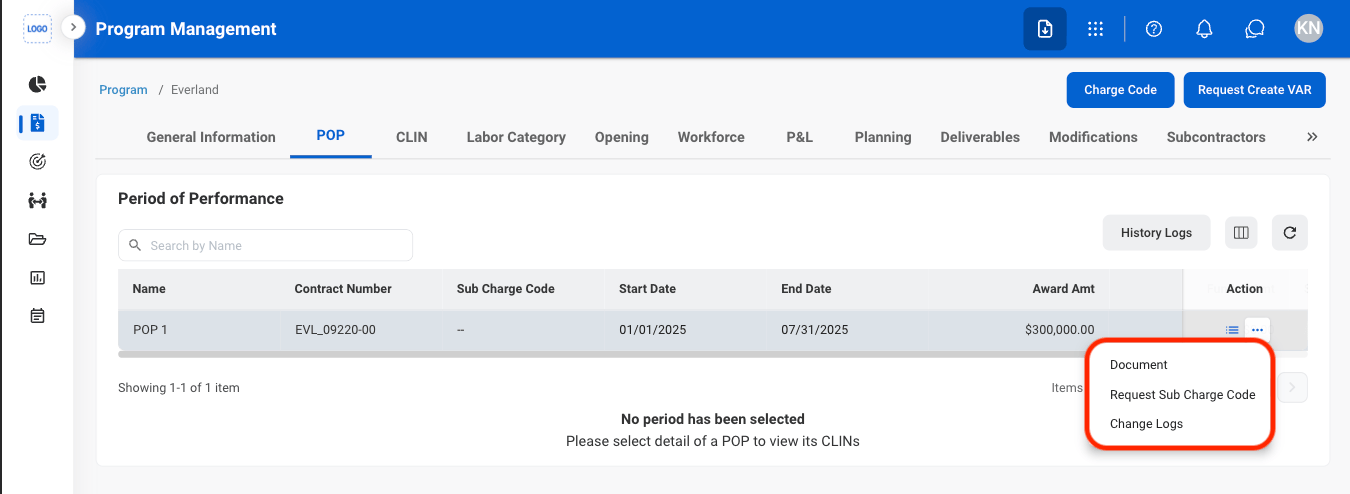
- Documents: View or add documents associated with the selected Period of Performance (POP).
- Request Sub Charge Code: Submit a request for a Sub Charge Code.
- Change Logs: View the change history and recorded updates for the selected POP.
Confirm the action
- Documents: Select a document to view or Add to upload an additional document.
- Request Sub Charge Code: Fill in the required information. Select Add to complete or Cancel to exit without saving changes.
- Change Logs: Select a log to view more details.
Contract Line Item Numbers
View CLIN Labor Categories
Navigate to CLIN
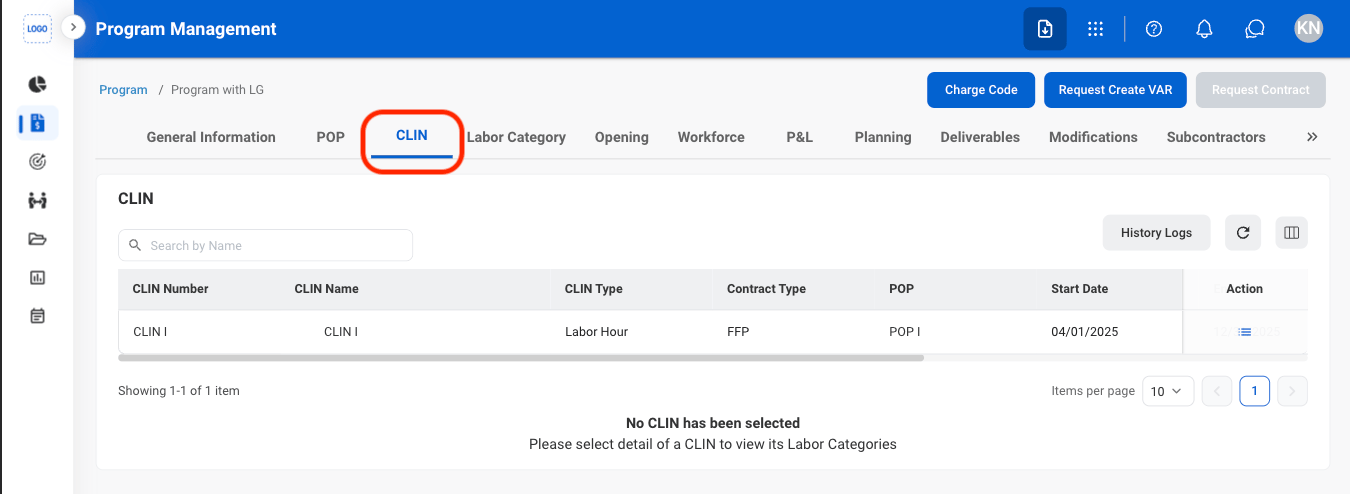
Select the list icon
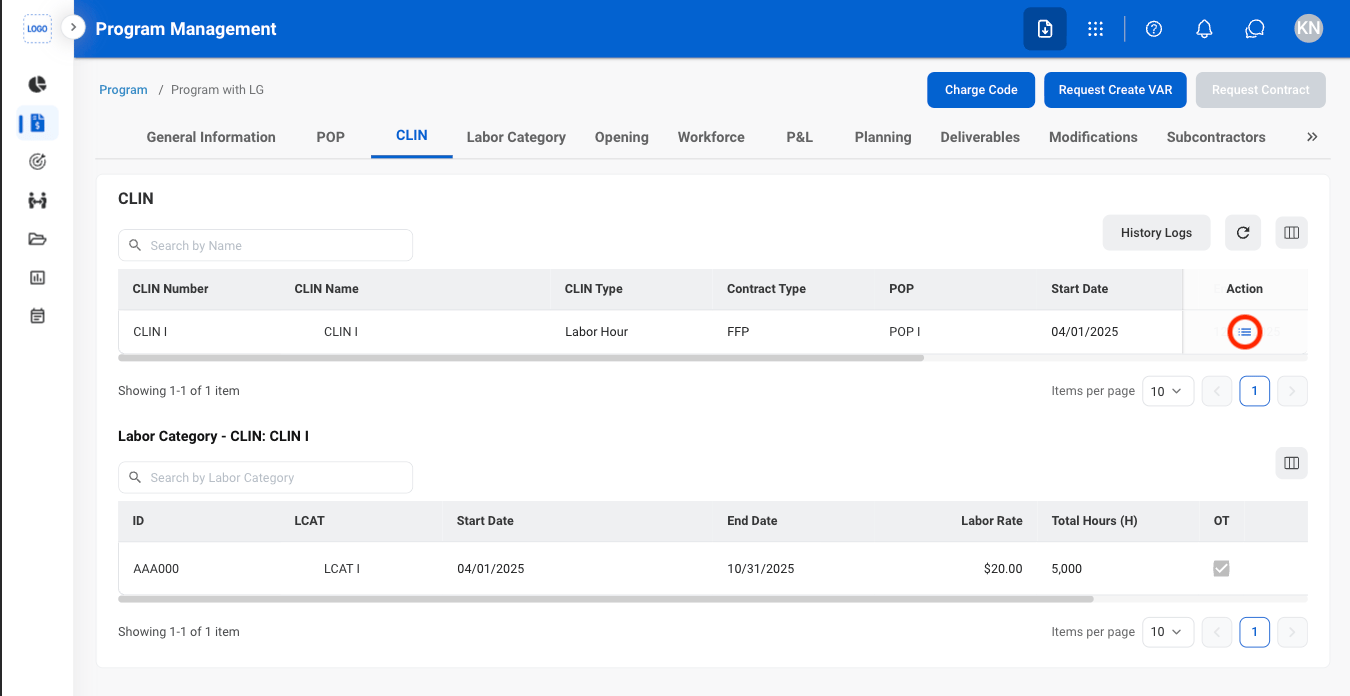
Labor Category
Assign an Employee to an LCAT
Navigate to Labor Category
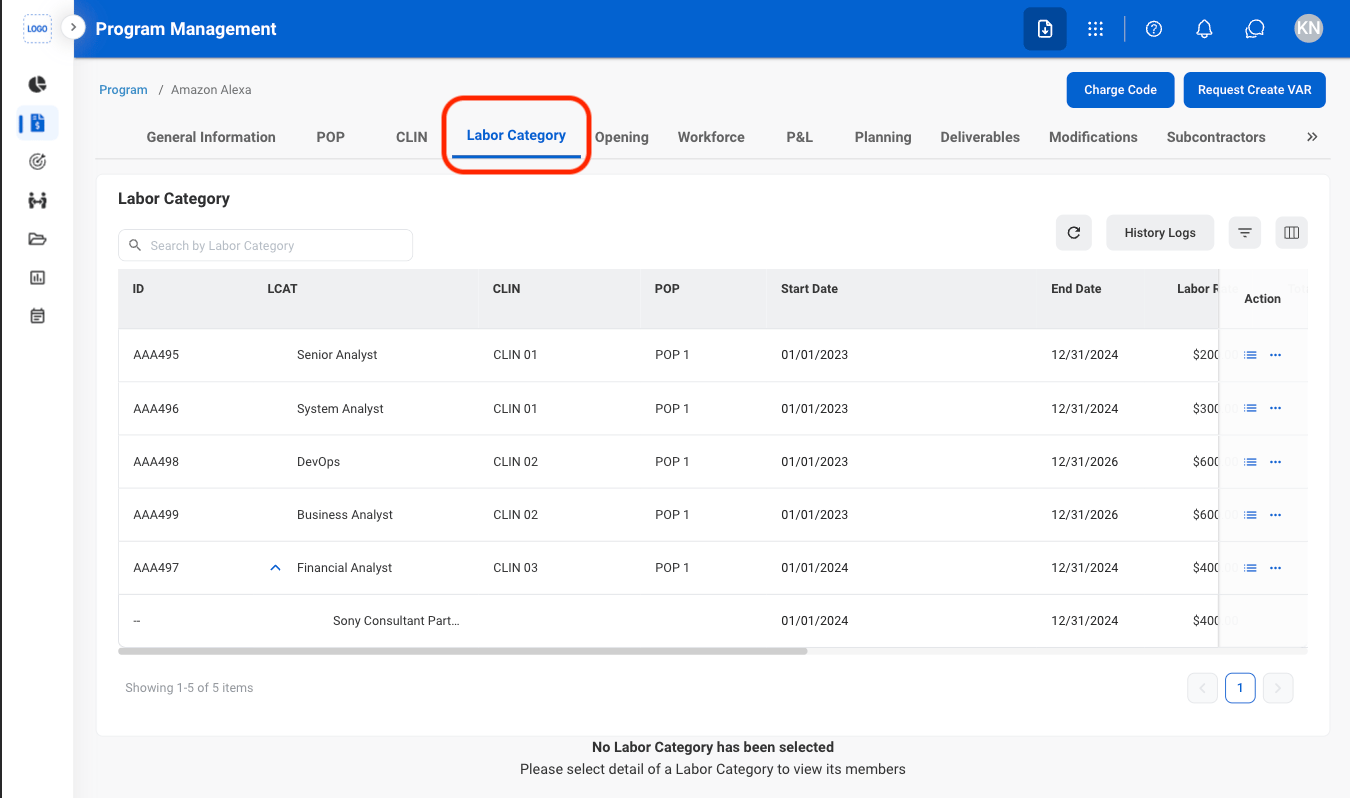
Select the list icon
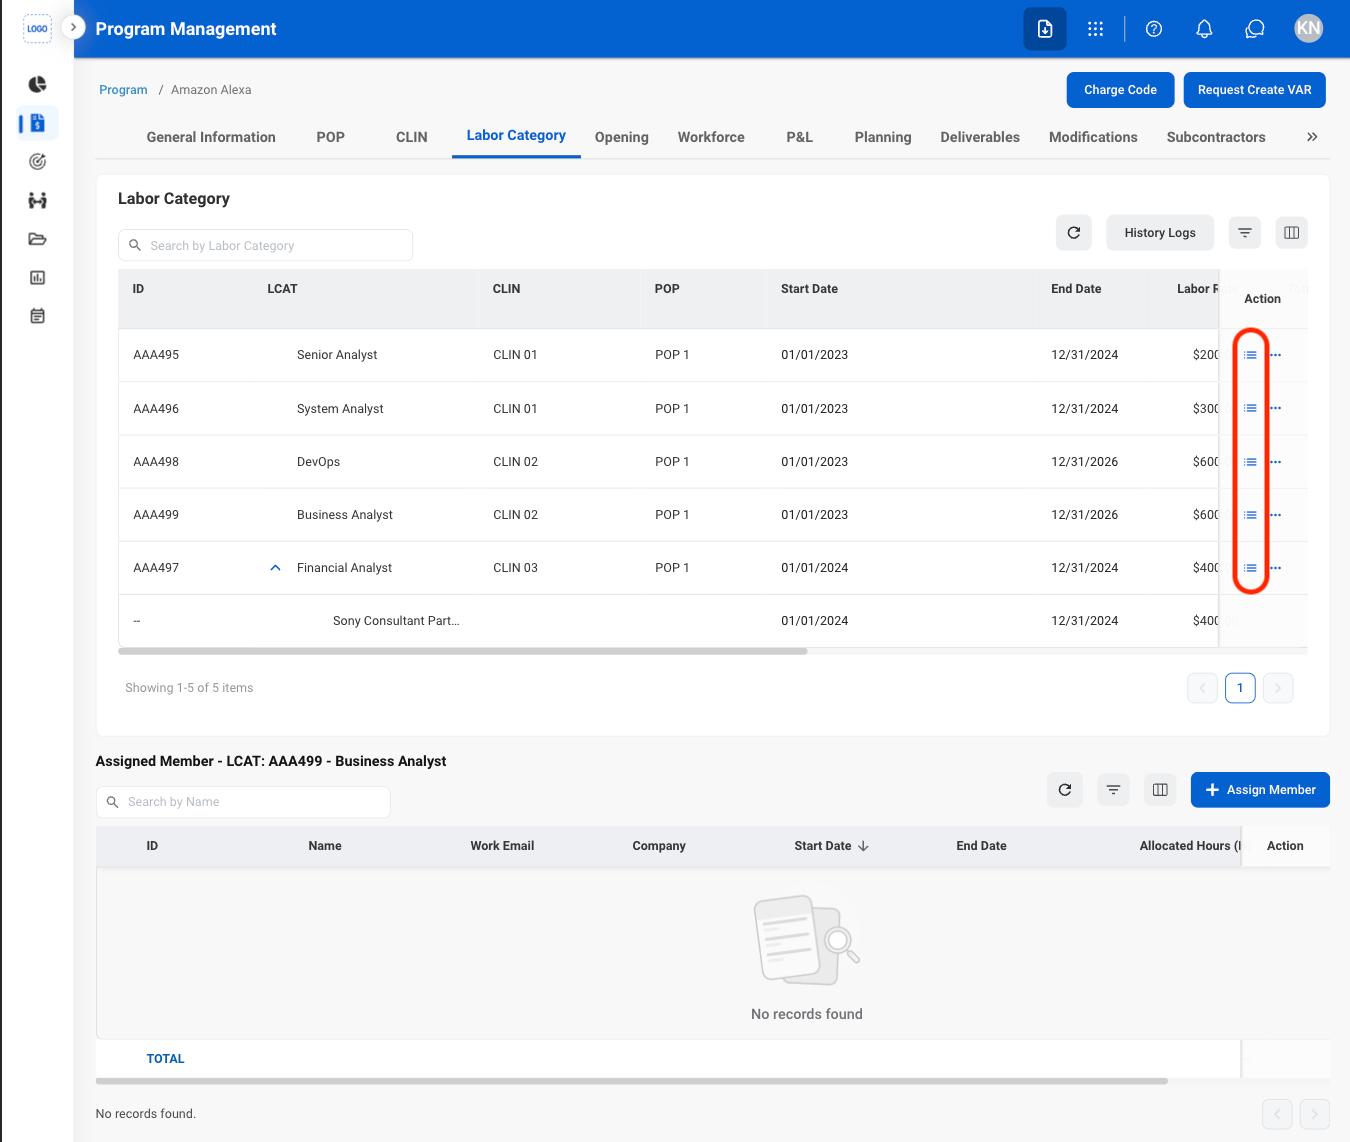
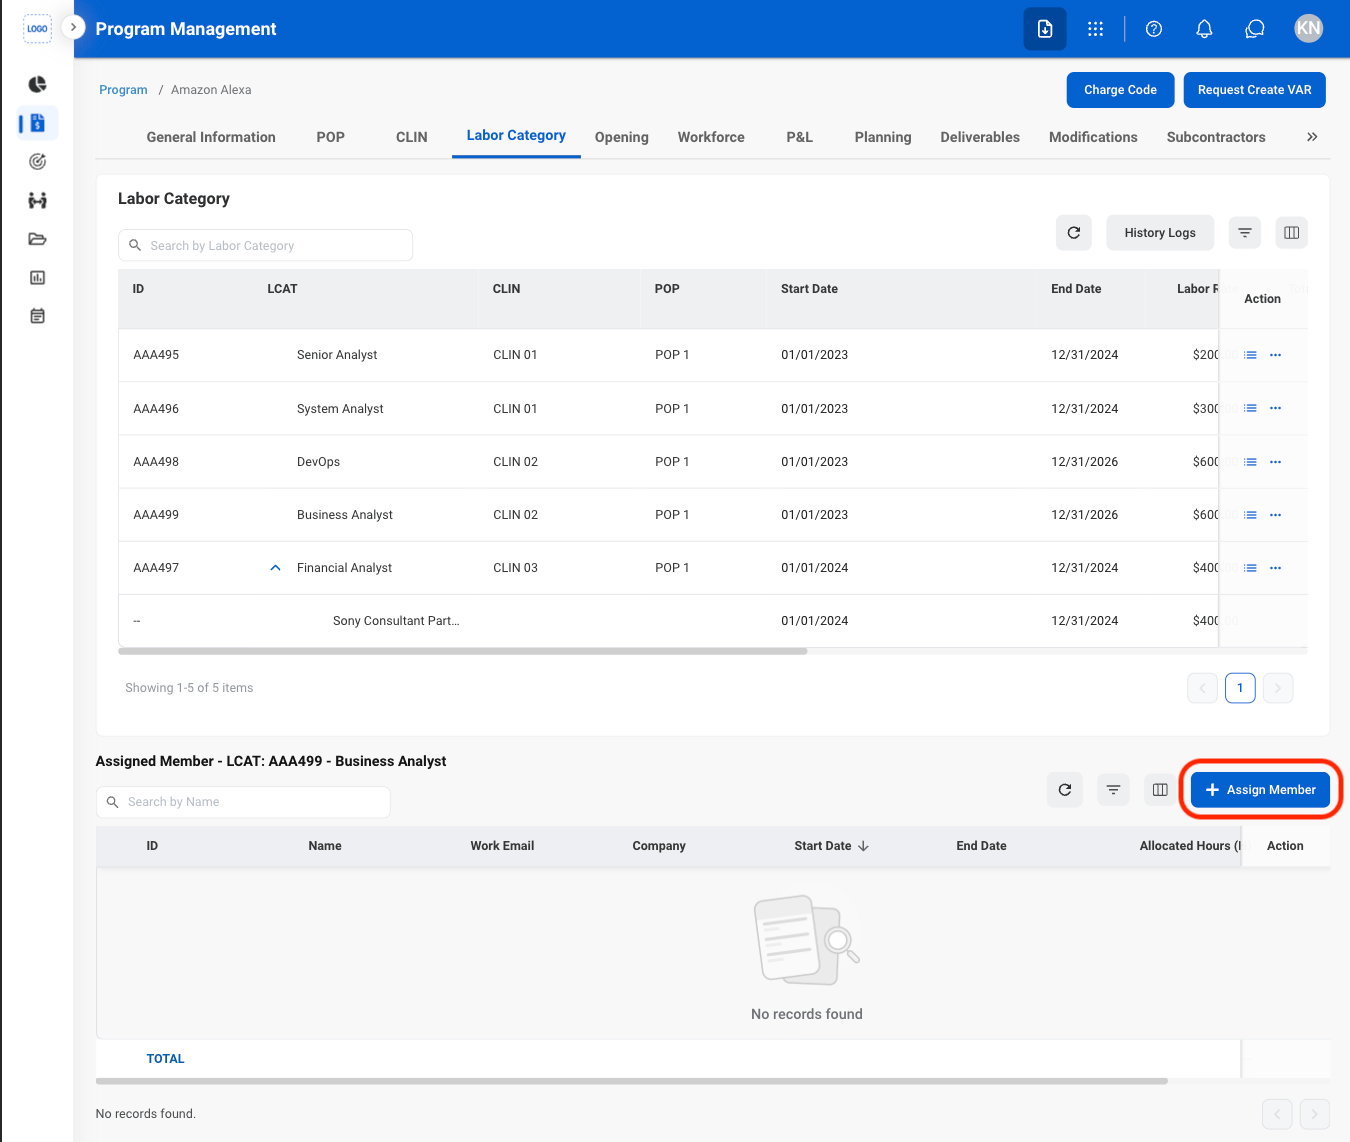
Select Assign Member
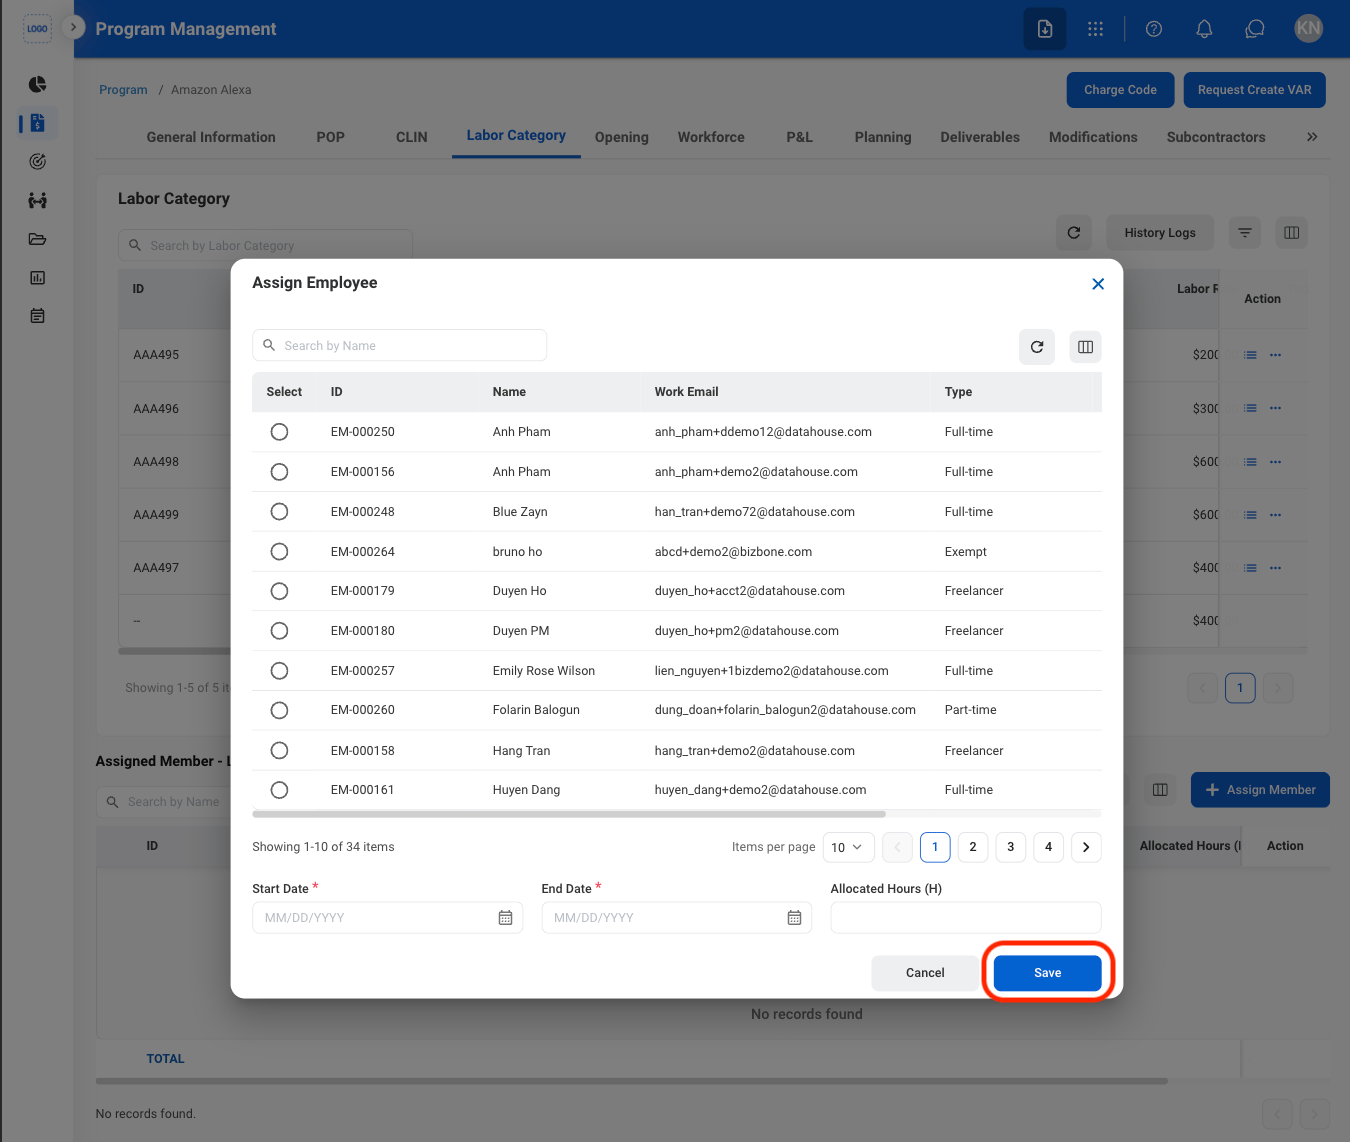
Fill in the required information
Modify an Assigned Member
Select an action
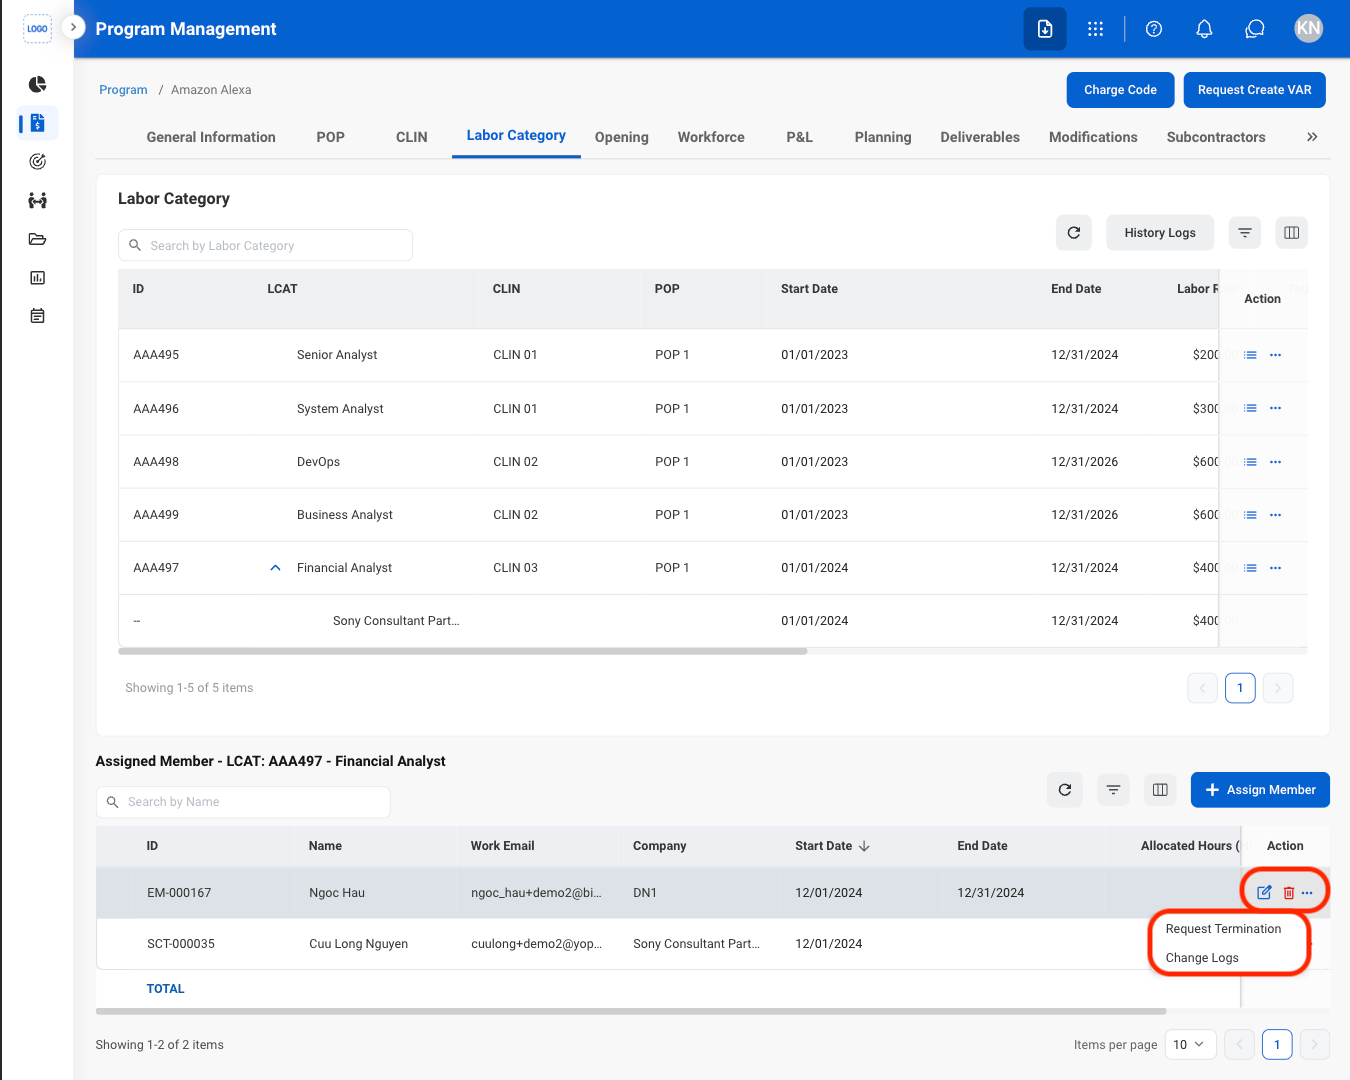
- Edit: Select the edit icon to update an existing entry
- Delete: Select the trash icon to delete an existing entry.
- Request Termination: Submit a request to terminate the employee.
- Remove Member: Remove a Subcontractor or Consultant.
- Change Logs: View the change history and recorded updated for the selected LCAT and employee.
Confirm the action
- Edit: Fill in the required information. Select Save to complete or Cancel to exit without saving changes.
- Delete: Select Delete to complete or Cancel to exit without saving changes.
- Request Termination: Fill in the required information. Select Add to complete or Cancel to exit without saving changes.
LCAT Actions
Select the ellipsis icon
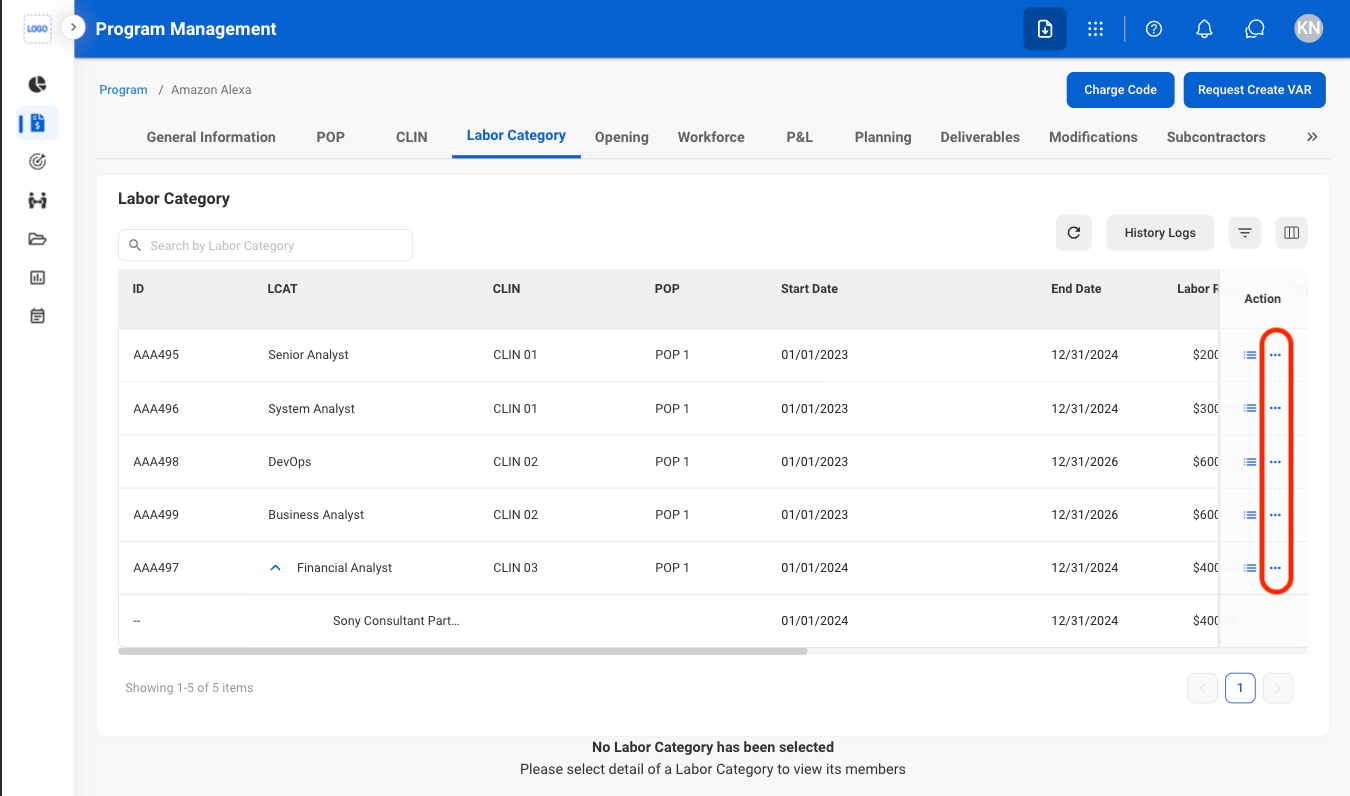
Select an action
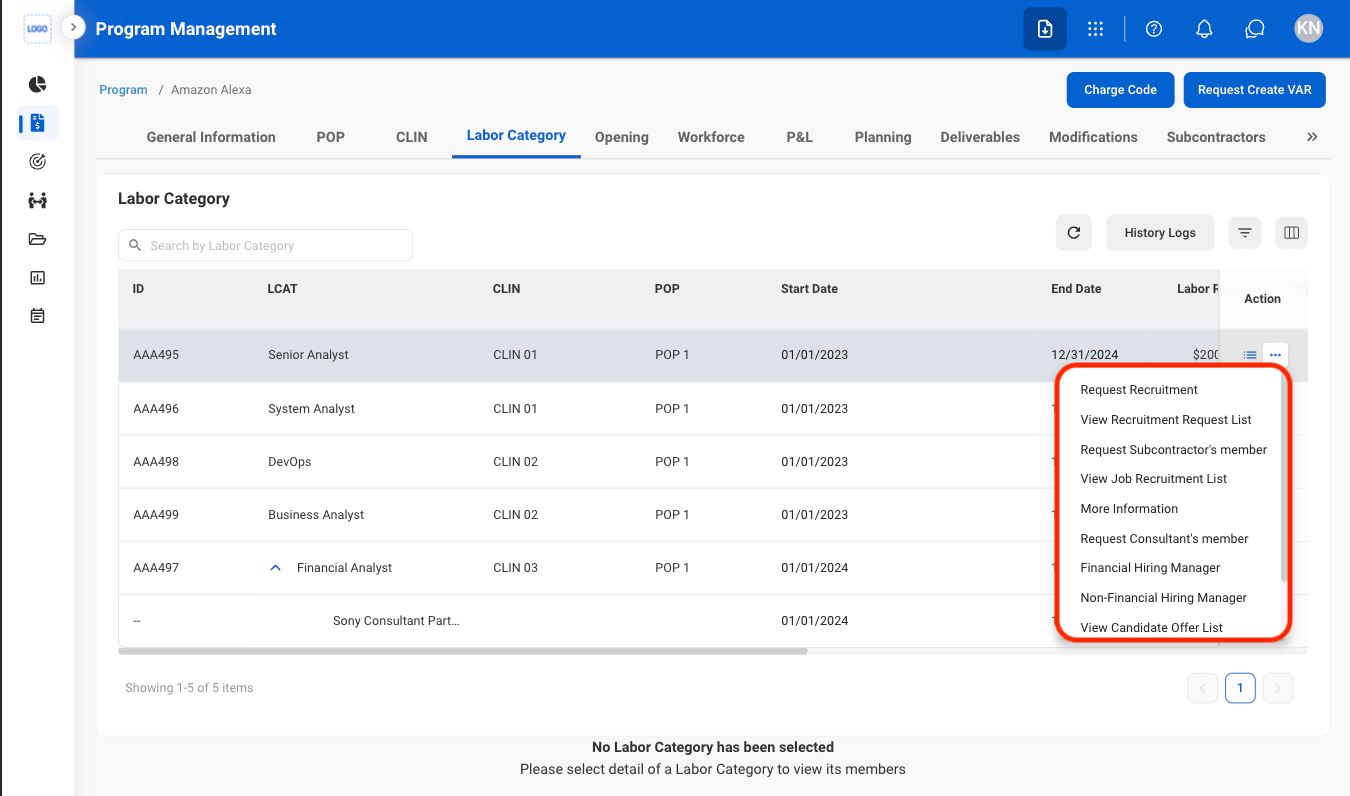
- Request Recruitment: Submit a recruitment request.
- View Recruitment Request List: View recruitment requests.
- Request Subcontractor’s Member: Submit a request for a subcontractor member.
- View Job Recruitment List: View job recruitment records.
- More Information: View additional information.
- Request Consultant’s Member: Submit a request for a consultant member.
- Financial Hiring Manager: Assign a financial hiring manager.
- Non-Financial Hiring Manager: Assign a non-financial hiring manager.
- View Candidate Offer List: View candidate offers.
- Change Logs: View the change history and recorded updates.
- Duplicate: Create a copy of the LCAT.
Confirm the action
- Request Recruitment: Fill in the required information. Select Add to complete or Cancel to exit without saving changes.
- Request Subcontractor’s Member: Fill in the required information. Select Add to complete or Cancel to exit without saving changes.
- Request Consultant’s Member: Fill in the required information. Select Add to complete or Cancel to exit without saving changes.
- Financial Hiring Manager: Fill in the required information. Select Assign to complete or Cancel to exit without saving changes.
- Non-Financial Hiring Manager: Fill in the required information. Select Assign to complete or Cancel to exit without saving changes.
- Duplicate: Fill in the required information. Select Add to complete or Cancel to exit without saving changes.
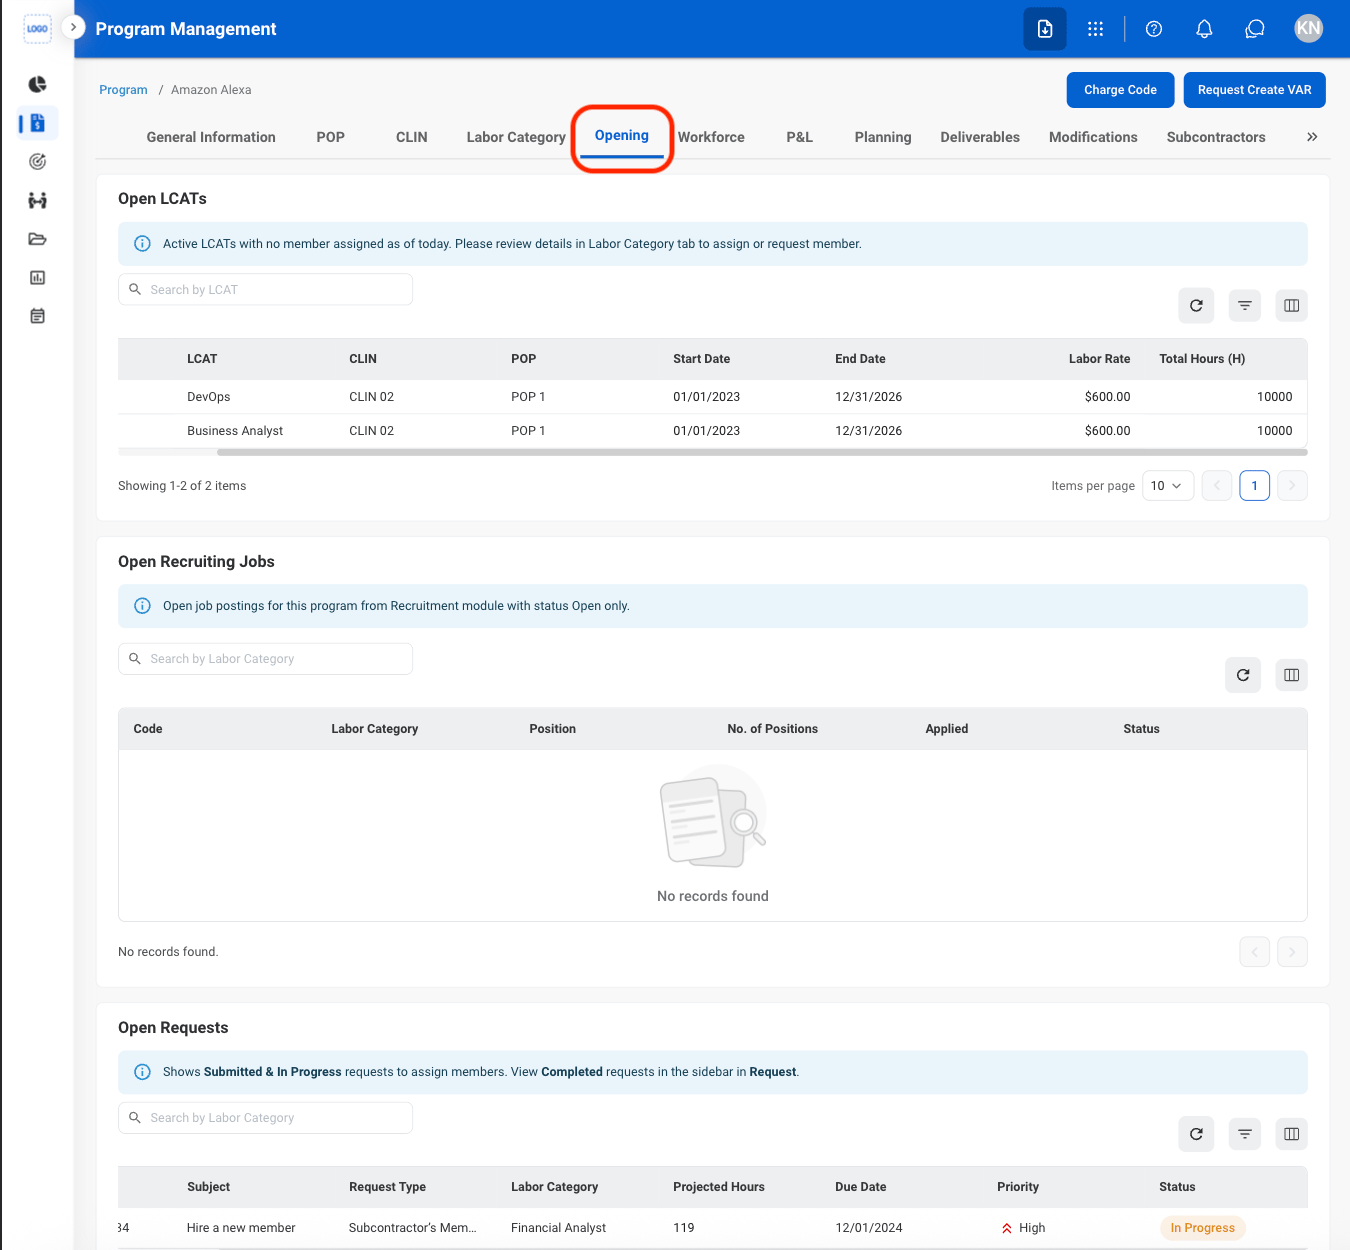
Openings
View Openings
Navigate to Opening
Workforce
View Workforce
Navigate to Workforce
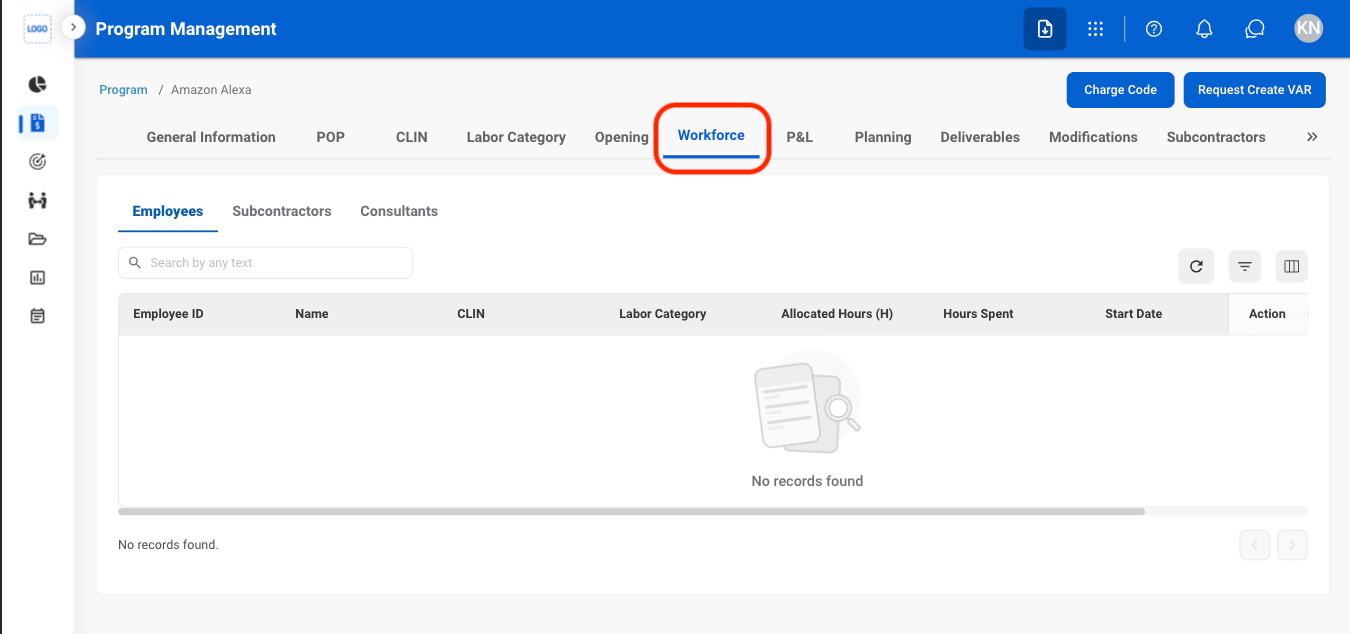
Select a tab
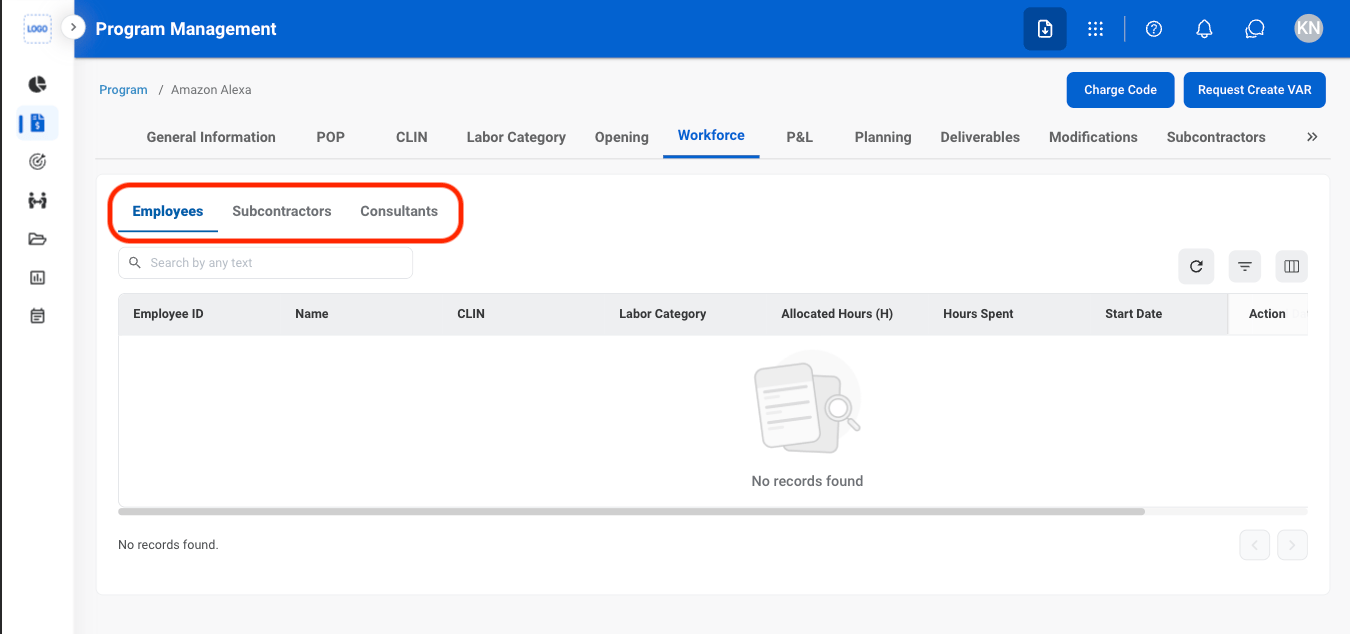
- Employees: Internal personnel employed directly by the organization.
- Subcontractors: External personnel provided through a subcontractor to support contracted work.
- Consultants: External professionals engaged to provide specialized expertise or services.
Modify Employee, Subcontractor, or Consultant Status
Select a tab
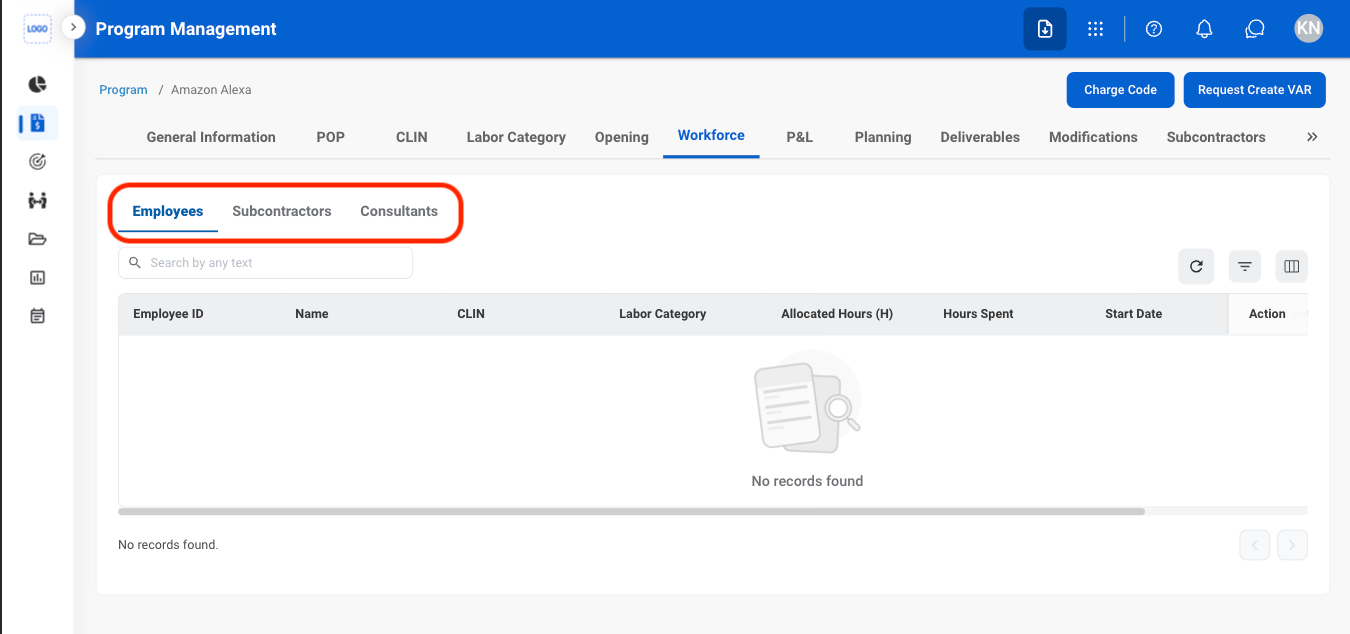
Select an action
- Employees
- Delete: Remove employee from the program
- Request Termination: Submit a request to terminate the employee from the company
- Subcontractors & Consultants
- Request Remove: Submit a request to remove the subcontractor or consultant’s team member from the program
Confirm the action
- Delete: Select Confirm to complete or Cancel to exit without saving changes.
- Request Termination: Fill in the required information. Select Add to complete or Cancel to exit without saving changes.
- Request Remove: Fill in the required information. Select Add to complete or Cancel to exit without saving changes.
View Profit & Loss
Navigate to P&L

Select a tab
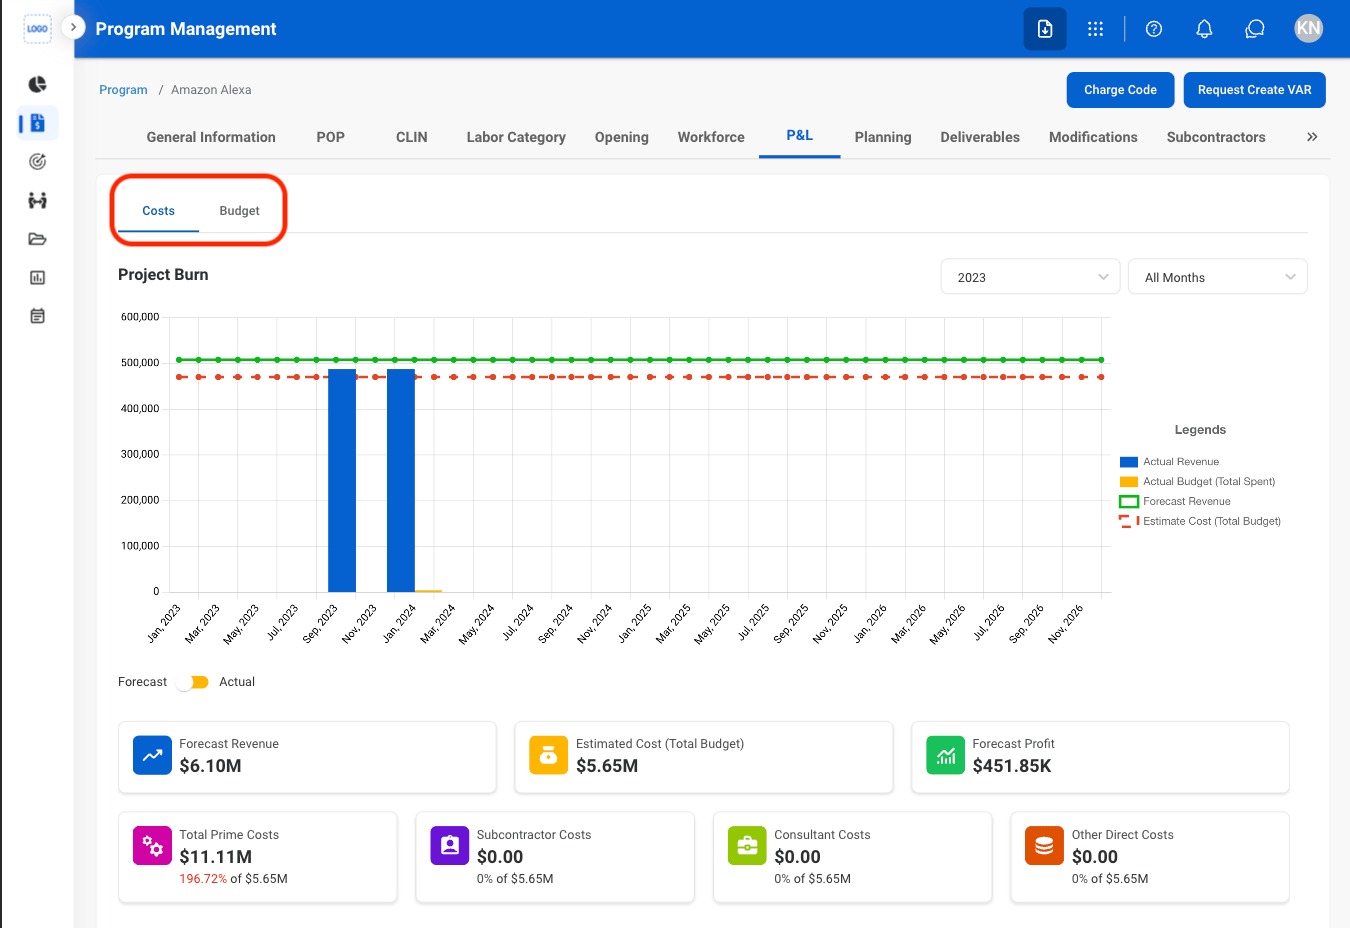
- Costs: View costs and expenses associated with the program.
- Budget: View the program’s budget and monitor allocated and available funds.
Planning
Add a Plan
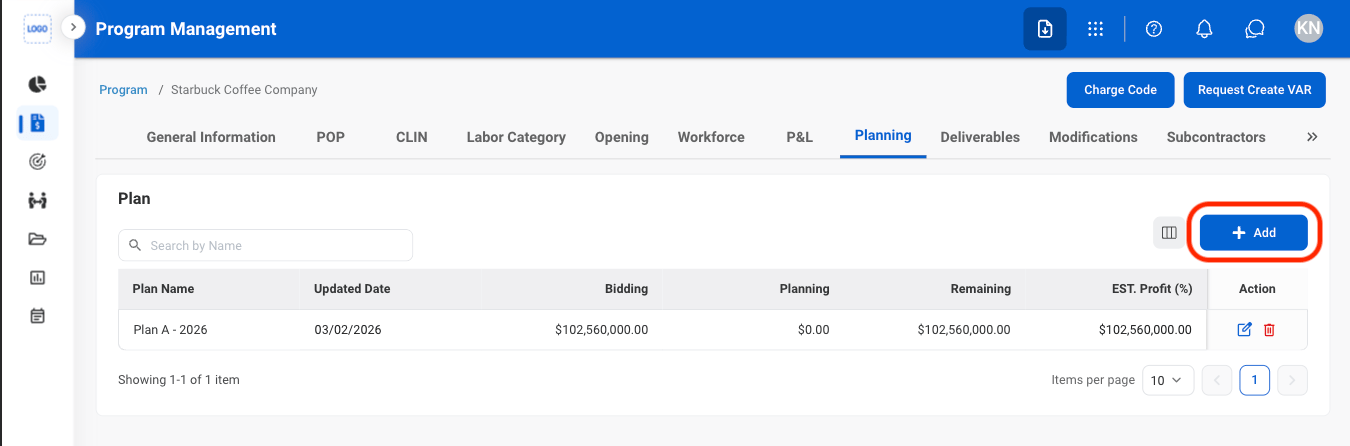
Navigate to Planning
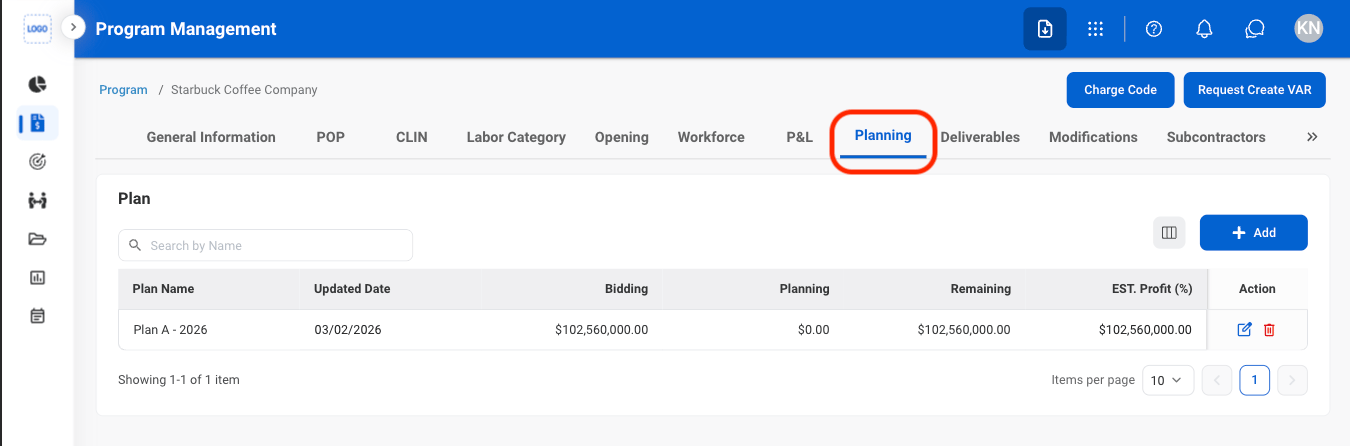
Select Add
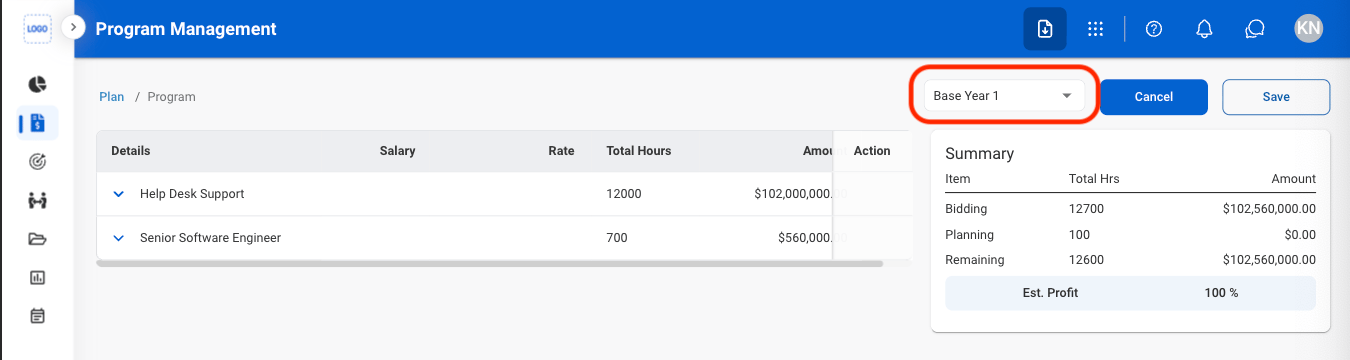
Select a POP
Edit details
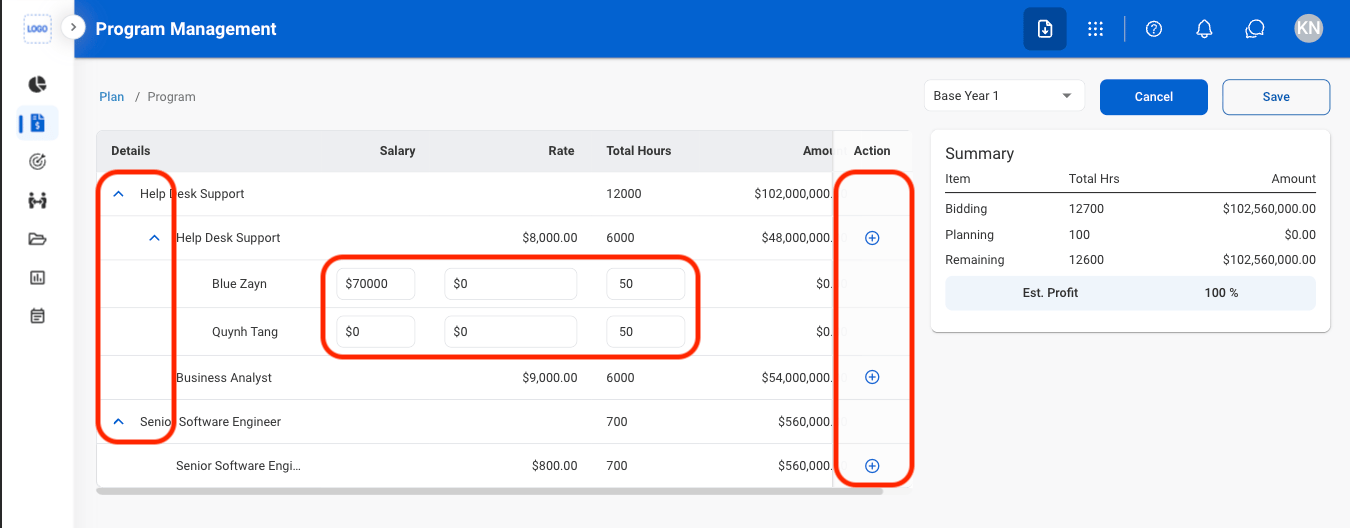
- Select the carets to expand details
- Select the Add icons to add more employees
- Fill in planned employee salary, rate, and hours
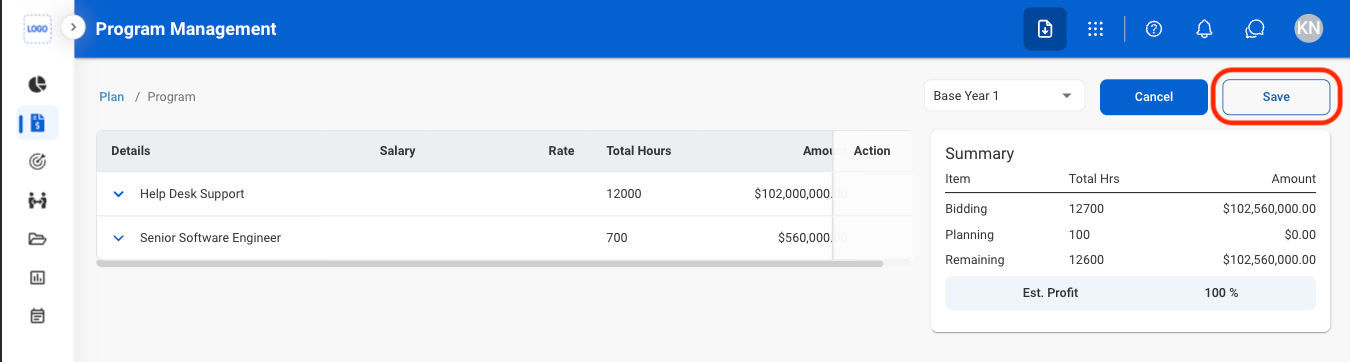
Save the plan
Modify a Plan
Select an action

- Edit: Select the edit icon to update an existing entry
- Delete: Select the trash icon to delete an existing entry.
Confirm the action
- Edit: Fill in the required information. Select Save to complete or Cancel to exit without saving changes.
- Delete: Select Delete to complete or Cancel to exit without saving changes.
Deliverables
Add a Deliverable
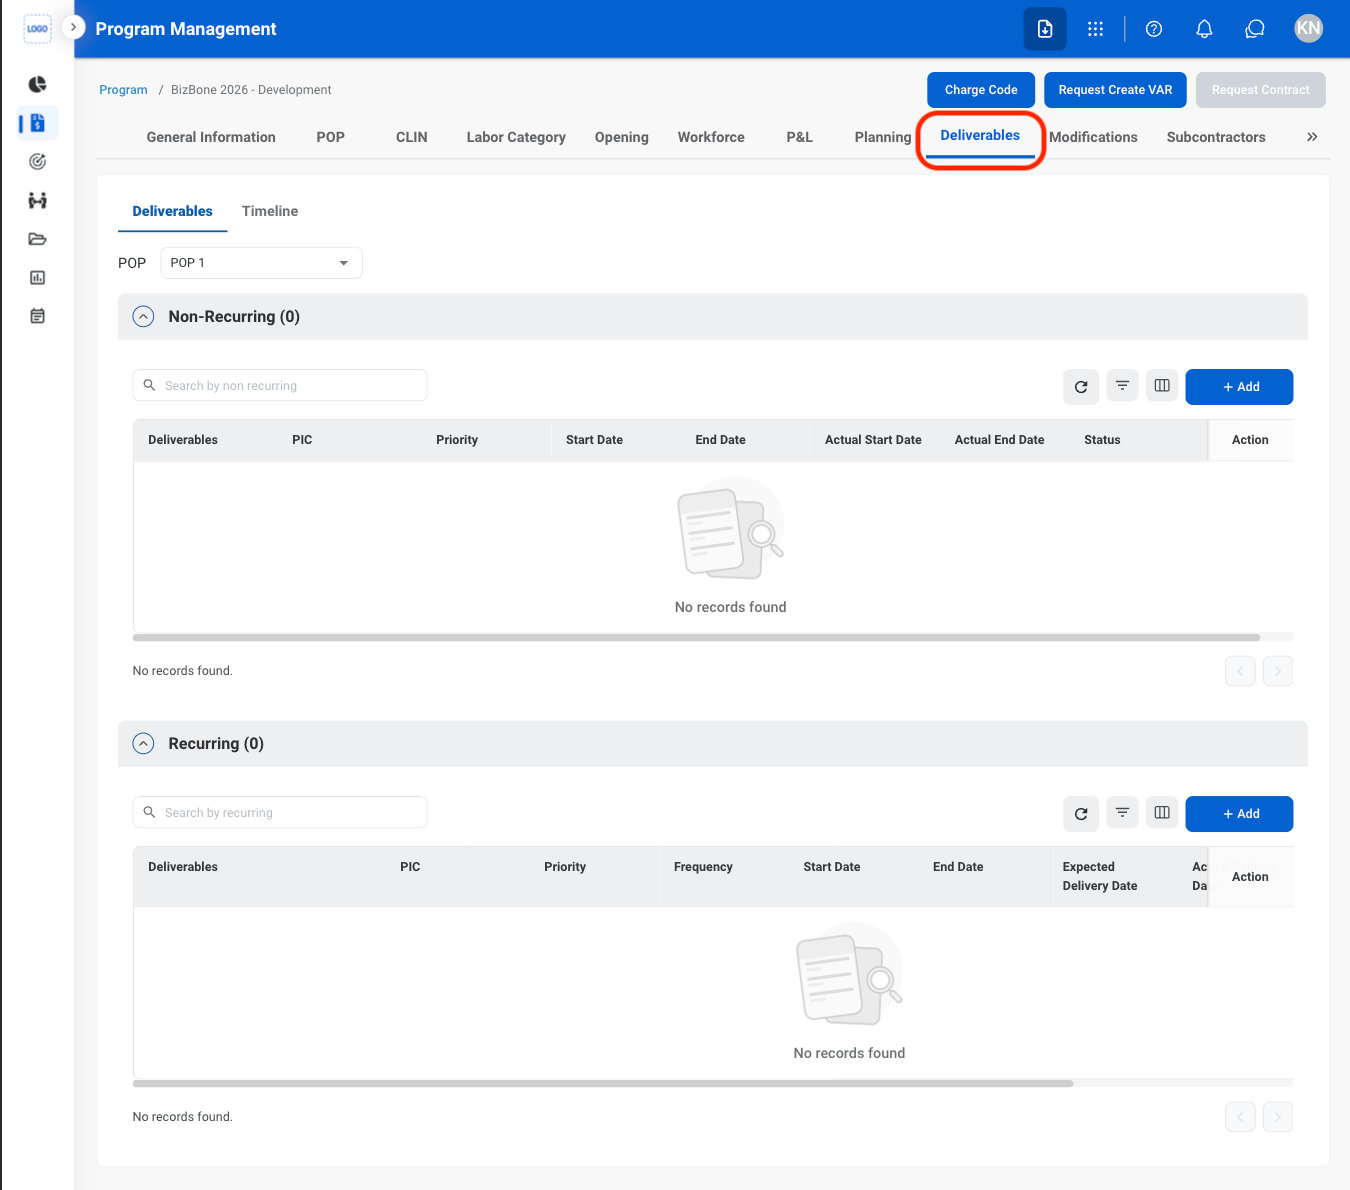
Navigate to Deliverables
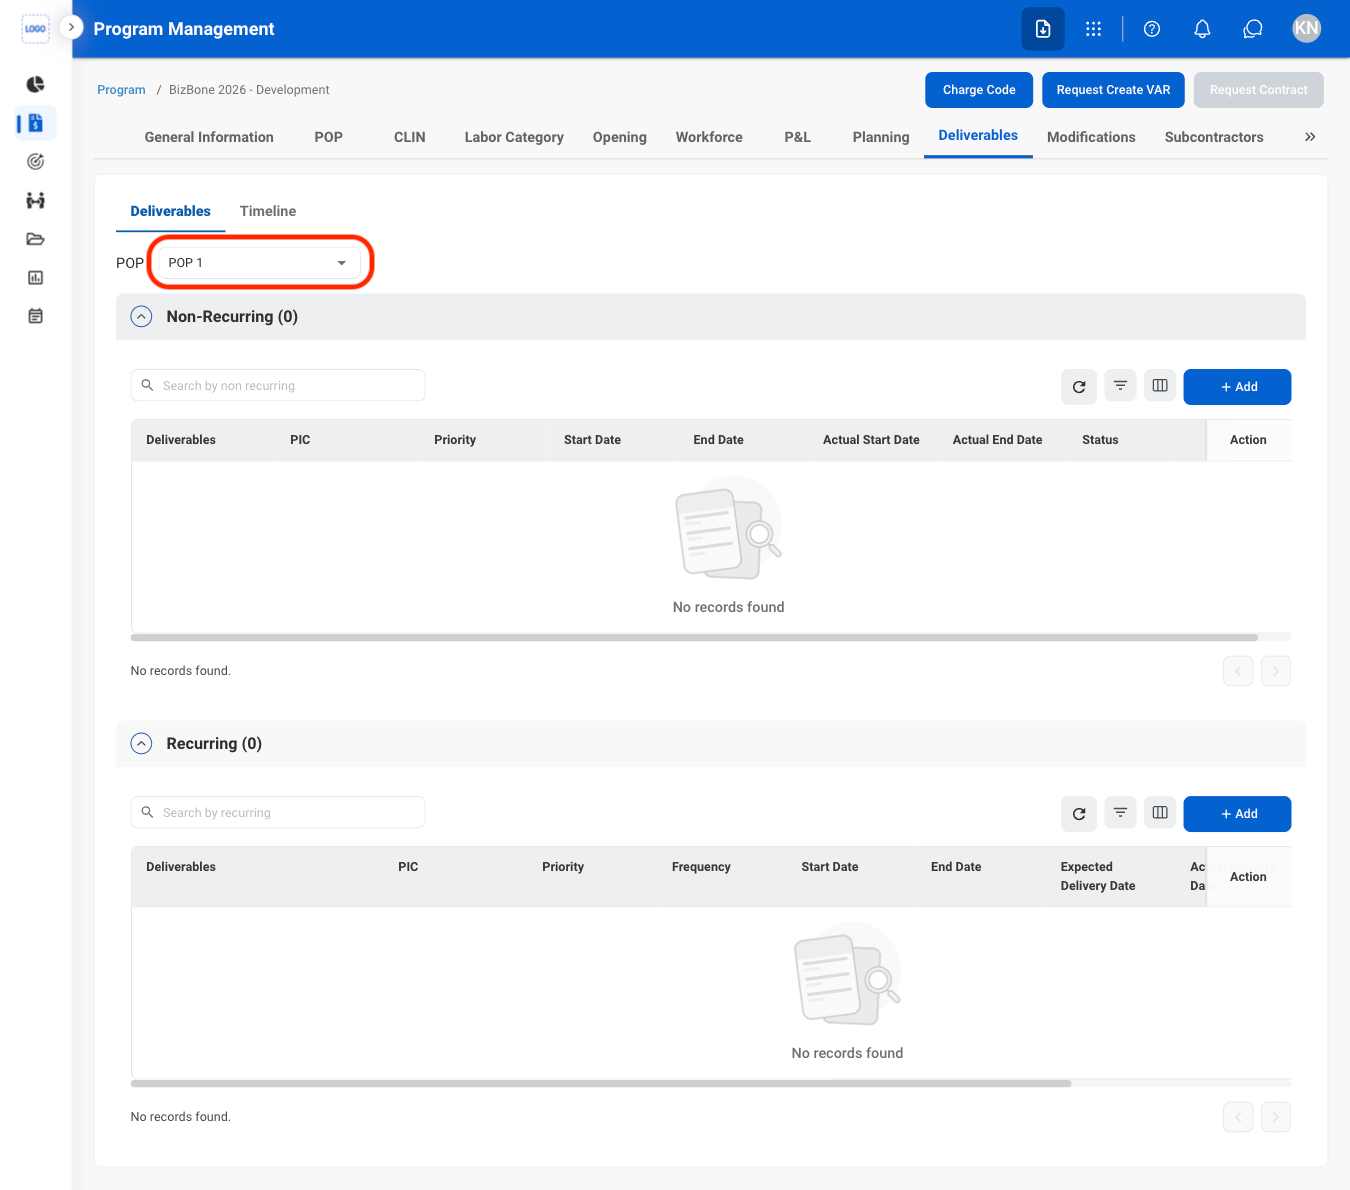
Select a POP
Select Add
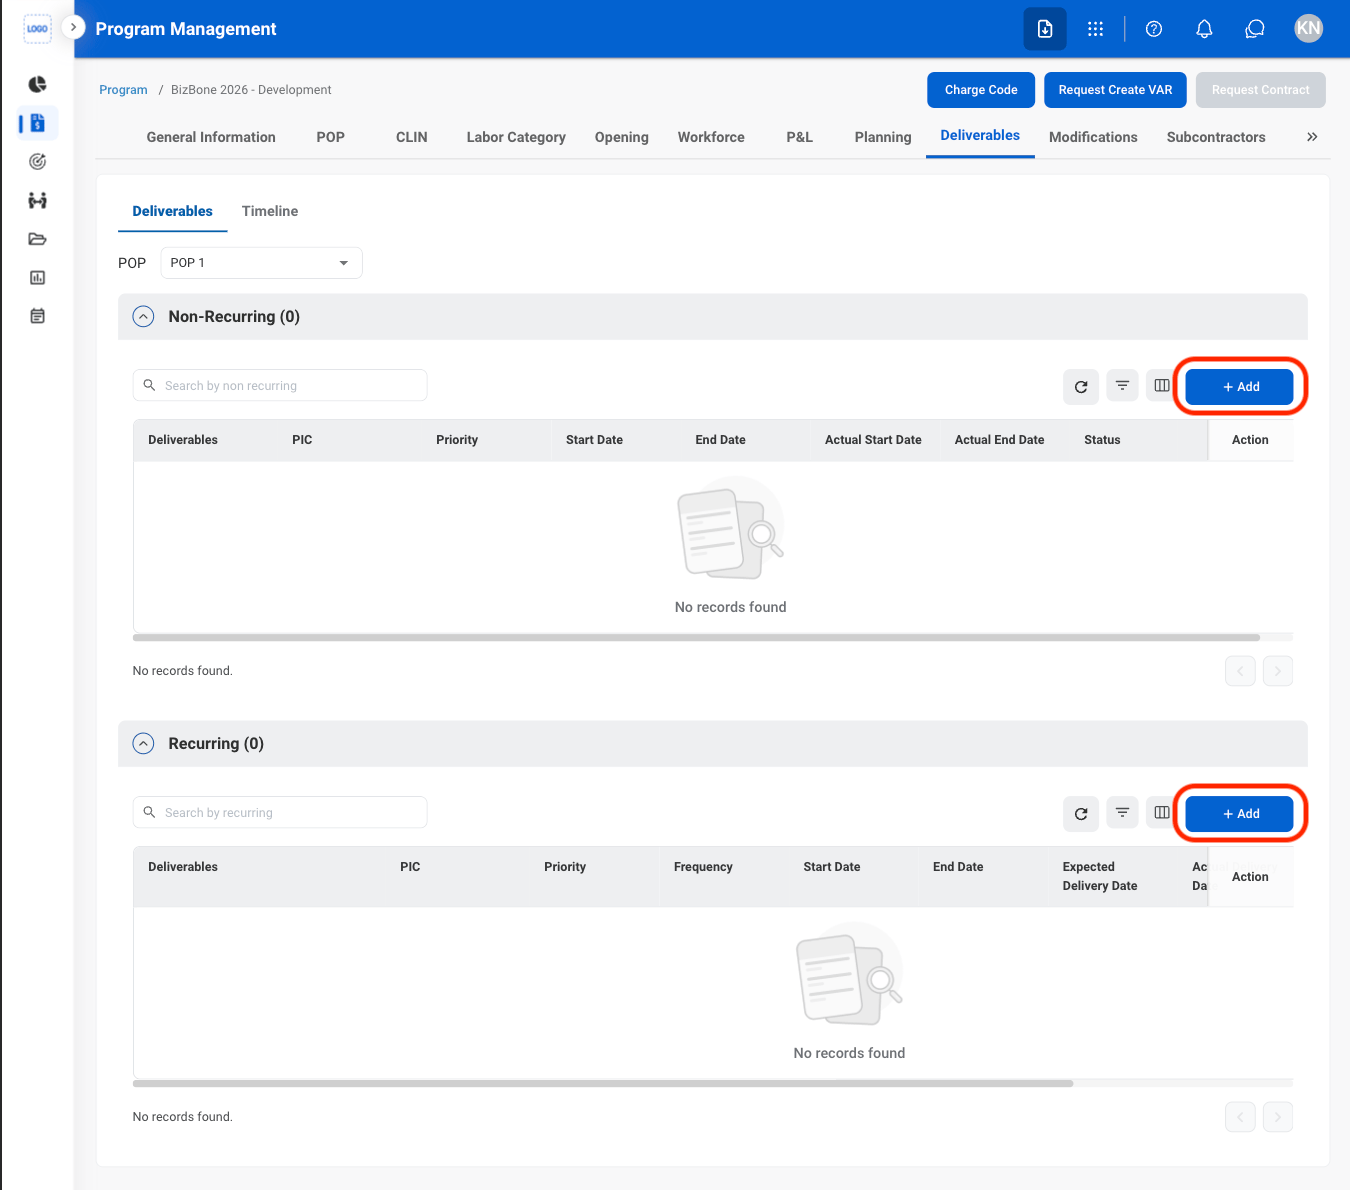
- Recurring: Deliverables that are required on a regular or repeated schedule.
- Non-Recurring: Deliverables that are required once or on a one-time basis.
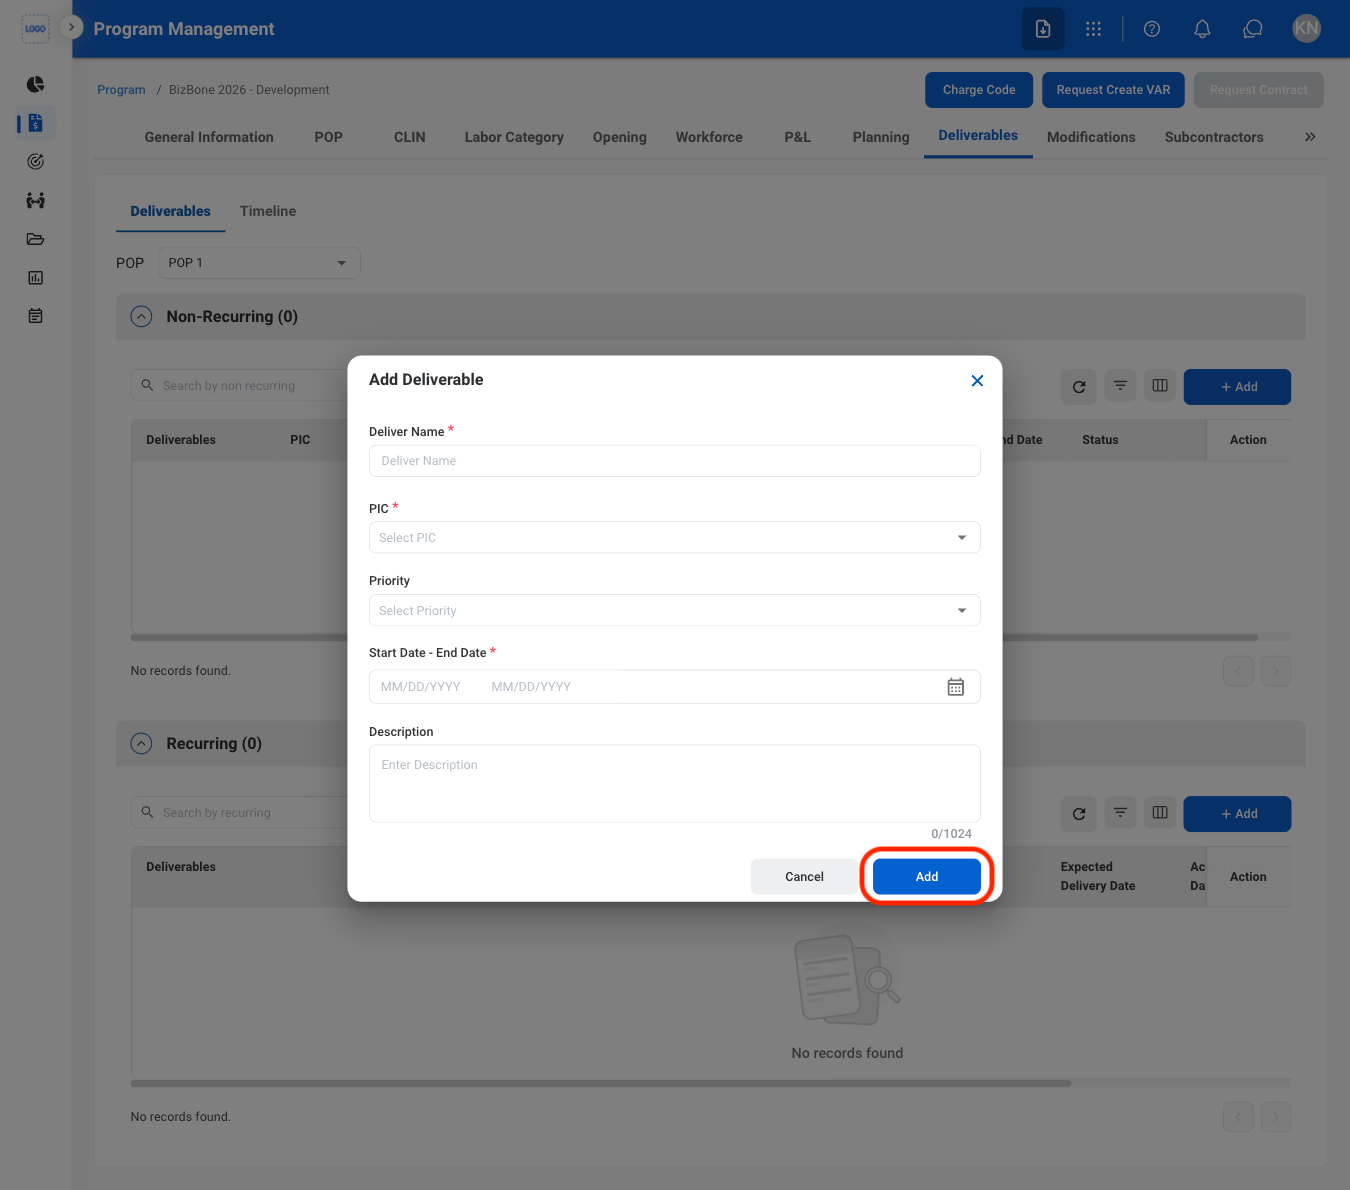
Fill in the required information
Modify a Deliverable
Select an action
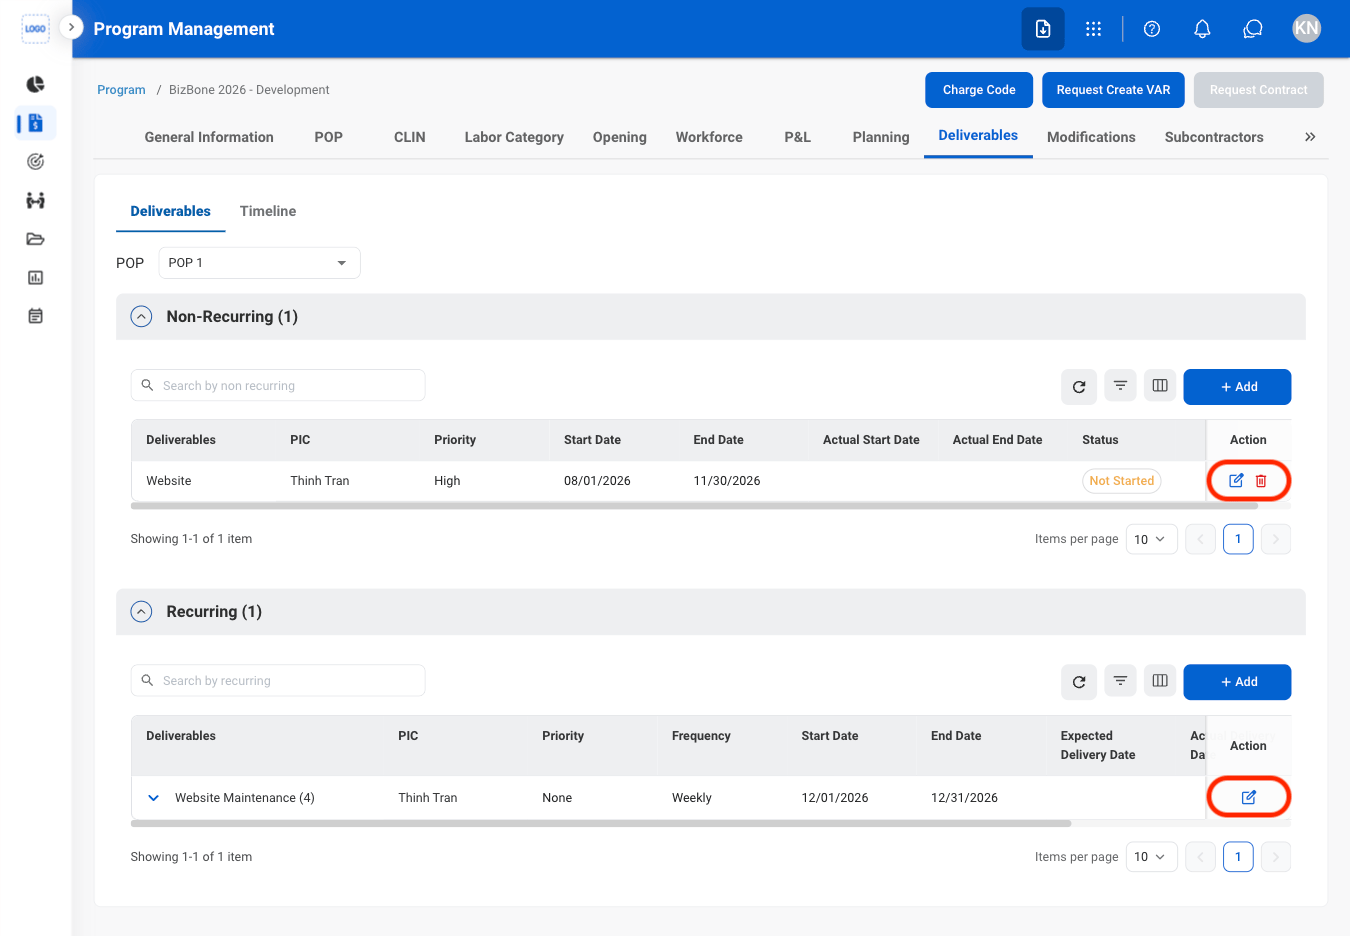
- Edit: Select the edit icon to update an existing entry
- Delete: Select the trash icon to delete an existing entry.
Confirm the action
- Edit: Fill in the required information. Select Update to complete or Cancel to exit without saving changes.
- Delete: Select Delete to complete or Cancel to exit without saving changes.
Modifications
Request a Modification
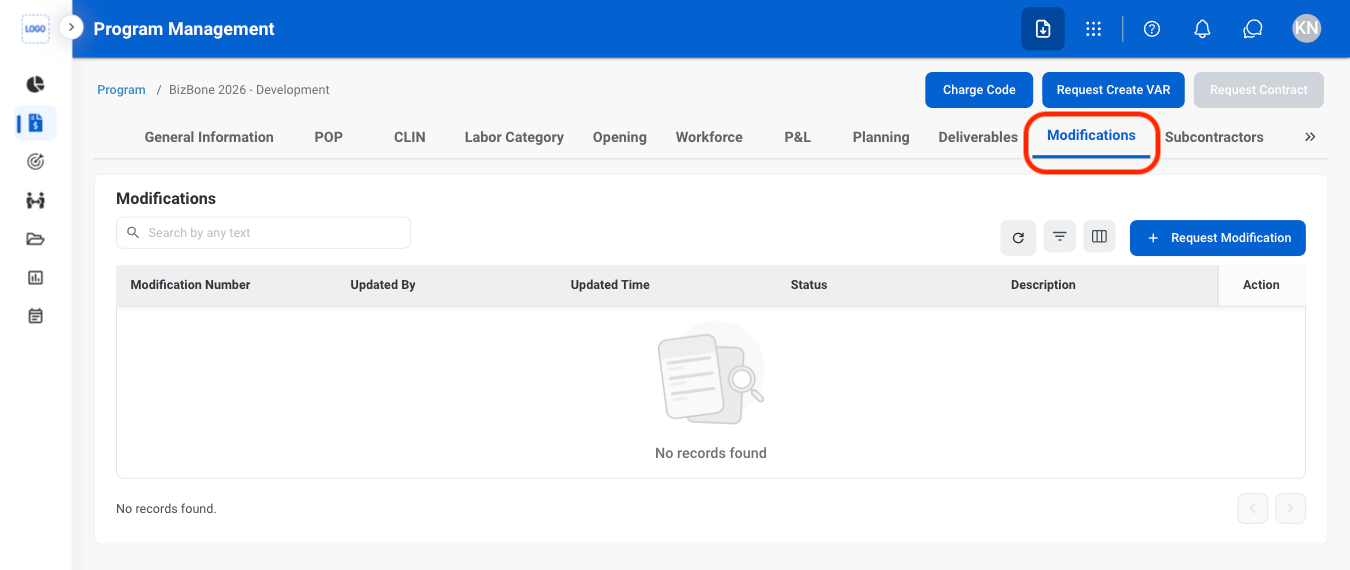
Navigate to Modifications
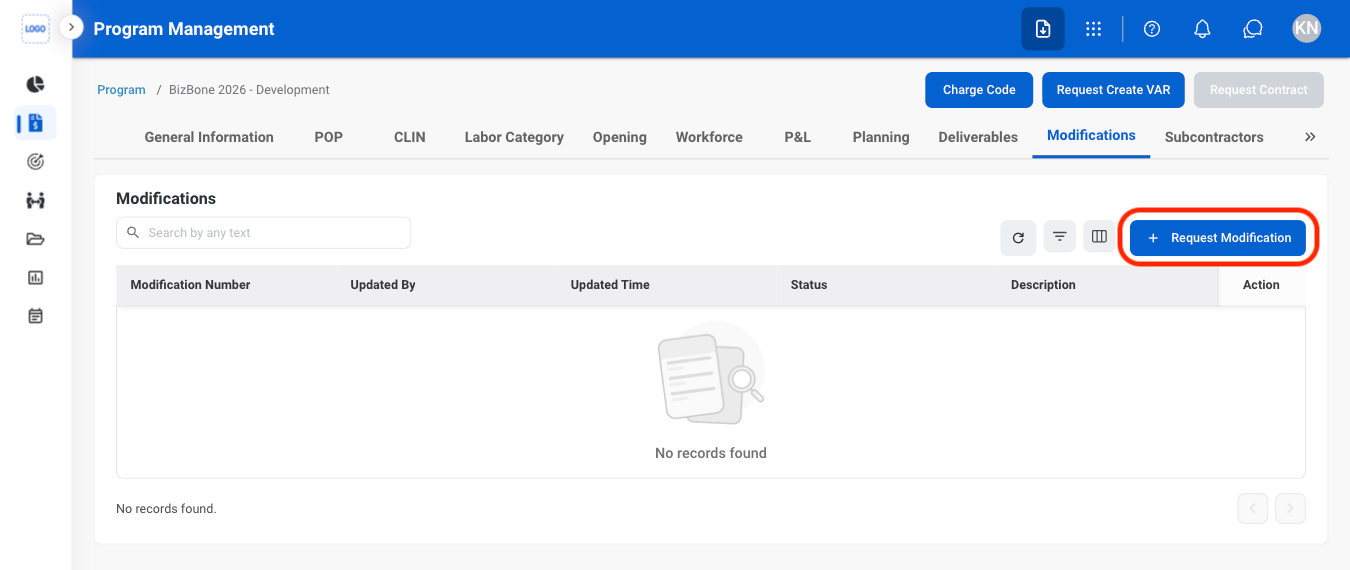
Select Request Modification
Fill in the required information

Subcontractors
Add a Subcontractor
Navigate to Subcontractors
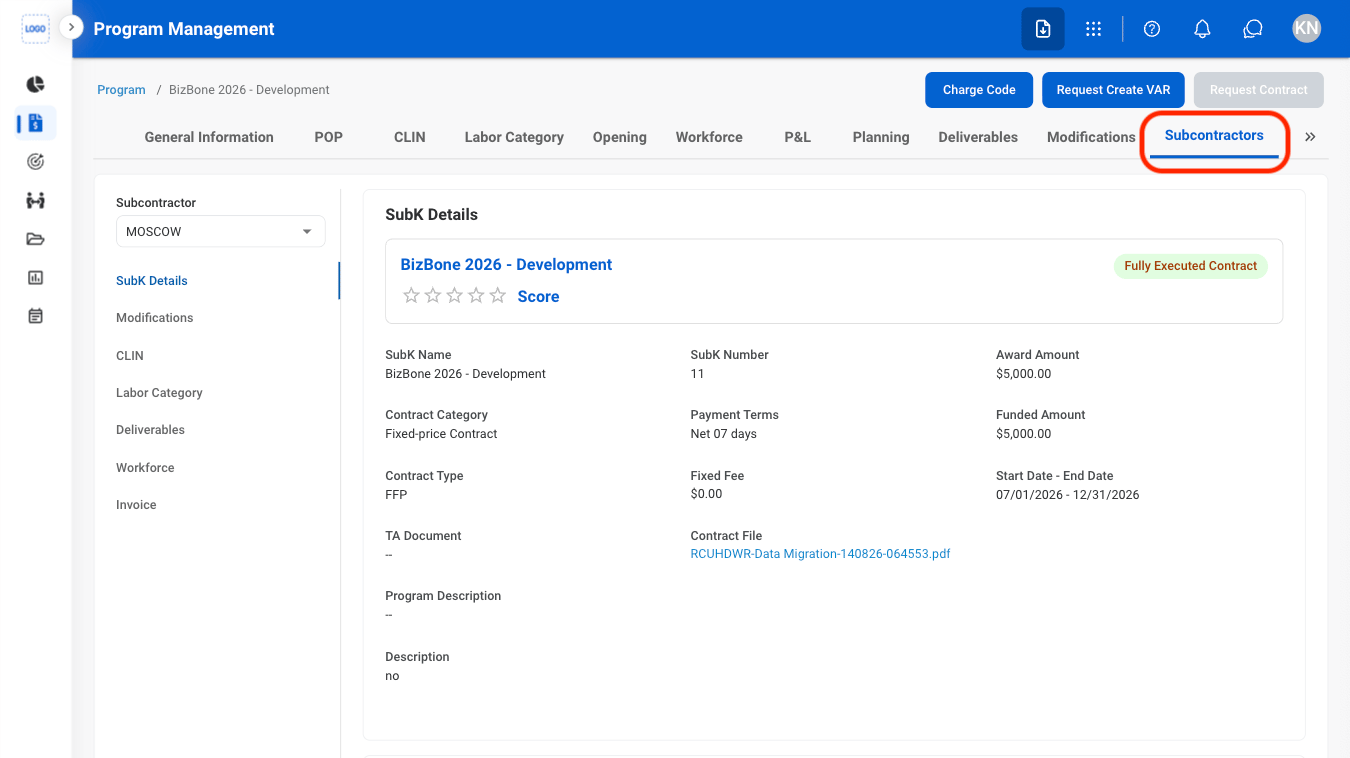
Select the Subcontractor dropdown
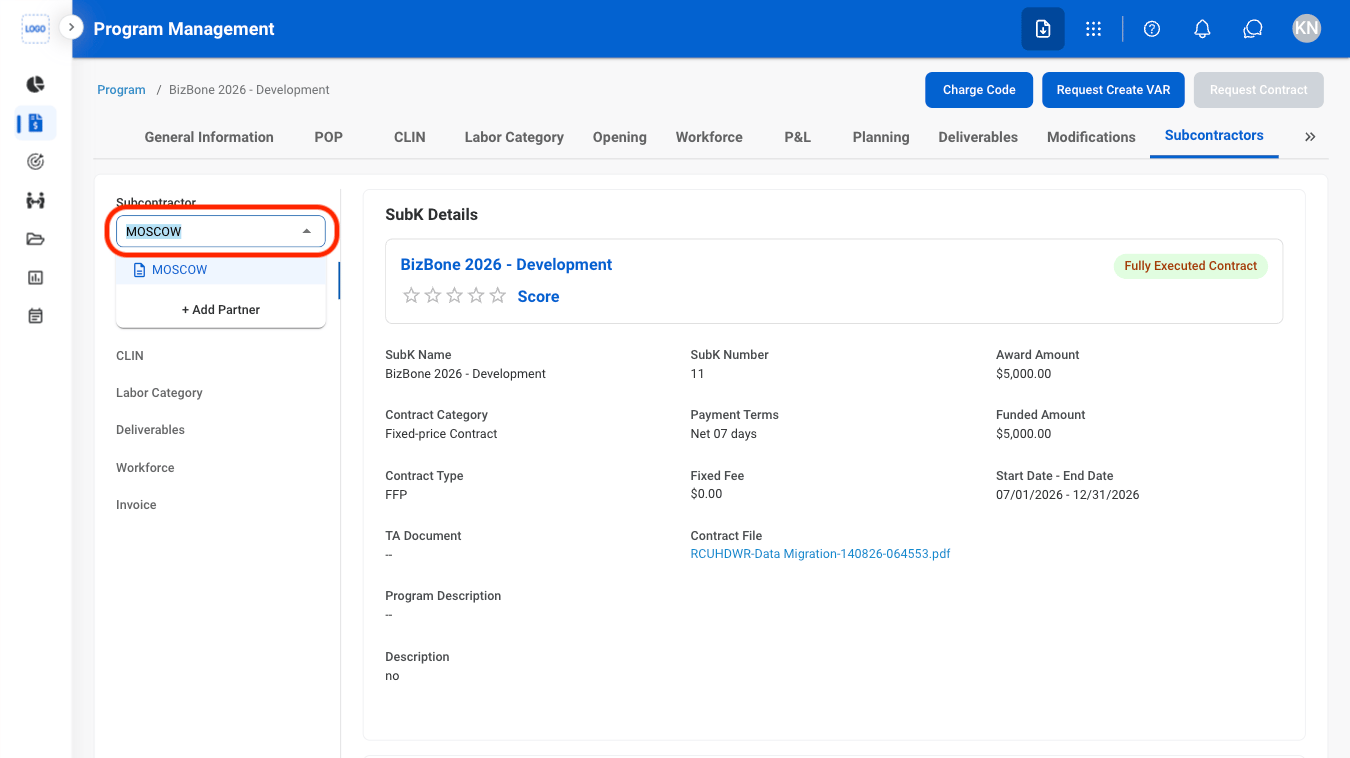
Select Add Partner
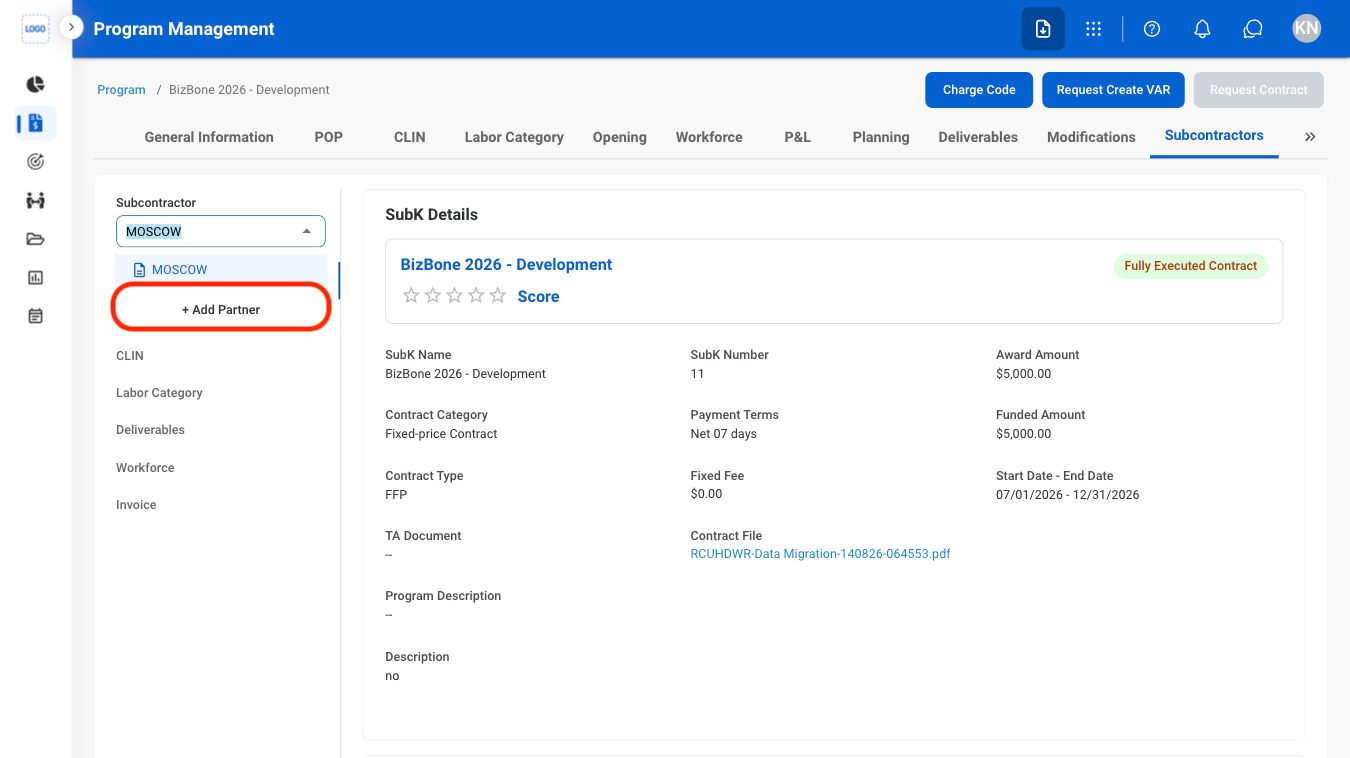
Select a partner
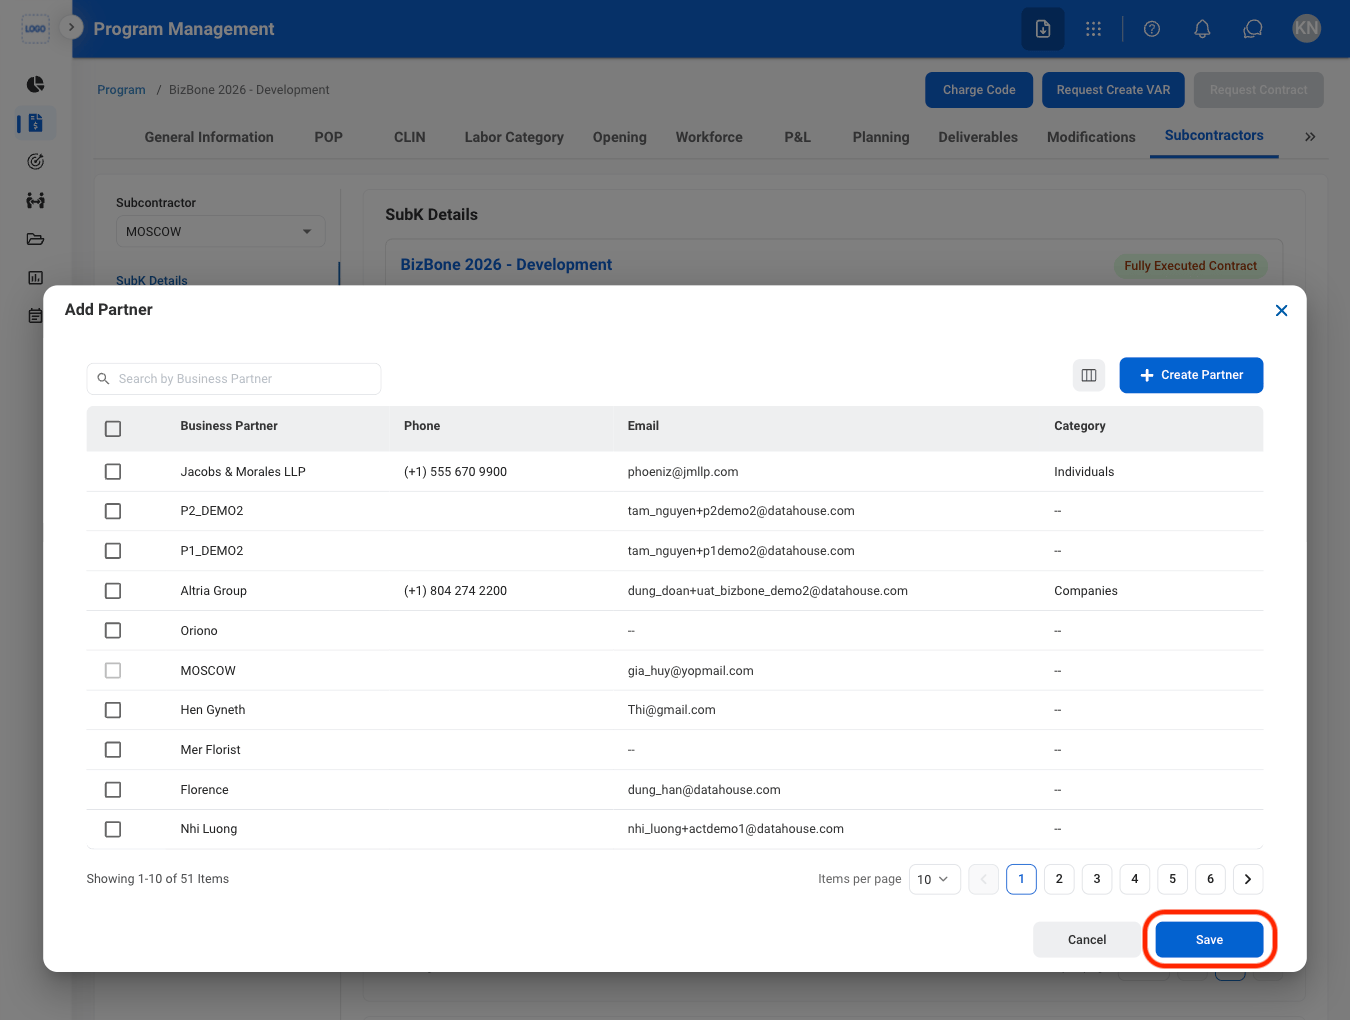
Select Request SubK

Fill in the required information
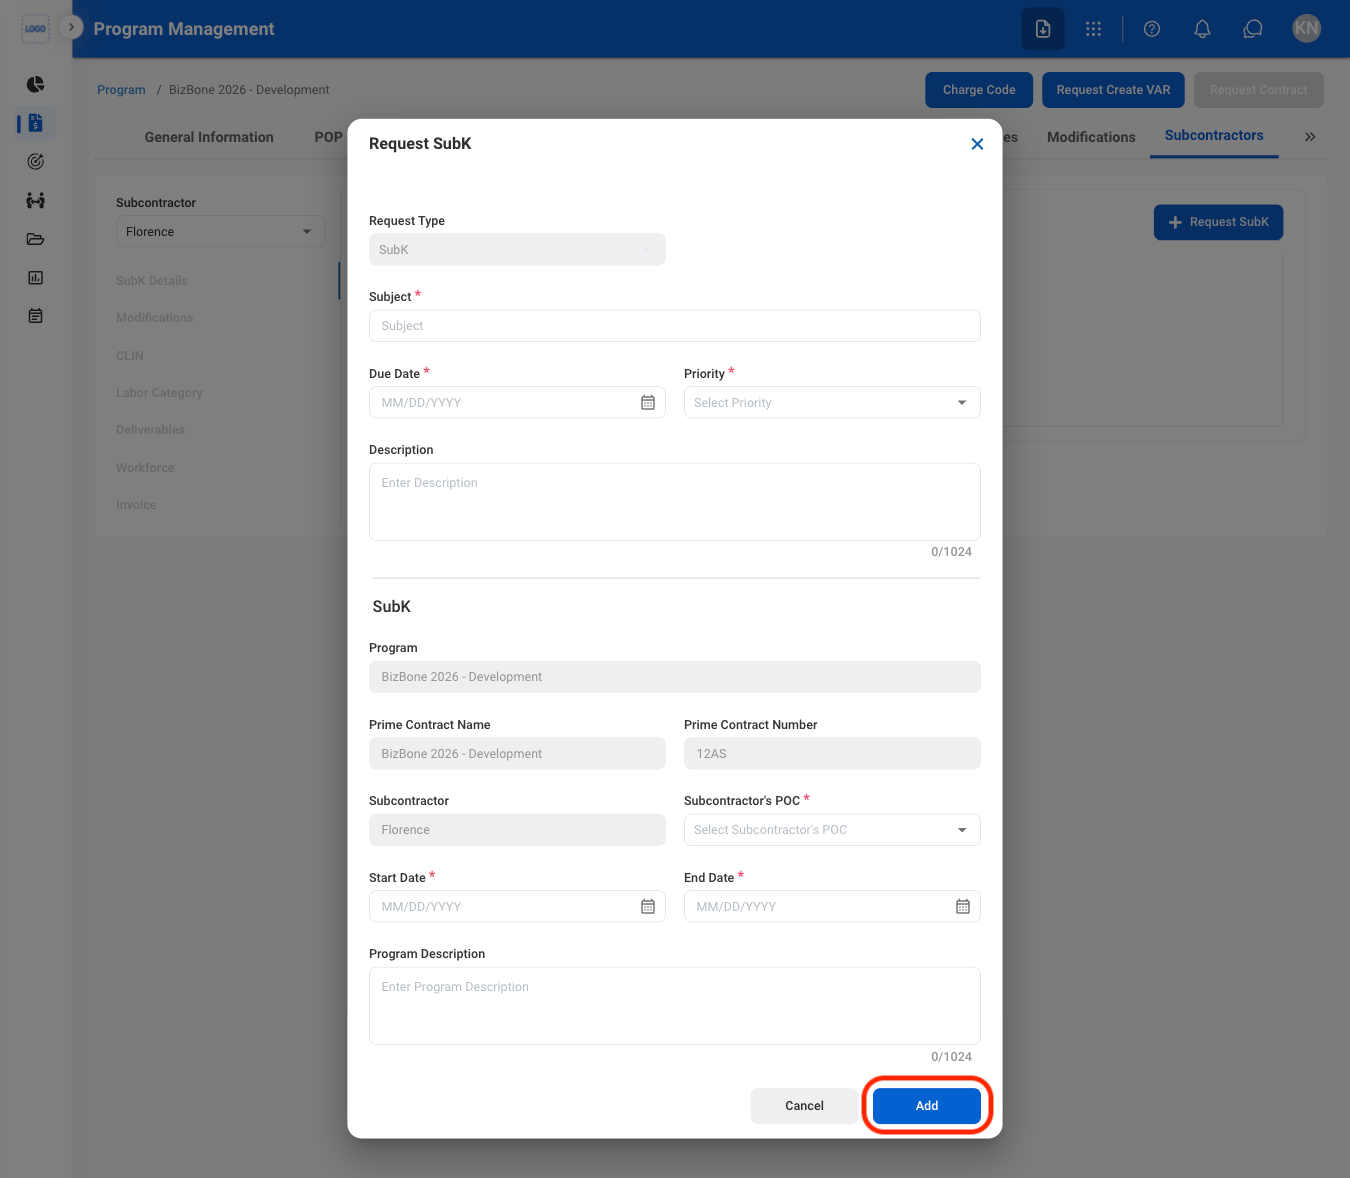
Add Subcontractor Details
Make changes to Role, Award/Funding Allocation, and Place of Performance.Navigate to SubK Details
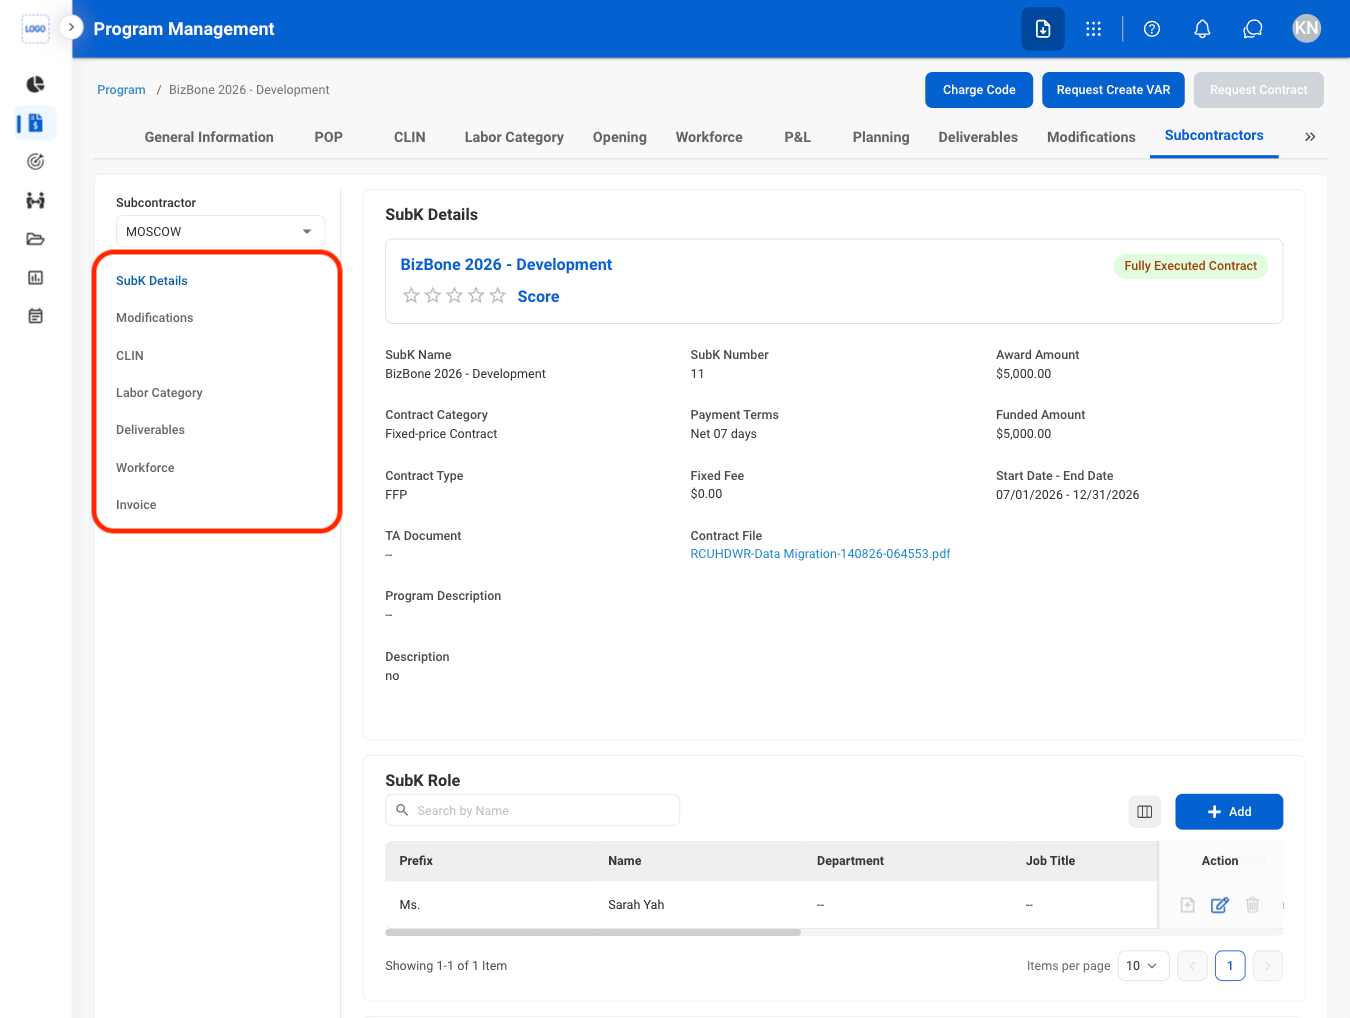
Select Add

Fill in the required information
Request Modification
Navigate to Modifications
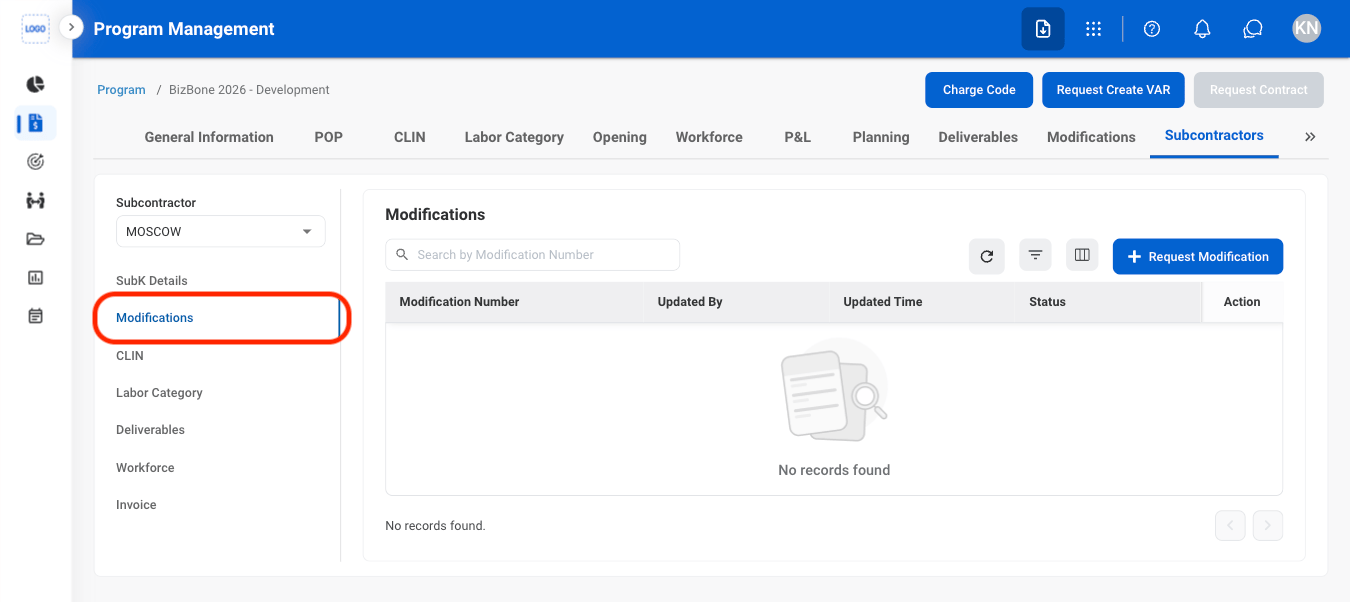
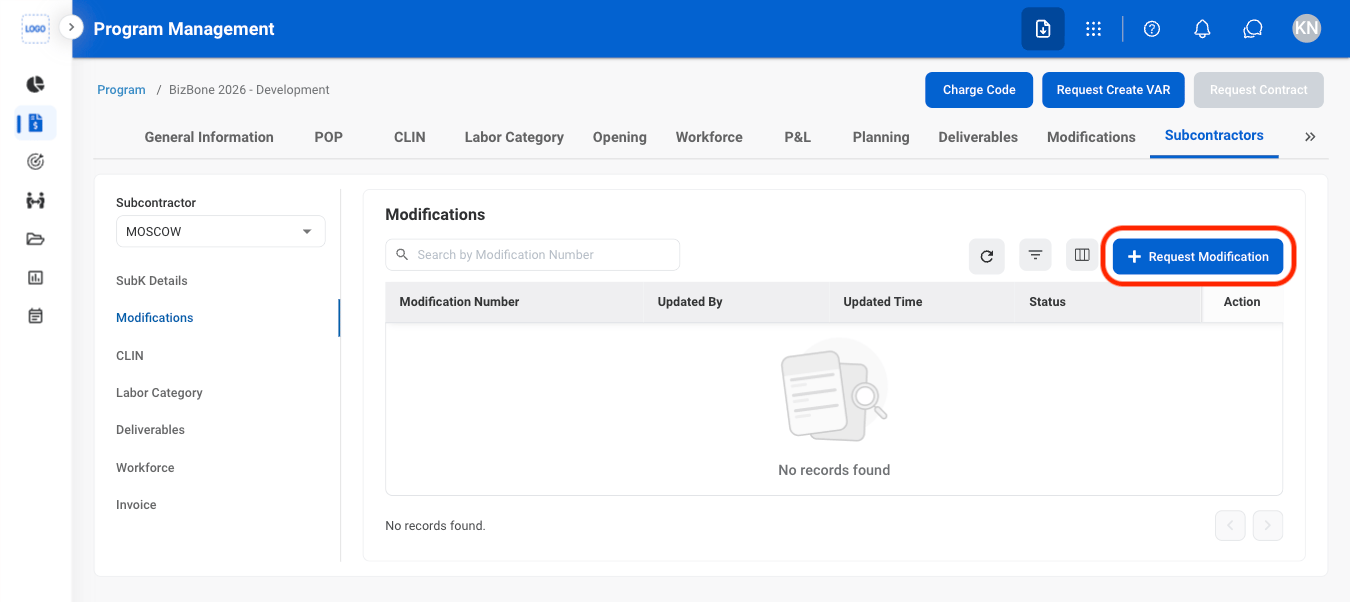
Select Request Modification
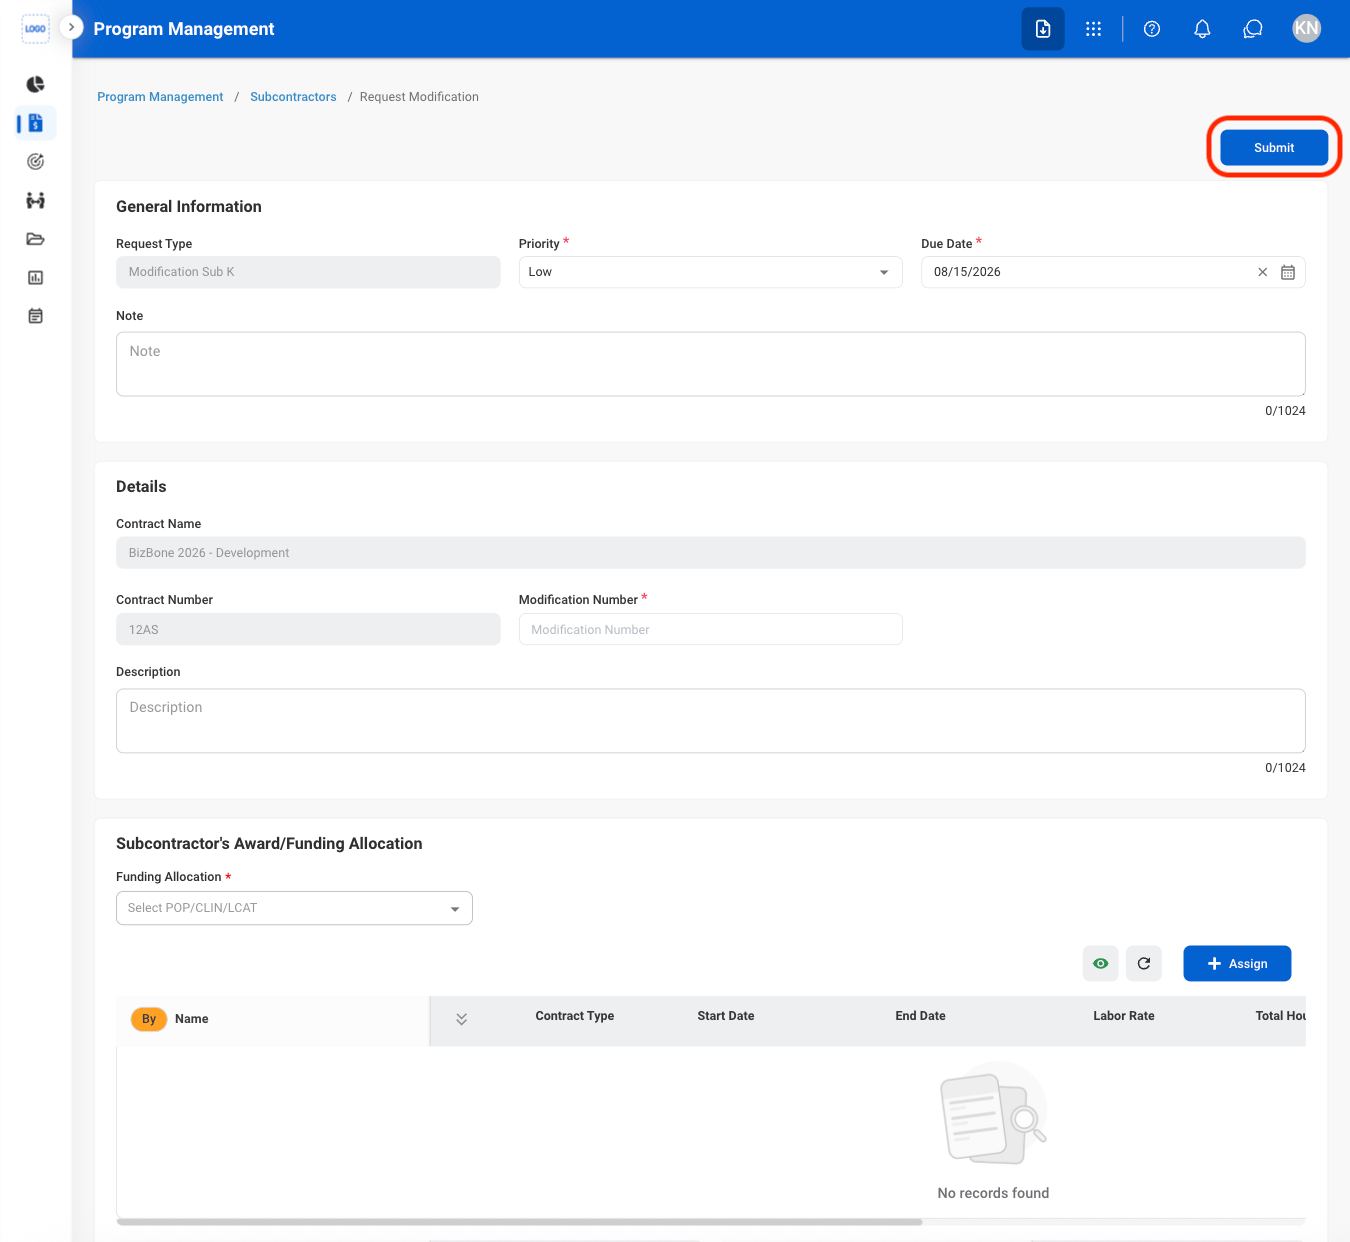
Fill in the required information
View CLIN
Navigate to CLIN
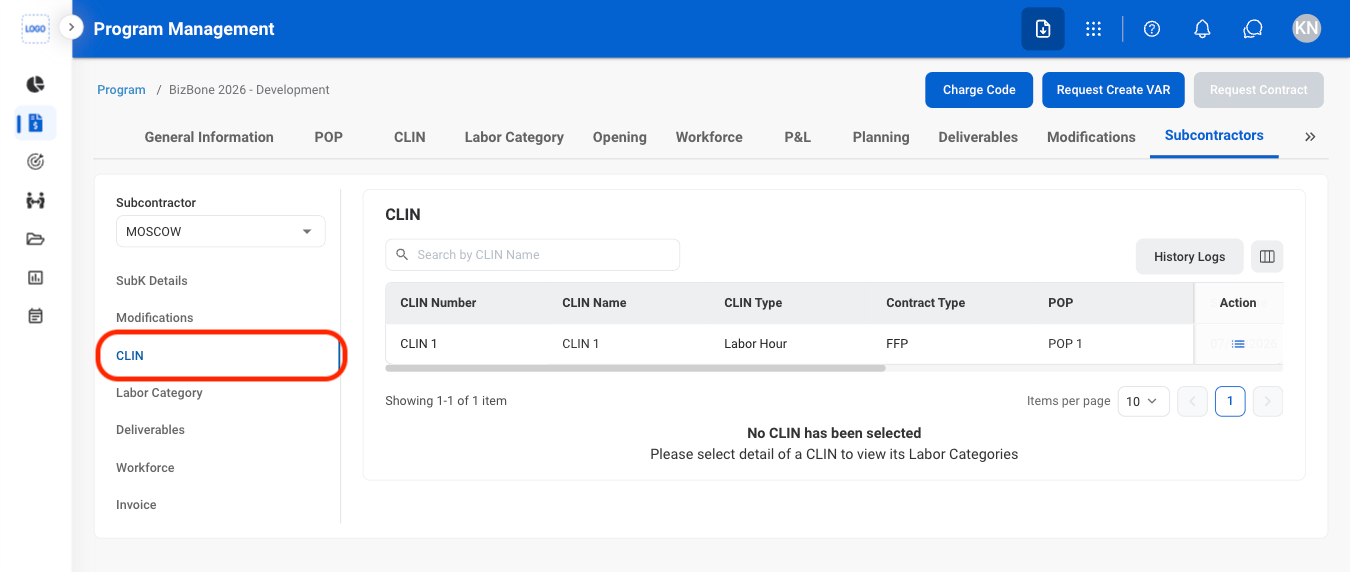
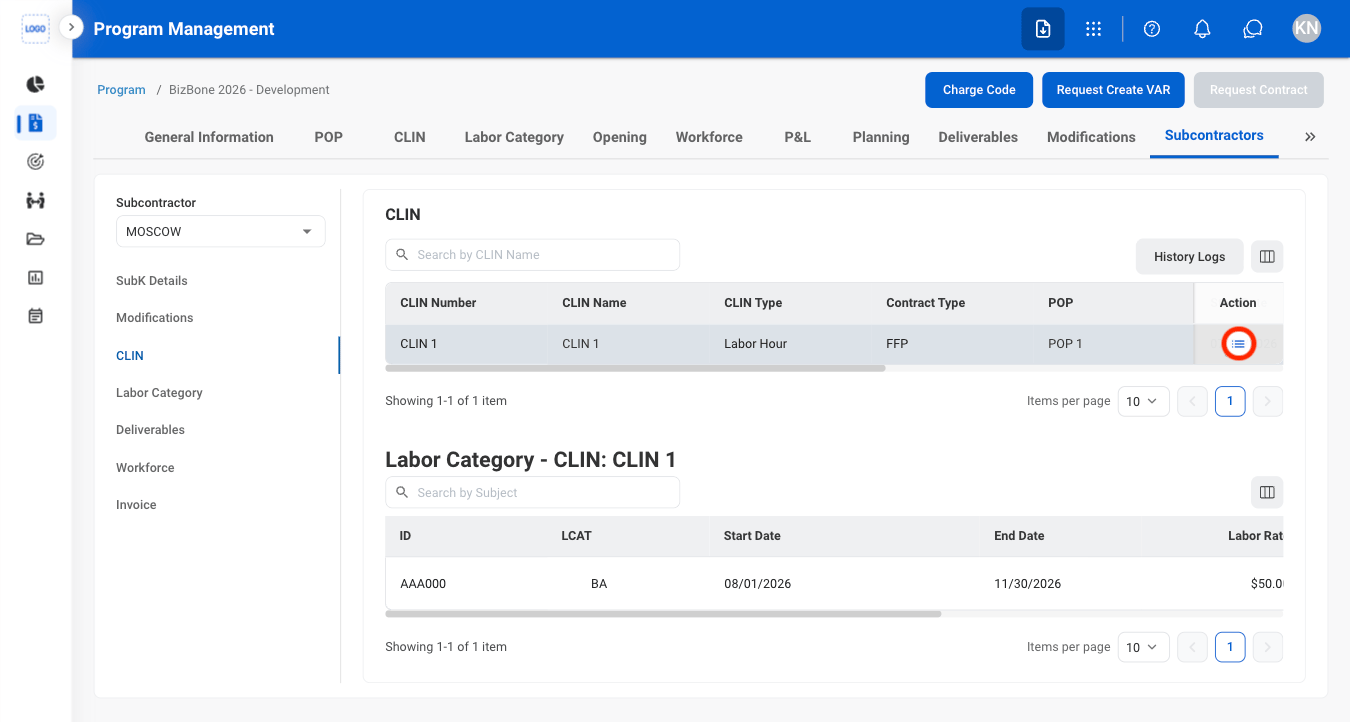
Select the details icon
Create an LCAT Request
Navigate to Labor Category
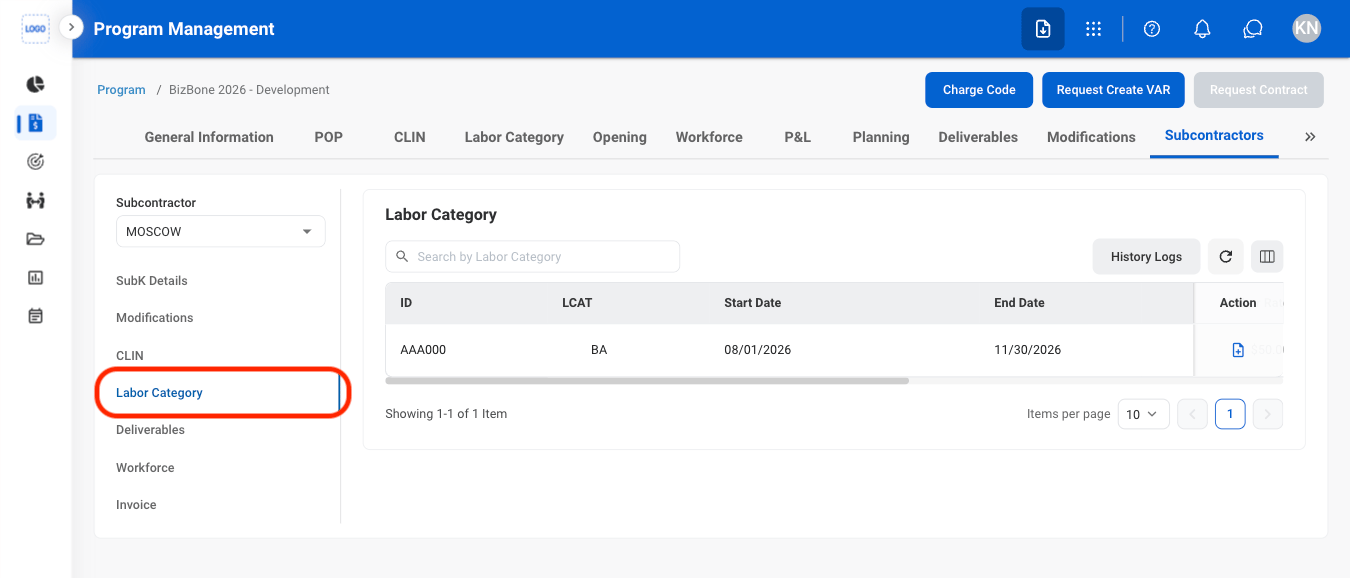
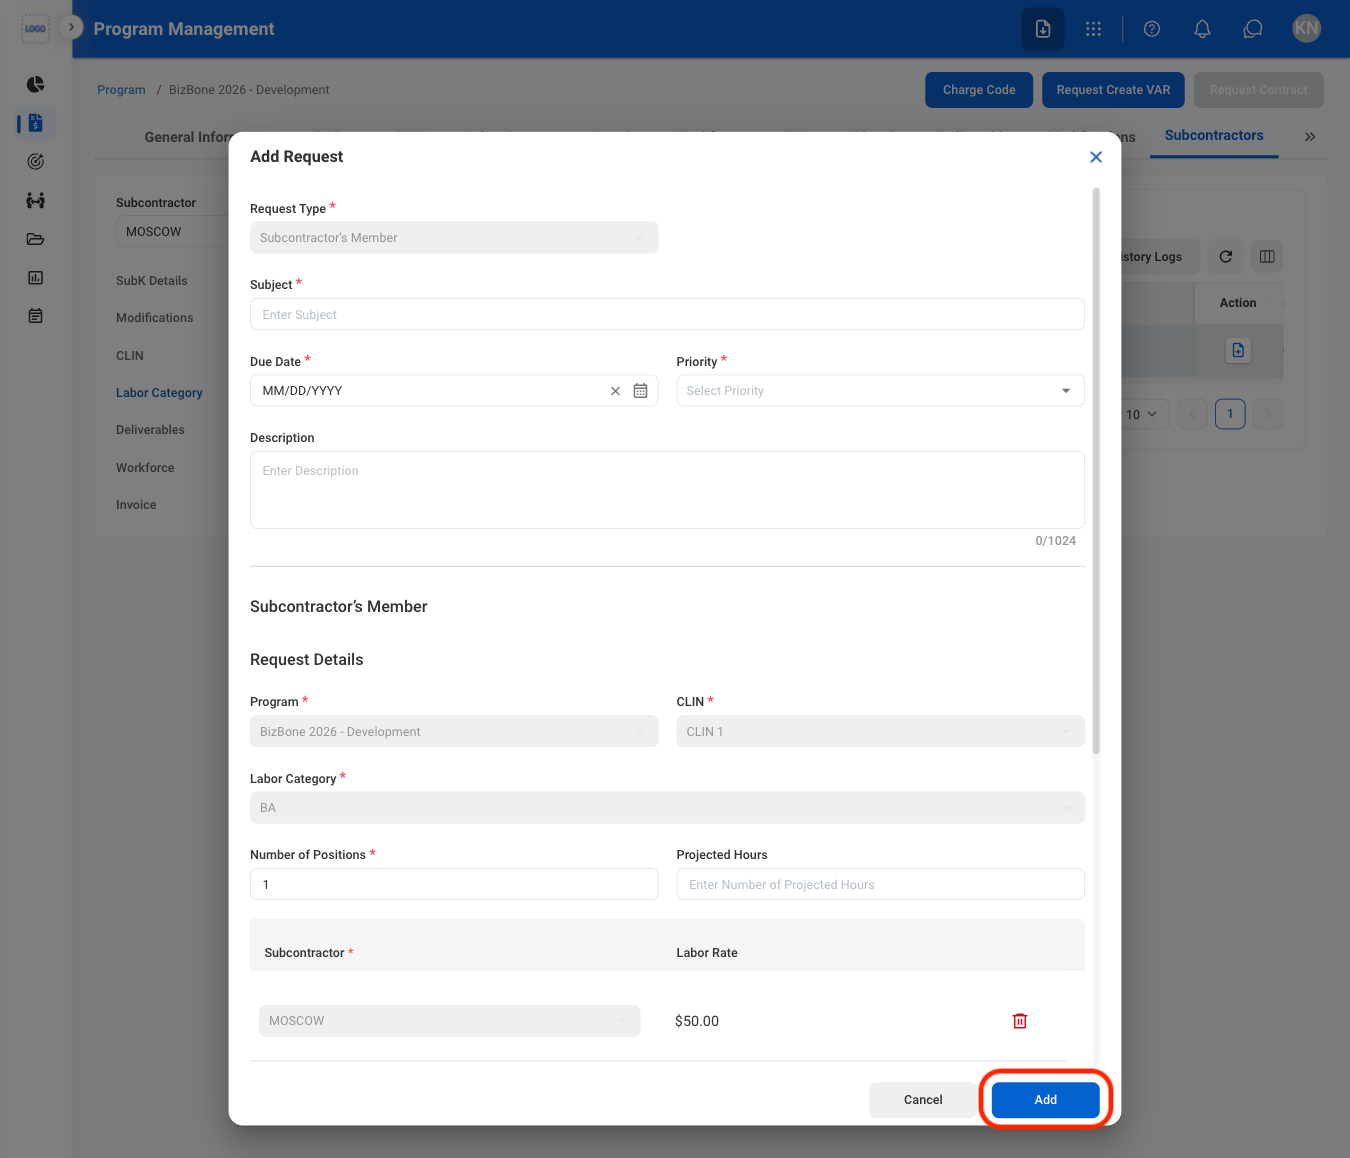
Select the icon

Fill in the required information
Assign a Deliverable
Navigate to Deliverables
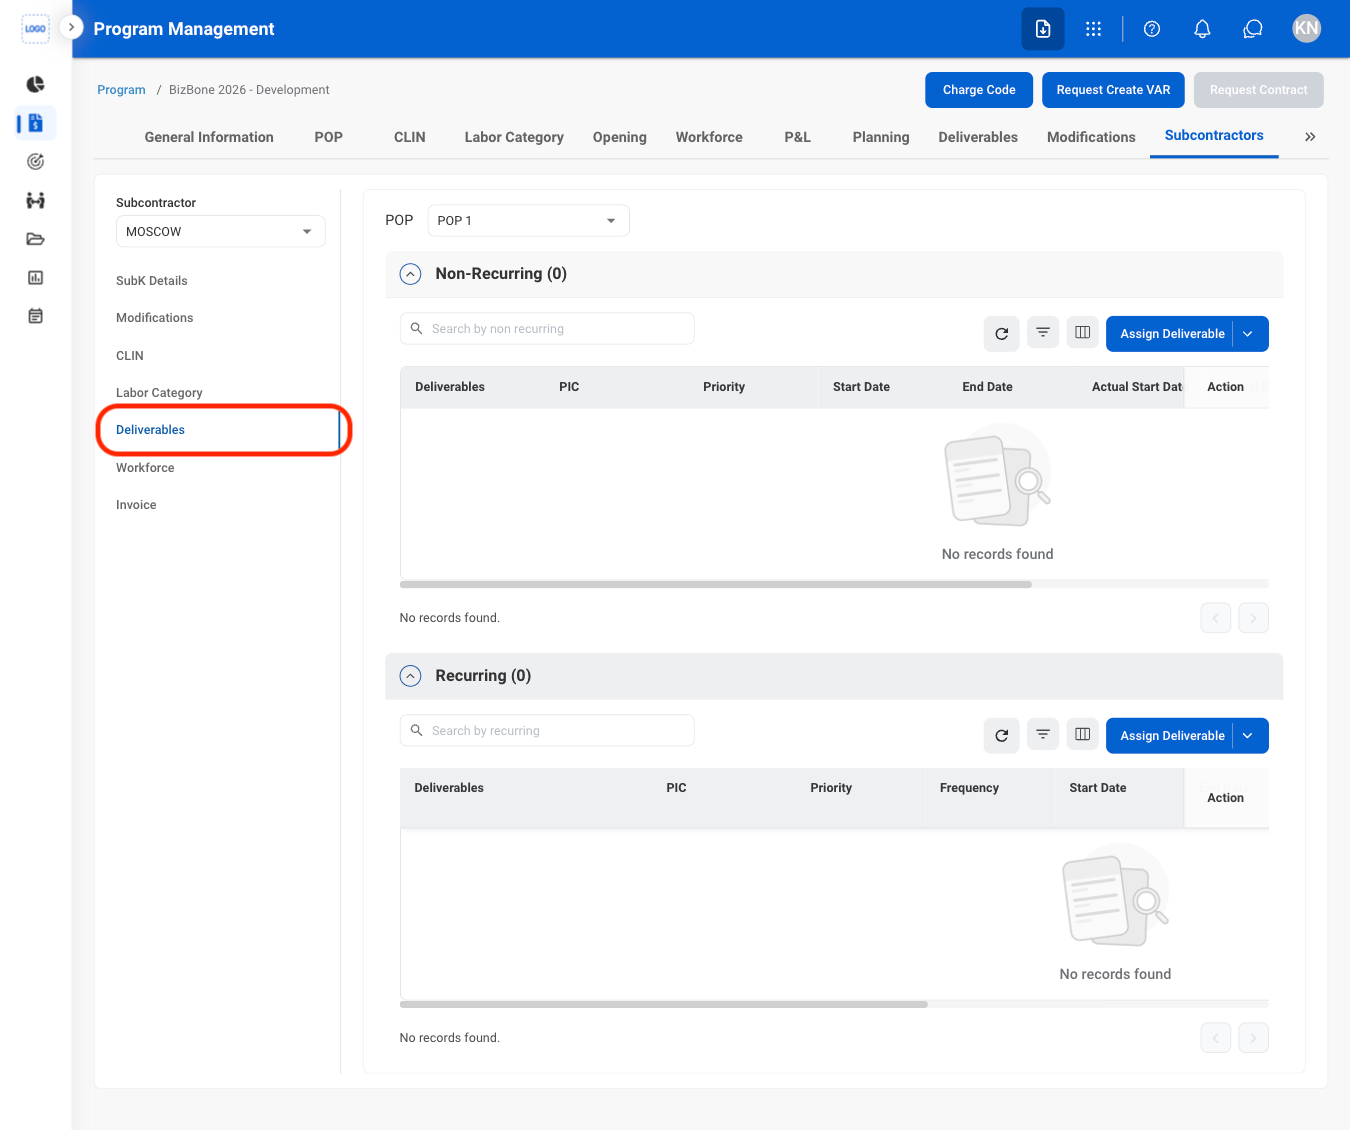
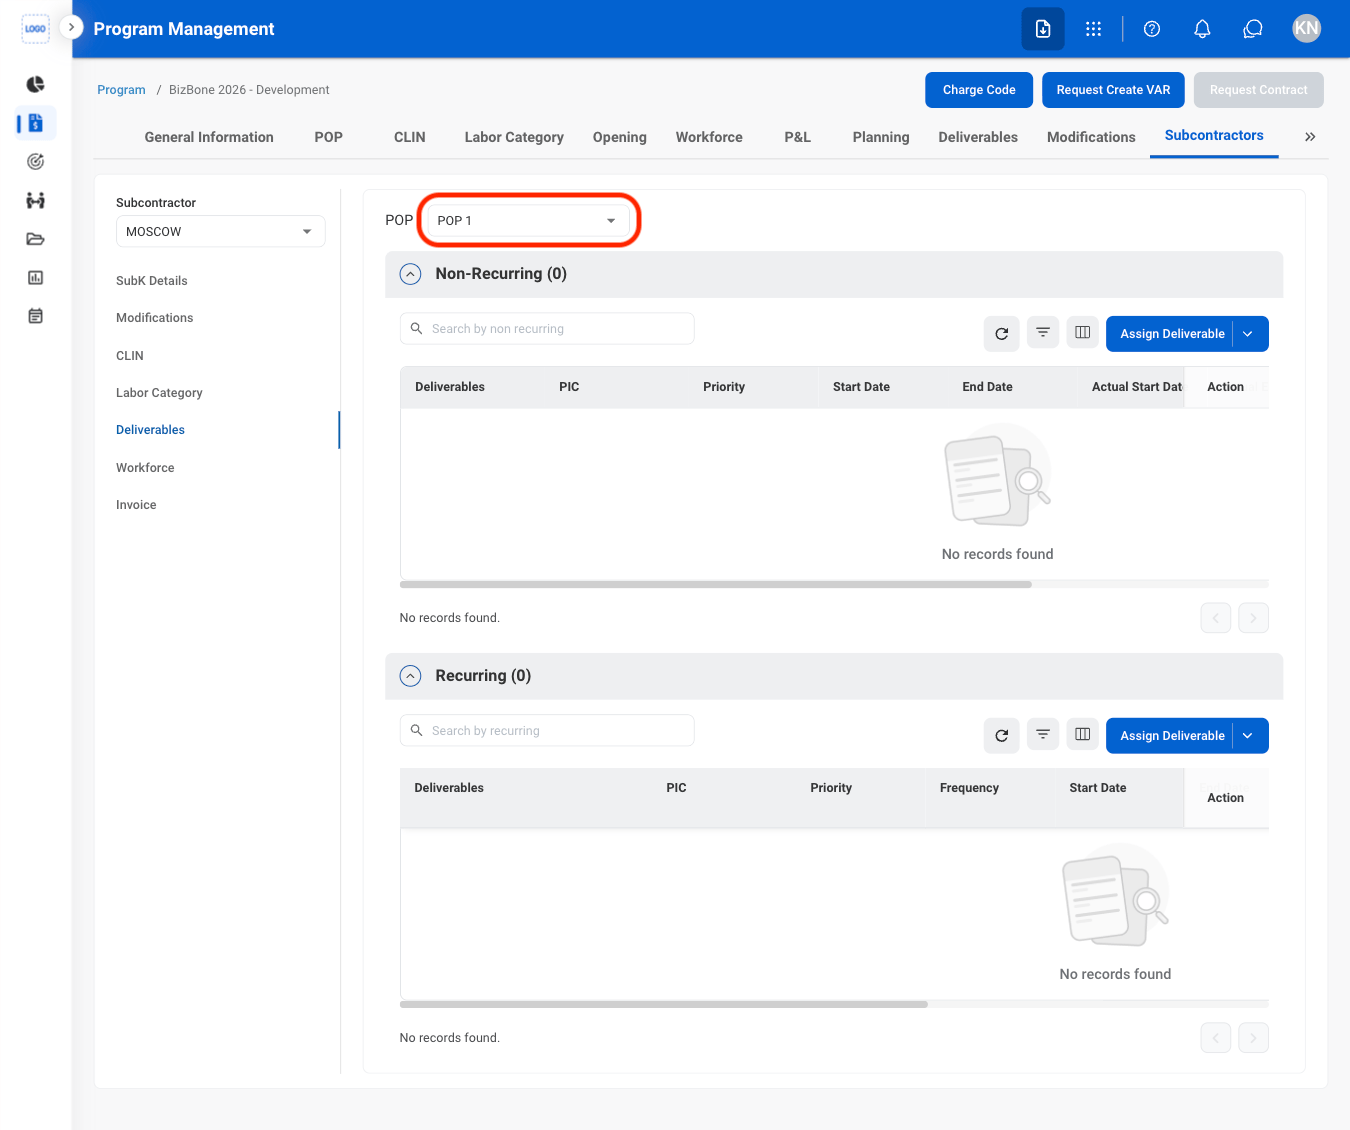
Select a POP
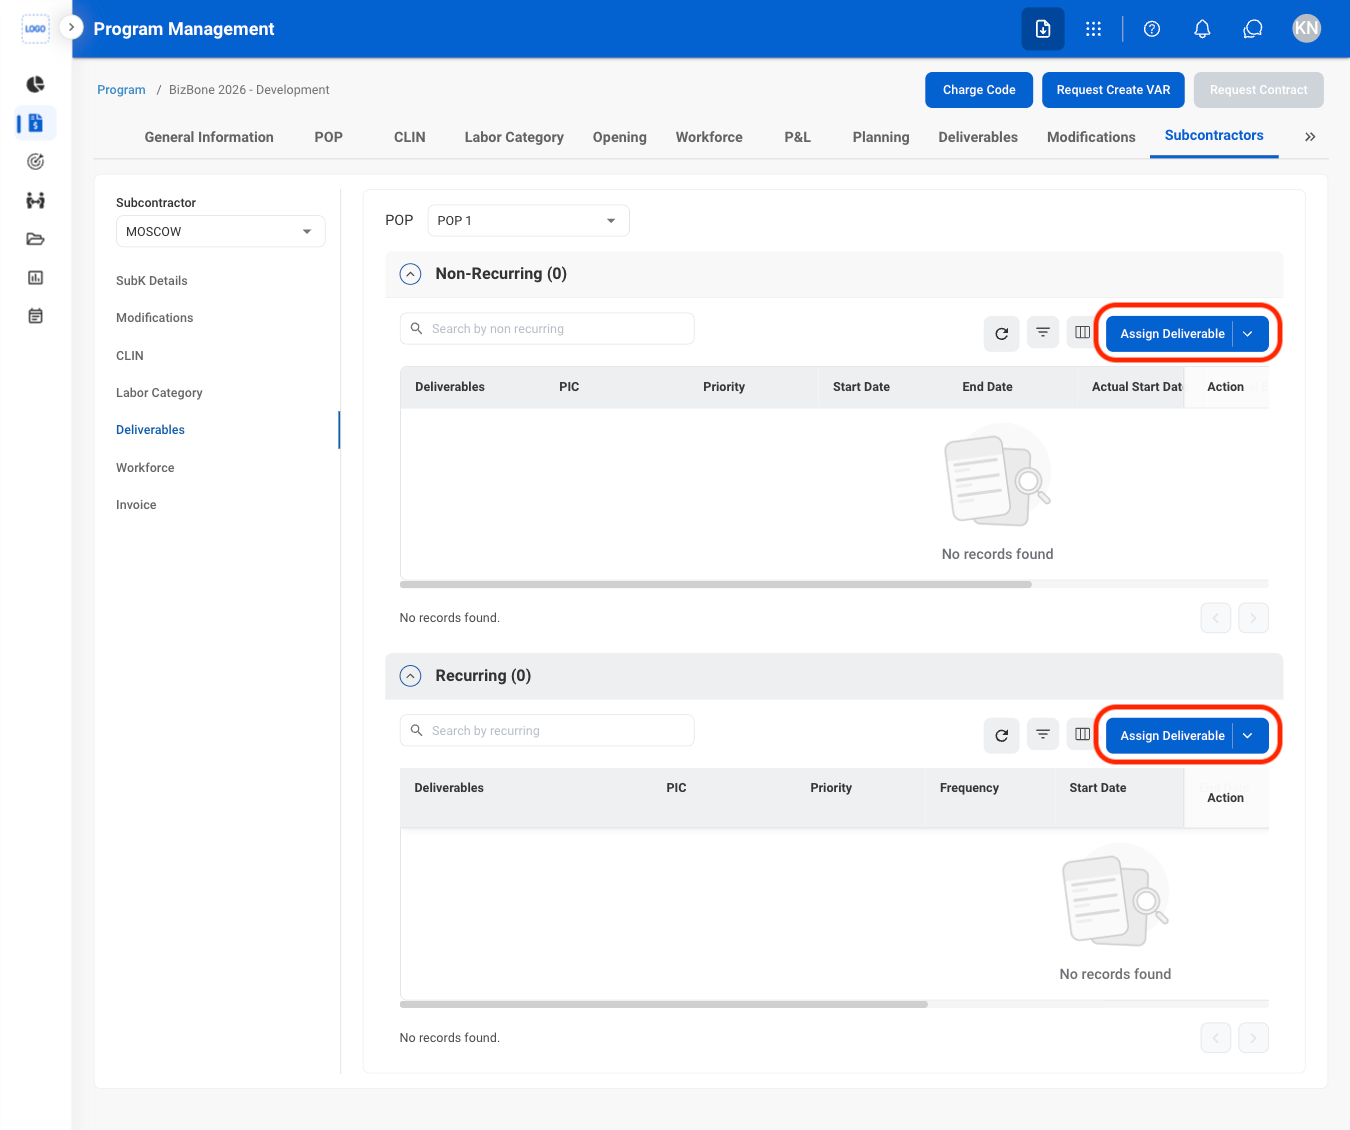
Select Assign Deliverable
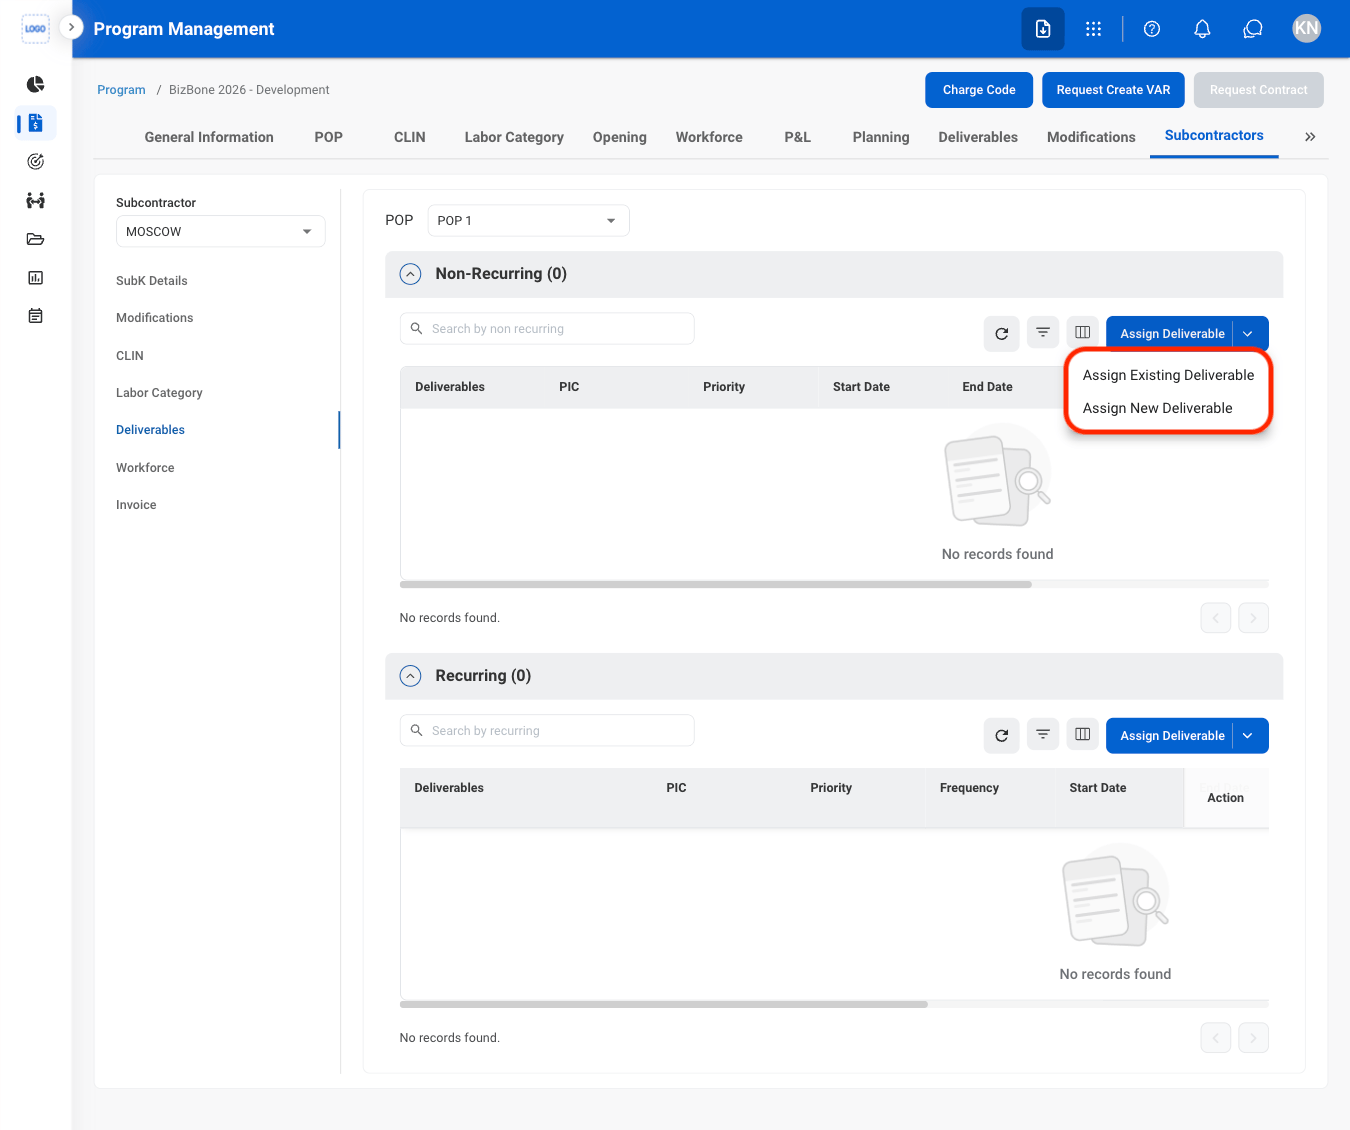
Select a deliverable type
Fill in the required information
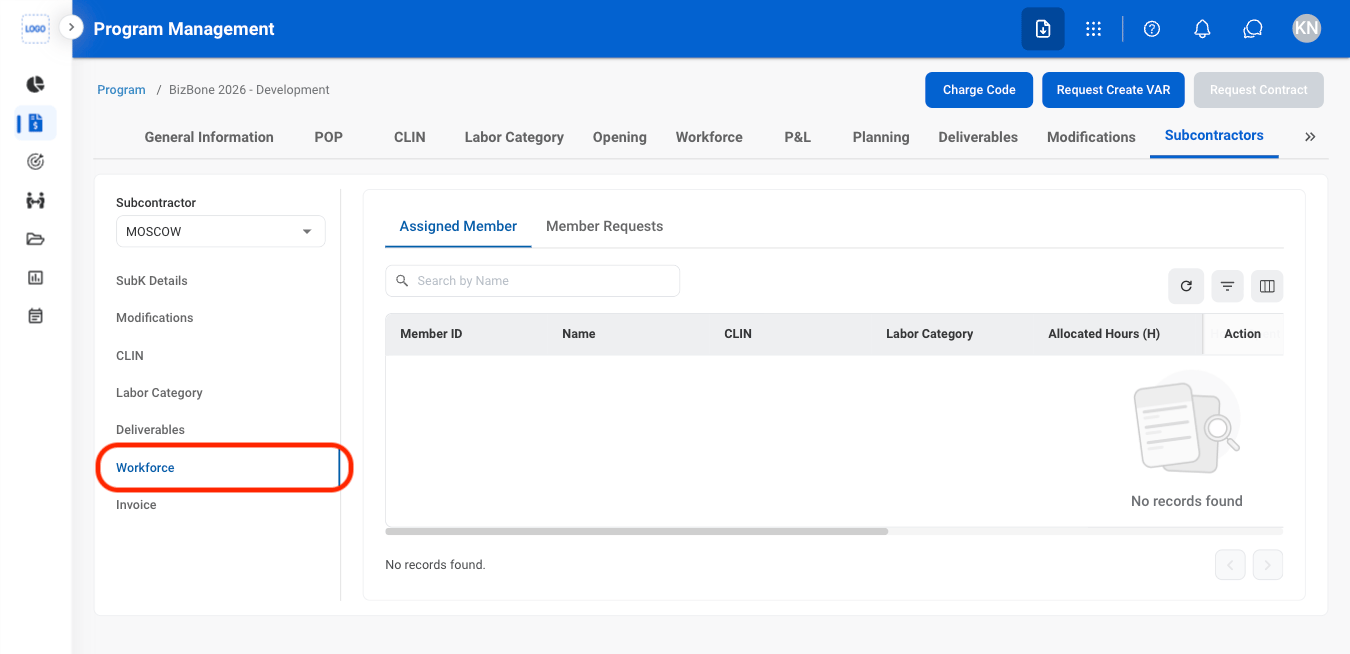
View Workforce
Navigate to Workforce
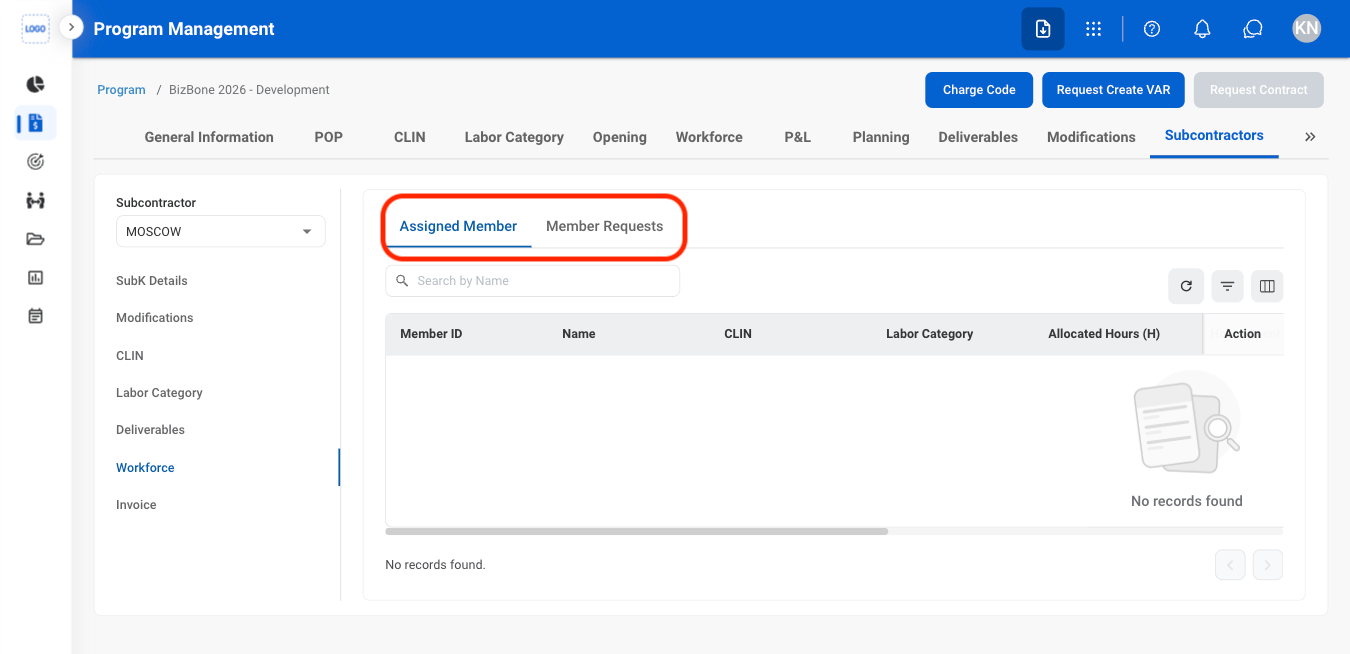
Select a tab
View Invoices
Navigate to Invoice

Consultants
View Agreement Details
Navigate to Consultants
Navigate to Agreement Details
Request Modification
Navigate to Modifications
Select Request Modification
Fill in the required information
View CLIN
Navigate to CLIN
Select the details icon
Create an LCAT Request
Navigate to Labor Category
Select the icon
Fill in the required information
Assign Deliverables
Navigate to Deliverables
Select a deliverable type
Fill in the required information
View Workforce
Navigate to Workforce
Select a tab
View Invoices
Navigate to Invoice
View Personal Information
Navigate to Personal Information
View Account Access
Navigate to Access
Invoices
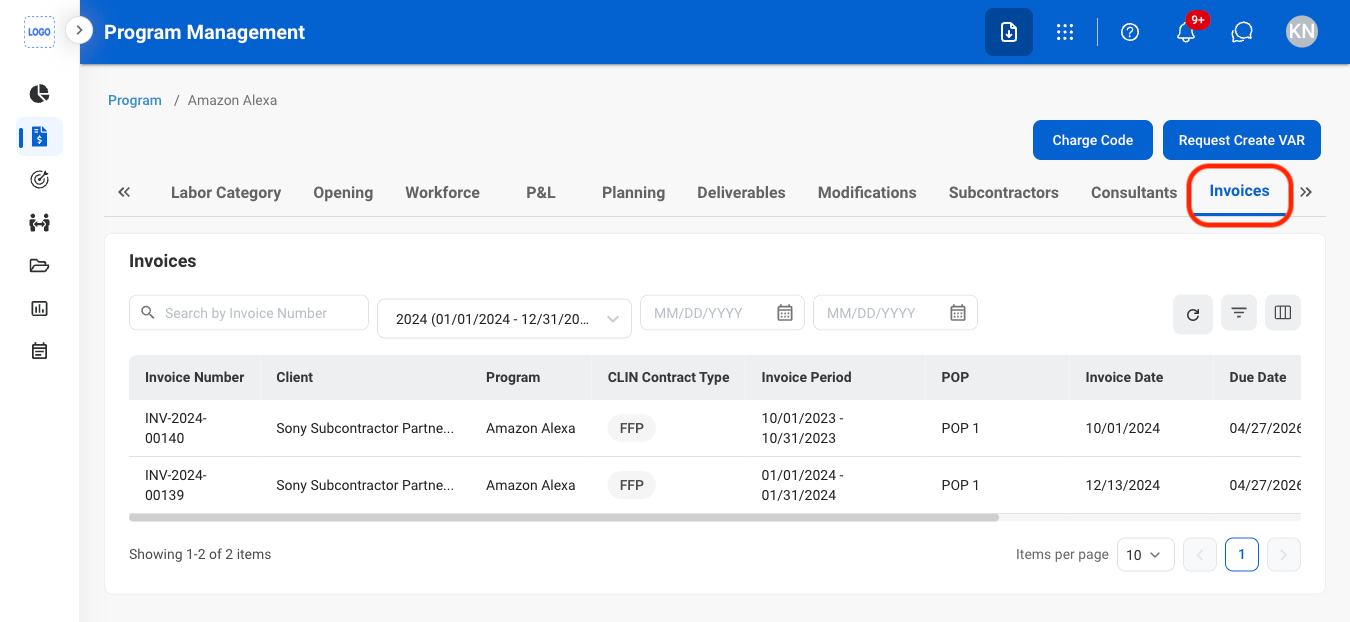
View Invoices
Navigate to Invoices
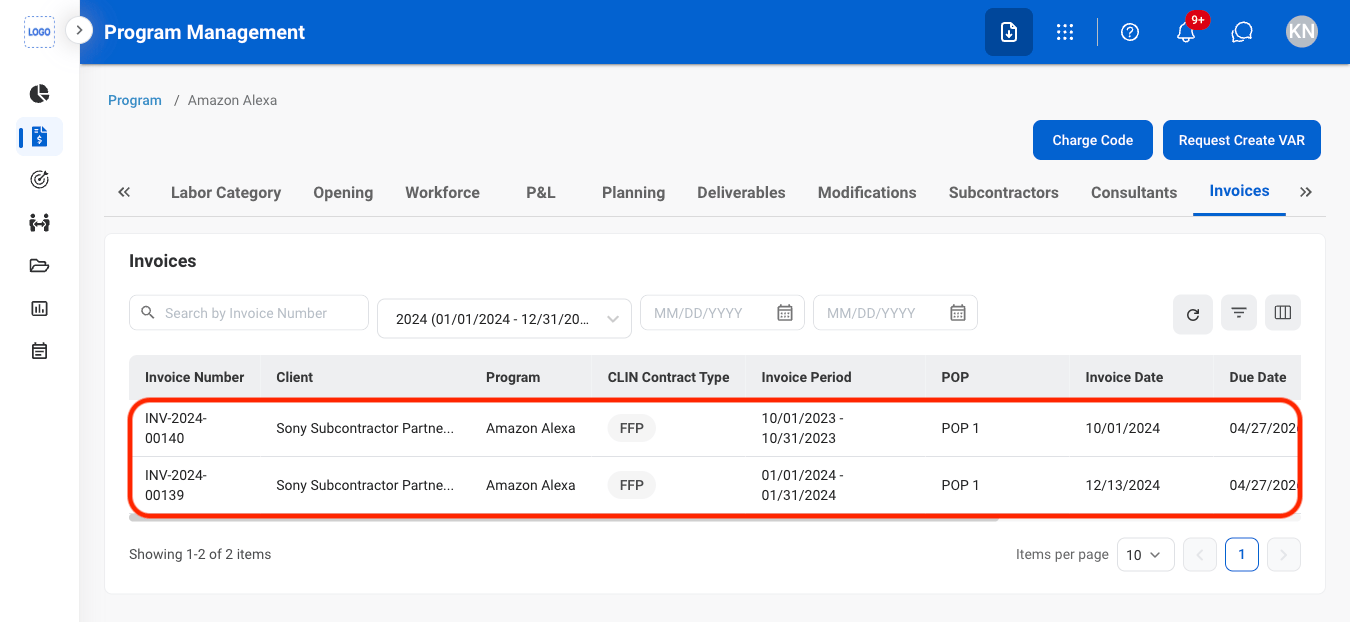
Select an invoice
Transitions
Add Transition Member
Navigate to Transitions
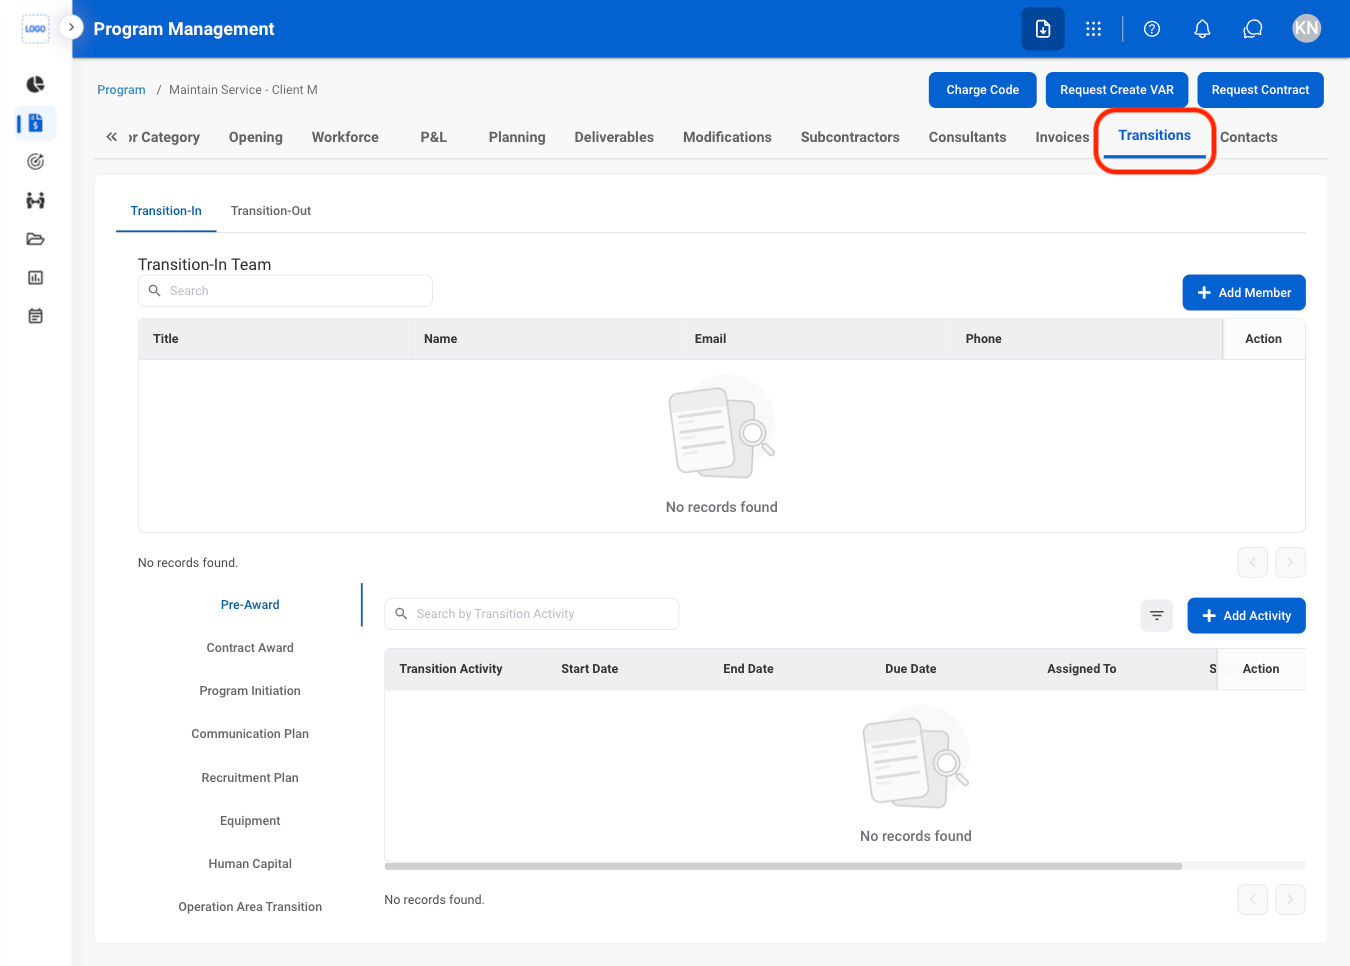
Select a tab

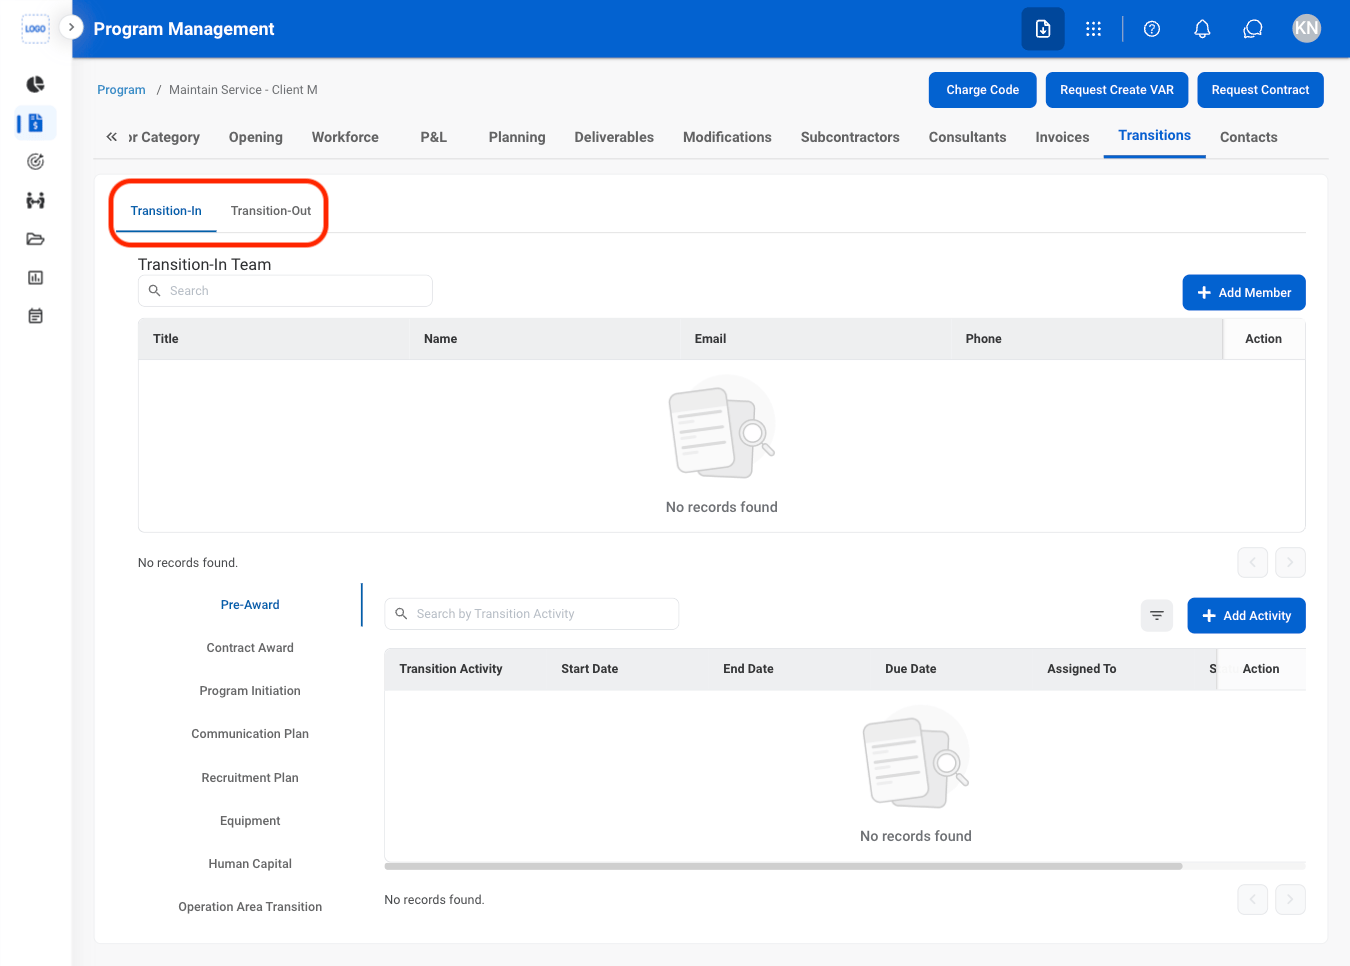
- Transition In: Taking over a program or engagement.
- Transition Out: Transferring or closing out a program or engagement.
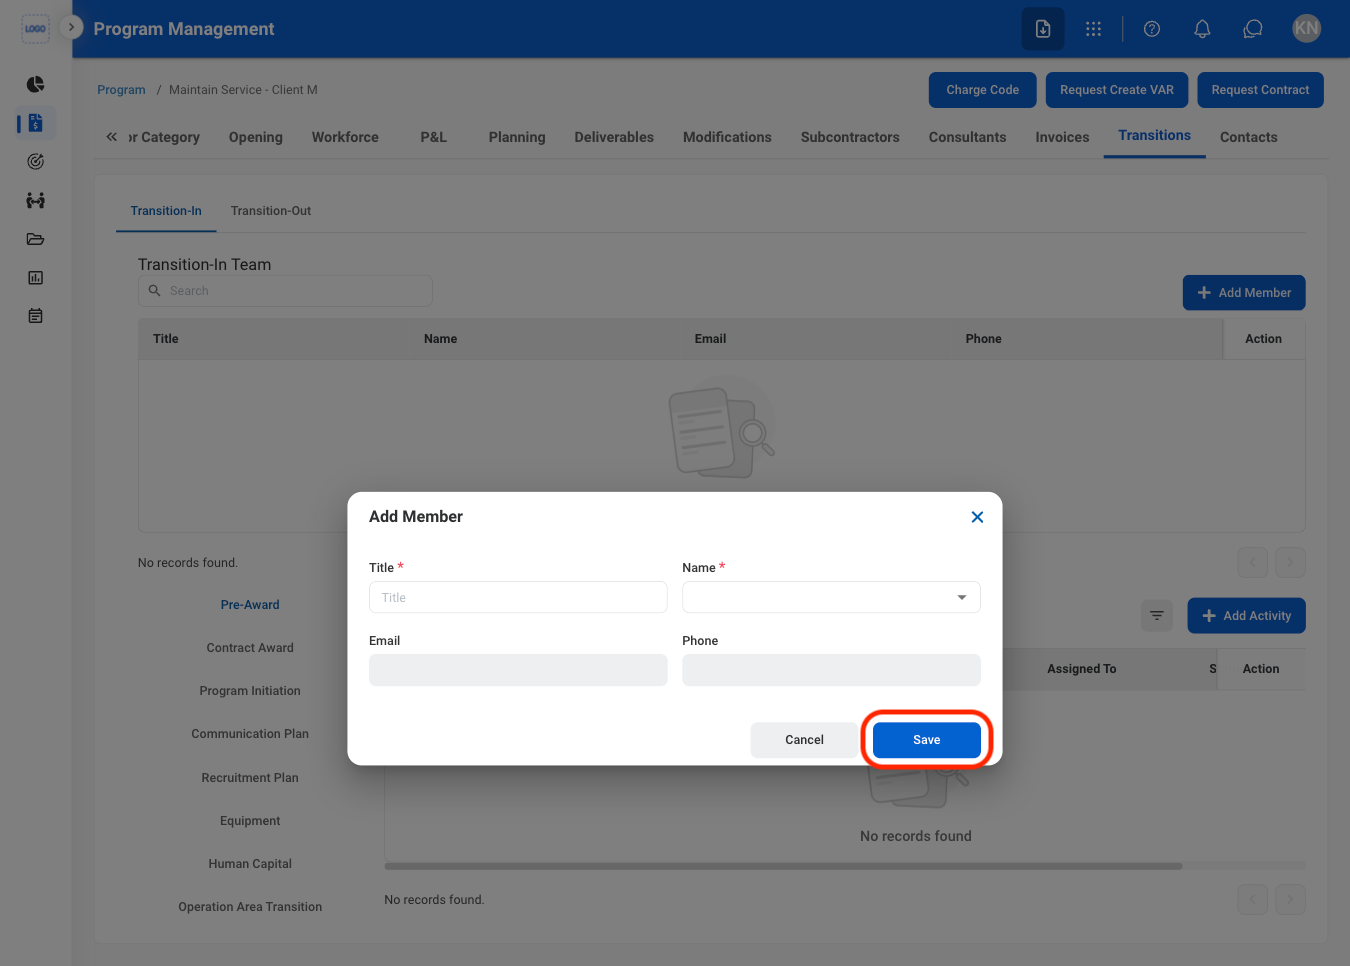
Select Add Member

Fill in the required information
Add Transition Activity
Select a tab
Select a section
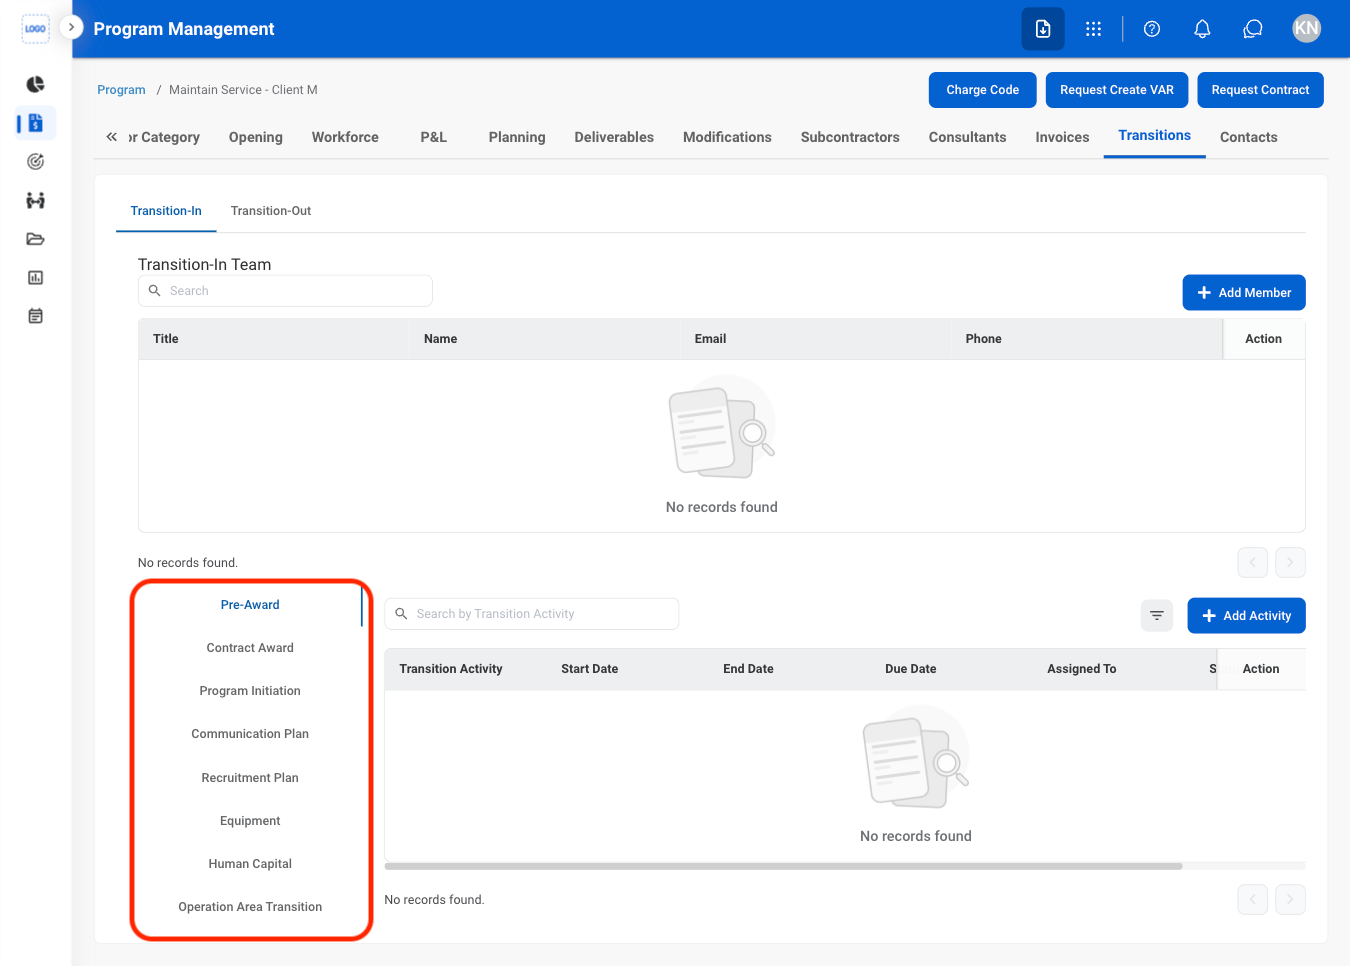
Select Add Activity
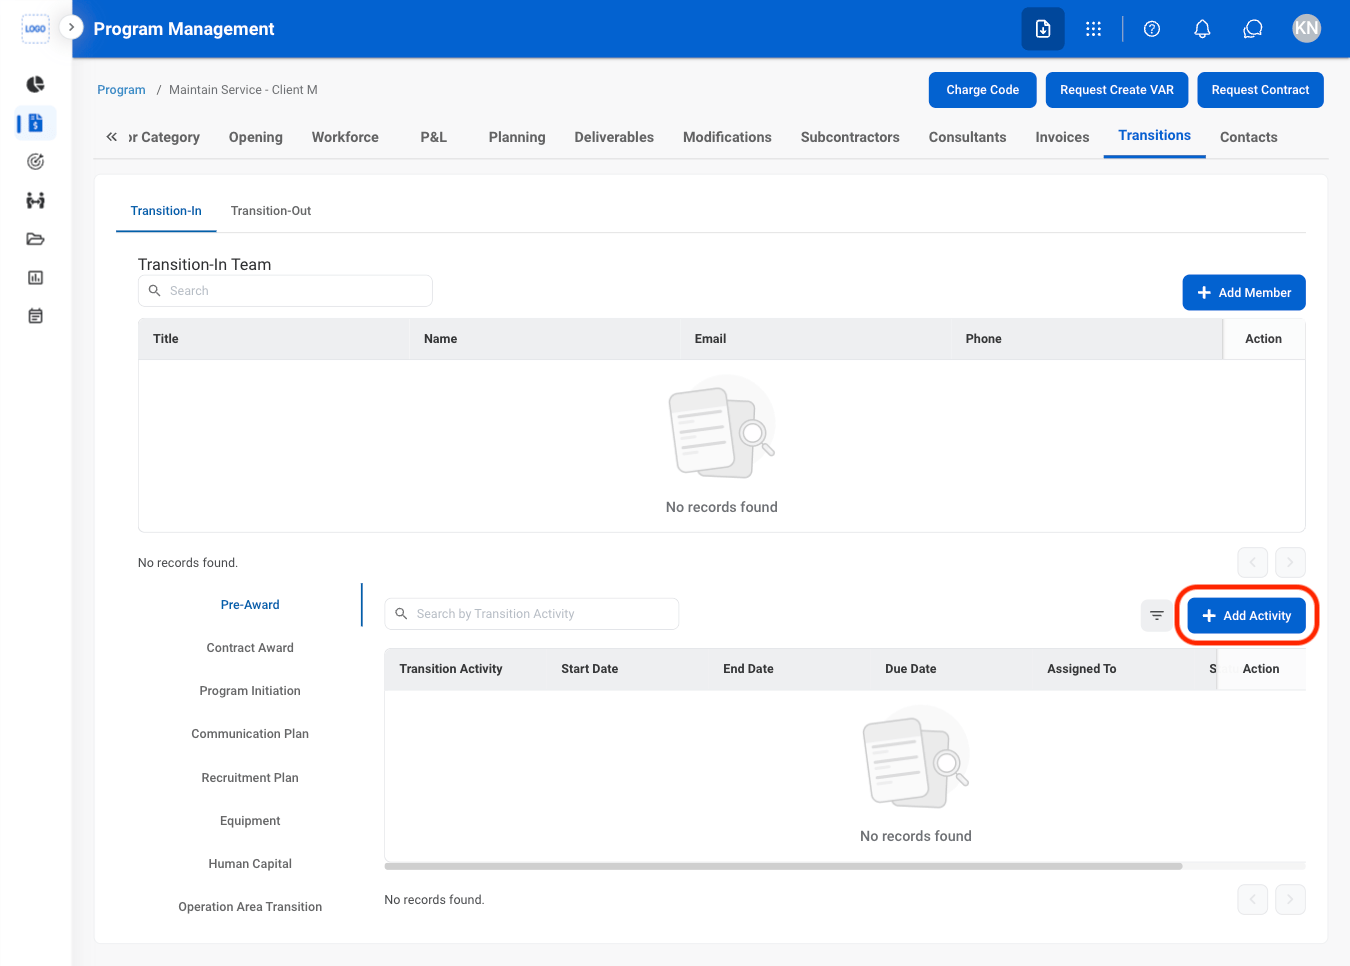
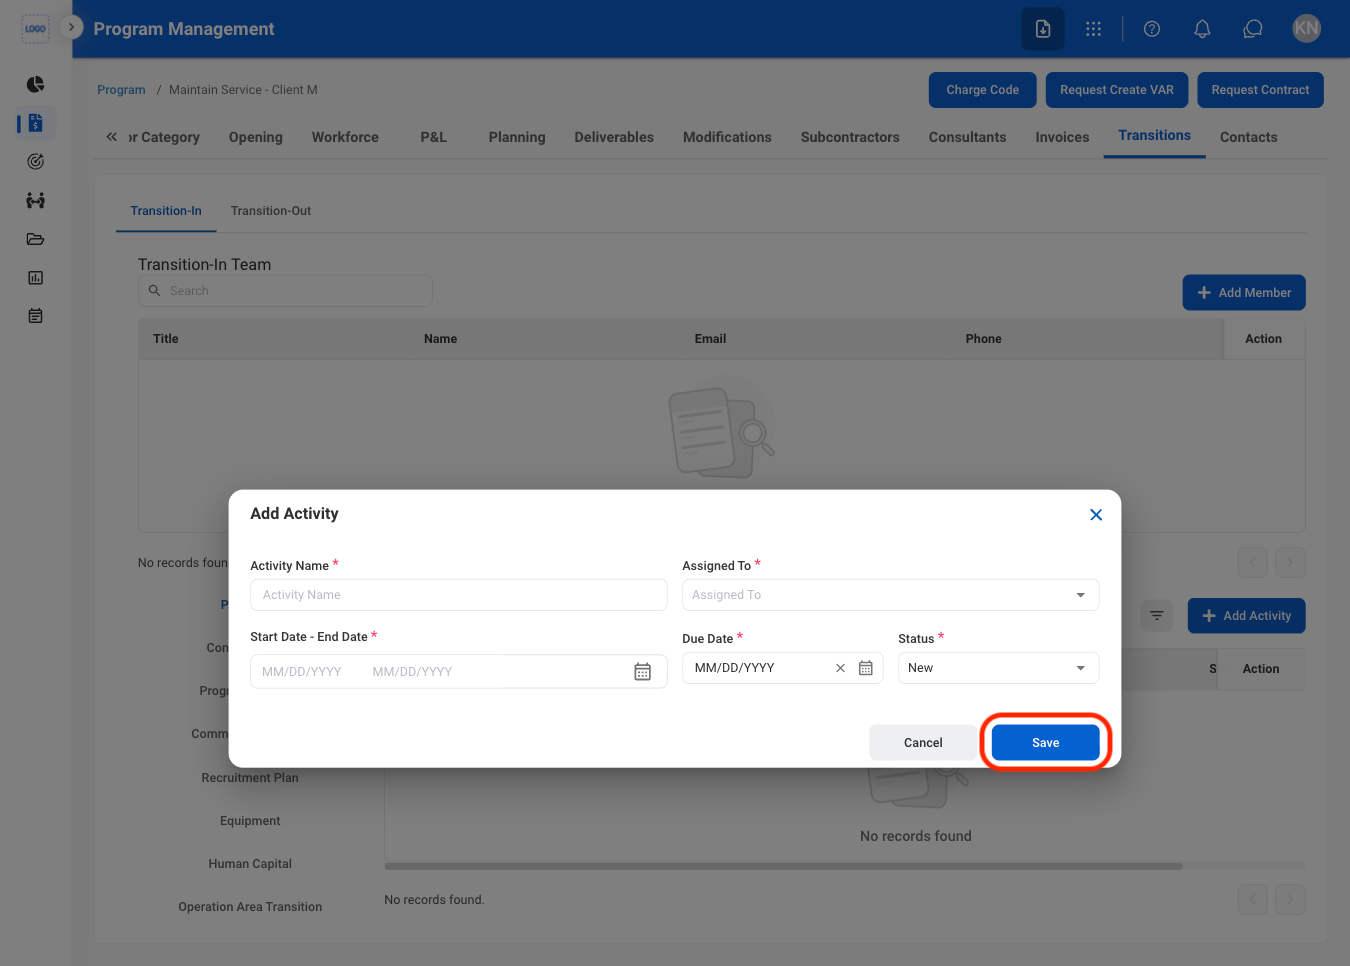
Fill in the required information
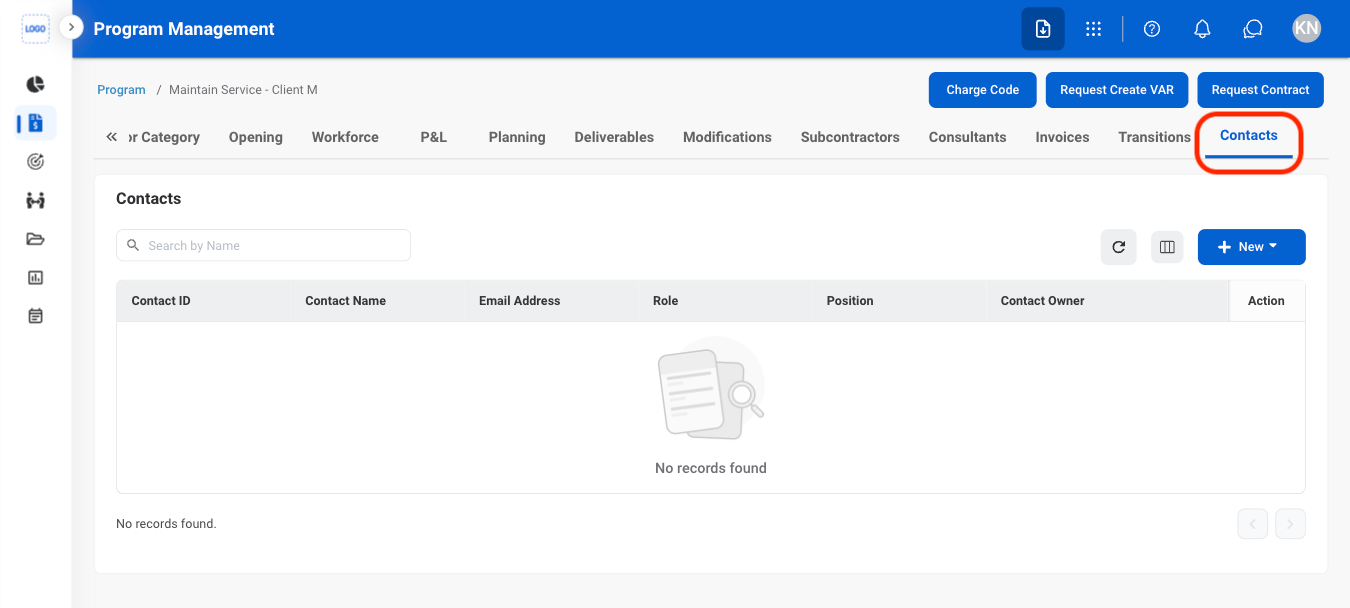
Contacts
Add a Contact
Navigate to Contacts
Select New

Select contact type
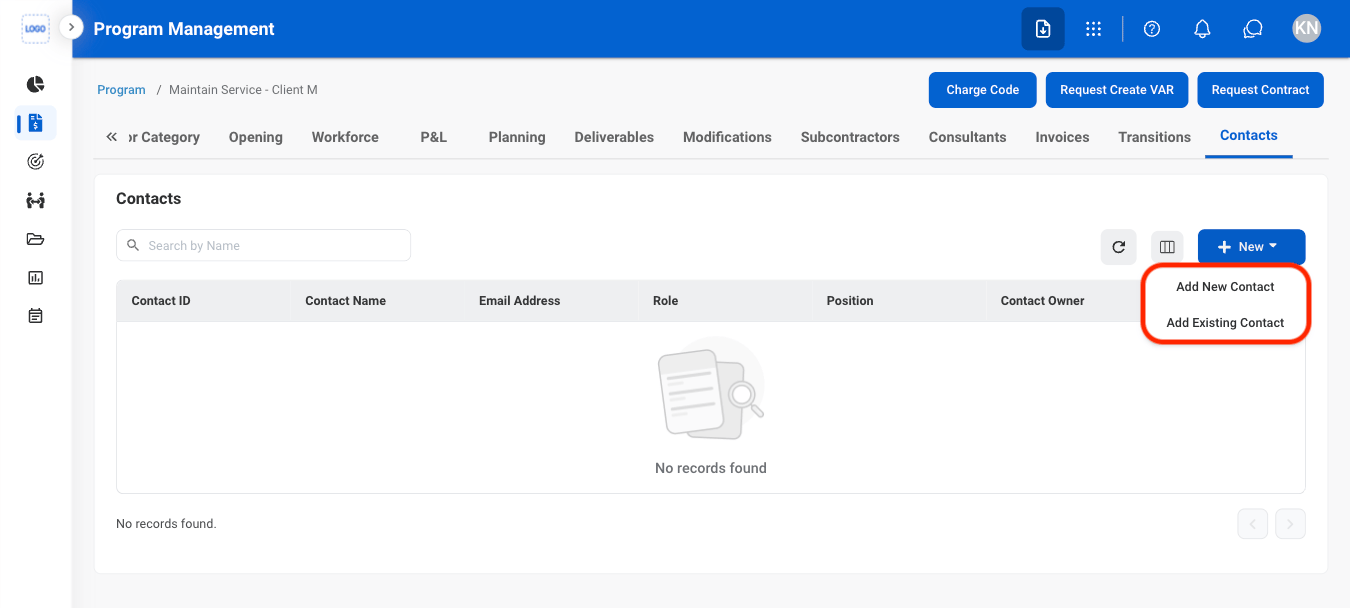
- Add New Contact: Create a new contact record and associate it with the program.
- Add Existing Contact: Select an existing contact record and associate it with the program.
Confirm the action
- Add New Contact: Fill in the required information. Select Add to complete or Cancel to exit without saving changes.
- Add Existing Contact: Select an existing contact record. Select Save to complete or Cancel to exit without saving changes.
Modify a Contact
Select an action
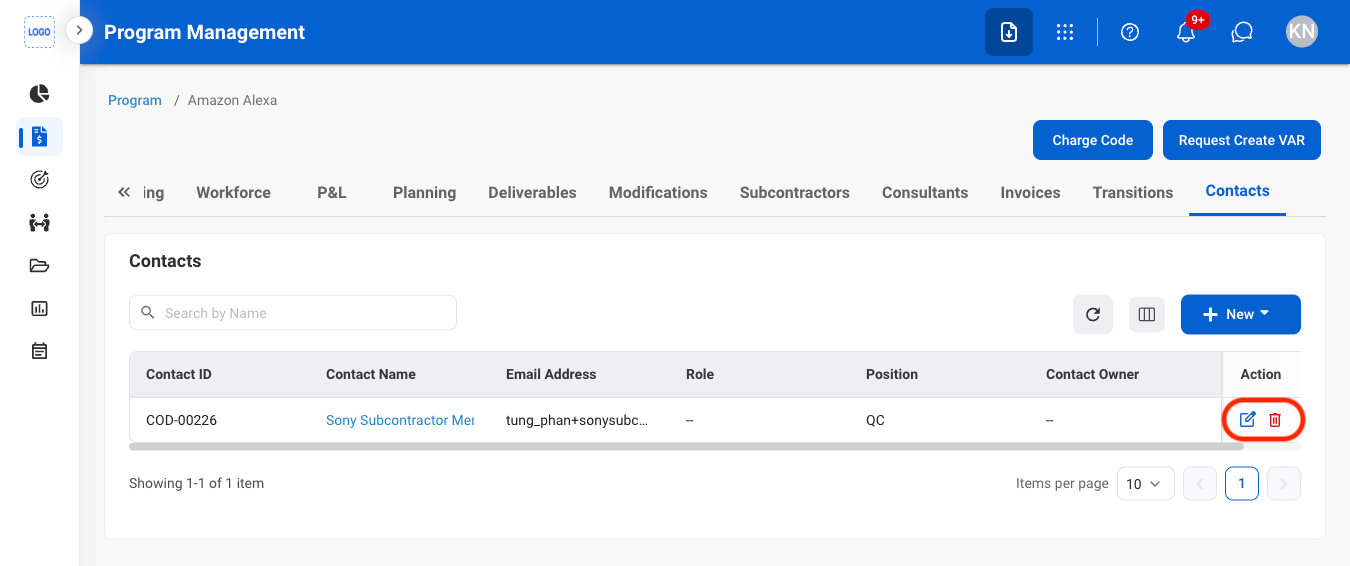
- Edit: Select the edit icon to update an existing entry
- Delete: Select the trash icon to delete an existing entry
Confirm the action
- Edit: Fill in the required information. Select Update to complete or Cancel to exit without saving changes.
- Delete: Select Delete to complete or Cancel to exit without saving changes.